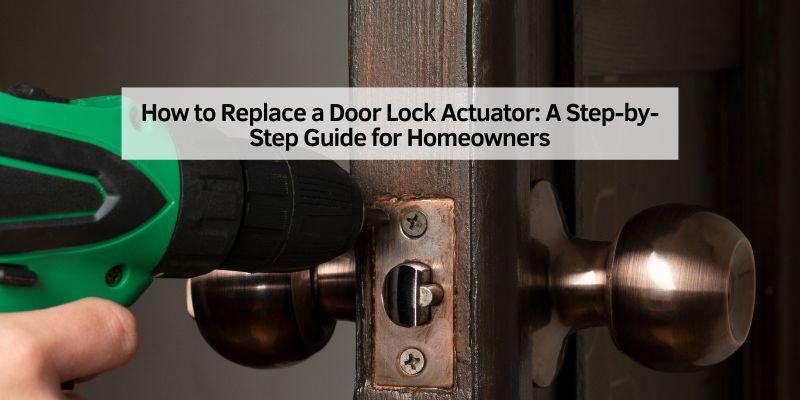
How to Replace a Door Lock Actuator: A Step-by-Step Guide for Homeowners
Hey there! If you’ve ever struggled with a car door that won’t lock or unlock with your key fob, you’re not alone. I’ve been there, fumbling with my keys, wondering why my car door is acting stubborn. The culprit? A faulty door lock actuator. Replacing it might sound like a job for a mechanic, but trust me, with a little patience and the right tools, you can do this yourself. I’ve tackled this project, and I’m excited to share my experience to help you save time and money. In this guide, I’ll walk you through everything you need to know about replacing a door lock actuator, from spotting the signs of a problem to finishing the job like a pro. Let’s dive in!
What Is a Door Lock Actuator and Why Does It Matter?
A door lock actuator is a small but mighty part of your car’s power door lock system. It’s the motor that makes your doors lock or unlock when you press the button on your key fob or inside the car. Think of it as the muscle behind the operation. When it fails, you’re stuck with a door that won’t respond, which can be a hassle or even a safety issue.
I first noticed something was off when my driver’s side door wouldn’t lock unless I manually pushed the lock down. It was annoying, especially in a rush. Over time, I learned that actuators wear out due to constant use, moisture exposure, or electrical issues. Replacing it not only restores convenience but also keeps your car secure. Knowing what this part does helps you understand why fixing it is worth your time.
Signs Your Door Lock Actuator Needs Replacing
Before you grab your tools, let’s make sure the actuator is the problem. I missed some of these signs at first, thinking it was just a glitch with my key fob. Here’s what to watch for:
- No Response to Key Fob or Button: If pressing the lock or unlock button does nothing, but other doors work fine, the actuator is likely at fault.
- Strange Noises: Hear grinding, clicking, or buzzing when you try to lock the door? That’s the actuator struggling.
- Partial Locking: The lock might move slightly but not fully engage.
- Manual Locking Issues: If even the manual lock feels stiff or unresponsive, the actuator could be seizing up.
When I noticed these signs, I confirmed the issue by testing my key fob batteries and checking the car’s fuse box. Both were fine, so the actuator was the clear suspect. If you’re seeing these symptoms, it’s time to roll up your sleeves.
Tools and Materials You’ll Need
Replacing a door lock actuator doesn’t require a fancy workshop, but you’ll need some basic tools. I gathered everything before starting to avoid mid-project trips to the store. Here’s what I used:
| Tool/Material | Purpose |
|---|---|
| Screwdriver Set (Phillips and Flathead) | Remove screws from the door panel |
| Trim Removal Tool | Pop off the door panel without damage |
| Socket Wrench Set | Loosen bolts holding the actuator |
| Replacement Actuator | The new part specific to your car model |
| Electrical Tape | Secure wiring connections |
| Multimeter (Optional) | Test electrical connections |
| Gloves and Safety Glasses | Protect your hands and eyes |
I got my replacement actuator online after checking my car’s make, model, and year. Double-check your vehicle’s specs to ensure you buy the right part. It’s also a good idea to have a clean workspace and a small container for screws—you don’t want to lose those tiny pieces!
Preparing Your Workspace
I learned the hard way that a cluttered workspace makes this job tougher. Clear a space near your car, ideally in a garage or shaded area to avoid weather hassles. Lay down a towel or mat to catch any screws or small parts. I also kept my phone handy with a repair video queued up for my car model, just in case I needed a visual guide.
Before you start, disconnect the car battery to avoid electrical shocks. I popped the hood, loosened the negative terminal, and set it aside. Safety first! Also, make sure your car is parked on a flat surface with the parking brake on. These little steps set you up for a smooth project.
Step-by-Step Guide to Replacing the Door Lock Actuator
Now, let’s get to the fun part—replacing the actuator. I’ll break this down into clear steps based on my experience. Take your time, and don’t rush. It took me about an hour the first time, but it gets easier with practice.
Step 1: Remove the Door Panel
The door panel is like a puzzle covering the actuator. Start by removing any screws around the edges, armrest, or door handle. I found a few hidden under plastic caps, so check carefully. Use a trim removal tool to gently pry the panel off—it’s held by plastic clips that can break if you’re too rough. Once loose, lift the panel upward to release it from the window track. Set it aside carefully to avoid scratching it.
Step 2: Disconnect Electrical Components
Inside the door, you’ll see a mess of wires and connectors. I was intimidated at first, but it’s simpler than it looks. Find the wiring harness connected to the actuator—it’s usually near the lock mechanism. Gently unplug it by pressing the release tab. If your door has power windows or mirrors, disconnect those too. I labeled my connectors with tape to avoid confusion later.
Step 3: Remove the Old Actuator
The actuator is bolted to the door’s lock assembly. Use your socket wrench to remove the bolts—mine had three. Keep them in your container. The actuator might be tricky to wiggle out due to tight space, so be patient. I had to angle mine just right to free it from the lock rod. If it’s stuck, check for any clips or screws you missed.
Step 4: Install the New Actuator
Take your new actuator and compare it to the old one to ensure it matches. I made the mistake of rushing this and almost installed a slightly different model. Attach the new actuator to the lock rod and bolt it into place. Make sure it’s secure but don’t overtighten the bolts. Reconnect the wiring harness, ensuring a snug fit. I gave mine a gentle tug to confirm it was locked in.
Step 5: Test the Actuator
Before putting everything back, reconnect the car battery and test the actuator. Press your key fob or lock button to see if the door responds. I held my breath the first time, but it worked perfectly! If it doesn’t, double-check the wiring and bolts. A multimeter can help test the electrical connection if you’re comfortable using one.
Step 6: Reassemble the Door
Once the actuator works, reattach the door panel. Line up the clips and press firmly until they snap into place. Replace all screws and caps, ensuring nothing rattles. I gave my door a gentle shake to confirm everything was secure. Clean up any fingerprints or smudges for a polished finish.
Common Challenges and How to Overcome Them
This project isn’t always smooth sailing. I ran into a few hiccups, and you might too. Here’s what to watch for:
- Stuck Door Panel Clips: If clips won’t budge, use a trim tool and apply steady pressure. Don’t force it, or you’ll break them.
- Wrong Actuator Model: Double-check your car’s specs before buying. I almost ordered one for a different year model.
- Electrical Issues: If the actuator doesn’t work after installation, test the fuse or wiring with a multimeter.
- Tight Spaces: Some doors have limited room to maneuver. A small flashlight and patience are your friends.
When I hit a snag with a stubborn clip, I took a deep breath and watched a quick YouTube tutorial for my car model. It helped me find the right angle to pop it loose. Stay calm, and you’ll get through it.
Maintenance Tips to Extend Actuator Life
After replacing my actuator, I wanted to make sure it lasted. Here are some tips I follow:
- Keep Doors Clean: Dirt and moisture can sneak into the lock mechanism. Wipe down door edges regularly.
- Avoid Overuse: Don’t repeatedly press the lock button—it wears out the actuator faster.
- Check Wiring: Loose or corroded wires can strain the actuator. Inspect them during routine maintenance.
- Lubricate Locks: A little silicone-based lubricant on the lock mechanism keeps things moving smoothly.
I now check my door locks every few months, especially after rainy seasons. It’s a small habit that saves big headaches.
When to Call a Professional
I’m all for DIY, but sometimes it’s best to call a pro. If you’re dealing with complex wiring, a high-end car model, or just don’t feel confident, a mechanic can handle it. I considered this when my actuator was buried deep in a tricky door assembly, but I pushed through with patience. If you’re short on time or tools, a professional can save you stress. Expect to pay $100-$300 for labor and parts, depending on your car.
Why DIY Is Worth It
Doing this myself was empowering. I saved about $200 compared to a shop quote, and I learned more about my car. Plus, there’s something satisfying about fixing a problem with your own hands. If you’re like me and love tackling home or car projects, this is a great one to try. You’ll feel like a hero every time you press that lock button and hear the satisfying click.
Conclusion
Replacing a door lock actuator might seem daunting, but it’s a project you can absolutely handle. I went from frustrated key-fob pressing to a fully functional door in just a couple of hours. With the right tools, a bit of patience, and this guide, you’ll be back to locking and unlocking your car with ease. The process taught me to trust my skills and enjoy the satisfaction of a job well done. So grab your screwdriver, put on some music, and give it a shot. You’ve got this! If you have more questions, check out the FAQs below or drop a comment on my blog—I’d love to hear how it goes for you.
FAQs
What Causes a Door Lock Actuator to Fail?
Actuators fail due to wear and tear, moisture, or electrical issues. Constant use over years can wear out the motor. Water from rain or car washes can seep into the door, causing corrosion. Faulty wiring or blown fuses can also stop the actuator from working. Regular maintenance, like cleaning door edges, helps prevent these issues.
How Long Does It Take to Replace a Door Lock Actuator?
For a beginner like I was, it takes about 1-2 hours. If you’re handy with tools, you might finish in under an hour. The trickiest part is removing the door panel without breaking clips. Take your time, and it’ll go smoothly.
Can I Replace the Actuator Without Disconnecting the Battery?
It’s not recommended. Disconnecting the battery prevents electrical shocks or short circuits. I skipped this step once and got a small zap—lesson learned! It only takes a minute to disconnect the negative terminal, so don’t skip it.
How Much Does a Replacement Actuator Cost?
A new actuator costs $30-$100, depending on your car’s make and model. I found mine online for $45, but luxury brands can be pricier. Always check compatibility with your vehicle before buying.
Will Replacing the Actuator Fix My Key Fob Issues?
If the key fob works on other doors but not one specific door, the actuator is likely the issue. Test your fob’s batteries first to rule them out. If the problem persists after replacing the actuator, check the car’s wiring or consult a mechanic.