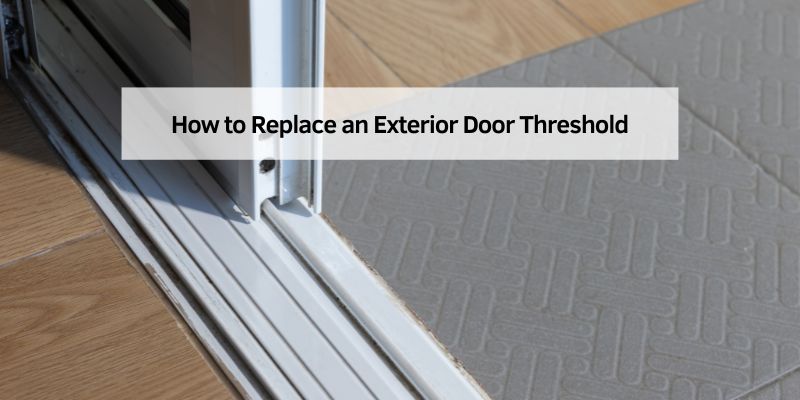
How to Replace an Exterior Door Threshold
Hey there! If you’ve noticed a draft sneaking under your front door or maybe your threshold is looking worn out, you’re in the right place. Replacing an exterior door threshold might sound like a big job, but I promise it’s something you can tackle with a little patience and the right steps. I’ve gone through this process myself a couple of times, and I’m excited to share everything I’ve learned to make it smooth for you. A new threshold can make your home more energy-efficient, keep out pests, and give your entryway a fresh look. Let’s dive into the details and get that threshold replaced like a pro!
Why Replacing Your Exterior Door Threshold Matters
I remember the first time I noticed my old threshold was letting in cold air. It was winter, and I could feel the chill right through my socks! A damaged or worn-out threshold does more than just look bad. It can let in drafts, water, and even bugs. Plus, it can make your door harder to open or close properly. A good threshold seals the gap between your door and the floor, keeping your home cozy and secure.
When I replaced mine, I was amazed at how much warmer my entryway felt. It also stopped those annoying little ants from sneaking in during the summer. Whether your threshold is cracked, warped, or just outdated, swapping it out can make a big difference in your home’s comfort and curb appeal.
Tools and Materials You’ll Need
Before we get started, let’s talk about what you’ll need. I like to gather everything beforehand so I’m not running to the hardware store mid-project. Here’s a list of tools and materials I used when I replaced my threshold:
| Item | Purpose |
|---|---|
| Replacement threshold | The new piece that seals the gap under your door. |
| Measuring tape | To measure the door frame and threshold accurately. |
| Screwdriver (Phillips/flathead) | For removing screws from the old threshold and door. |
| Pry bar | To gently remove the old threshold without damaging the frame. |
| Utility knife | For cutting away old caulk or sealant. |
| Hacksaw or reciprocating saw | To trim the new threshold to the right size. |
| Drill with bits | For pre-drilling holes for screws in the new threshold. |
| Silicone caulk | To seal gaps and prevent water or air leaks. |
| Caulk gun | For applying the silicone caulk smoothly. |
| Wood shims | To level the threshold if your floor isn’t perfectly even. |
| Sandpaper | To smooth any rough edges on the threshold or frame. |
| Safety gear (gloves, goggles) | To protect yourself while cutting or prying. |
| Cleaning supplies | For cleaning the area before installing the new threshold. |
When I did this, I made sure to pick a threshold that matched my door’s style and material. You can find aluminum, wood, or composite thresholds at most home improvement stores. I went with an aluminum one because it’s durable and low-maintenance.
Preparing Your Work Area
I learned the hard way that prep work makes all the difference. The first time I tried this, I didn’t cover my floor, and I ended up with sawdust everywhere! Start by clearing the area around your door. Move any rugs, furniture, or decorations out of the way. Lay down a drop cloth to catch debris.
Next, open the door wide and prop it open with something heavy, like a toolbox. This keeps it out of your way while you work. I also like to vacuum or sweep the area under the threshold to get rid of dirt and grime. A clean surface helps the new threshold sit properly and ensures a good seal.
If your old threshold has caulk or sealant around it, grab your utility knife and carefully score along the edges. This makes it easier to remove without damaging the door frame. Trust me, taking a few extra minutes here saves a lot of hassle later.
Measuring and Choosing the Right Threshold
Getting the measurements right is crucial. I made the mistake of eyeballing it once, and let’s just say the new threshold didn’t fit! Use your measuring tape to measure the width of the door frame from one side to the other. Most exterior doors are 36 inches wide, but older homes can vary, so double-check.
Also, measure the height and depth of the existing threshold. You want the new one to sit flush with the floor and door. I found it helpful to take a quick picture of the old threshold with my phone for reference when shopping.
When choosing a threshold, think about your climate. If you live somewhere with a lot of rain, like I do, go for one with a built-in weatherstrip to keep water out. Aluminum thresholds are great for durability, but wooden ones can add a classic look if you’re willing to maintain them. I’d recommend checking the product reviews at the store or online to make sure it’s high-quality.
Removing the Old Threshold
This part can feel a bit daunting, but it’s not too bad once you get going. Start by removing any screws holding the old threshold in place. I used a Phillips screwdriver for this, but some older thresholds might have flathead screws. If the screws are rusted, a bit of penetrating oil can help loosen them.
Once the screws are out, use your pry bar to gently lift the threshold. I found it easiest to start at one end and work my way across. Be careful not to damage the door frame or floor. If the threshold is stuck, check for hidden nails or adhesive. A little wiggling usually does the trick.
After it’s out, inspect the area underneath. I was surprised to find some rot in my subfloor the first time I did this. If you see any damage, now’s the time to fix it. You might need to replace a small section of wood or apply a sealant to protect it. Clean the area thoroughly to remove any old caulk, dirt, or debris.
Cutting and Fitting the New Threshold
Now comes the fun part—getting the new threshold ready! Most thresholds come a bit longer than standard door widths, so you’ll likely need to trim it. I used a hacksaw for my aluminum threshold, but a reciprocating saw works too if you’re careful. Measure the exact width of your door frame and mark the threshold with a pencil.
Before cutting, double-check your measurements. I always say, “Measure twice, cut once!” Hold the threshold in place to make sure it fits snugly against the door frame. If your floor isn’t level (mine wasn’t), you might need to use wood shims to raise one side slightly. Just slide the shims under until the threshold sits evenly.
If your threshold has a weatherstrip, make sure it’s positioned to seal against the bottom of the door when closed. I had to adjust mine a couple of times to get it just right. Once it fits perfectly, sand any rough edges for a clean look.
Installing the New Threshold
With the threshold cut to size, it’s time to put it in place. I found it helpful to do a dry fit first—no screws or caulk, just to make sure everything lines up. Place the threshold in the door frame and close the door to check the seal. The door should close smoothly without catching, and the weatherstrip should press lightly against it.
If everything looks good, mark where the screw holes will go. I used a drill to pre-drill holes in the threshold and subfloor to make screwing easier. Be sure to use screws that are long enough to hold the threshold securely but not so long that they poke through the floor.
Apply a bead of silicone caulk along the bottom edges of the threshold before setting it in place. This helps seal out water and air. Press the threshold down firmly and screw it in place. I tightened the screws just enough to hold it steady without warping the material.
Sealing and Finishing the Job
To make your new threshold weatherproof, you’ll need to seal it properly. I used silicone caulk because it’s flexible and durable. Run a thin bead of caulk along the edges where the threshold meets the door frame and floor. Smooth it out with your finger or a caulk tool for a neat finish.
If you’re using a wooden threshold, you might want to apply a coat of sealant or paint to protect it from moisture. I skipped this step with my aluminum threshold, but I did wipe it down with a damp cloth to remove any dust. Check the door’s operation again to make sure it opens and closes smoothly.
Step back and admire your work! I was so proud the first time I finished this project. It’s amazing how such a small change can make your entryway feel brand new.
Maintenance Tips for Your New Threshold
To keep your threshold in great shape, a little maintenance goes a long way. I check mine every few months to make sure the caulk is intact and there’s no debris buildup. If you have a wooden threshold, inspect it for signs of water damage or wear, especially after heavy rain. A quick coat of sealant every year or two can extend its life.
For aluminum or composite thresholds, a simple cleaning with soap and water keeps them looking sharp. I also like to lubricate the weatherstrip with a silicone spray to keep it flexible. If you notice any gaps or drafts over time, a quick touch-up with caulk can fix it.
Common Mistakes to Avoid
I’ve made my share of mistakes, so let me save you some trouble. First, don’t rush the measuring step. A threshold that’s too short or too long is a headache to fix. Also, avoid over-tightening the screws, as this can warp the threshold or crack the subfloor.
Another thing—don’t skip the caulk. I thought I could get away without it once, and water started seeping in during the next rainstorm. Finally, make sure your door frame is in good shape before starting. If it’s damaged, you might need to fix it first to ensure a proper fit.
Conclusion
Replacing an exterior door threshold is one of those home improvement projects that feels so rewarding when it’s done. I still smile every time I walk through my front door and feel that tight seal keeping the weather out. With just a few tools and a bit of time, you can transform your entryway, boost your home’s energy efficiency, and keep those pesky drafts at bay. I hope my experience and these steps make the process easy for you. Grab your tools, take it one step at a time, and you’ll have a shiny new threshold in no time. Happy DIY-ing!
Frequently Asked Questions
How long does it take to replace an exterior door threshold?
It usually takes me about 2-3 hours, depending on how tricky the old threshold is to remove. If you’re new to this, give yourself a half-day to account for measuring, cutting, and fitting. Take your time to get it right!
Can I replace a threshold without removing the door?
Yes, I’ve done it without removing the door, and it’s totally doable. Just prop the door open and work carefully. Removing the door can make it easier to access, but it’s not necessary for most jobs.
What type of threshold is best for my home?
It depends on your needs. I chose an aluminum threshold for durability and low maintenance, but wooden ones look great if you’re okay with regular upkeep. Check your climate—weatherstripped thresholds are awesome for rainy areas.
How do I know if my threshold needs replacing?
If you feel drafts, see water leaks, or notice cracks or wear, it’s probably time. I knew mine was done when I could see daylight under the door and felt cold air coming in.
Can I paint my new threshold?
Absolutely! If it’s wood, I’d recommend painting or sealing it to protect against moisture. For aluminum, you can paint it with a metal-specific paint, but I usually leave mine as-is for a sleek look.