How to Replace Recessed Lighting with Flush Mount Lighting: A Step-by-Step Guide
Hey there! If you’re staring up at those recessed lights in your home or garage and thinking it’s time for a change, you’re in the right place. A few years ago, I decided to swap out the recessed lighting in my home for sleek, modern flush mount fixtures, and let me tell you, it was a game-changer. Not only did it freshen up the look of my space, but it was also a fun DIY project that saved me a bundle.
If you’re curious about how to replace recessed lighting with flush mount lighting, I’m excited to share everything I’ve learned. Whether you’re a car enthusiast looking to upgrade your garage or a homeowner wanting a brighter living space, this guide is for you. Let’s roll up our sleeves and get started!
Why Switch from Recessed to Flush Mount Lighting?
When I first moved into my house, the recessed lights in my living room and garage felt modern and sleek. But over time, I noticed they weren’t giving me the vibe I wanted. Recessed lights are great for a minimalist look, but they can feel cold and don’t always spread light evenly. Flush mount lighting, on the other hand, sits snug against the ceiling, offering a wider spread of light and a chance to add some style with decorative fixtures.
For me, the switch was about both aesthetics and function. In my garage, where I spend hours tinkering with my car, I wanted brighter, more even lighting to make my workspace feel inviting. Flush mounts also come in tons of designs, from industrial to elegant, so you can match them to your space. Plus, they’re often easier to clean and maintain since they don’t collect dust in a recessed can. If you’re thinking about a lighting upgrade, flush mounts are a fantastic choice.
Understanding Recessed and Flush Mount Lighting
Before I jumped into the project, I had to get clear on what I was working with. Recessed lighting, sometimes called can lights, is installed into the ceiling, with the bulb tucked inside a metal housing. It’s great for a clean look, but can be tricky to replace because the housing is built into the ceiling. Flush mount lighting, by contrast, is a fixture that attaches directly to the ceiling surface, with the bulb covered by a decorative shade or panel.
The big difference is in the installation. Recessed lights require a hole in the ceiling and a can to hold the bulb, while flush mounts just need a mounting bracket and a junction box. I learned that switching from recessed to flush mount means removing the old can and wiring in a new fixture, which sounds intimidating but is totally doable with the right steps. Knowing this helped me feel confident before I grabbed my tools.
Tools and Materials You’ll Need
I’m a big believer in being prepared, so before I started, I gathered everything I’d need. Here’s what I used to replace my recessed lights with flush mounts:
- Screwdriver (Phillips and flathead): For removing screws and prying out old fixtures.
- Wire cutters/strippers: To trim and prepare the electrical wires.
- Voltage tester: To make sure the power is off (safety first!).
- Ladder: To reach the ceiling comfortably.
- Flush mount light fixture: Pick one that matches your style and space.
- Wire nuts and electrical tape: For securing wire connections.
- Drywall patch kit: To fill the hole left by the recessed can.
- Stud finder: To locate ceiling joists for secure mounting.
- Safety glasses and gloves: To protect yourself while working.
I also grabbed a new junction box in case the existing one wasn’t compatible with my flush mount fixture. If you’re doing this in a garage or automotive workspace, make sure your fixture is rated for damp or dusty environments. I learned that the hard way when my first garage fixture started flickering in the humid summer air!
Step-by-Step Guide to Replacing Recessed Lighting
Alright, let’s get to the good stuff—how I actually made the switch. I’ll walk you through the process I followed, step by step, so you can do it too.
Step 1: Turn Off the Power
Safety is non-negotiable. Before I touched anything, I went to my breaker box and turned off the power to the room I was working in. I used a voltage tester to double-check that the wires were dead. Trust me, you don’t want to mess with live wires. I once got a tiny shock from a “turned-off” circuit, and it was not fun.
Step 2: Remove the Recessed Light
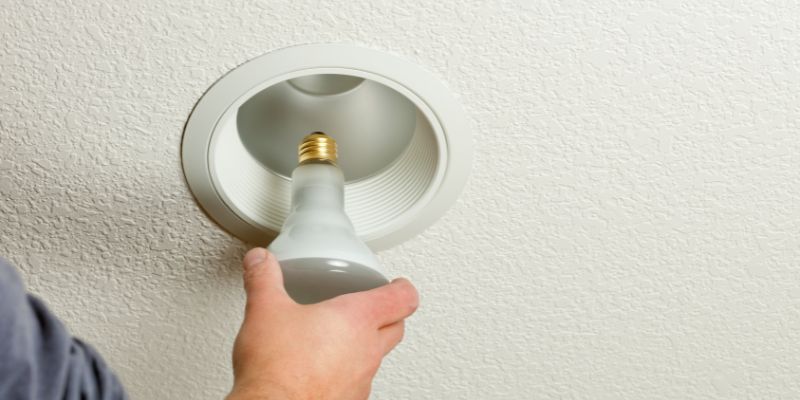
Next, I climbed up my ladder and removed the recessed light’s trim and bulb. Most recessed lights have a trim piece that pops out with a gentle tug or a screwdriver. The bulb usually unscrews or unclips. Then, I had to remove the recessed can, which was held in place by clips or screws. I used a screwdriver to loosen it and carefully pulled it down. Some cans are tricky to remove, so I wiggled mine gently to avoid damaging the ceiling.
Step 3: Disconnect the Wiring
With the can out, I saw the junction box and wires inside the ceiling. I carefully disconnected the wires from the recessed light, noting which was the hot (black), neutral (white), and ground (green or bare). I used wire cutters to trim any frayed ends. Pro tip: Take a picture of the wiring before you disconnect anything. It saved me a lot of confusion later!
Step 4: Patch the Ceiling Hole
Removing the recessed can left a big hole in my ceiling. I used a drywall patch kit to fill it in. First, I sanded the area to smooth it out, then applied a drywall patch and joint compound. I let it dry for 24 hours, sanded it again, and painted over it to match the ceiling. This step was crucial for making my flush mount look seamless. If you’re not handy with drywall, you might want to call a friend who is—I did!
Step 5: Install the New Junction Box (If Needed)
Some recessed lights have a junction box that works with flush mounts, but mine didn’t. I installed a new ceiling-rated junction box, securing it to a ceiling joist with screws. I used a stud finder to locate the joist and made sure the box was flush with the ceiling. This part was a bit fiddly, but it’s important for safety and a sturdy mount.
Step 6: Mount the Flush Mount Fixture
Now for the fun part! I attached the mounting bracket that came with my flush mount fixture to the junction box. Then, I connected the wires from the fixture to the ceiling wires: black to black, white to white, and ground to ground. I used wire nuts to secure them and wrapped the connections with electrical tape for extra safety. After that, I screwed the fixture to the bracket and attached the decorative cover. It was so satisfying to see it come together!
Step 7: Test Your Work
Once everything was in place, I turned the power back on and flipped the light switch. The moment that flush mount lit up my garage, I felt like a DIY rockstar. If the light doesn’t work, double-check your wiring connections or make sure the bulb is properly seated. I had to tweak one connection the first time, but it was an easy fix.
Choosing the Right Flush Mount Fixture
Picking the right flush mount was one of my favorite parts of this project. There are so many styles out there, from sleek modern designs to vintage-inspired ones. For my garage, I chose an industrial-style flush mount with a metal cage to protect the bulb from stray tools. For my living room, I went with a frosted glass fixture that gives off a warm, cozy glow.
When shopping, check the fixture’s size and light output (measured in lumens). An 800-1000 lumen fixture is great for most rooms, but you might want something brighter for a workspace like a garage. Also, make sure the fixture is rated for your environment. For example, damp-rated fixtures are best for garages or bathrooms. I learned to check the wattage limit too—some fixtures can’t handle high-wattage bulbs, which can limit your brightness options.
Benefits of Flush Mount Lighting
Switching to flush mount lighting gave my spaces a whole new vibe. Here’s why I’m such a fan:
- Better Light Distribution: Flush mounts spread light more evenly than recessed lights, which can create harsh shadows. My garage feels brighter and more inviting now.
- Style Options: There’s a flush mount for every taste, whether you’re into minimalist, rustic, or fancy designs. I love how my living room fixture adds a touch of elegance.
- Easier Maintenance: No more climbing ladders to clean dust out of recessed cans. Flush mounts are a breeze to wipe down.
- Energy Efficiency: Many flush mounts are compatible with LED bulbs, which I already love for their energy savings. My new fixtures cut my lighting costs even more.
For car enthusiasts, flush mounts are a dream in the garage. They provide bright, even light for working on your vehicle, and you can choose rugged designs that stand up to dust and grease.
Common Challenges and How to Overcome Them
I’ll be honest—this project wasn’t all smooth sailing. One challenge I faced was patching the ceiling hole. My first attempt at drywall patching looked like a lumpy mess, so I watched a few YouTube videos to get the hang of it. Practice makes perfect, and my second try was much better.
Another issue was wiring compatibility. Some older homes have outdated wiring that doesn’t play nice with modern fixtures. If your house is older, check the wiring condition or call an electrician to be safe. I also struggled with aligning the flush mount perfectly—it’s easy to end up with a slightly crooked fixture if you’re not careful. I used a level to make sure mine was straight.
If you’re replacing multiple recessed lights, pacing yourself is key. I tried to do my whole house in one weekend and ended up exhausted. Spread the work over a few days to keep it manageable.
Safety Tips for a Smooth Project
I can’t stress safety enough. Here are the tips that kept me out of trouble:
- Always turn off the power at the breaker and use a voltage tester.
- Wear safety glasses and gloves to protect against debris and sharp edges.
- Use a sturdy ladder and have someone nearby to hold it if you’re working high up.
- Double-check all wire connections to avoid shorts or fire hazards.
- If you’re unsure about any step, call a professional electrician. It’s worth the peace of mind.
I had a buddy help me with my garage lights, and it made the process faster and safer. Plus, it was more fun with someone to chat with while I worked!
Why This Upgrade Is Worth It
After swapping out my recessed lights, I can’t imagine going back. My garage is now a bright, welcoming space where I love working on my car. The flush mounts make it easier to see every bolt and screw, and the stylish fixtures add a touch of personality. In my home, the new lighting has transformed the mood of my rooms, making them feel warmer and more inviting.
The project also saved me money in the long run. By pairing my flush mounts with LED bulbs, I’ve cut my energy bills, and the fixtures themselves were reasonably priced. Plus, I got a huge sense of accomplishment from doing it myself. If you’re on the fence about this upgrade, I say go for it—it’s easier than you think and totally worth the effort.
Conclusion
Replacing recessed lighting with flush mount lighting was one of the best home improvement projects I’ve tackled. It’s a straightforward DIY job that can completely change the look and feel of your space, whether it’s your home or your garage. From picking the perfect fixture to patching the ceiling and wiring it up, I’ve shared every step that helped me get it done. The result?
Brighter, more stylish rooms and a garage that’s a pleasure to work in. If you’re ready to say goodbye to those recessed cans and hello to flush mount flair, grab your tools and give it a shot. You’ll be amazed at the difference, and you might just have as much fun as I did!
Frequently Asked Questions
Can I replace recessed lighting with flush mount lighting myself?
Yes, you can! It’s a manageable DIY project if you’re comfortable with basic wiring and drywall patching. I did it with no prior experience, but I always turn off the power and follow safety steps.
Do I need to hire an electrician for this?
Not necessarily. If your wiring is in good shape and you follow the steps, you can do it yourself. But if you’re unsure about the wiring or don’t feel confident, an electrician is a smart call.
Will replacing recessed lights leave a big hole in my ceiling?
Yes, but it’s fixable. You’ll need to patch the hole with a drywall kit. It took me a bit of practice, but it’s not too hard to make it look smooth and seamless.
Can I use LED bulbs with flush mount fixtures?
Absolutely! Most flush mounts work great with LEDs. I use them in all my fixtures to save energy and get bright, long-lasting light.
How do I choose the right flush mount fixture?
Look at the size, style, and light output (lumens). For garages, go for durable, bright fixtures. For homes, pick a design that matches your vibe. I chose industrial for my garage and elegant for my living room.
Is flush mount lighting better than recessed lighting?
It depends on your needs. Flush mounts spread light more evenly and are easier to maintain. I love them for my garage because they’re bright and stylish, but recessed lights are great for a minimalist look.
How long does it take to replace one recessed light?
It took me about an hour per light, including patching the ceiling. If you’re doing multiple lights, spread the work over a few days to avoid burnout.