How to Restore Brushed Nickel Finish: Effortless Guide
Quick Summary:
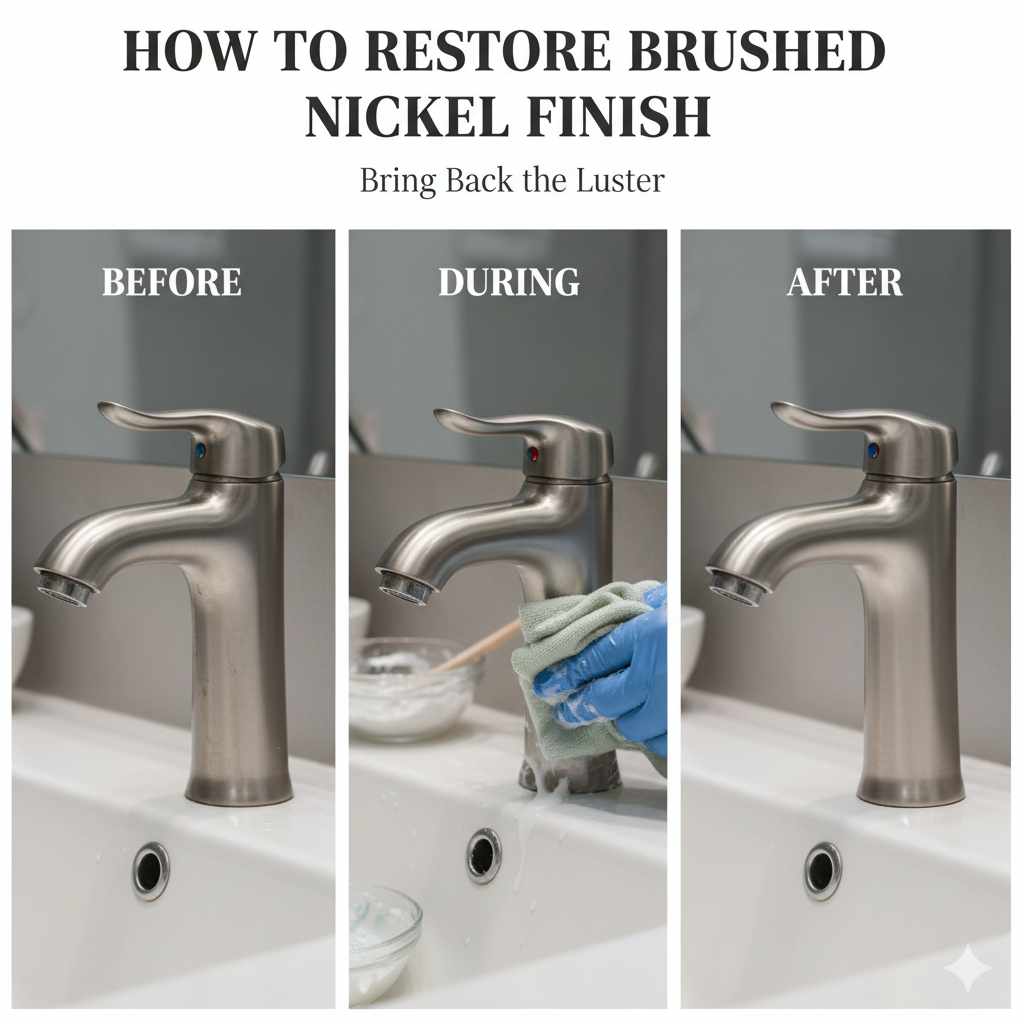
Restore your brushed nickel finish with simple, safe methods! This guide shows you how to clean, repair minor scratches, and protect your fixtures, making them look like new again without expensive replacements. Get ready for effortless shine!
Brushed nickel fixtures add a touch of modern elegance to any home. But over time, everyday use can leave them looking dull, smudged, or even scratched. It’s a common frustration when those beautiful finishes lose their luster, making your kitchen or bathroom feel less inviting. You might think you need to replace the whole fixture, but don’t worry! With a few easy steps and common household items, you can bring that brushed nickel back to life. This guide will walk you through everything you need to know, from gentle cleaning to tackling minor imperfections, so you can restore your home’s shine with confidence.
Why Does Brushed Nickel Lose Its Shine?
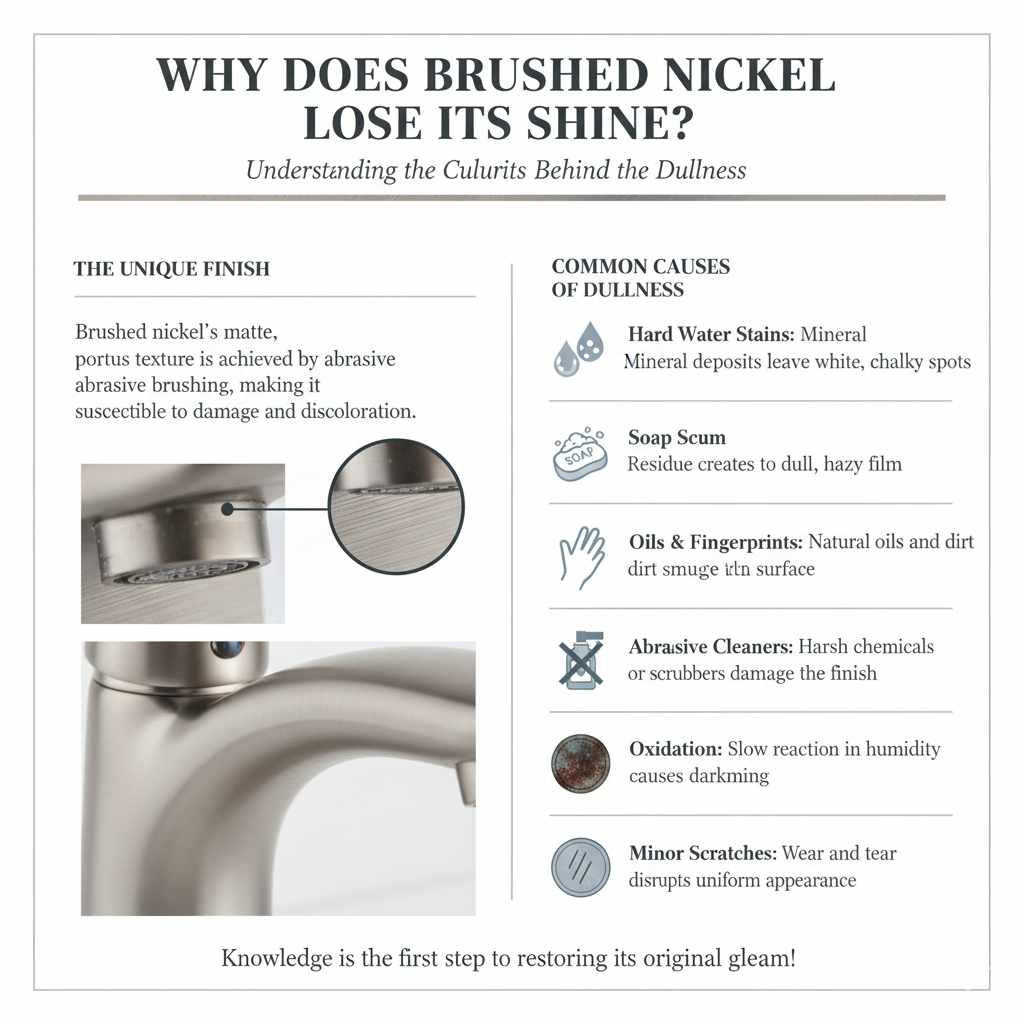
Brushed nickel, while beautiful, has a unique finish that requires specific care. Unlike polished chrome, its matte, brushed texture is achieved by applying a physical or chemical process to create a satin-like appearance. This process often involves brushing the metal with a fine-grit abrasive. While this gives it a warm, sophisticated look, it also means the surface is more porous and susceptible to certain types of damage and discoloration.
Several factors contribute to the loss of shine:
- Hard Water Stains: Mineral deposits from water can leave unsightly white or chalky spots.
- Soap Scum: Residue from soaps and detergents can build up, creating a dull film.
- Oils and Fingerprints: Natural oils from our skin, along with dirt and grime, can easily transfer and create smudges.
- Abrasive Cleaners: Using harsh chemicals or abrasive scrubbers can actually remove or damage the brushed finish itself, leading to permanent dull spots or streaks.
- Oxidation: Over extended periods, especially in humid environments, the nickel can undergo a slow oxidation process, causing a slight darkening or dulling.
- Minor Scratches: Everyday wear and tear, accidental bumps, or cleaning with the wrong materials can create fine scratches that disrupt the uniform appearance of the finish.
Understanding these common culprits is the first step to effectively restoring your brushed nickel. Knowing what you’re up against helps you choose the right methods to bring back that original gleam without causing further harm.
Gathering Your Restoration Toolkit
Before we dive into the cleaning and repair process, let’s make sure you have the right tools and supplies. You’ll be surprised how many of these items you might already have around your house! Using the correct materials is key to a successful restoration without damaging the delicate brushed finish.
Essential Cleaning Supplies
- Soft Microfiber Cloths: These are your best friends for cleaning brushed nickel. They are non-abrasive and excellent at picking up dust, dirt, and water spots without scratching.
- Mild Dish Soap: A gentle, pH-neutral dish soap is perfect for cutting through grease and grime without harming the finish.
- Warm Water: For rinsing and creating cleaning solutions.
- White Vinegar (Optional, for hard water stains): Diluted white vinegar can effectively dissolve mineral deposits.
- Baking Soda (Optional, for gentle scrubbing): A paste of baking soda and water can provide mild abrasion for tougher spots.
- Rubbing Alcohol (Isopropyl Alcohol): Great for removing stubborn greasy marks and fingerprints.
- Spray Bottle: Useful for applying cleaning solutions evenly.
Supplies for Minor Scratch Repair
- Non-Gel Toothpaste: A small amount of non-gel, white toothpaste can act as a very mild abrasive for minor surface scratches.
- Fine-Grit Steel Wool (0000 Grade): This is the finest grade and should be used with extreme caution and only as a last resort for deeper scratches or to re-establish the brushed look after a repair. Always test in an inconspicuous area first. You can find high-quality 0000 steel wool at most hardware stores or online.
- Metal Polish (Nickel-Specific or Non-Abrasive): A polish designed for nickel or a very mild, non-abrasive metal polish can help blend repairs and restore shine.
- Rubbing Compound (Automotive Grade, Very Fine): For more persistent scratches, a very fine automotive rubbing compound can be used sparingly.
Protective Measures
- Clear wax or Sealant (Optional): A high-quality paste wax or a clear sealant specifically designed for metal finishes can help protect the restored surface from future damage.
- Gloves: To protect your hands, especially when using vinegar or polishes.
Having these items ready will ensure you’re prepared to tackle any issue that arises with your brushed nickel fixtures. Remember, gentleness is key – always start with the mildest cleaning method and escalate only if necessary.
Effortless Cleaning for a Sparkling Finish
The most common issue with brushed nickel is dullness and spotting from everyday use. Fortunately, cleaning it is straightforward and requires minimal effort. The goal is to remove buildup without stripping the finish or creating new scratches.
Step 1: Gentle Wipe-Down
Start with the simplest method. Dampen a soft microfiber cloth with warm water. Gently wipe down the entire surface of the fixture. This will remove loose dust and fresh smudges. Dry immediately with a separate, dry microfiber cloth to prevent water spots.
Step 2: Mild Soap Solution for Grime
If water alone doesn’t do the trick, create a mild cleaning solution. Mix a few drops of gentle dish soap with warm water in a bowl or spray bottle. Dip a microfiber cloth into the solution, wring it out so it’s damp, not soaking wet, and wipe the fixture. Pay attention to areas with visible grime or fingerprints.
After cleaning with the soap solution, rinse the fixture thoroughly with a clean, damp cloth (rinsed in plain warm water). This is crucial to remove any soap residue, which can also cause dullness if left behind. Finally, buff dry with a clean, dry microfiber cloth.
Step 3: Tackling Hard Water Stains and Soap Scum
For tougher spots like hard water deposits or soap scum, a slightly stronger solution might be needed. You have a couple of gentle options:
- Vinegar Solution: Mix equal parts white vinegar and water in a spray bottle. Lightly spray the affected areas. Let it sit for no more than 5-10 minutes. The acidity of the vinegar helps break down mineral deposits. Gently scrub with a soft cloth or sponge. Rinse thoroughly with plain water and dry completely. Important: Do not let vinegar sit on the nickel for too long, as prolonged exposure to acid can damage the finish. Always test in an inconspicuous spot first.
- Baking Soda Paste: For stubborn grime, make a paste of baking soda and water. Apply the paste to the stained areas with a soft cloth. Gently rub in the direction of the brush marks. Baking soda is a mild abrasive that can lift tough residue without being overly harsh. Rinse thoroughly and dry.
For extremely persistent spots, you can try a very small amount of rubbing alcohol on a microfiber cloth to lift greasy residues. Always follow up with a rinse and thorough drying.
Step 4: Final Polish and Protection
Once the fixture is clean and completely dry, you can give it a final buff with a clean, dry microfiber cloth. This will bring out its natural sheen. For added protection against future water spots and fingerprints, consider applying a thin layer of a clear wax or metal sealant. Look for products specifically designed for metal finishes. Apply sparingly according to the product’s instructions, usually with a soft cloth, and buff to a gentle shine. This protective layer can make future cleaning much easier and keep your brushed nickel looking great for longer.
Remember, consistent light cleaning is far better than occasional deep scrubbing with harsh materials. A quick wipe-down with a microfiber cloth after each use can prevent most buildup.
Repairing Minor Scratches in Brushed Nickel
Scratches happen, especially on high-traffic items like faucet handles or cabinet pulls. The good news is that minor surface scratches on brushed nickel can often be repaired at home, restoring the uniform appearance of the finish. It’s crucial to approach scratch repair with patience and the right materials to avoid making the problem worse.
Understanding Scratch Severity
First, assess the scratch. Is it a light surface scuff, or is it a deep gouge that has removed the finish? This guide focuses on light to moderate scratches. Deep gouges that have removed the metal itself are much harder to repair without professional refinishing.
Method 1: Non-Gel Toothpaste (For Very Light Scratches)
This is often the gentlest and most accessible method for very fine surface scratches. The mild abrasives in toothpaste can help to buff out minor imperfections.
- Clean the Area: Ensure the scratched area is clean and dry.
- Apply Toothpaste: Put a small dab of white, non-gel toothpaste onto a soft microfiber cloth. Avoid gel or whitening toothpastes, as they can contain harsher chemicals or larger abrasive particles.
- Gentle Buffing: Gently rub the toothpaste into the scratch using the microfiber cloth. Work in the direction of the brushed finish (usually straight lines). Apply light, consistent pressure.
- Wipe and Inspect: Wipe away the toothpaste residue with a clean, damp cloth. Dry the area thoroughly and inspect. You may need to repeat this process a few times for noticeable results.
- Rinse and Dry: Once satisfied, rinse the area with a clean, damp cloth and buff dry.
Method 2: Baking Soda Paste (Slightly More Abrasive)
Similar to toothpaste, baking soda can act as a mild abrasive. It’s a good alternative if toothpaste doesn’t yield results.
- Create Paste: Mix baking soda with a small amount of water to form a thick paste.
- Apply and Rub: Apply the paste to a soft cloth and gently rub it into the scratch, following the direction of the brushed finish.
- Clean and Dry: Wipe away the paste with a damp cloth, rinse, and dry thoroughly.
Method 3: Fine-Grit Steel Wool (0000 Grade) – Use with Extreme Caution
This method is for more noticeable scratches and requires the utmost care. 0000-grade steel wool is the finest available and can be effective, but it can also remove the finish if used incorrectly. Always test this method in an inconspicuous area first.
You can learn more about the different grades of steel wool and their uses from resources like Popular Mechanics, which often covers tool and material applications.
- Clean and Prepare: Ensure the area is perfectly clean and dry.
- Light Lubrication (Optional but Recommended): Some professionals recommend applying a tiny bit of mineral oil or even a dab of dish soap to the steel wool or the surface to help it glide more smoothly and reduce the risk of harsh abrasion.
- Gentle Strokes: Lightly rub the 0000-grade steel wool over the scratch, always moving in the direction of the brushed nickel finish. Use minimal pressure. The goal is to blend the scratch into the surrounding finish, not to aggressively remove metal.
- Wipe and Inspect Frequently: Stop frequently to wipe away debris with a microfiber cloth and inspect your progress. It’s easy to overdo it.
- Clean and Assess: Once the scratch is less visible, clean the area thoroughly with a mild soap and water solution to remove any steel wool residue. Rinse and dry.
- Re-Brushing (If Necessary): If the area looks too smooth or different from the surrounding finish, you might need to re-establish the brushed look. You can do this by gently buffing with a soft nylon brush or a specialized brushed metal finishing pad, always in the direction of the grain.
Method 4: Metal Polish
After attempting to buff out a scratch, you might find the area looks dull. A non-abrasive metal polish can help restore some of the shine and blend the repaired area.
- Apply Polish: Apply a small amount of nickel-specific or non-abrasive metal polish to a clean microfiber cloth.
- Buff Gently: Gently rub the polish onto the repaired area, following the brush marks.
- Buff Off: Use a clean, dry microfiber cloth to buff away the excess polish and bring out the shine.
Safety Note: When using steel wool or any abrasive material, wear safety glasses to protect your eyes from stray particles. Always work in a well-ventilated area, especially if using polishes or compounds.
Restoring Heavily Damaged or Discolored Brushed Nickel
Sometimes, brushed nickel fixtures can suffer more than just light scratches or water spots. Discoloration, significant dullness, or areas where the finish seems to be wearing off can present a bigger challenge. While a complete restoration to factory-new condition might be difficult for a DIYer, you can often significantly improve the appearance.
Dealing with Discoloration and Tarnishing
Brushed nickel is generally resistant to tarnishing compared to polished brass or silver, but it can still develop a dull, grayish hue over time, especially if exposed to harsh chemicals or prolonged moisture. If cleaning with mild soap and water or diluted vinegar doesn’t restore the color:
- Specialized Nickel Polish: Look for metal polishes specifically formulated for nickel. These are designed to be effective without being overly aggressive. Follow the product instructions carefully, using a soft cloth and working in the direction of the brushed grain.
- Gentle Abrasives (as a last resort): For persistent dullness that mild cleaners can’t fix, you might consider a very fine abrasive pad (like a Scotch-Brite gray pad, which is finer than green) or the 0000 steel wool method described earlier. Again, test in an inconspicuous area and use minimal pressure. The goal is to lightly abrade the dull surface layer to reveal a brighter finish underneath.
Repairing Areas Where the Finish is Wearing Off
If you notice spots where the brushed nickel finish appears to be completely worn away, revealing a different metal underneath (often brass or copper), this is a more serious issue. It means the plating has been compromised.
- Minor Touch-Ups: For very small, isolated areas, you might be able to use a nickel-plating repair pen or kit. These are available at some hardware stores or online. They contain a nickel-based solution that can be applied to fill in small worn spots. The results can be variable, and it’s challenging to perfectly match the original brushed texture. Follow the kit’s instructions precisely and allow adequate drying time.
- Coloring and Blending: Sometimes, after using abrasive methods or if there’s minor wear, the area might look slightly different in color. You can sometimes use a very fine-tip permanent marker (in a color that closely matches nickel, like a dark gray or silver-gray) to carefully fill in the scratch or worn area. Then, very gently buff with a soft cloth to blend. This is a cosmetic fix and requires a steady hand.
- Metal Patina or Sealant: After any abrasive repair, the area might be more susceptible to future issues. Applying a clear metal sealant or a protective wax can help seal the repaired area and provide a barrier against moisture and dirt.
When to Consider Professional Help or Replacement
If the damage is extensive, involves deep scratches, significant corrosion, or if the plating is peeling off in large sections, DIY repair might not yield satisfactory results. In such cases, you have a few options:
- Professional Refinishing: Some companies specialize in refinishing metal fixtures. This can be costly but may be more affordable than full replacement.
- Replacement: For many homeowners, especially with older or heavily damaged fixtures, replacing the item might be the most practical and cost-effective solution. You can find beautiful brushed nickel replacements at reasonable prices from many home improvement retailers.
Always remember to check the manufacturer’s recommendations for your specific fixtures, as they may have specific care instructions. Resources like the EPA’s Renovation, Repair and Painting Program (though focused on lead paint) highlights the importance of understanding material handling and safety in home improvement, which applies to any restoration project.
Maintaining Your Restored Brushed Nickel Finish
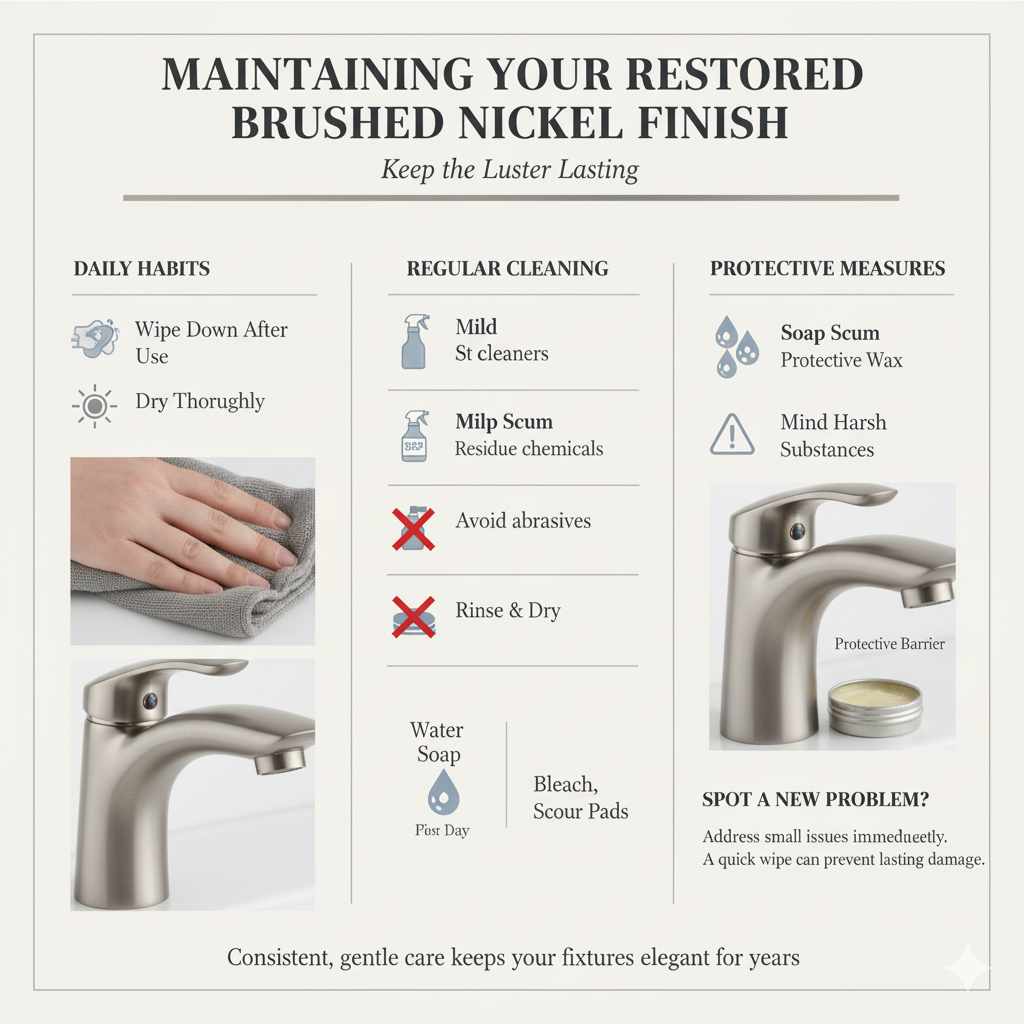
You’ve put in the effort to restore your brushed nickel fixtures, and now you want them to stay looking their best! The key to long-lasting shine is consistent, gentle maintenance. Think of it like caring for a good piece of furniture – regular, light attention prevents the need for major overhauls.
Daily Habits for a Gleaming Finish
- Wipe Down After Use: This is the single most effective habit. Keep a soft microfiber cloth handy in your kitchen and bathroom. After using the faucet, sink, or showerhead, give it a quick wipe. This removes water droplets, soap residue, and oils before they can dry and become stubborn spots.
- Dry Thoroughly: Always ensure the fixture is completely dry after wiping or cleaning. Water left to air dry is the primary cause of water spots and mineral buildup.
Regular Cleaning Schedule
Even with daily wiping, a more thorough cleaning every week or two is beneficial:
- Use Mild Cleaners: Stick to the methods outlined earlier: warm water, a few drops of mild dish soap, or a diluted vinegar solution for occasional tougher spots.
- Avoid Abrasives: Never use abrasive cleaners, scouring pads, steel wool (unless it’s 0000 grade for specific repairs and used with extreme care), or harsh chemicals like bleach, ammonia, or oven cleaner. These can strip the finish, cause dullness, and leave permanent marks.
- Rinse and Dry: Always rinse away any cleaning solution residue with a clean, damp cloth and then buff dry with a separate, dry microfiber cloth.
Protective Measures
To further extend the life and beauty of your brushed nickel finish:
- Apply a Protective Wax or Sealant: As mentioned in the cleaning section, applying a thin coat of carnauba wax or a specialized metal sealant every few months can create a barrier. This makes it harder for water and grime to adhere, making subsequent cleanings easier and protecting against minor scratches.
- Be Mindful of Harsh Substances: Try to keep harsh chemicals, acidic foods (like lemon juice or vinegar if left to sit), and abrasive cleaning products away from your brushed nickel fixtures.
What to Do If You Spot a New Problem
If you notice a new water spot, fingerprint, or minor scratch, address it immediately. Small issues are much easier to fix when they are fresh. A quick wipe for a smudge, or a gentle buff with toothpaste for a new scratch, can prevent it from becoming a larger problem.
By incorporating these simple maintenance tips into your routine, you can keep your brushed nickel fixtures looking beautifully restored and elegant for years to come. It’s all about consistent, gentle care!
Brushed Nickel vs. Other Finishes: A Quick Comparison
Understanding how brushed nickel compares to other popular finishes can help you appreciate its unique qualities and care requirements. Each finish has its own pros and cons:
| Finish Type | Appearance | Maintenance Difficulty | Scratch Resistance | Best For |
|---|---|---|---|---|
| Brushed Nickel | Matte, satin, soft sheen; hides fingerprints and water spots well. | Easy; requires mild cleaners and soft cloths. | Moderate; fine scratches can occur but are often less noticeable than on polished finishes. | Kitchens, bathrooms, modern or transitional decor. |
| Polished Chrome | Bright, highly reflective, mirror-like finish. | Moderate; shows fingerprints and water spots prominently, requires frequent polishing. | Good; very hard and durable. | Modern, high-traffic areas where a bright look is desired. |
| Brushed Stainless Steel | Similar to brushed nickel but often cooler in tone; very durable. | Easy; resists smudges and water spots better than polished finishes. | Good; durable and less prone to showing fine scratches than polished finishes. | Kitchens, appliances, contemporary styles. |
| Oil-Rubbed Bronze | Deep, dark, rich brown with coppery undertones; often has a mottled appearance. | Easy; designed to age and patina over time, hides imperfections well. | Good; the finish is often a patina, so minor wear can blend in. | Traditional, rustic, or craftsman styles. |
| Matte Black | Modern, bold, non-reflective finish. | Moderate; can show dust and mineral deposits if not cleaned regularly. | Moderate; can show scratches if harsh materials are used. | Modern, industrial, or minimalist designs. |
As you can see, brushed nickel strikes a great balance between aesthetics and ease of maintenance. Its ability to camouflage minor imperfections makes it a forgiving choice for busy households. The methods for restoring brushed nickel are generally simpler and less risky than those for highly reflective finishes like polished chrome, which can easily show buffing marks.
Frequently Asked Questions (FAQ)
Q1: Can I use household cleaners on brushed nickel?
A: It’s best to stick to mild household cleaners like dish soap and water, or a diluted white vinegar solution for hard water spots. Avoid harsh chemicals, abrasive powders, and acidic or alkaline cleaners, as they can damage the finish.
Q2: How do I remove water spots from brushed nickel?
A: For fresh water spots, a quick wipe with a microfiber cloth is usually enough. For dried-on spots, use a solution of equal parts white vinegar and water. Apply with a cloth, let it sit for a few minutes, then gently scrub, rinse thoroughly with plain water, and buff dry.
Q3: Is it safe to use steel wool on brushed nickel?
A: Only use the finest grade, 0000 steel wool, and do so with extreme caution. It should be a last resort for deeper scratches and always used with light pressure, in the direction of the brush marks, and tested in an inconspicuous area first. Always follow up with cleaning and drying.
Q4: My brushed nickel faucet looks dull. What can I do?
A: Start with a thorough cleaning using mild dish soap and warm water. If it remains dull, try a specialized nickel polish or a very mild abrasive like a baking soda paste. Ensure you are rinsing and drying completely after any cleaning process.
Q5: Can I restore brushed nickel that has been painted or coated?
A: If the “brushed nickel” finish is actually a coating or paint, restoration methods for actual nickel may not apply. You would need to identify the coating material. Often, if a painted finish is damaged, it may require repainting or refinishing by a professional.
Q6: How often should I clean my brushed nickel fixtures?
A: For best results, wipe them down with a soft cloth after each use to remove moisture and fingerprints. A more thorough cleaning with mild soap and water can be done weekly or bi-weekly, depending on usage and water hardness.
Q7: What’s the best way to prevent scratches on brushed nickel?
A: Be mindful of your surroundings. Avoid using abrasive scrubbers or placing rough items against the fixtures. For high-wear areas like cabinet pulls, consider applying a clear protective film or wax sealant to add a layer of defense.
Conclusion
Restoring the beauty of your brushed nickel fixtures doesn’t have to be a daunting task. By understanding the common issues that affect this finish and employing gentle, effective cleaning and repair techniques, you can easily bring back its original shine and elegance. Remember, patience and the right tools – primarily soft cloths and mild cleaning agents – are your greatest allies.
From tackling stubborn water spots with a simple vinegar solution to gently buffing out minor scratches with toothpaste or the finest grade of steel wool, this guide has equipped you with the knowledge to handle most common problems. Regular maintenance, including a quick wipe-down after use and periodic gentle cleaning, will go a long way in preserving that desirable matte finish and preventing future buildup.
Don’t let dull or scratched fixtures detract from your home’s appeal. With these straightforward steps, you can confidently restore and maintain your brushed nickel surfaces, ensuring they continue to add a touch of sophisticated charm to your living spaces for years to come. Enjoy the satisfaction of a beautifully maintained home, achieved with your own hands!