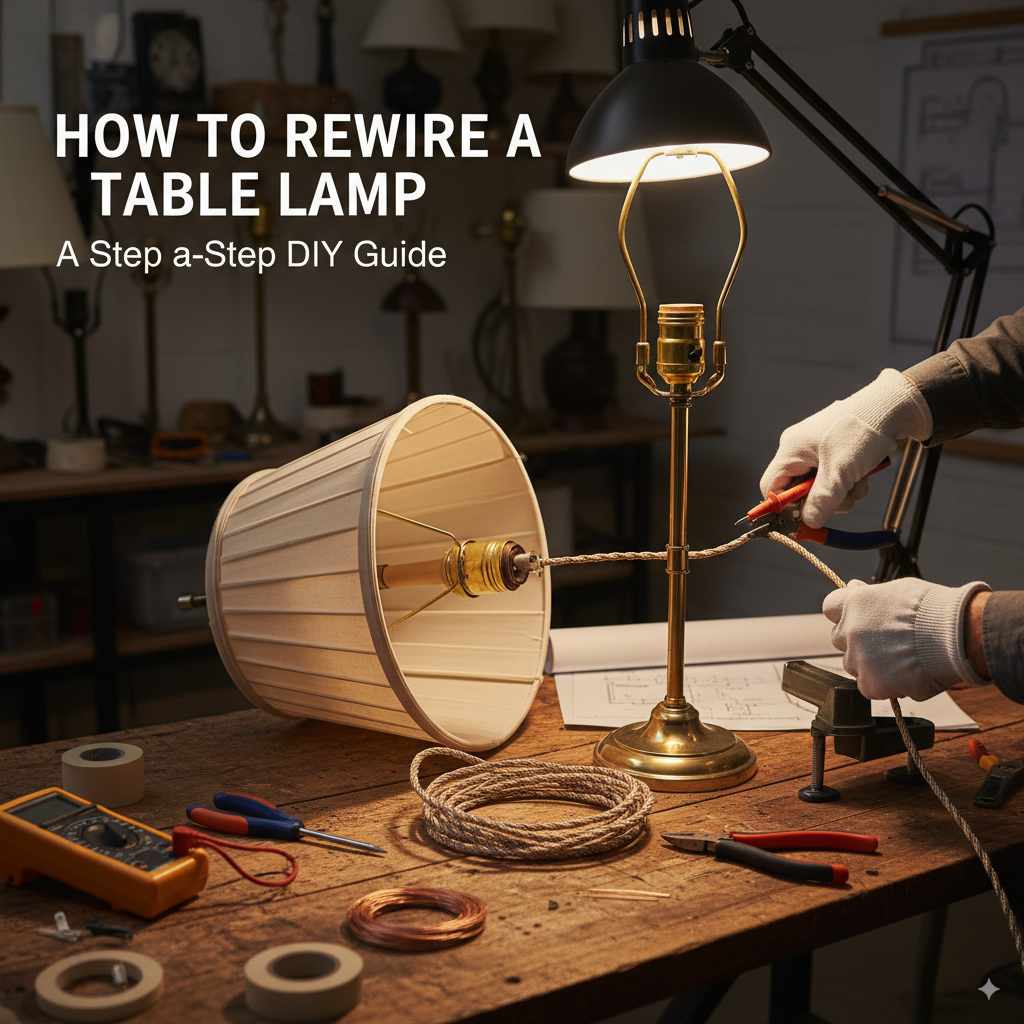
How to Rewire a Table Lamp: Essential Guide
Quick Summary:
Rewiring a table lamp is a straightforward DIY project that revitalizes old fixtures. This guide provides simple, step-by-step instructions using common tools to safely replace worn-out cords and plugs, ensuring your lamp is functional and safe for continued use.
Is your favorite table lamp suddenly dark? Don’t toss it just yet! A frayed or faulty cord is often the culprit, and thankfully, it’s usually a simple fix. Rewiring a table lamp might sound intimidating, but with a little guidance, you can bring your beloved lamp back to life. It’s a rewarding project that saves money and keeps perfectly good lamps out of landfills. We’ll walk you through each step, making it easy and safe for you to tackle. Get ready to see the light again!
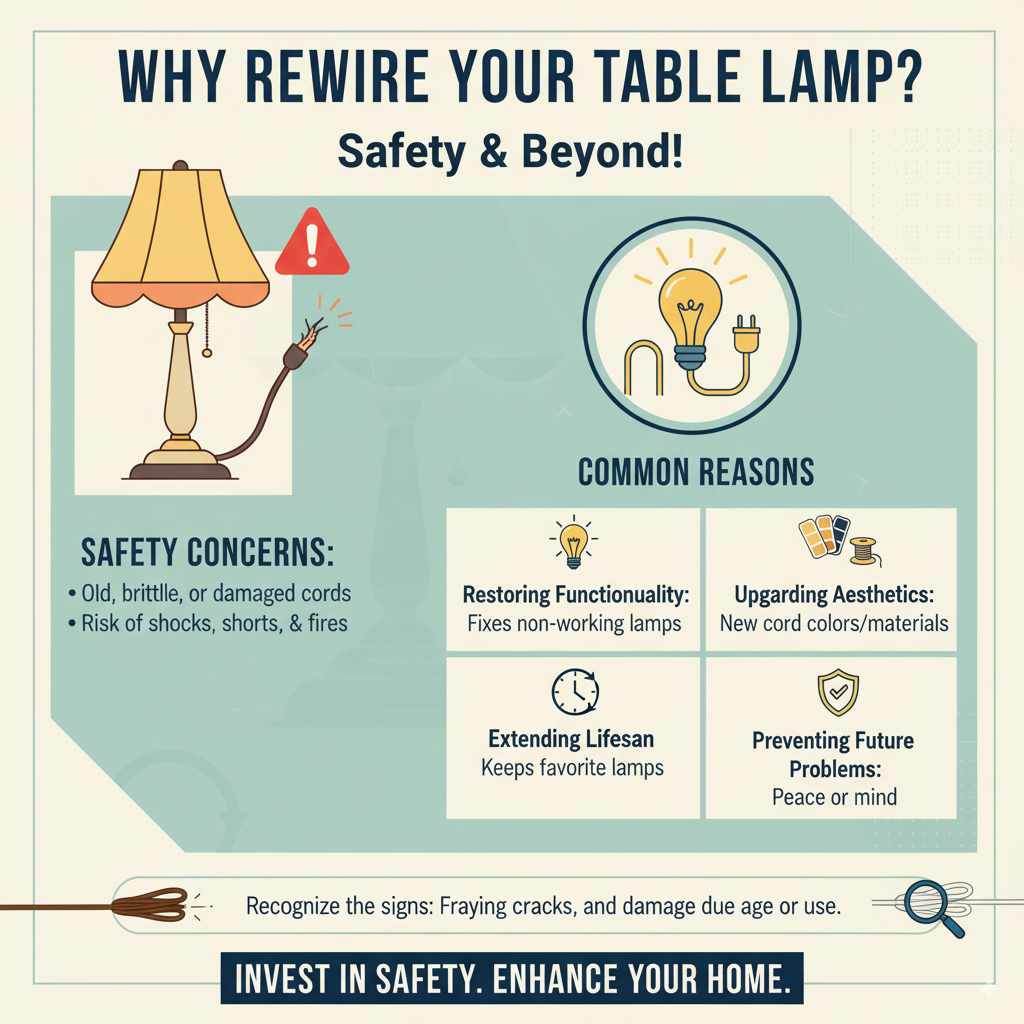
Why Rewire Your Table Lamp?
Over time, the electrical cord on a table lamp can suffer from wear and tear. This isn’t just an inconvenience; it’s a safety hazard. Exposed wires, cracked insulation, or a damaged plug can lead to short circuits, electric shocks, or even fires. Common reasons to rewire include:
- Safety Concerns: The most crucial reason. Old, brittle, or damaged cords pose a significant risk.
- Restoring Functionality: A lamp that won’t turn on might simply have a bad cord.
- Upgrading Aesthetics: You might want a cord that better matches your decor or a fabric-covered cord for a vintage look.
- Extending Lifespan: Don’t discard a lamp with a great base and shade just because of a worn cord.
- Preventing Future Problems: A new cord means peace of mind for years to come.
Many lamps, especially vintage or antique pieces, have cords that have degraded due to age. Even newer lamps can experience cord damage from being bent, pinched, or exposed to heat. Recognizing these signs is the first step to a safe and functional lamp.
Gathering Your Tools and Materials
Before you start, having all your supplies ready will make the process smooth and efficient. Think of it like prepping your ingredients before cooking – it makes everything easier! Here’s what you’ll need:
Essential Tools:
- Wire Strippers/Cutters: These are crucial for safely removing insulation from wires. Look for a pair with comfortable grips.
- Screwdriver Set: You’ll likely need a Phillips head and a flathead screwdriver, possibly in various sizes, to open the lamp base and the plug.
- Pliers (Needle-nose recommended): Useful for gripping small wires and screws.
- Wire Brush (Optional): For cleaning any corrosion on terminal screws.
- Utility Knife or Craft Knife (Optional): For carefully trimming away old cord if needed, but wire strippers are generally preferred for the cord itself.
- Safety Glasses: Always protect your eyes when working with tools and electrical components.
- Work Gloves (Optional): For added protection.
Materials You’ll Need:
- New Lamp Cord with Plug: You can buy these at hardware stores or online. They come in various lengths and colors. Ensure it’s rated for the lamp’s wattage. A common choice is a 3-conductor cord, which includes a grounding wire for added safety. You can find these at reputable retailers like The Home Depot.
- New Plug (if your cord doesn’t have one attached): Make sure it’s polarized if your lamp has a polarized plug.
- Wire Nuts (if needed): Small plastic connectors used to join wires securely. Ensure they are the correct size for the wires you are connecting.
- Electrical Tape: For extra insulation if necessary.
When selecting a new lamp cord, consider its length to ensure it reaches your outlet comfortably without being a tripping hazard. The gauge of the wire should also be appropriate for the lamp’s power draw. For most standard table lamps, a 16-gauge or 18-gauge cord is sufficient.
Safety First: Understanding Electrical Basics
Working with electricity requires respect and caution. Even low-voltage AC power can be dangerous if handled improperly. Before you begin, it’s essential to understand a few basic safety principles:
- Always Unplug the Lamp: This is the golden rule. Ensure the lamp is completely disconnected from the power source before you touch any wires or components. Double-check by trying to turn the lamp on after unplugging it.
- Understand the Wires: Most lamp cords have at least two wires: a hot wire (usually black or red) and a neutral wire (usually white). Many modern cords also include a third wire, the ground wire (usually green or bare copper). The ground wire is a safety feature that provides a path for electricity to flow safely to the ground in case of a fault.
- Polarized Plugs: A polarized plug has one blade wider than the other. This ensures the plug can only be inserted into the outlet one way, connecting the hot and neutral wires correctly. If your original lamp had a polarized plug, your replacement cord and plug should also be polarized.
- Inspect the Lamp’s Internal Wiring: While you’re rewiring, take a moment to inspect the wiring within the lamp itself, where the cord connects to the socket. Look for any signs of damage, scorching, or loose connections.
- Work in a Dry Area: Ensure your workspace is dry and free from moisture.
- Never Work on Live Wires: This cannot be stressed enough. Always assume the power is on until you have definitively turned it off and unplugged the appliance.
For more in-depth information on electrical safety, you can refer to resources from the U.S. Consumer Product Safety Commission (CPSC), such as their Electrical Safety guidelines.
Step-by-Step Guide: How to Rewire a Table Lamp
Let’s get to it! Follow these steps carefully, and you’ll have your lamp rewired in no time.
Step 1: Disconnect Power and Prepare the Lamp
First and foremost, unplug the table lamp from the wall outlet. Place the lamp on a stable, well-lit surface where you have enough room to work. You might need to remove the lampshade, harp, and light bulb to get better access to the lamp base.
Step 2: Access the Cord Entry Point
Locate where the old cord enters the lamp base. This is usually at the bottom or side of the base. You may need to remove a small metal plate, a plastic cap, or even unscrew the entire base to expose the internal wiring where the cord connects.
For lamps with a metal base, there might be a threaded rod running through the center. The cord will pass through this. You might need to gently lift or tilt the lamp to slide the old cord out from the bottom. For lamps with a solid base, look for a removable cover or panel.
Step 3: Detach the Old Cord
Once you have access to the wiring inside the lamp base, you’ll see how the old cord’s wires are connected. Typically, the hot and neutral wires from the cord will be attached to two screws on a terminal block or directly to the switch mechanism. The ground wire, if present, will be attached to a grounding screw, often marked with a green or yellow-green symbol.
Use your screwdriver to carefully loosen the screws and detach the wires from the terminal block or switch. Make a note (or take a picture!) of which wire from the cord connects to which terminal. This is crucial for reconnecting the new cord correctly.
Gently pull the old cord out from the lamp base, feeding it through any channels or rods it passes through.
Step 4: Prepare the New Lamp Cord
If your new cord doesn’t have a plug attached, you’ll need to attach one. If it does have a plug, you might need to trim the end to expose the wires. Using your wire strippers, carefully remove about 1 to 1.5 inches of the outer insulation from the end of the new cord.
Inside, you’ll find the individual insulated wires (hot, neutral, and ground if applicable). Now, use the wire strippers to carefully remove about 0.5 to 0.75 inches of insulation from the end of each of these inner wires. Be careful not to nick or cut the copper wire itself. You should see clean, shiny copper strands.
If you are attaching a new plug, follow the instructions that come with the plug. Generally, you’ll loop the stripped wires around the terminal screws inside the plug: the ground wire (green/bare) to the green screw, the neutral wire (white) to the silver screw, and the hot wire (black/red) to the brass screw. Then, tighten the screws and secure the plug housing.
Step 5: Connect the New Cord to the Lamp
Now, feed the new cord into the lamp base through the same entry point where the old cord was. Make sure the cord is routed neatly and won’t be pinched. If your lamp has a threaded rod, ensure the cord passes through it smoothly.
Refer to your notes or photos from Step 3. Connect the wires from the new cord to the appropriate terminals inside the lamp base:
- Ground Wire (Green or Bare Copper): Connect to the grounding screw (usually green or marked with a ground symbol).
- Neutral Wire (White): Connect to the neutral terminal (usually a wider slot on the socket or a silver screw).
- Hot Wire (Black or Red): Connect to the hot terminal (usually a narrower slot on the socket or a brass screw).
Wrap the stripped end of each wire clockwise around the terminal screw and tighten the screw securely. Ensure no stray strands of copper are sticking out, and that the insulation comes right up to the screw terminal. A good connection is vital for safe operation.
If your lamp uses wire nuts to connect the cord to internal wiring (less common for table lamps, more for ceiling fixtures), ensure the wire nuts are the correct size and are twisted on tightly, creating a secure connection.
Step 6: Reassemble the Lamp
Carefully tuck the wires back into the lamp base, ensuring they are not pinched or strained. Reattach any covers, plates, or the base itself that you removed. Make sure everything is snug and secure.
Reinstall the light bulb, harp, and lampshade. Ensure the new cord is routed away from any heat sources, like the bulb itself, and that it hangs freely without being stressed.
Step 7: Test the Lamp
Once everything is reassembled, plug the lamp into a working electrical outlet. Turn the lamp on. If all connections were made correctly, your lamp should light up!
If the lamp doesn’t turn on, immediately unplug it and recheck all your connections. Ensure the plug is fully inserted into the outlet and that the bulb is screwed in properly. Most issues are due to loose connections or wires connected to the wrong terminals.
Table Lamp Cord Types and Considerations
Not all lamp cords are created equal. Understanding the different types can help you choose the best replacement for your lamp and ensure safety and compatibility.
| Cord Type | Description | Best For | Considerations |
|---|---|---|---|
| Non-Polarized Cord | Has two identical prongs on the plug. | Lamps with non-polarized sockets (where the socket has two identical openings). | Less common in modern lamps; offers less safety against incorrect wiring. |
| Polarized Cord | Has one wider prong and one narrower prong on the plug. | Lamps with polarized sockets (one opening is wider than the other). | Ensures correct orientation for safety. Most common type for modern lamps. |
| Grounding Cord (3-Prong) | Has three wires: hot, neutral, and ground (usually green or bare). The plug has three prongs, including a round ground pin. | Lamps with metal bases or components that require grounding for safety. Essential for lamps with higher wattage bulbs or those designed with metal enclosures. | Provides an extra layer of safety by directing fault current safely to the ground. Always use if your lamp has a grounding connection point. |
| Fabric-Covered Cord | A decorative cord often used for vintage or aesthetic purposes. Can be polarized or non-polarized, and may or may not be grounded. | Restoring vintage lamps, or for decorative flair in modern designs. | Ensure the fabric is rated for electrical use and that the internal wiring is safe. Can be more prone to fraying if not handled carefully. |
When in doubt, always refer to the original lamp’s construction or consult an electrician. For most modern table lamps, a polarized, 3-conductor (grounding) cord is the safest and most appropriate choice. You can often find these cords at hardware stores and online retailers. For example, Amazon offers a wide variety of lamp cords suitable for different projects.
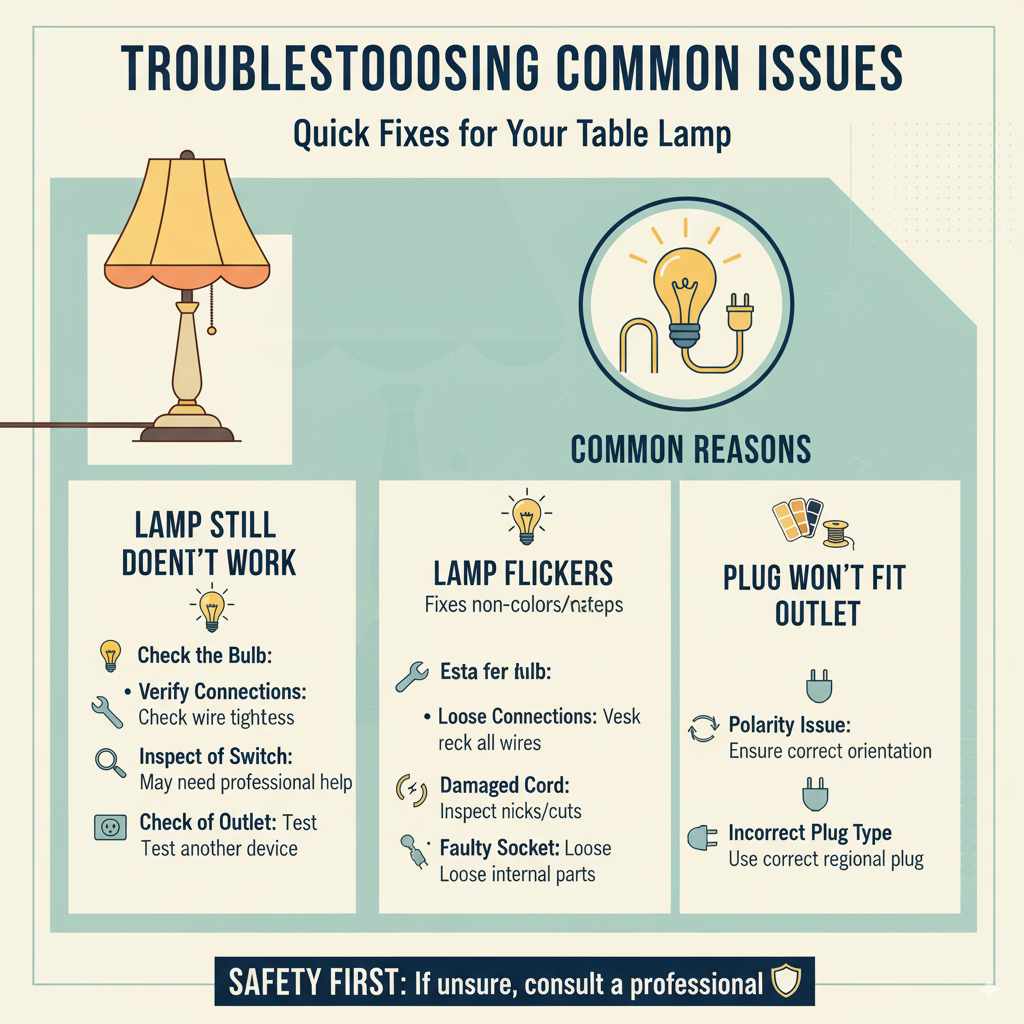
Troubleshooting Common Issues
Even with careful work, sometimes things don’t go perfectly the first time. Here are a few common issues and how to fix them:
-
Lamp Still Doesn’t Work:
- Check the Bulb: Ensure the bulb is new and working correctly.
- Verify Connections: Unplug the lamp and re-check every wire connection inside the base and at the plug. Are they all tight? Are they on the correct terminals?
- Inspect the Switch: The lamp’s switch itself could be faulty. This is a more complex repair, and if you suspect the switch, it might be time to consult a professional or consider replacing the lamp.
- Check the Outlet: Ensure the outlet you’re using is working by plugging in another device.
-
Lamp Flickers:
- Loose Connections: This is the most common cause. Recheck all wire connections.
- Damaged Cord: Inspect the entire length of the new cord for any nicks, cuts, or damage.
- Faulty Socket: The socket where the bulb screws in might be damaged or have loose internal connections.
-
Plug Won’t Fit Outlet:
- Polarity Issue: If you used a polarized plug, ensure it’s inserted correctly. If the lamp itself has a polarized socket, the plug must match.
- Incorrect Plug Type: Ensure you’ve used the correct type of plug for your region (e.g., standard North American plug).
Remember, safety is paramount. If you’re ever unsure or uncomfortable, it’s always best to seek assistance from a qualified electrician.
Frequently Asked Questions (FAQ)
Q1: How long should a new lamp cord be?
The length depends on where you’ll place the lamp and the nearest outlet. A common length is 6 to 8 feet, but you can find them shorter or longer. Ensure it reaches the outlet without being stretched taut or creating a tripping hazard.
Q2: Can I use any type of wire for a lamp cord?
No, you must use a cord specifically designed for use with appliances and lamps, often labeled as “SPT-1” or “SPT-2” cord for non-grounded lamps, or a 3-conductor cord for grounded lamps. These cords have appropriate insulation and gauge for the voltage and current involved.
Q3: What does it mean if my lamp cord is polarized?
A polarized cord has a plug with one blade wider than the other. This is a safety feature that ensures the cord can only be plugged into the outlet one way, correctly connecting the neutral and hot wires to prevent potential electrical hazards.
Q4: Do I need to ground my lamp?
If your lamp has a metal base or metal components and has a grounding wire (green or bare copper) in its original cord or a grounding connection point, you should use a grounding cord. Grounding provides an extra layer of safety by directing electricity away from you in case of a fault.
Q5: What’s the difference between hot, neutral, and ground wires?
The hot wire carries the electrical current from the power source. The neutral wire completes the circuit, returning the current to the source. The ground wire is a safety wire that provides a path for electricity to flow to the ground if there’s a fault, preventing shocks.
Q6: Can I repair a frayed cord by just taping it?
No, taping a frayed or damaged cord is a dangerous temporary fix. The insulation is compromised, and taping won’t restore its safety. You should always replace the entire cord if it shows signs of damage.
Q7: Where can I buy replacement lamp cords?
Replacement lamp cords are available at most hardware stores, home improvement centers, and online retailers like Amazon or specialized lighting supply websites.
Conclusion
You’ve done it! By following these steps, you’ve successfully learned how to rewire a table lamp. This project not only restores your lamp’s functionality but also significantly enhances its safety. It’s a fantastic way to save money, reduce waste, and gain confidence in your DIY abilities. Remember, safety is always the top priority – always unplug your lamp before you begin, and double-check all your connections.
With a new cord, your lamp is ready to shine for years to come. Don’t hesitate to tackle other simple home improvement tasks; you might be surprised at what you can accomplish. Happy lighting!