How to Take a Door Off Hinges: A Step-by-Step Guide for Any DIYer
Hey there! So, you’re looking to figure out how to take a door off its hinges? Maybe you’re moving furniture, painting, or replacing a creaky old door, and you need it out of the way. I get it—doors can be heavy and tricky, but removing them is easier than it looks once you know the ropes. I’ve taken doors off hinges in my own home for all sorts of projects, from squeezing a new couch through a tight doorway to giving my bedroom door a fresh coat of paint.
Over the years, I’ve learned the ins and outs of this task, and I’m excited to share my tips with you. Whether you’re a first-time DIYer or a seasoned pro, I’ll walk you through every step in a way that’s clear and simple, so you can tackle this like a champ. Let’s get started and get that door off!
Why You Might Need to Remove a Door
Before we dive into the how-to, let’s talk about why you’d want to take a door off its hinges in the first place. I’ve found myself doing this for all sorts of reasons. Maybe you’re moving a big piece of furniture, like a dresser or mattress, and the door’s making it impossible to maneuver. I once had to take a bedroom door off just to get a new bed frame through—tight spaces are no joke! Or perhaps you’re painting your door and want to avoid drips or uneven coverage by laying it flat. Other times, you might be replacing a damaged door, installing new hardware, or even making repairs to the hinges themselves. Whatever the reason, removing a door is a handy skill that saves time and hassle, especially if you’re into DIY projects around the house.
Tools You’ll Need to Get Started
You don’t need a fancy toolbox to take a door off its hinges, which is one of the things I love about this job. Here’s what I keep on hand when I’m ready to pop a door off:
| Tool/Item | Why You Need It |
|---|---|
| Screwdriver (flathead or Phillips) | Loosens screws or pries out hinge pins. Most hinges use Phillips screws. |
| Hammer | Taps the hinge pin loose if it’s stuck. |
| Nail or punch | Helps push out stubborn hinge pins when paired with a hammer. |
| Lubricant (like WD-40) | Loosens rusty or stuck hinge pins for easier removal. |
| Rag or cloth | Wipes off lubricant or dirt from hinges. |
| Doorstop or wedge | Keeps the door steady while you work. |
| Helper (optional) | Holds the door to prevent it from falling once the hinges are loose. |
Most of these are probably already in your garage or toolbox. If not, a quick trip to the hardware store will set you up for under $20. I always keep a can of WD-40 handy—it’s a lifesaver for rusty hinges.
Types of Hinges You Might Encounter
Not all hinges are the same, and I’ve learned that knowing what you’re dealing with makes the job easier. Here are the most common types you’ll find in a home:
Standard Butt Hinges
These are the classic hinges you see on most interior and exterior doors. They have two flat plates (leaves) connected by a pin. I’ve dealt with these in every house I’ve lived in—they’re straightforward to remove once you get the pin out.
Spring-Loaded Hinges
These are often on self-closing doors, like screen doors or some interior doors. They’re a bit trickier because the spring adds tension. I once struggled with a spring-loaded hinge until I realized I needed to release the tension first—more on that later.
Double-Acting Hinges
These let the door swing both ways, like in some restaurants or old homes. They’re rare in modern homes, but I helped a friend remove one in a historic house, and it took some extra patience to align everything.
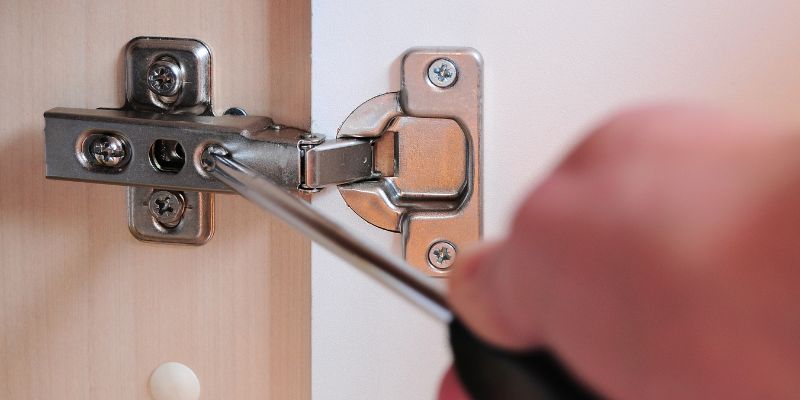
Concealed or European Hinges
These are hidden inside cabinet doors or some modern interior doors. They’re less common for main doors, but if you’ve got one, you’ll need to unscrew the entire hinge from the frame.
Most home doors use standard butt hinges, so I’ll focus on those, but I’ll toss in tips for other types too.
Step-by-Step Guide to Taking a Door Off Hinges
Alright, let’s get to the fun part—how to take that door off! I’ve done this enough times to have a foolproof process, and I’ll break it down so you can follow along.
Step 1: Prep the Area
Clear the space around the door to give yourself room to work. I always make sure there’s nothing on the floor that could trip me up, like shoes or rugs. Open the door slightly and slide a doorstop or wedge under it to keep it steady. If the door swings freely, it’s harder to work on. I learned this when a door almost fell on me because I skipped the wedge—don’t make my mistake!
Step 2: Inspect the Hinges
Take a close look at the hinges. Most doors have two or three hinges, with a pin in the center holding the two leaves together. If the hinges are painted over or rusty, they might be tougher to deal with. I once had to chip away paint with a screwdriver to even see the hinge pin. If you see screws instead of a pin, you might have a different type of hinge, like a concealed one.
Step 3: Loosen the Hinge Pin
For standard butt hinges, you need to remove the hinge pin. Start with the bottom hinge to keep the door stable. Use a flathead screwdriver or a nail and tap it gently with a hammer at the bottom of the pin to push it upward. I usually place the screwdriver under the pin’s head and give it a few light taps. If it’s stuck, spray some WD-40 on the pin and let it sit for a minute. I had a rusty hinge once that wouldn’t budge until I used lubricant—it made all the difference.
Step 4: Remove the Pin
Once the pin is loose, pull it out with your fingers or pliers. I like to wiggle it gently to avoid bending it. Set the pin aside somewhere safe—you’ll need it later to rehang the door. Repeat this for the middle and top hinges, working from bottom to top to keep the door from tipping.
Step 5: Lift the Door Off
With all the pins out, the door should be free. Grab the handle and lift the door slightly to separate the hinge leaves. This is where a helper comes in handy, especially for heavy exterior doors. I once tried to lift a solid wood door by myself and nearly dropped it on my foot—lesson learned! If you’re alone, go slow and keep a firm grip. Set the door flat on the floor or lean it against a wall to keep it safe.
Step 6: Handle Special Hinges
If you’ve got spring-loaded hinges, you’ll need to release the spring tension first. Look for an adjustment screw or pin on the hinge and follow the manufacturer’s instructions—usually, you turn it to release the spring. For concealed hinges, you’ll need to unscrew the entire hinge from the door and frame, which takes a bit more time. I helped a neighbor with concealed hinges once, and it was like solving a puzzle, but we got there with patience.
Tips for Dealing with Stubborn Hinges
Sometimes, hinges don’t cooperate. I’ve run into my fair share of stubborn ones, so here’s what I do when things get tricky:
- Rusty Hinges: Spray WD-40 or another lubricant and let it soak for 5–10 minutes. Tap gently with a hammer to loosen the pin. I had a 50-year-old door with hinges so rusty I thought I’d never get them out, but patience and lubricant worked.
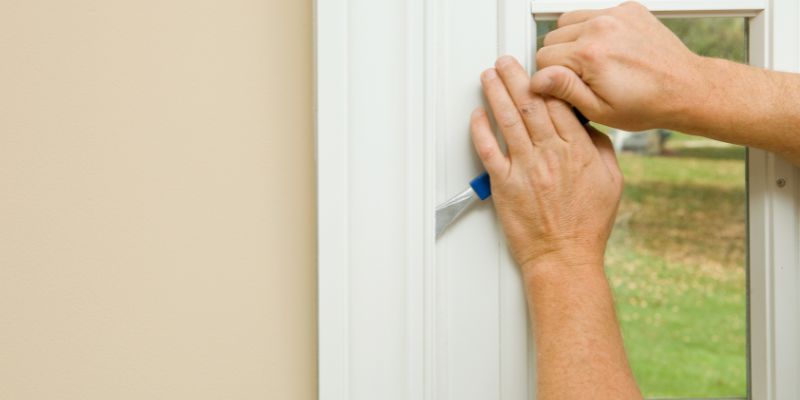
- Painted-Over Hinges: Use a utility knife to score around the pin and screws to break the paint seal. I’ve spent way too long chipping away paint, so trust me, scoring first saves time.
- Bent Pins: If the pin is bent, it might not come out easily. Use pliers to straighten it as you pull. I’ve replaced bent pins with new ones from the hardware store—they’re cheap and worth it.
- Stuck Doors: If the door won’t lift off, check if it’s binding against the frame. Wiggle it gently or tap the hinges to loosen things up.
How to Handle Different Types of Doors
Not all doors are the same, and I’ve learned that the type of door affects how you approach the job.
Interior Doors
These are usually lightweight and have standard butt hinges. They’re the easiest to remove. My bedroom door came off in under 10 minutes the first time I tried it. Just follow the steps above, and you’re good.
Exterior Doors
Exterior doors are heavier and might have security hinges with non-removable pins. I had to remove an exterior door once, and it had a set screw I had to loosen first. Check for extra screws or pins before starting, and get a helper for the weight.
Sliding or Pocket Doors
These don’t use traditional hinges, so you’ll need to lift them out of their tracks instead. I helped a friend with a pocket door, and we had to unscrew the track stops to slide it out. It’s a different process, so check your door type first.
French or Double Doors
For double doors, remove one door at a time, starting with the one that opens second. I did this for a set of French doors in a dining room, and it was straightforward as long as we kept them stable.
Storing and Handling the Door
Once the door is off, you need to store it properly to avoid damage. I always lay mine flat on a padded surface, like a blanket, to prevent scratches. If you’re painting or sanding, set up sawhorses to keep it elevated. Avoid leaning the door against a wall without securing it—it can tip over. I learned this when a door I leaned against a wall crashed down in the middle of the night. Scared me half to death!
Reinstalling the Door
When you’re ready to put the door back, reverse the process. Lift the door into place, aligning the hinge leaves, and slide the pins back in, starting with the top hinge. I tap the pins gently with a hammer to get them seated. Check that the door swings smoothly and doesn’t stick. If it’s off-kilter, you might need to adjust the hinges or tighten screws. I had to shim a hinge once to get a door to hang straight—small tweaks make a big difference.
Preventing Damage to Hinges and Doors
Taking a door off can be rough on the hinges or the door if you’re not careful. Here’s how I avoid problems:
- Don’t force the pins out—it can bend them or damage the hinges.
- Clean the hinges with a rag and lubricant to remove dirt or rust before reinstalling.
- Check screws for wear and replace any that are stripped.
- Handle the door gently to avoid dings or scratches, especially on wood doors.
I once scratched a brand-new door because I wasn’t careful setting it down. A little caution goes a long way.
When to Call a Professional
Most door removals are DIY-friendly, but sometimes you need a pro. If the hinges are welded, rusted beyond repair, or part of a complex security system, it’s worth calling a locksmith or carpenter. I had a friend who tried to force a security hinge off and ended up damaging the door frame—not fun. Also, if the door is super heavy or you’re dealing with a historic home, a professional can save you time and headaches.
My Personal Experience with Door Removal
I’ll never forget the first time I took a door off its hinges. I was moving into a new apartment, and the doorway was too narrow for my couch. I was nervous I’d break something, but with a screwdriver, a hammer, and a little courage, I got the door off in 15 minutes. Since then, I’ve removed doors for painting, repairs, and even just to make a room feel more open. Each time, I’ve gotten faster and more confident. Helping friends with their projects has taught me that every door is a little different, but the basics stay the same. It’s one of those DIY skills that makes you feel like you can tackle anything.
Conclusion
So, there you have it—everything I’ve learned about how to take a door off its hinges. From gathering your tools to handling stubborn pins and different door types, it’s a skill anyone can pick up with a bit of practice. I love the satisfaction of popping a door off and getting a project done, whether it’s moving furniture or giving a room a fresh look.
With a screwdriver, a hammer, and some patience, you’ll have that door off in no time. Just take it slow, keep safety first, and don’t be afraid to ask for help with heavy doors. Now go grab your tools and make it happen! Got more questions? Check out the FAQs below for quick answers.
FAQs
Do I need special tools to take a door off its hinges?
Not really. A screwdriver, hammer, and maybe some WD-40 are usually enough. A nail or punch helps with stubborn pins, but they’re optional.
Can I take an exterior door off by myself?
It’s possible, but exterior doors are heavy. I’d recommend a helper to hold the door steady and prevent it from falling.
What do I do if the hinge pin won’t come out?
Spray it with WD-40 and let it sit for a few minutes. Then tap gently with a hammer and screwdriver or nail. Be patient—it’ll come.
Will removing a door damage it?
Not if you’re careful. Avoid forcing pins or dropping the door. Lay it flat on a padded surface to prevent scratches.
How long does it take to remove a door?
For a standard interior door, it takes about 10–15 minutes. Rusty or tricky hinges might take longer, but it’s usually quick.
Can I remove a door with spring-loaded hinges the same way?
You’ll need to release the spring tension first, usually with an adjustment screw. Check the hinge instructions, and go slow to avoid injury.