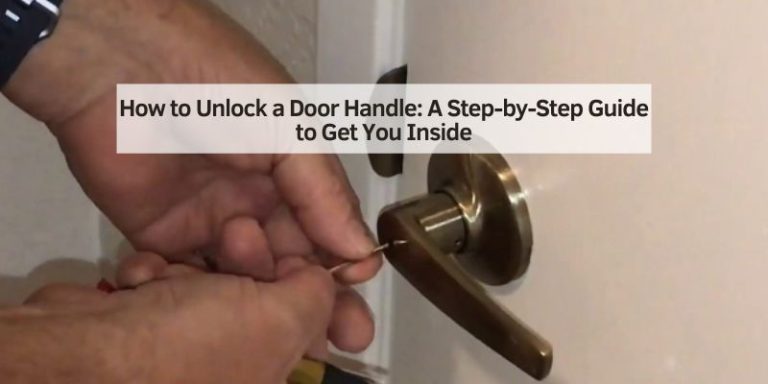
How to Take Apart a Door Knob Easily
Sometimes you need to fix a sticky door knob or maybe just give it a good clean. For many people, taking apart a door knob can seem a little tricky. You might worry about breaking something or not knowing where to start.
But it’s actually quite simple with a few easy steps. We’ll walk you through How to Take Apart a Door Knob Easily so you can get the job done without any stress. Let’s get started so you can see just how straightforward this task can be.
Taking Apart Your Door Knob Explained
This section will give you a clear idea of why you might need to take apart your door knob and what tools you’ll likely need. It’s like getting ready for a simple DIY project. We’ll cover the common reasons people do this and make sure you have everything on hand before you begin.
Knowing this will make the whole process smoother.
Why Take Apart A Door Knob
People often take apart door knobs for a few key reasons. One common issue is a knob that is stiff or hard to turn. Over time, the inner workings can get a bit gummed up with dirt or the lubricant might dry out.
Cleaning and re-lubricating can fix this. Another reason is if the knob is loose and wobbly. Tightening up the screws inside will solve this problem.
Sometimes, a knob might be sticking or not returning to its original position properly. This can also be fixed by taking it apart, cleaning, and putting it back together. Lastly, if a knob is broken or you want to
Fixing A Stiff Knob: Dirt and old grease can build up inside the knob’s mechanism. This makes turning it feel difficult. Taking it apart lets you clean out this old gunk. A good cleaning can make the knob turn smoothly again.
Tightening A Loose Knob: If your door knob feels wobbly, it’s usually because the screws holding it together have loosened. You can tighten these screws. This makes the knob feel secure and stable when you use it.
Repairing A Sticking Knob: When a knob doesn’t click back into place or feels sticky when you push or turn it, it might need attention. Internal parts could be misaligned or need cleaning. This is a common fix for minor wear and tear.
Replacing The Knob: If you are upgrading your door hardware or the knob is damaged beyond repair, you will need to remove it first. This process is straightforward once you know the steps.
Tools You Will Need
Before you start, gather a few basic tools. Most door knobs can be taken apart with just a screwdriver. You will probably need a Phillips head screwdriver, which has a cross-shaped tip.
Sometimes, a flathead screwdriver might also be useful, especially for prying off certain caps or covers. Make sure your screwdriver fits the screws you see on the knob. If the screws are very small or have a special head, you might need a small precision screwdriver set.
Other helpful items include a soft cloth for wiping parts clean and perhaps some penetrating oil or lubricant if you think the knob needs it. Having these items ready means you can work without interruption and make the job much easier.
- Screwdrivers: A Phillips head screwdriver is usually required. A small flathead screwdriver can also be handy for popping off covers.
- Cleaning Cloth: A soft, clean cloth will be useful for wiping away dust and old grease from the knob’s parts.
- Lubricant (Optional): If the knob is stiff, a bit of spray lubricant can help.
- Small Container: To hold any small screws or parts so you don’t lose them.

Step By Step Guide How to Take Apart a Door Knob
Now, let’s get into the actual steps of taking apart a door knob. We will break it down into easy-to-follow stages. This guide is designed for anyone to follow, even if you’ve never done this before.
We’ll start with the outer parts and work our way to the inner workings. You’ll see how simple it is to disassemble the knob assembly.
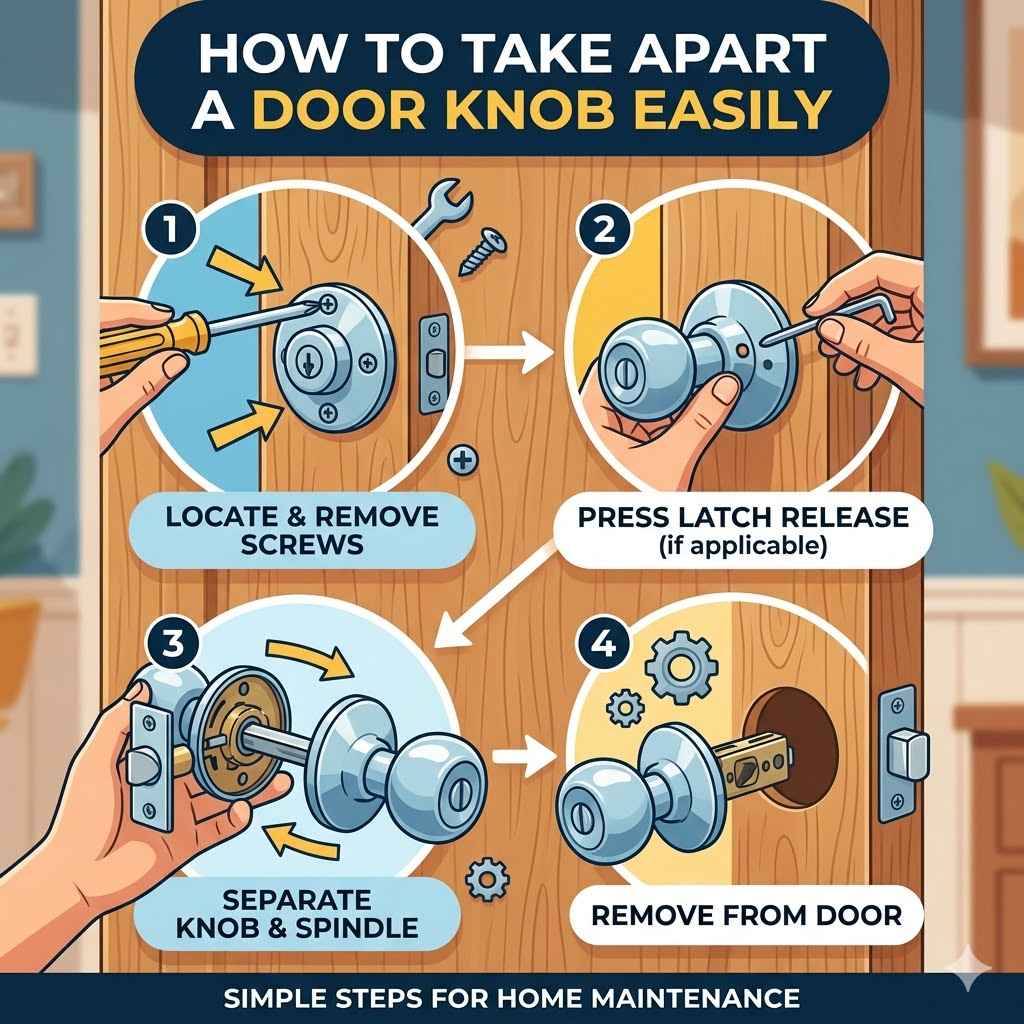
Removing The Knob Covers
Many door knobs have decorative covers or caps that hide the screws. These are usually found on the side of the knob or on the rose, which is the circular plate at the base of the knob. Look closely for a small slot or a tiny hole.
If you see a slot, you can gently might be a tiny button or pin inside that you need to press. You can use a small nail, a paperclip, or a thin screwdriver to push this button.
Pressing the button will release the knob from its spindle. Be gentle; you don’t want to force anything or scratch the finish. Once the cover is off, you will see the screws that hold the knob assembly together.
- Locate The Cover: Look for a small decorative cap on the knob or the baseplate.
- Check For A Slot: Some covers have a small slit. Use a flathead screwdriver to carefully pry it open.
- Find The Release Button: Other covers have a tiny hole. Push a small pin or paperclip into this hole to release the knob.
- Gentle Handling: Always be gentle to avoid damaging the knob’s finish or internal parts.
Unscrewing The Main Assembly
With the covers removed, you will now see the screws. These screws usually go through the inner mechanism and into the other side of the knob. They are often located on the side of the knob’s shaft or on the rose plate.
Use the correct size Phillips head screwdriver to turn these screws counter-clockwise. This is the standard way to loosen and remove screws. Keep turning until the screws are completely out.
It’s a good idea to have a small container ready to put the screws in so they don’t roll away and get lost. Once all the visible screws are removed, the knob assembly should start to come apart.
- Identify The Screws: Once caps are off, locate the screws holding the knob parts together.
- Use The Right Screwdriver: A Phillips head screwdriver is typically needed.
- Turn Counter-Clockwise: To loosen, turn the screws to the left.
- Collect Small Parts: Keep all removed screws in a safe place, like a small dish.
Separating The Knobs And Spindle
After removing the screws, the two halves of the knob and the internal mechanism should be loose. You can usually pull the knobs apart from each other. They might be attached by a spindle, which is a metal rod that passes through the door and connects the two knobs.
Sometimes, one knob might slide off the spindle, and the other might stay attached until you remove the spindle from the door. If the knobs don’t slide off easily, there might be a small set screw on the underside of one of the knobs that you need to loosen. Once you find and loosen this set screw, you should be able to pull the knob off the spindle.
The spindle itself can then be removed from the door by pulling it straight out from the other side. Carefully set all the parts aside in the order you removed them, if possible, as this will help when you reassemble.
- Pull The Knobs Apart: Gently separate the two knob pieces.
- Check For A Set Screw: Some knobs have a small screw that holds them onto the spindle.
- Remove The Spindle: Once knobs are off, pull the metal rod (spindle) from the door.
- Keep Parts Organized: Lay out all removed pieces so you know how they go back together.
Cleaning And Reassembling Your Door Knob
Once your door knob is taken apart, it’s the perfect time to clean it up. A clean knob works better and looks nicer. This part is also quite simple, and we’ll guide you through putting it all back together correctly.
Proper reassembly is key to a functional knob.
Cleaning The Parts
With all the parts separated, take your soft cloth and wipe away any dust, dirt, or old grease. For stubborn grime, you can slightly dampen the cloth with water or a mild cleaning solution. Be sure to dry all the parts thoroughly afterward.
If the internal mechanism feels stiff, a small amount of lubricant can be sprayed onto the moving parts. This will help them move more freely when you put the knob back together. Avoid using too much lubricant, as it can attract more dust.
Make sure all surfaces are clean and dry before reassembly.
- Wipe Down All Pieces: Use a dry cloth to remove dust and loose dirt from every part.
- Tackle Stubborn Grime: For tough spots, use a damp cloth with a little mild soap.
- Dry Completely: Ensure all parts are completely dry before moving on.
- Apply Lubricant Sparingly: A small spray on moving parts helps them work smoothly.
Putting It Back Together
Reassembly is basically the reverse of taking it apart. Start by reinserting the spindle through the door. Then, slide the knob pieces back onto the spindle, making sure they are aligned correctly.
If you loosened a set screw, make sure to tighten it now to secure the knob to the spindle. Next, put the screws back into their holes and tighten them with your screwdriver, turning them clockwise this time. Make sure the screws are snug but don’t overtighten them, as this could strip the threads or damage the knob.
Finally, push the decorative covers or caps back into place until they click or snap securely. Test the knob by turning it a few times to ensure it moves smoothly and the latch engages and disengages properly.
- Insert The Spindle: Slide the metal rod back through the door.
- Reattach The Knobs: Slide the knob pieces onto the spindle and secure any set screws.
- Screw It Together: Insert and tighten the main screws clockwise.
- Replace Covers: Snap the decorative caps back into place.
- Test The Knob: Turn it to make sure it works correctly.
Troubleshooting Common Door Knob Issues
Even with the best efforts, sometimes things don’t go perfectly. This section covers some common problems you might face and how to fix them. Knowing these solutions can save you time and frustration.
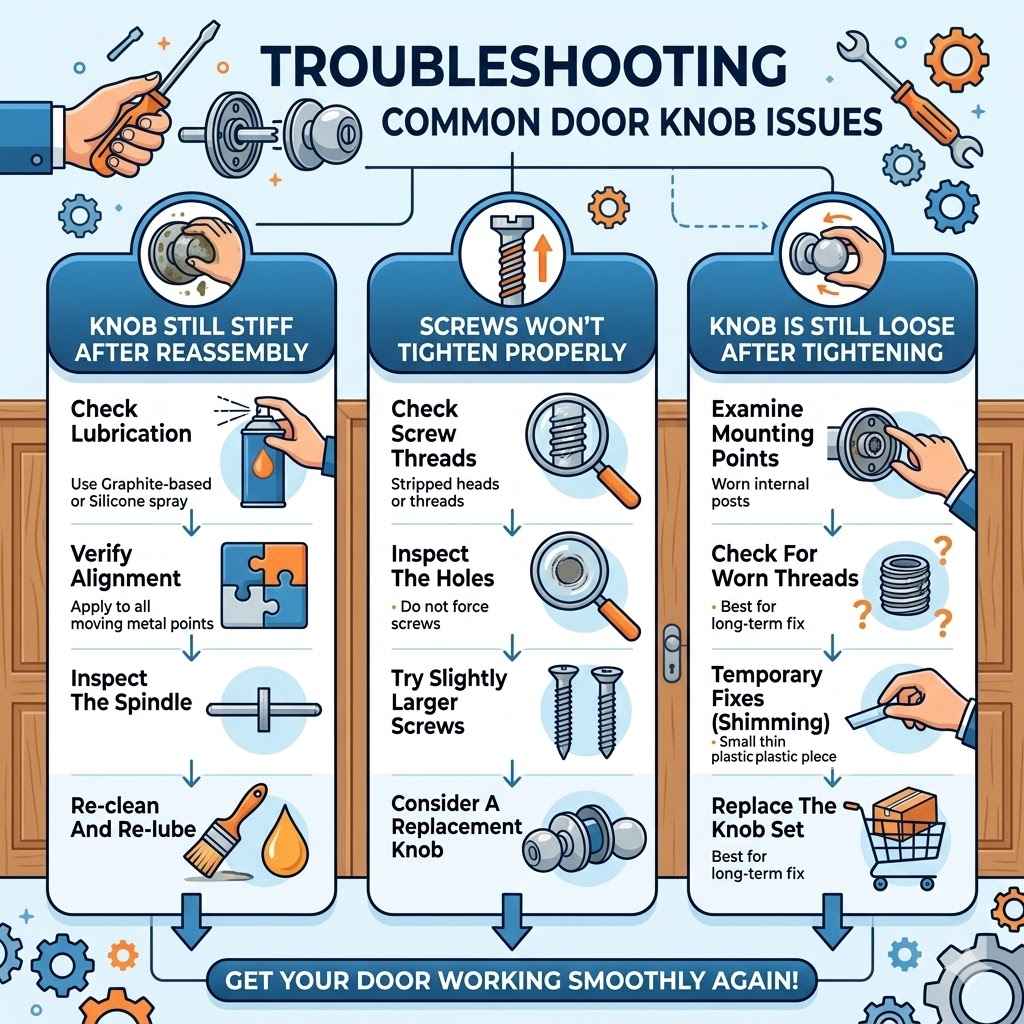
Knob Still Stiff After Reassembly
If your door knob is still stiff after you’ve cleaned and reassembled it, the issue might be with the lubricant or how the parts are seated. You may have not used enough lubricant, or the wrong type. Consider using a graphite-based lubricant or a silicone spray, which are often recommended for door hardware.
Make sure you applied it to all moving metal-on-metal contact points within the mechanism. Sometimes, the problem is that the spindle isn’t quite straight, or the internal parts are slightly misaligned. Gently jiggling the parts while reassembling can help them seat properly.
If it’s still stiff, you might need to take it apart again and be more thorough with cleaning and lubrication, paying close attention to where the spindle rotates inside the mechanism.
- Check Lubrication: Ensure you used enough and the right type of lubricant.
- Verify Alignment: Make sure all parts are lined up correctly as you put them back together.
- Inspect The Spindle: Ensure the spindle is straight and not binding within the mechanism.
- Re-clean And Re-lube: If issues persist, disassemble again for a deeper cleaning and lubrication.
Screws Won’t Tighten Properly
If the screws won’t tighten properly, it usually means the screw threads or the holes they go into are damaged. This is often called stripping. If the screw threads are stripped, the screw will just keep turning without getting tighter.
If the hole threads are stripped, the same thing will happen. For minor stripping, you might try using slightly larger screws if the hole is the problem. If the screw head is stripped (the part you put the screwdriver into), you might need a screw extractor tool.
In some cases, if the stripping is severe, you might need to replace the entire door knob set. It is important not to force screws if they are not going in smoothly, as this can cause more damage.
- Check Screw Threads: Look for any damage on the screw threads themselves.
- Inspect The Holes: See if the threaded holes in the knob mechanism are damaged or stripped.
- Try Slightly Larger Screws: For stripped holes, a slightly larger screw might provide a new grip.
- Consider A Replacement Knob: If damage is extensive, replacing the whole unit may be necessary.
Knob Is Still Loose After Tightening
A door knob that remains loose even after tightening the screws suggests that the internal mounting posts or the receiving threads within the knob assembly are worn or damaged. The screws are meant to tighten against these solid points. If these points are compromised, the screws have nothing firm to grip.
This is more common in older or heavily used door knobs. Sometimes, you can try shimming the area around the mounting screws with a small piece of thin plastic or metal if there’s a slight gap, but this is often a temporary fix. The most reliable solution for a persistently loose knob is to replace the entire door knob set.
This ensures that all the internal components are new and properly functional.
- Examine Mounting Points: Look at where the screws connect inside the knob mechanism for wear.
- Check For Worn Threads: The internal threads where screws engage might be stripped.
- Temporary Fixes (Shimming): Small inserts can sometimes fill gaps for a tighter fit, but this isn’t always long-term.
- Replace The Knob Set: For a lasting solution to persistent looseness, a new knob is the best option.
Frequently Asked Questions
Question: Do I need special tools to take apart a door knob
Answer: Usually, you only need a Phillips head screwdriver. Sometimes a small flathead screwdriver can be helpful for removing decorative caps.
Question: What if I lose the small screws
Answer: It’s best to keep all small parts in a small container or a bowl while you work. If you do lose a screw, you might be able to find a replacement at a hardware store, but matching the size and thread can be tricky.
Question: Can I take apart any type of door knob
Answer: Most standard interior and exterior door knobs can be taken apart following similar steps. Some high-security or specialized knobs might have different mechanisms.
Question: How often should I clean my door knob
Answer: For most home doors, cleaning and lubricating a door knob once a year or when you notice it becoming stiff is usually sufficient.
Question: Can I paint my door knob after taking it apart
Answer: Yes, you can paint a door knob after disassembling it. Make sure to clean it thoroughly, lightly sand it for better paint adhesion, and use a spray paint designed for metal. Ensure all moving parts are dry before reassembly.
Summary
Taking apart a door knob is a simple task that requires basic tools and a little patience. By following these steps, you can easily disassemble, clean, and reassemble your door knob. This process can fix common issues like stiffness or looseness.
Enjoy your smoothly working door knob!