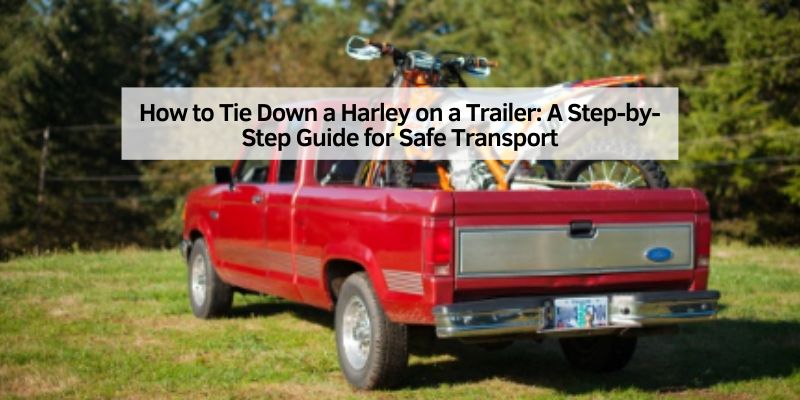
How to Tie Down a Harley on a Trailer: A Step-by-Step Guide for Safe Transport
Hey there, fellow rider! If you’re a Harley-Davidson enthusiast like me, you know the thrill of hitting the open road on your bike. But sometimes, you need to haul your pride and joy to a rally, a new home, or a repair shop. That’s where knowing how to tie down a Harley on a trailer comes in. I’ve transported my Harley countless times, from short trips to cross-country adventures, and I’ve learned the hard way what works and what doesn’t.
Let me share my experience with you, so you can secure your bike safely and hit the road with peace of mind. This guide is packed with practical tips, easy steps, and everything you need to keep your Harley safe during transport. Let’s get started!
Why Proper Tie-Down Matters
I’ll never forget the first time I tried to haul my Harley. I thought a couple of ropes and some guesswork would do the job. Big mistake! Halfway down the highway, I noticed my bike shifting, and my heart sank. Luckily, I pulled over in time, but that scare taught me a valuable lesson: securing a Harley properly is non-negotiable. A loose bike can damage itself, the trailer, or even cause an accident. Harleys are heavy, often weighing 600 to 900 pounds, so they need strong, reliable tie-downs to stay put. Plus, you’ve invested a lot in your ride—time, money, and love, so protecting it during transport is worth the effort. Doing it right keeps your bike safe and lets you focus on the journey ahead.
Choosing the Right Trailer
Before you tie down your Harley, you need a solid trailer. I’ve used everything from small single-bike trailers to large enclosed ones, and here’s what I’ve learned. The trailer must be sturdy enough to handle your bike’s weight. A typical Harley needs a trailer rated for at least 1,000 pounds. Open trailers are great for short trips—they’re lightweight and easy to load. Enclosed trailers offer extra protection from weather and theft, perfect for long hauls.
Make sure the trailer has a flat, non-slip deck and strong anchor points for tie-downs. I prefer trailers with built-in wheel chocks to keep the front wheel stable, but a portable chock works too. Check the trailer’s tires, lights, and hitch before every trip. A shaky trailer is a recipe for trouble.
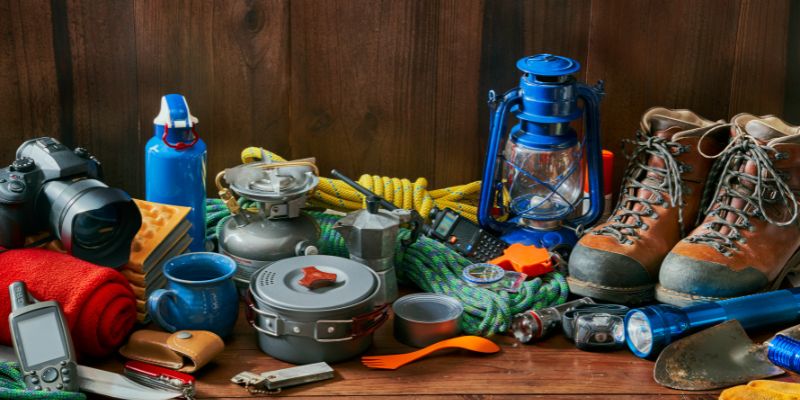
Gathering the Right Gear
Tying down a Harley isn’t about grabbing whatever rope you have lying around. You need the right tools to do it safely. Here’s my go-to gear list:
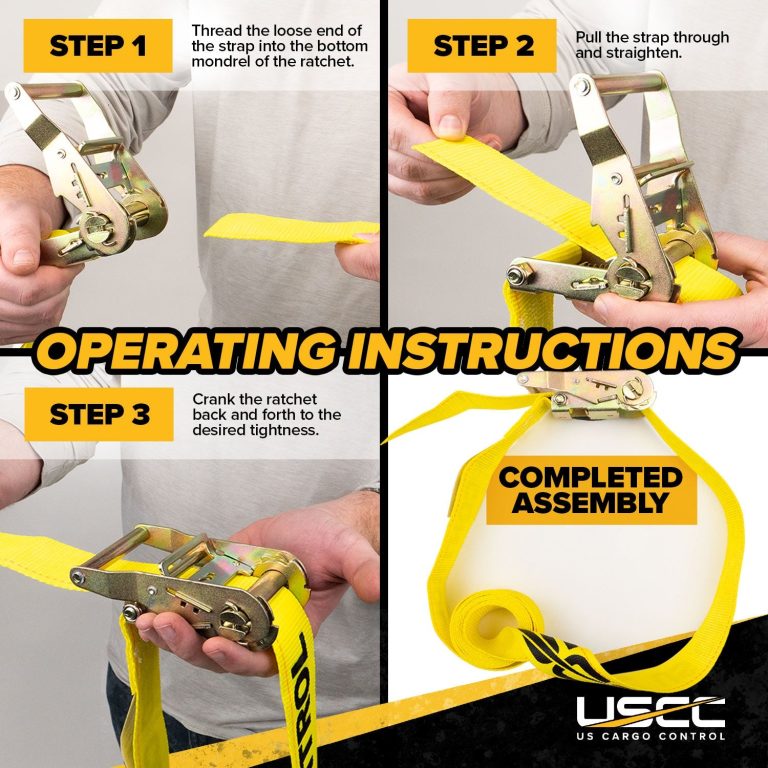
- Ratchet Straps: Get four heavy-duty ratchet straps rated for at least 1,500 pounds each. I prefer soft-loop straps—they’re gentle on your bike’s frame and handlebars.
- Wheel Chock: This keeps the front wheel secure and takes pressure off the straps. A removable chock is handy if your trailer doesn’t have one built-in.
- Canyon Dancer or Handlebar Straps: These grip your handlebars safely without scratching them. They’re a lifesaver for securing the front end.
- Bungee Cords: Use these for extra stability, like securing loose parts or a tarp.
- Tarp or Cover: Protect your Harley from rain or road debris, especially on long trips.
- Gloves and Tools: Gloves protect your hands, and a basic toolkit helps with adjustments.
I always double-check my gear before loading. Worn straps or weak hooks can fail, so replace anything that looks sketchy. Investing in quality gear saves headaches down the road.
Preparing Your Harley for Transport
Before you load your bike, take a few minutes to prep it. I learned this after a trip where my side mirror got scratched because I skipped this step. Start by cleaning your Harley—it’s easier to spot damage later if it’s clean. Turn off the fuel valve and run the engine until the carburetor is empty to prevent leaks. If your bike has fuel injection, just switch it off. Remove any loose items like saddlebags, GPS units, or windshields. These can bounce around and cause damage. Lower the tire pressure slightly, about 10%, to give better grip on the trailer. Finally, put the bike in neutral and disengage the alarm if it has one. This makes loading smoother and keeps your bike secure.
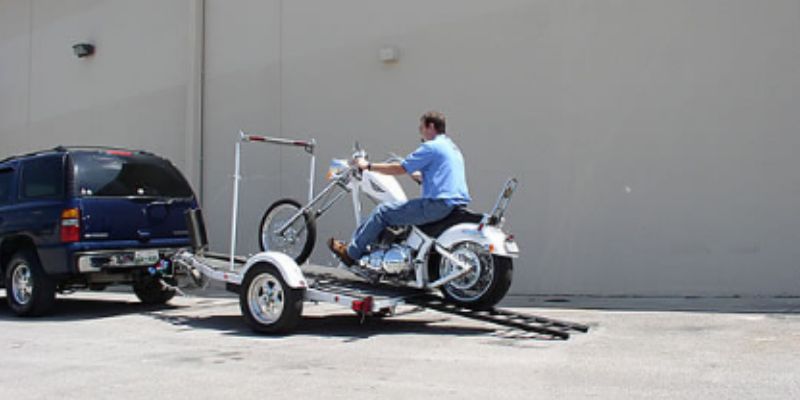
Loading Your Harley Onto the Trailer
Loading a Harley can feel intimidating, especially if you’re doing it alone. I’ve done it enough to know it’s all about preparation and patience. Here’s how I load my bike:
- Position the Trailer: Park the trailer on flat ground and attach it to your vehicle. Engage the parking brake and chock the trailer wheels for stability.
- Set Up the Ramp: Use a sturdy ramp rated for your bike’s weight. Align it with the trailer’s center and secure it tightly.
- Install the Wheel Chock: Place the chock on the trailer deck, centered where the front wheel will go. Secure it firmly.
- Roll the Bike Up: With the bike in neutral, push it up the ramp slowly. I usually have a buddy guide me, but if you’re alone, take it steady. Keep the bike upright and centered.
- Secure the Front Wheel: Once the front wheel is in the chock, engage the chock’s lock or strap to hold it in place.
Take your time here. Rushing can lead to slips or misalignment. If your Harley feels too heavy, don’t hesitate to ask for help. Safety first!
Tying Down Your Harley: Step-by-Step
Now comes the most important part—securing your bike. I use a four-point tie-down system for maximum stability. Here’s how I do it:
- Attach Front Straps: Loop two ratchet straps through soft loops or a Canyon Dancer on your handlebars. Avoid attaching straps to mirrors or grips—they’re not strong enough. Hook the other ends to anchor points on the trailer, one on each side, at a 45-degree angle. Ratchet the straps until the front suspension compresses slightly, about 1/3 of its travel. This keeps the bike upright but not overstressed.
- Secure the Rear: Attach two more straps to strong points on the rear frame, like the passenger peg mounts or swingarm. Hook them to anchor points on the trailer, pulling slightly downward and backward. Tighten until the rear suspension compresses a bit, matching the front.
- Check Stability: Push the bike gently side to side. It should feel rock-solid with no wobble. If it moves, tighten the straps evenly.
- Add Extra Security: Use bungee cords to secure loose parts like the kickstand or a tarp. I also strap the front wheel to the chock for added peace of mind.
The goal is to keep your Harley stable without over-tightening. Too much pressure can damage the suspension or frame. I always double-check each strap’s tension and hooks before hitting the road.
| Step | Action | Tips |
|---|---|---|
| Front Straps | Loop through handlebars, attach to trailer | Push the bike side to side |
| Rear Straps | Attach to frame, hook to trailer | Pull downward, match front tension |
| Check Stability | Push bike side to side | Should feel solid, no wobble |
| Extra Security | Use bungee cords for loose parts | Secure kickstand, add tarp if needed |
Checking Your Setup Before You Go
Before you drive off, do a thorough check. I’ve learned to never skip this step, especially after a strap loosened on a bumpy road once. Walk around the trailer and tug on each strap to ensure they’re tight and secure. Check the hooks and ratchets for any signs of slipping. Make sure the wheel chock is locked in place. Inspect the trailer’s tires, lights, and hitch again.
Give your Harley a quick once-over for any loose parts or leaks. Finally, take a short test drive—five minutes around the block—to feel how the trailer handles. If anything feels off, stop and recheck. This extra effort ensures your bike stays safe for the whole trip.
Driving Tips for Transporting Your Harley
Driving with a Harley on a trailer changes how your vehicle handles. I noticed this the first time I hauled my bike—turns felt heavier, and braking took longer. Here are my tips for a smooth ride:
- Drive Slowly: Keep your speed lower than usual, especially on highways. I stick to 55-60 mph to reduce wind resistance and swaying.
- Increase Following Distance: Give yourself extra room to brake. A loaded trailer needs more stopping distance.
- Avoid Sharp Turns: Take corners slowly and wide to prevent the trailer from tipping or the bike from shifting.
- Check Regularly: Stop every hour or so to inspect the straps and trailer. I always recheck after rough roads or high winds.
- Watch the Weather: Rain or strong winds can make towing trickier. If conditions worsen, pull over and wait it out.
Driving cautiously keeps your Harley secure and makes the trip stress-free. I also keep my phone handy for GPS, but avoid distractions like texting or loud music.
Unloading Your Harley Safely
Once you reach your destination, unloading is just as important as loading. I always park on flat ground and engage the trailer’s brakes. Start by removing the bungee cords and any tarp. Loosen the rear straps first, then the front ones, slowly releasing tension. Remove the straps completely and store them safely. Unlock the wheel chock and gently roll the bike backward down the ramp.
Keep it upright and move slowly to avoid tipping. If you have a buddy, ask them to guide you. Once the bike is off, give it a quick inspection for any scratches or issues. Then, you’re ready to ride or store your Harley!
Common Mistakes to Avoid
I’ve made plenty of mistakes over the years, so let me save you some trouble. Here are pitfalls to watch out for:
- Using Cheap Straps: Flimsy straps can snap or stretch. Invest in heavy-duty ratchet straps rated for your bike’s weight.
- Over-Tightening: Compressing the suspension too much can damage your bike. Aim for slight compression, not a squashed look.
- Weak Anchor Points: Only attach straps to solid points on the trailer and bike. Mirrors or plastic parts won’t hold up.
- Skipping Checks: Always inspect your setup before and during the trip. A loose strap can cause big problems.
- Uneven Tension: Tighten straps evenly to keep the bike balanced. Uneven straps lead to wobbling or shifting.
Learning from my mistakes has made me a better hauler, and avoiding these errors will keep your Harley safe.
Maintaining Your Gear for Future Trips
Your tie-down gear takes a beating, so keep it in top shape. After every trip, I clean my straps and check for fraying or wear. Store them in a dry place to prevent mildew. Inspect your wheel chock for cracks or loose bolts. Check the trailer’s deck, tires, and lights regularly, even when not in use. I also lubricate the hitch and ramp hinges to keep them smooth. Good maintenance means your gear is ready when you need it, and it saves money on replacements. I learned this after a rusty trailer light failed during a night drive—not fun!
Why This Skill Is Worth Mastering
Tying down a Harley on a trailer isn’t just about getting from point A to B. It’s about protecting your investment and enjoying the freedom of the road. I love the confidence of knowing my bike is secure, whether I’m heading to Sturgis or just the local shop. This skill lets you travel farther, attend rallies, or move without worrying about your Harley. Plus, it’s satisfying to do it yourself. Every time I load my bike, I feel a little more connected to the riding community. It’s a practical skill that every Harley owner should have in their toolbox.
Conclusion
Hauling your Harley on a trailer doesn’t have to be stressful. With the right gear, a solid plan, and a little practice, you can tie down your bike like a pro. I’ve loved sharing my journey with you—from my early mistakes to the tips that make transporting my Harley a breeze. Whether you’re a new rider or a seasoned one, mastering this skill opens up new adventures. So, grab your ratchet straps, check your trailer, and get ready to hit the road with confidence. Your Harley deserves a safe ride, and you deserve the peace of mind that comes with doing it right. Here’s to many more miles and memories with your trusty steed!
FAQs
What kind of straps should I use to tie down my Harley?
Use heavy-duty ratchet straps rated for at least 1,500 pounds each. Soft-loop straps are best—they protect your bike’s frame and handlebars.
Do I need a wheel chock to haul my Harley?
A wheel chock isn’t mandatory, but it makes a huge difference. It keeps the front wheel stable andreduces strain on the straps.
Can I use regular rope instead of ratchet straps?
No way! Rope isn’t strong or reliable enough for a heavy Harley. Stick to ratchet straps for safety.
How tight should the straps be on my Harley?
Tighten until the suspension compresses slightly, about 1/3 of its travel. Too tight can damage the bike; too loose, and it’ll shift.
How often should I stop to check my bike during transport?
Stop every hour or after rough roads. Tug on the straps and check the trailer to make sure everything’ssecure.
Can I haul my Harley on an open trailer in the rain?
Yes, but use a tarp or cover to protect your bike from water and debris. Check straps more often, as rain can loosen them.
What’s the best trailer for a Harley?
A trailer rated for 1,000 pounds or more works well. Open trailers are great for short trips; enclosed ones offer extra protection for long hauls.