Remove Paint From Wood Trim Without Damaging Wood: Proven
To remove paint from wood trim without damaging the wood, use a chemical stripper followed by gentle scraping or heat, or carefully use an orbital sander with low-grit sandpaper, always prioritizing wood grain protection and ventilation.
If you are planning to repaint or refinish old wood trim—maybe it’s antique baseboards or charming window casings—you’ve likely noticed the old, chipped paint is stubbornly attached. Trying to remove it with harsh methods often results in gouges, splintering, or that fuzzy, damaged wood look we all dread. It can be incredibly frustrating when you want beautiful results but feel like you are fighting your own materials!
Don’t worry, my friend. With the right approach and a little patience, you can safely strip years of old paint away while keeping the underlying wood healthy and smooth. I’ve helped many homeowners tackle these tricky spots, and I’m here to guide you through proven, gentle techniques. We will cover chemical stripping, heat methods, and sanding, ensuring you know exactly which tool is best for your project. Let’s get that beautiful wood grain showing through!
The Golden Rules for Protecting Wood Trim While Stripping Paint
Wood trim is usually delicate, often featuring detailed profiles (like beadboard or crown molding) that a heavy-duty sander can destroy in seconds. Before we grab any tools, we need to understand the priorities: safety and grain preservation.
Safety First: Prep Your Work Area
Removing old paint often means dealing with chemicals or dust, sometimes even lead paint if your home was built before 1978. Always prioritize safety!
- Ventilation is Key: Whether you use chemicals or heat guns, you need fresh air moving. Open all windows and use fans to draw air out of the room, not just blow it around.
- Protect Yourself: Always wear chemical-resistant gloves, safety goggles, and, especially when sanding or using heat, an appropriate respirator mask (N95 or better). Check guidelines from the Environmental Protection Agency (EPA) if you suspect lead paint.
- Protect the Surroundings: Lay down heavy plastic sheeting or canvas drop cloths around the trim to catch paint chips and stripper residue. Protect adjacent walls and flooring with painter’s tape.

Choosing Your Method: Chemical vs. Heat vs. Mechanical
The best way to remove paint from wood trim without damage depends on the age of the paint, how many layers there are, and the type of wood. Here is a quick look at what each method excels at:
| Method | Best For | Damage Risk to Wood | Time Commitment |
|---|---|---|---|
| Chemical Stripper | Multiple thick layers, detailed profiles | Low (if neutralized properly) | Moderate (includes dwell time) |
| Heat Gun | Single, thin layers of oil-based paint | Moderate (risk of scorching wood) | Slow and meticulous |
| Sanding | Thin, top coats or smoothing after stripping | High (easy to round edges) | Fast, but requires great care |
Method 1: Gentle Chemical Stripping (The Most Reliable Choice)
For most homeowners dealing with layered, stubborn paint on trim, a quality chemical stripper is the safest way to preserve the wood profile underneath. Modern strippers are much safer than the old, harsh ones, but you still must be careful.
Tools and Materials Needed for Chemical Stripping
Gathering everything beforehand makes this process much smoother:
- Appropriate paint stripper (Citrus/Soy-based for low odor, or solvent-based for tough jobs—check if it’s safe for your type of paint).
- Stiff plastic scraper or putty knife (never metal on fine wood).
- Old paintbrush (natural bristle works well for applying stripper).
- Steel wool (#0000 grade for residue removal).
- Mineral spirits or water (depending on the stripper instructions for neutralization).
- Rags, gloves, safety glasses, and respirator.
Step-by-Step Chemical Paint Removal
This method requires patience. Let the chemical do the hard work!
Step 1: Prepare and Test the Stripper
If you are unsure how the stripper will react with the wood or the paint, test a small, inconspicuous area first. Apply a small amount of the stripper with a cheap brush and let it sit for the recommended time. If the paint bubbles and lifts, you are ready to proceed.
Step 2: Apply the Stripper Thickly
Using an old, inexpensive paintbrush, apply the stripper generously onto the paint—like icing a cake. Do not brush it thinly; a thick layer ensures the chemical can penetrate all the layers down to the wood surface. Work in small sections (about 2 feet at a time) so the stripper doesn’t dry out before it works its magic.
Step 3: Wait for the Lift
Check the product label for the required dwell time. This might be 20 minutes or several hours. You are looking for the paint to wrinkle, bubble, or start to pull away from the wood surface naturally. This is the point where the chemical bond between the paint and the wood is broken.
Step 4: Gently Scrape Off the Softened Paint
Once the paint is loose, use your plastic scraper or the dull edge of a wooden putty knife. Work with the grain of the wood. Gently push the softened paint off the trim. If the paint doesn’t come off easily, stop scraping and apply more stripper—forcing it will scratch the wood. For tight corners and grooves in detailed trim, use the edge of a popsicle stick or a toothpick wrapped in a rag.
Step 5: Tackle Stubborn Residue with Fine Steel Wool
For tiny flecks embedded in the grain or hard-to-reach corners, dip a wad of 0000 (quadruple ought) steel wool into the stripper residue. Gently rub the area. The fine steel wool will lift the remaining paint bits without significantly scratching the underlying wood, provided you use very light pressure.
Pro Tip: For older, solvent-based paint removal, sometimes a slightly abrasive, yet gentle, pad like a Scotch-Brite pad (maroon or gray) dipped in mineral spirits works wonders to clean up the sludge.
Step 6: Neutralize the Chemical
This step is crucial for preventing future finish failure! Read your stripper’s instructions carefully. Some require a thorough wash with water, while others need neutralization with mineral spirits or denatured alcohol. Neutralizing stops the chemical action so the stripper cannot continue eating into the wood surface or reacting with your new finish. Wipe the entire stripped area down until clean.
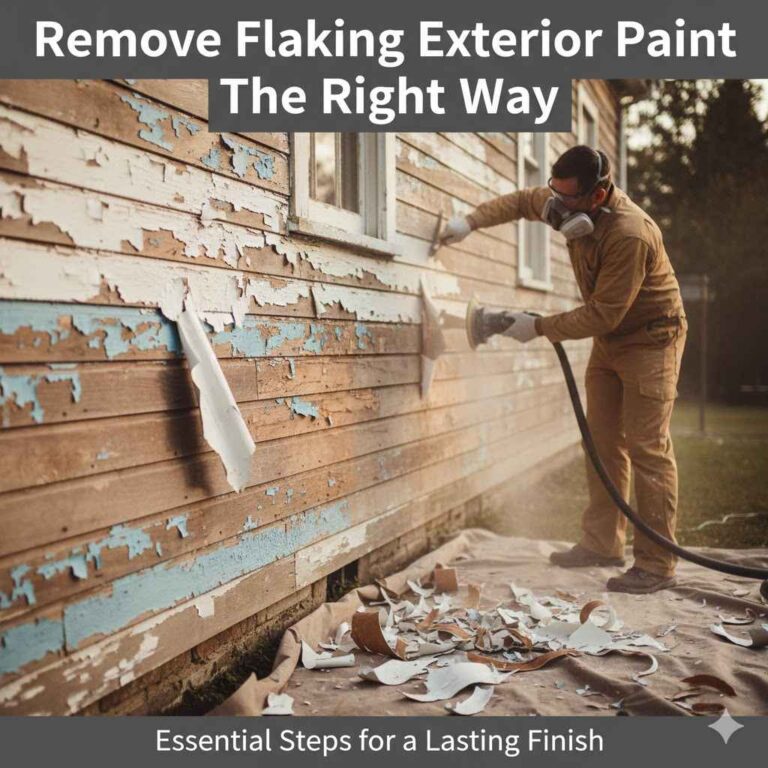
Method 2: Heat Gun Application (For Delicate Situations)
A heat gun is an excellent tool when you want to avoid chemicals completely, but it demands focus and a very light touch. The key here is using low heat and constant movement. This method works best on single layers of relatively fresh, oil-based paint.
Safety Alert: Understanding Heat Gun Risks
Using a heat gun improperly can cause immediate, irreversible damage:
- Scorching: Too much heat in one spot burns the wood, turning it black and making it permanently stained.
- Fire Hazard: Hot air blowing on insulation or dry wood dust inside wall cavities is a serious fire risk.
- Lead Paint Danger: If you suspect the paint is pre-1978, using a heat gun can vaporize lead, which is extremely dangerous to inhale. If you suspect lead, use chemical stripping only, or hire a professional for testing and removal.
Step-by-Step Heat Gun Technique
Use a heat gun set to the lowest effective temperature setting.
- Test the Distance: Hold the heat gun a few inches away from the trim. Move it constantly in small circles. You want the paint to just start softening and bubbling slightly, not smoking or charring.
- Work Small Areas: Focus the heat on a 6-inch section of trim. Keep moving the heat source constantly.
- Scrape Immediately: As soon as the paint softens—usually within 10–15 seconds—use your plastic scraper or a razor blade held at a very low angle (almost flat against the wood) to gently push the paint away.
- Focus on the Scraper’s Path: The goal is to keep the heat source following immediately behind your scraper, softening the next bit of paint before you get there.
- Dealing with Edges: For detailed profiles, a specialized stripping tool might help. These tools often have shaped edges (like hooks or loops) that match common trim profiles, allowing you to pull paint out of crevices without digging into the surrounding flat surfaces.
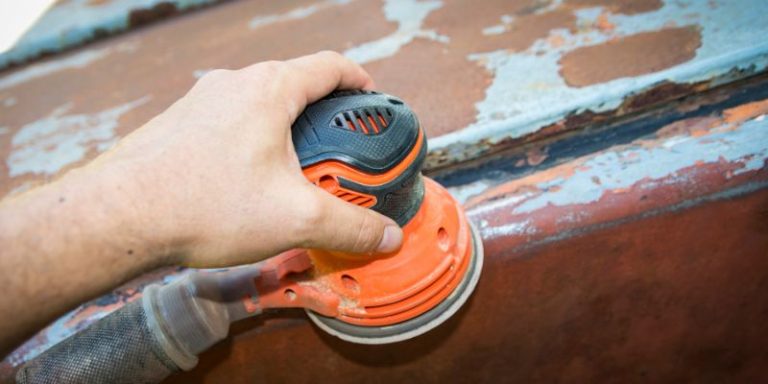
Method 3: Mechanical Removal (Sanding Wisely)
Sanding should almost always be the last step in paint removal, used to clean up chemical residue or remove very thin, flaky paint layers. For trim, aggressive sanding is the fastest way to ruin profiles and make edges rounded or uneven. If you must sand, precision is everything.
The Tools for Sensitive Sanding
You cannot simply bring out the heavy-duty orbital sander. Precision is required.
- Detail Sander or Mouse Sander (better for corners).
- Sanding sponges (flexible and conform better to slight curves).
- Very fine sandpaper: Start with 120-grit only if necessary, but plan to finish with 180-grit or 220-grit.
- Sanding block (for flat surfaces only).
How to Sand Without Destroying the Profile
The main enemy of detailed trim is an aggressive power sander that cuts faster than you can control.
Avoid Power Sanders on Detailed Trim
If your trim has beveled edges, curves, or indentations, do not use an orbital sander. These sanders inevitably round over sharp corners and create dips in flat areas, which looks terrible once stained or painted. Rely on hand-sanding for profiles.
Sanding Technique for Flat Sections
If you have a long, flat piece of baseboard, a detail sander can work, but use extreme caution:
- Use 120-grit sandpaper initially, applying very light pressure.
- Sand only enough to remove the final traces of old finish or stripper residue.
- Always move the sander along the direction of the wood grain. Never sand across it.
- Switch immediately to 180-grit or 220-grit sandpaper to smooth out any fine scratches left by the coarser paper.
Hand Sanding Curves and Profiles
For the detailed parts, use sanding sponges or wrap 220-grit sandpaper around a small dowel or block of wood that matches the curve of the trim:
- Use the sponge or curved block to gently scrub the remaining paint residue.
- Use soft-bristled nylon brushes (like a heavy-duty kitchen brush) dipped in mineral spirits to scrub paint out of tight crevices without eroding the wood fibers.
Dealing with Tough Areas: Joints and Gaps
The areas where trim pieces meet—inside corners, outside corners, and around window/door casings—are often the hardest to clean without chipping the wood or the adjoining painted surface.
Inside Corners
The interior corner joint is where many DIYers accidentally gouge the wood trying to scrape deeply. If chemical stripping has loosened the paint here, use fine-tipped tools:
- A stiff plastic wedge or a specialized corner tool.
- A bamboo skewer or the end of a wooden chopstick, dipped in stripper.
- A flexible plastic strip (like a segment cut from an old plastic container) that you can push deep into the corner to scrape the softened paint upwards.
Paint Build-up on Edges
If you have heavy layers of paint built up only on the very edge or bevel, a very gentle application of heat followed by a single pass with a plastic razor blade can sometimes shear the paint off cleanly without digging into the main surface underneath. Be extremely careful not to catch the blade on the wood grain itself.
Water Damage and Grain Raising
If you use water or water-based strippers extensively, the wood grain might swell and raise, feeling fuzzy even after it dries. To counteract this:
- Allow the trim to dry completely (24 hours).
- Use a very fine-grit sandpaper (320 or 400 grit) or a sanding sponge and lightly “sand the whiskers.” You are only knocking down the raised fibers, not trying to remove paint.
- Wipe clean with a tack cloth before applying a new finish.
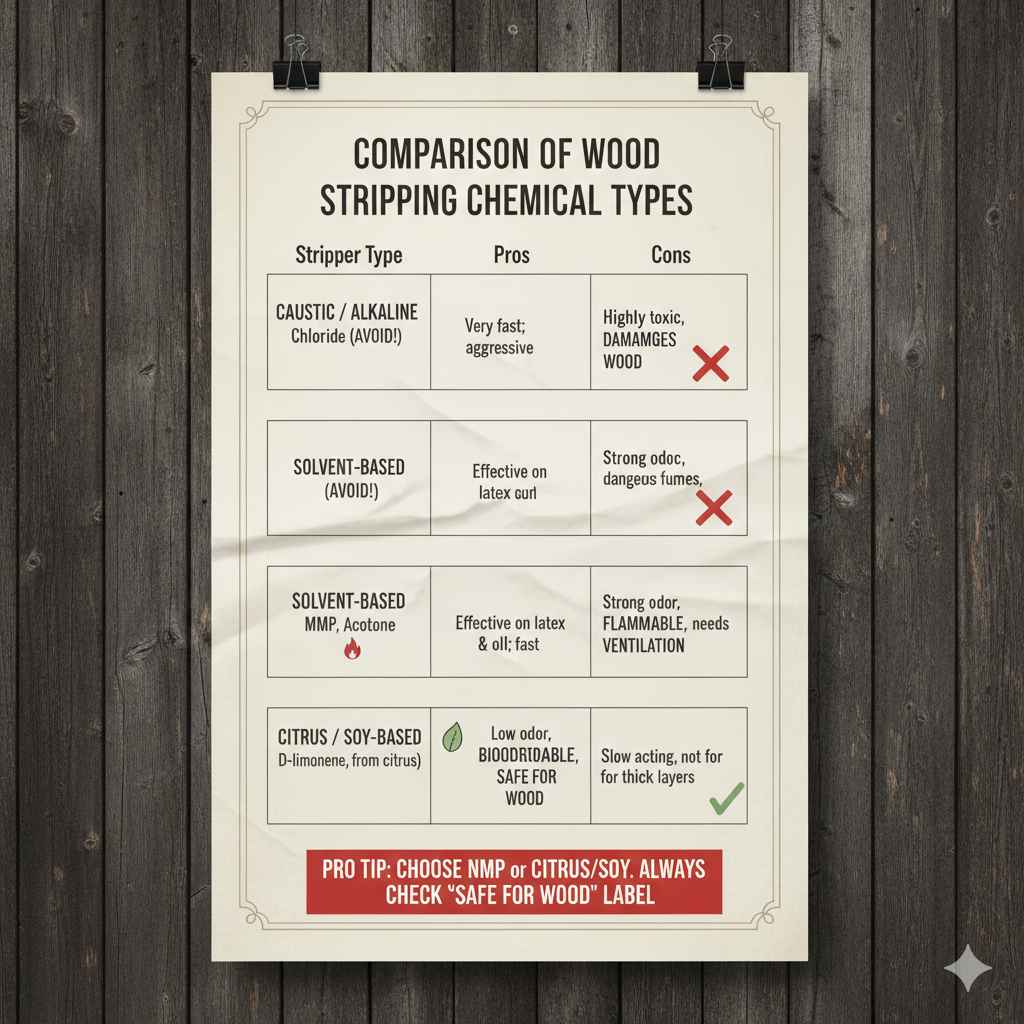
Comparison of Wood Stripping Chemical Types
Choosing the right chemical matters for both effectiveness and wood safety. Here’s a breakdown of common options for beginners:
| Stripper Type | Composition Example | Pros | Cons |
|---|---|---|---|
| Caustic/Alkaline | Methylene Chloride (Avoid if possible) | Very fast; aggressive on old finishes. | Highly toxic, dangerous fumes, requires thorough neutralization, can damage wood if left too long. |
| Solvent-Based | NMP, Acetone | Effective on latex and oil paints; fast acting. | Strong odor, requires excellent ventilation, usually flammable. |
| Citrus/Soy-Based | D-limonene (from citrus peels) | Low odor, biodegradable, very safe for wood. | Slowest acting, best for thin layers, sometimes ineffective on multiple layers of old enamel. |
For most residential trim projects today, a high-quality, slower-acting NMP (N-Methyl-2-pyrrolidone) solvent stripper or a citrus-based stripper is the best balance of safety and performance. Always verify that the product is labeled as “safe for wood” or “non-caustic.”
Frequently Asked Questions (FAQ) About Removing Paint from Trim
Q1: Can I use an electric paint remover tool (sander attachment)?
A: Generally, no, not for detailed trim. Specialized rotary tools can remove paint, but they are notoriously aggressive and will quickly chew into the soft wood grain or round over sharp edges, causing visible damage that is hard to hide later.
Q2: How do I know if the paint on my trim contains lead?
A: If your home was built before 1978, assume it contains lead. You can purchase an EPA-recognized lead test kit from any hardware store. If the test is positive, only use chemical strippers in a highly ventilated area and follow strict cleanup protocols.
Q3: What is the best way to clean paint out of a deep groove on a chair rail or molding?
A: After chemically softening the paint, use a wooden coffee stirrer or a bamboo skewer. Wrap the tip with a small piece of old cloth dipped in your stripper or mineral spirits, and carefully work the residue out of the groove. Avoid using anything metallic.
Q4: Can I use vinegar to strip paint from wood trim?
A: Hot white vinegar can soften very fresh, thin latex paint if left on for hours under plastic wrap. However, it is generally ineffective against older, oil-based, or multiple layers of paint. It’s safer than harsh chemicals but often too weak for historical trim restoration.
Q5: What should I do if I accidentally gouge the wood while scraping?
A: If the gouge is minor, wait until the whole trim piece is stripped and dry. You can use a wood filler or patching compound designed for wood to carefully fill the shallow depression. Once cured, sand the patched area smooth with 220-grit paper before priming and painting.
Q6: Should I strip painted trim or just sand it down?
A: You should almost always use chemical stripping first. Sanding risks removing too much wood material, especially on thinner trims, which ruins the precise profile. Stripping removes the bulk of the paint gently, leaving only minor residue for very light final sanding.
Q7: How long do I need to wait after stripping before repainting?
A: This depends entirely on the stripper you used. If you used a water-based stripper, allow at least 48 hours for the wood to fully dry out. If you used mineral spirits or an oil-based solvent, wipe down thoroughly and wait 24 hours, ensuring there are absolutely no chemical odors remaining. Check the stripper manufacturer’s recoat recommendation.
The Final Polish: Preparing for the New Finish
Once the wood is stripped, scraped, and neutralized, you are almost done! The surface needs a final preparation phase to ensure your new paint job looks professional.
Cleaning and Degreasing
Even after rinsing, trace oils from the stripper (especially mineral spirits or soy-based residue) can interfere with primer adhesion. Wipe down every inch of the exposed wood with a clean rag lightly dampened with denatured alcohol or a specialty degreaser.
Spot Sanding the Final Time
Using a very flexible sanding sponge or a single sheet of 220-grit sandpaper wrapped around your finger, gently pass over the entire surface one last time. You are not trying to smooth the wood; you are just scuffing the surface slightly so that the primer has “tooth” to grip onto. Focus lightly on flat areas and be very gentle on any detailed edges.
Tack Cloth Magic
The single most important step before priming is removing all dust. Use a high-quality tack cloth (they are sticky and designed to grab fine particles) to wipe down the trim thoroughly. Pay attention to the floor directly beneath the trim, as dust often settles there.
Priming is Non-Negotiable
Never skip priming! Even if you used a paint stripper that claims to be primer/sealer/paint in one, applying a dedicated, high-quality primer is essential after heavy stripping. The stripped wood will absorb your new paint unevenly (flashing) unless sealed first. Use an oil-based or shellac-based primer to ensure you seal in any remaining tannins or residue from the old paint and create a perfect, uniform surface for your topcoat.
You’ve successfully navigated the tricky process of removing old, ugly paint while protecting the beautiful wood underneath. Remember, patience with the chemical softening process is what saves the wood from damage. You’ve put in the hard work of restoration, and now you can move on to the fun part: applying that gorgeous new finish with total confidence in the quality of your base prep! Happy stripping, and enjoy those perfectly revealed wood lines!