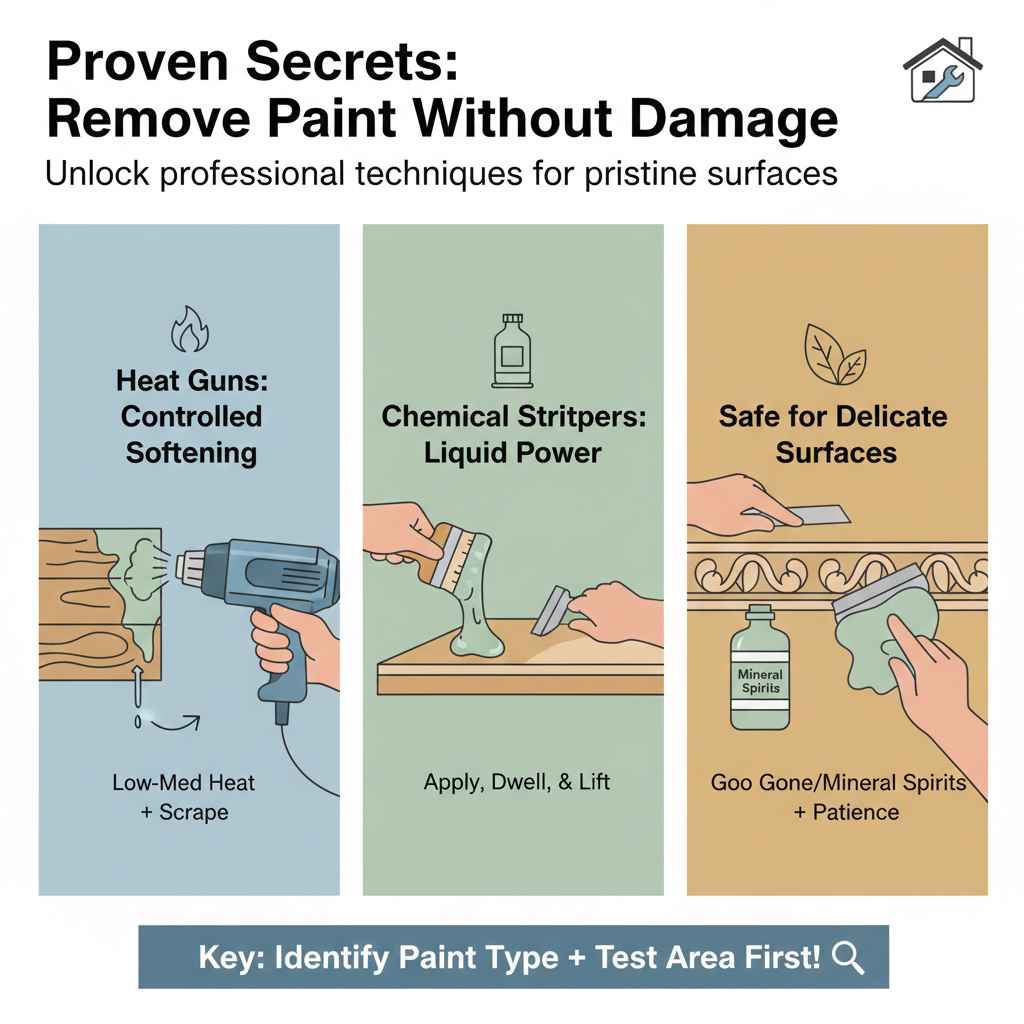
Proven Secrets: Remove Paint Without Damage
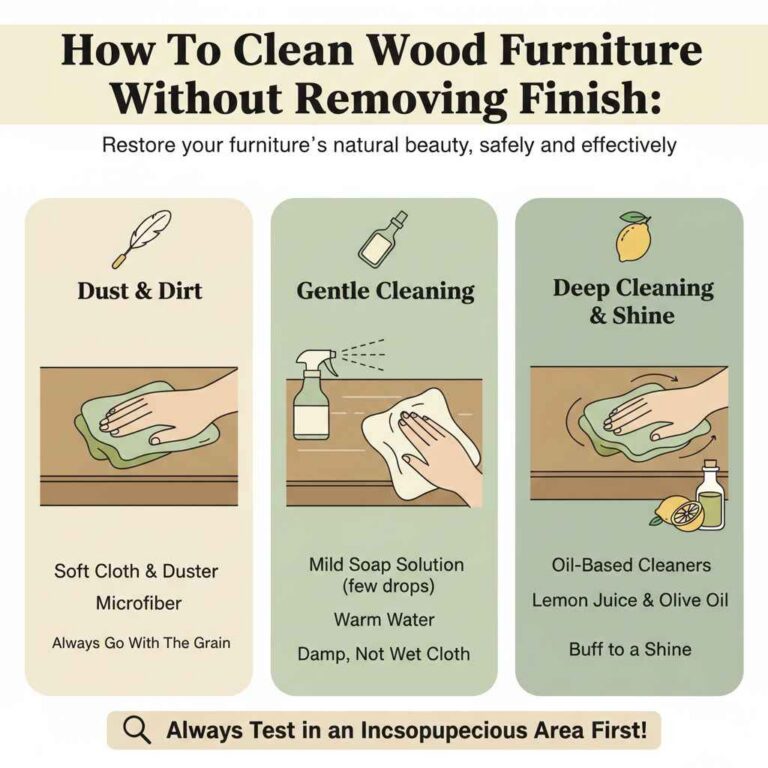
Removing paint without damaging the original surface—like wood or delicate trim—requires patience and the right gentle technique. The secret is matching the paint type you are removing to the least aggressive removal method first, often involving steaming, gentle scraping, or natural solvents, always testing a small spot beforehand.
Hello there! I’m Md Meraj, and I know how frustrating it is to look at a beautiful piece of old wood or metal that’s been ruined by a bad paint job. Maybe you want to reveal that gorgeous oak grain or just fix a few chips. The biggest fear? Taking off the old paint and accidentally gouging the material underneath! Don’t worry. You absolutely can remove that unwanted top layer without causing any lasting harm. We are going to walk through proven, easy methods that feel safe for even the most nervous DIYer. We’ll start mild and only get stronger if we have to. Let’s get started uncovering that hidden beauty!
Why Removing Paint Without Damage Is a DIY Challenge
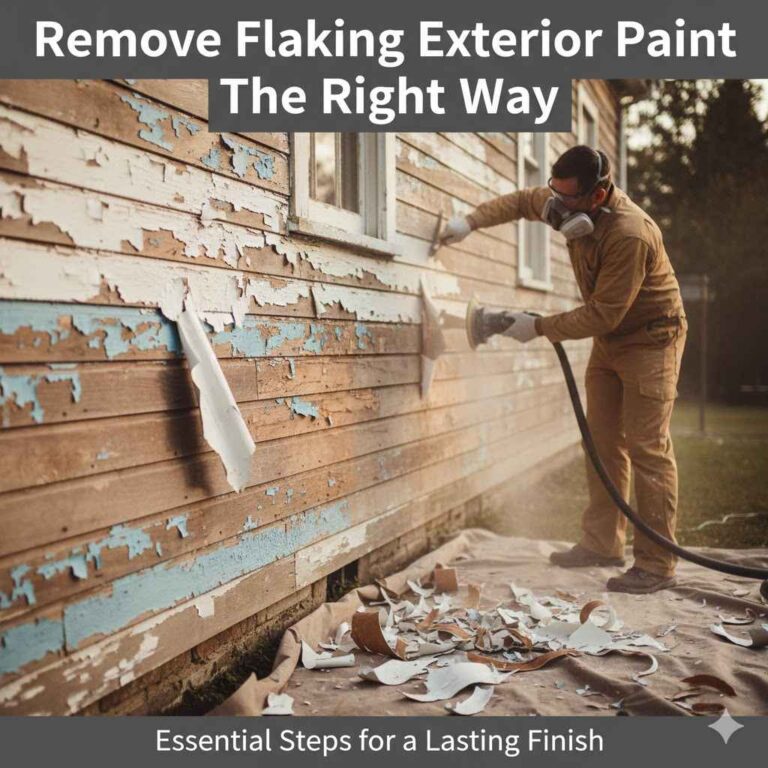
Painting over something old is easy, but taking it off correctly is tough. Why? Because different paints bond differently, and surfaces like soft wood or old plaster are fragile. If you use the wrong tool or too much heat, you risk creating deep scratches, burning the wood, or lifting veneers. For us DIY folks, precision beats brute force every time. We need methods that dissolve the top layer without eating into the good material underneath. Safety, especially concerning lead paint, must always be our first priority.
Step 1: Identifying Your Surface and Paint Type (The Crucial First Move)
Before you even grab a scraper, you need to know what you are dealing with. This determines everything else!
A. Know Your Surface Material
The base material dictates how aggressive you can be.
Wood (Softwoods like Pine): Scratches easily. Heat must be low, and scraping requires a very light touch.
Wood (Hardwoods like Oak/Maple): More durable, but still susceptible to deep scraping marks.
Metal: Generally forgiving, but high heat can warp thin metal.
Masonry/Brick: Very porous and durable, often handling stronger chemicals or higher heat better than wood.
B. Identifying the Paint Type
Is it latex (water-based) or oil-based? This is key because water-based paints usually come off easier with mild methods.
The Scratch Test: Gently scratch a small, hidden area with a fingernail or a soft plastic tool. If it chips easily, it might be older, brittle paint.
The Water Test: Dab a small amount of water on an inconspicuous spot. If the paint softens or beads up, it might be latex. If nothing happens, it’s likely oil-based, which requires stronger treatment.
Safety Note: Test for Lead Paint! If your home was built before 1978, there is a chance the old paint contains lead. Never sand or aggressively scrape unknown older paint without testing first. You can buy inexpensive lead test kits or contact your local health department for information, as disturbing lead paint dust is dangerous. The EPA provides guidelines on safe lead paint removal if needed.
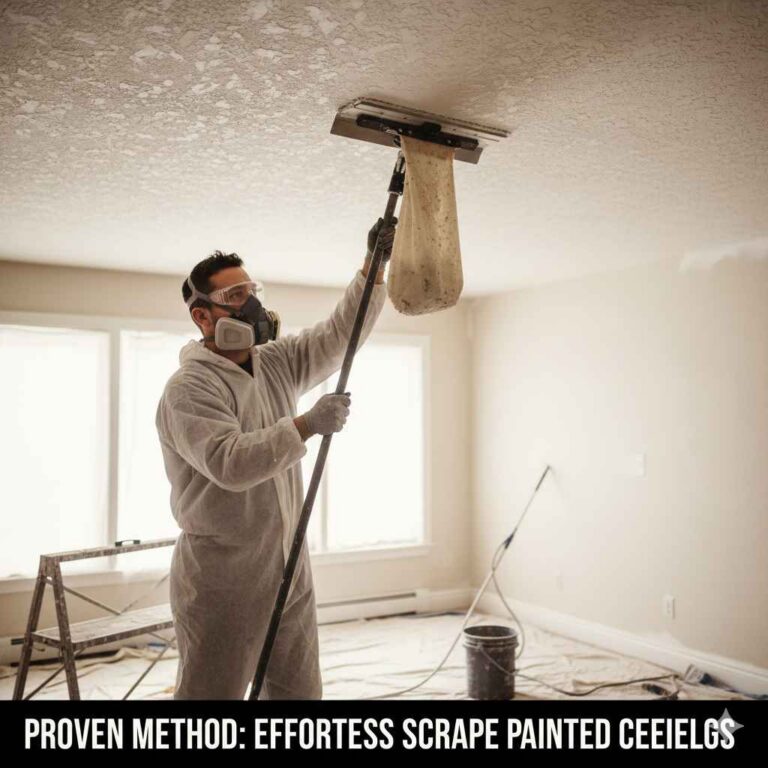
Step 2: The Gentlest Approach – Heat and Steam (The Best for Wood Trim)
For painted wood, especially detailed moldings or window frames, gentle heat is often the secret weapon to lift the paint without touching the wood surface with sharp objects. This works best on older, brittle oil-based paints.
Tools Needed for Gentle Heat Removal:
- Heat Gun (or a quality hair dryer for very small areas)
- Paint Scraper (a wide, flexible putty knife, not a razor edge)
- Thick, heat-resistant gloves
- A damp cloth
The Heat and Steam Process:
- Set the Temperature Low: If using a heat gun, start on the lowest setting (around 500°F). High heat will scorch the wood underneath instantly.
- Apply Heat Indirectly: Hold the heat gun 3 to 4 inches away from the paint surface. Move it constantly back and forth across a small area (about 4 inches wide). You are trying to heat the paint until it bubbles slightly or softens, not scorch it.
- Watch for the Wrinkle: As the paint softens, you will see it wrinkle up. This is your cue!
- Gentle Scrape: Immediately switch to your flexible putty knife. Hold the scraper almost flat against the wood (a very shallow angle). Push gently under the wrinkled edge. The paint should lift off in strips easily.
- The Steam Boost (Optional): For stubborn spots, lightly dampen an old rag, wring it out well, and place it over the area for 30 seconds, then quickly hit it with the heat gun. The quick burst of steam helps break the bond.
- Cool Down and Clean: Always let the surface cool before touching it. Wipe away any soft residue with a damp cloth.
Step 3: The Chemical Solution – Paint Strippers (For Tough Jobs)
When heat fails, or if the surface is too irregular for a heat gun (like deeply carved furniture), a chemical stripper is necessary. The trick here is choosing the right stripper that won’t harm your underlying material.
Choosing Your Stripper Wisely
We want to avoid methylene chloride-based strippers if possible, as they are harsh and require extensive ventilation. Look for newer, safer options.
| Stripper Type | Best For | Pros | Cons |
|---|---|---|---|
| Citrus/Soy-Based (Safer) | Latex paint, light oil paint on wood, interior use. | Low odor, non-corrosive, easy cleanup. | Slower acting, may require multiple coats. |
| Solvent-Based (Stronger) | Multiple layers of oil paint, very old finishes, metal. | Works quickly and aggressively. | Strong fumes, requires excellent ventilation, needs careful neutralization. |
| Caustic (Lye/Caustic Soda) | Thick masonry, concrete, or stubborn industrial coatings. | Extremely powerful. | Highly damaging to wood and soft metals; requires extreme safety gear. |
Essential Safety Protocol for Chemical Stripping
Safety gear is non-negotiable when using chemical removers. You must protect your eyes, skin, and lungs. Visit the Occupational Safety and Health Administration (OSHA) website for detailed information on chemical handling if you plan frequent use.
- Wear chemical-resistant gloves (nitrile or butyl rubber).
- Use tight-fitting safety goggles (not just glasses).
- Ensure maximum ventilation—work outside or open every window.
- Wear long sleeves and old clothes.
Applying Chemical Strippers:
- Prep the Area: Lay down thick plastic sheeting or drop cloths below your project.
- Apply Thickly: Use a cheap natural bristle brush (synthetic bristles can melt) to apply a very generous, thick coat of the stripper—like frosting a cake. Do not spread it thin.
- Wait (Patience is Key): Check the product instructions, but generally, you must let the stripper sit for 15 minutes to several hours. You should see the paint start to bubble, wrinkle, or soften visibly.
- Scrape Carefully: Use a plastic scraper or a dull, putty knife. If you are working on wood, angle the scraper very low to slide under the softened paint, minimizing contact with the wood itself.
- Clean Up Residue: This is vital! Residue left behind can prevent new paint from sticking. For latex/water-based paints, you might follow up with warm, soapy water. For oil-based paints, you often need a mineral spirit wash or the stripper’s recommended neutralizer, according to the manufacturer’s guide.
Step 4: Scraping Techniques for Scratch-Free Results
Even with heat or chemicals, you still need a scraping tool. The tool itself can cause damage if misused.
Choosing the Right Scraper:
Forget those tiny, sharp razor scrapers for delicate surfaces. We need surface-hugging tools.
- Flexible Putty Knife: Excellent for spreading out pressure. Look for one with a rounded corner.
- Plastic Scrapers: Perfect for the very final lift or for extremely soft woods. They won’t scratch but won’t remove heavy layers.
- Detail Scrapers: Small tools with angled blades designed for corners and crevices, but use these with great care.
Scraping Do’s and Don’ts:
- DO:
- Keep the scraper at a very low angle (almost flat) against the surface.
- DON’T:
- Dig the corner of the scraper into the material.
- DO:
- Work in short, smooth strokes, following the grain of the wood.
- DON’T:
- Use power tools like orbital sanders until all paint is chemically removed (sanding dry paint creates dangerous dust).
Step 5: When All Else Fails – Gentle Sanding (The Last Resort)
Sanding is often the easiest method people jump to, but it is the most damaging if done incorrectly, as it removes surface material indiscriminately. We only use sanding to remove the residue left by chemical stripping or to smooth minor imperfections after heat removal.
The Golden Rule of Gentle Sanding:
Use the highest grit sandpaper possible and apply the least amount of pressure necessary.
The Process:
- Wait for Complete Neutralization: Ensure all chemical residue is gone, as residue gums up sandpaper instantly.
- Start High Grit: Begin with 150-grit sandpaper, used either by hand or on a sanding block. Never start below 120-grit on exposed wood if your goal is preservation.
- Wrap the Paper: For detailed areas, wrap sandpaper around a dowel rod or even a cork. This allows you to sand the curves without creating flat spots.
- Feathering Technique: If you removed paint unevenly, you must “feather” the edges. This means sanding the newly exposed area much more gently than the area still holding residue, slowly blending the height difference.
- Progressive Grits: Once the paint is off, move up through grits (180, 220, 320) to smooth the wood fiber raised by the stripping process.
Special Considerations for Specific Surfaces
Different materials demand slight shifts in our approach to prevent damage.
Removing Paint from Glass or Metal Trim
Metal is tough, but glass is fragile.
Glass: A sharp, single-edge razor blade held almost perpendicular to the glass works wonders for dried paint spatters, but only if the glass is wet (use Windex or soapy water). Keep the blade angle very low to avoid scratching the glass surface.
Metal: Metal handles heat well. For thicker coatings on metal railings or car parts, high heat is often effective, followed by a stiff wire brush (not steel wool, which can leave behind particles that rust).
Removing Paint from Brick and Masonry
Brick is porous, meaning paint sinks deep into the surface. You often need chemical action here, but you must choose a stripper safe for mortar.
Muriatic Acid Warning: Never use muriatic acid (a strong chemical cleaner often used on concrete) on old, soft brick or mortar without professional consultation. It can dissolve the surface entirely.
Best Practice for Brick: Use a thick poultice of a specialized masonry paint stripper or a thick paste of a citrus stripper, allowed to sit under plastic for 24 hours. Pressure washing afterward (at low PSI) can help flush the loosened paint out of the pores.
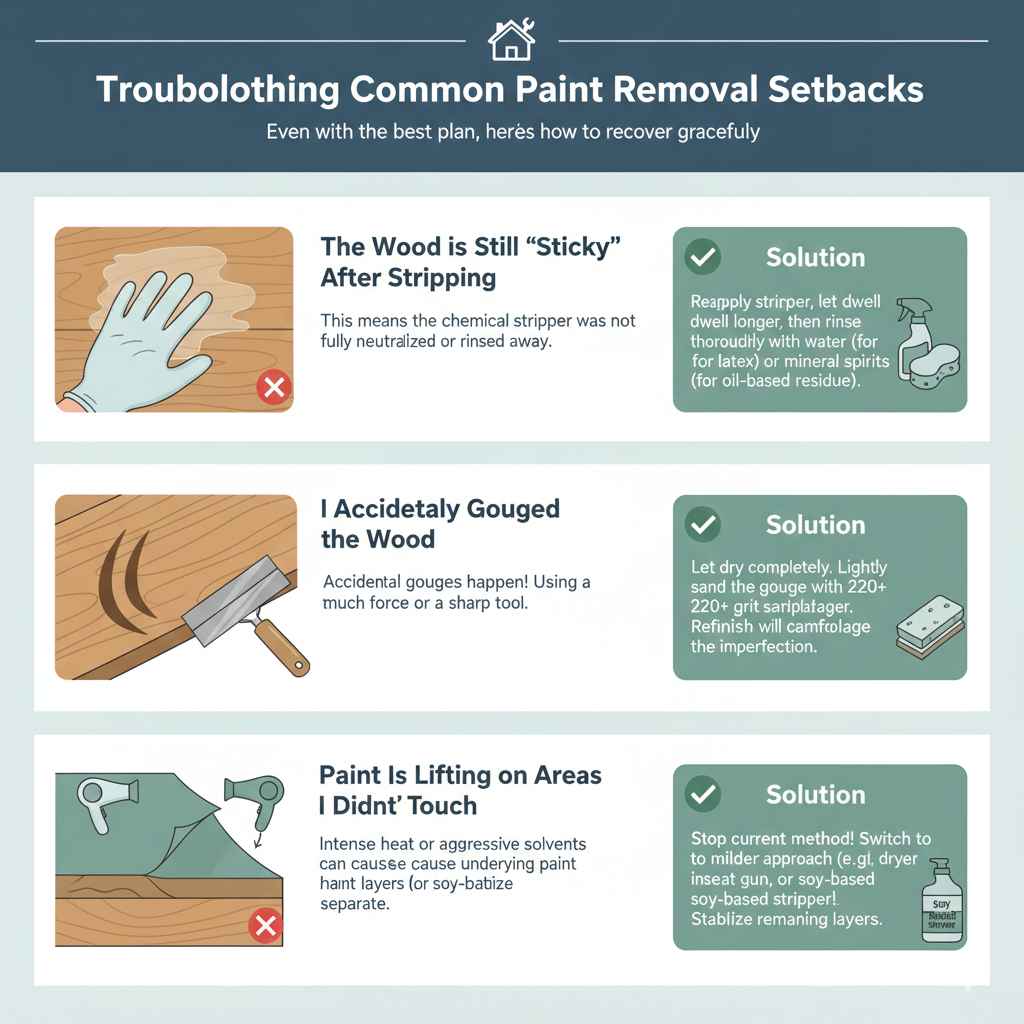
Troubleshooting Common DIY Setbacks
Even with the best plan, things can go slightly awry. Here is how to recover gracefully.
Problem 1: The Wood is Still “Sticky” After Stripping
This usually means the chemical stripper was not fully neutralized or rinsed away, or the paint was extremely old and the chemical couldn’t fully break the bond.
- Solution: Reapply the stripper to just the sticky areas, let it dwell longer, and ensure you rinse thoroughly with the appropriate solvent (water for water-based residue, mineral spirits for oil-based residue).
Problem 2: I Accidentally Gouged the Wood
It happens to everyone! Don’t panic. A small scrape is better than a large removed section.
- Solution: If the gouge is minor, let the stripped wood dry completely. Lightly sand the gouge using a very high grit (220 or higher) to smooth the edge. When you go to repaint or refinish, the stain or clear coat will often camouflage minor imperfections better than bare, raw wood does.
Problem 3: Paint Is Lifting on Areas I Didn’t Touch
This often occurs when using intense heat or highly aggressive solvents, causing the paint layer below the one you are removing to separate from the wood.
- Solution: Stop the current method immediately. Switch to a significantly milder approach (e.g., move from a heat gun to a hair dryer, or switch from a strong solvent to a soy-based stripper). You must stabilize the remaining layers before proceeding.
Frequently Asked Questions for Beginner DIYers
Q1: Can I use a heat gun safely on veneer furniture?
A: Be extremely cautious. Veneer is very thin wood glued onto a core material. High heat can quickly cause the veneer to bubble, warp, or delaminate (peel away from the core). Use the lowest possible heat setting and keep the gun moving constantly.
Q2: How long does it take to remove paint using a natural stripper?
A: Natural or citrus strippers are much slower. They often require 4 to 24 hours of dwelling time. You must check the specific product instructions, but patience is essential; rushing them prevents them from working effectively.
Q3: Is it better to sand or use chemicals first?
A: If you have many layers or stubborn oil-based paint, always try heat or chemicals first to remove the bulk of the paint. Sanding dry paint creates fine, toxic dust and is very inefficient for thick coats.
Q4: What is the safest way to clean a scraper after using chemical stripper?
A: After scraping, wipe the tool down immediately with the solvent recommended for the stripper you used (usually mineral spirits or paint thinner for oil-based strippers). If you let the stripper dry on the tool, it becomes very hard to remove.
Q5: What if I only want to remove a little bit of the top layer to distress it?
A: If you are aiming for a “distressed” look, use fine-grit sandpaper (220 grit) attached to a sanding block, or use very fine steel wool (#0000 grade). Lightly rub the areas you want to look worn. This gives you maximum control.
Q6: How do I prevent dust when sanding off final residue?
A: If you are sanding residue after using a solvent stripper, lightly dampen a rag with water and wipe the surface frequently. This traps the fine dust particles before they become airborne. If sanding dry wood dust, consider using a sander with a built-in dust collection bag or connecting it to a shop vac.
Conclusion: Confident Finishing Awaits
Seeing that beautiful, untouched wood or clean metal emerge from under layers of old paint is incredibly rewarding. You now have the proven secrets—start gentle with heat, graduate carefully to the right chemical stripper, and always use the right scraping technique for your surface. Remember that every successful DIY project starts with preparation and patience, not aggressive action. Test in a hidden spot, wear your safety gear, and take your time. With these methods in your toolkit, you can confidently tackle those paint removal jobs, knowing you are preserving the beauty of your materials for years to come. Go ahead and uncover that hidden treasure—you’ve got this!