Stain vs Varnish What Is The Main Difference
Many people get confused when they want to finish wood. They often wonder about the difference between wood stain and varnish. It can seem a bit tricky at first.
This guide makes it super easy. We will walk you through it step by step so you know exactly what to use. Get ready to learn the main difference between Stain vs Varnish: What’s the Main Difference?
Understanding Wood Finishes
Wood finishes are coatings applied to wood surfaces. They serve many purposes, like protecting the wood and making it look better. Finishes can change the color, add shine, or offer a matte look.
They also guard against spills, scratches, and wear and tear. Choosing the right finish is key to a beautiful and long-lasting wood project.
What Is Wood Stain
Wood Stain is used to add color to wood. It does not add a protective layer on its own. Instead, it soaks into the wood grains, changing their hue.
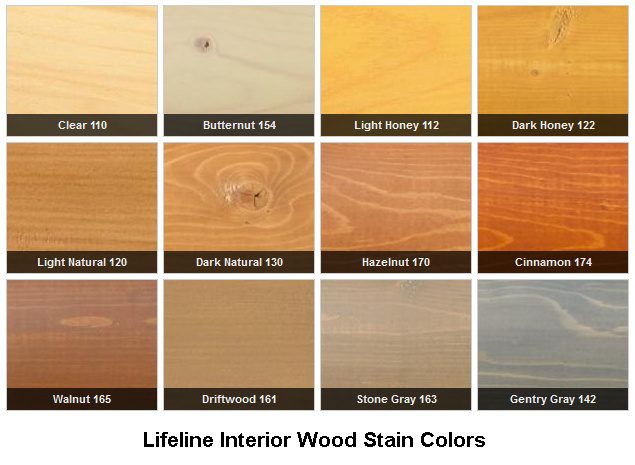
Stains come in many colors, from light natural tones to deep, rich shades. They can make softwood look like hardwood. Stains also highlight the natural beauty of the wood’s grain pattern.
Stains work by coloring the wood fibers. They do not form a surface film like paint or varnish. This means the wood still feels like wood after staining.
It allows the natural texture to show through. Many stains contain pigments or dyes that penetrate the wood. This gives the wood its new color.
Different types of stains exist, like oil-based, water-based, and gel stains. Oil-based stains tend to penetrate deeper. Water-based stains dry faster and are easier to clean up.
Gel stains are thicker and offer more control, making them good for vertical surfaces. Each type has its own drying times and application methods. It is important to pick the right one for your project.
Why Use Stain
- To Change Wood Color: Stain is the primary way to alter the natural color of wood. You can go from a light pine to a dark walnut look. This lets you match existing furniture or achieve a specific design.
- To Highlight Grain Patterns: The way stain soaks into the wood brings out the natural lines and patterns. This adds depth and visual interest to the wood. Different woods have different grain patterns.
- To Make Softwood Look Like Hardwood: If you are using a less expensive softwood, stain can make it look like a much pricier hardwood. This is a great way to save money without sacrificing appearance.
- To Prepare for Top Coats: While stain itself doesn’t offer much protection, it prepares the wood for a protective top coat like varnish. The color is locked in before the protective layer is added.
What Is Varnish
Varnish is a clear protective coating for wood. It forms a hard, durable film on the surface. This film shields the wood from moisture, stains, and damage.
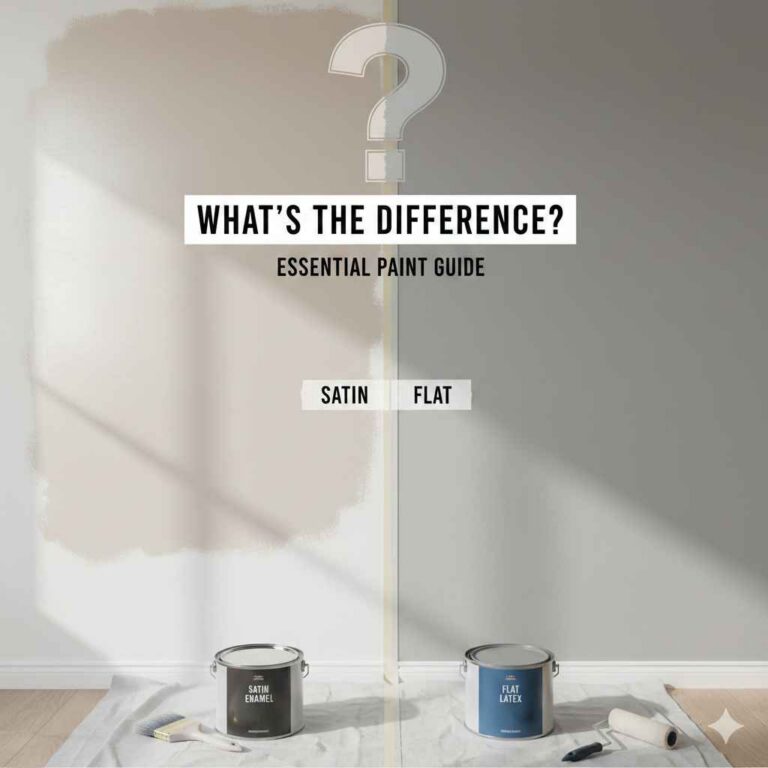
Varnish can be glossy, semi-gloss, or matte. It makes wood surfaces tough and easy to clean.
Varnish is made of oil, resin, and a solvent. When the solvent evaporates, the oil and resin cure, creating a solid, protective layer. This layer sits on top of the wood, not soaking in like stain.
It provides a physical barrier against wear and tear.
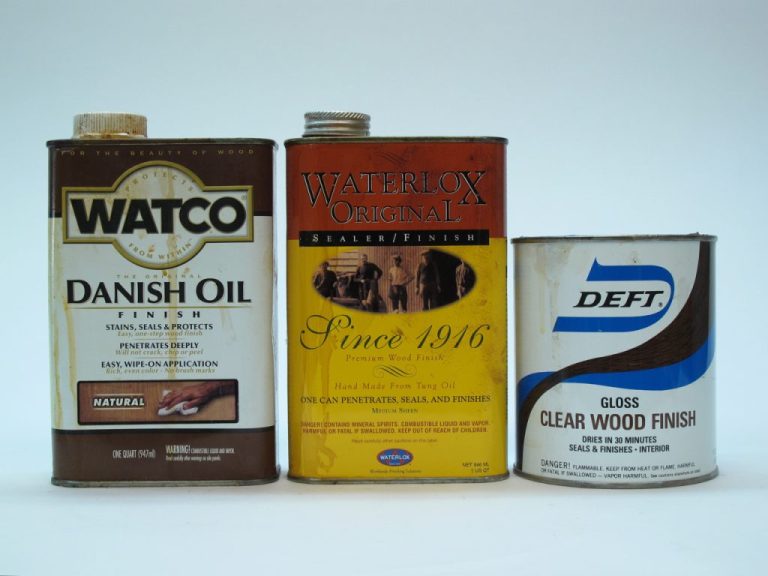
There are several types of varnish. Oil-based varnishes are very durable and offer good protection. They tend to yellow over time, which can be desirable for some looks.
Water-based varnishes dry clear and do not yellow. They are less durable than oil-based ones but are easier to work with and clean.
Polyurethane is a popular type of varnish. It is known for its toughness. It can be used on floors, furniture, and other high-traffic areas.
Other types include spar varnish, which is more flexible and used for outdoor projects. Each type offers different levels of protection and finishes.
Why Use Varnish
- To Protect the Wood: Varnish is the main protector. It shields the wood from water, heat, scratches, and everyday use. This keeps the wood looking good for a long time.
- To Add Durability: It creates a hard shell. This shell stands up to impacts and friction, which is vital for items like tabletops or wooden floors.
- To Enhance Appearance: Varnish can add a beautiful sheen. It can make the wood look richer and deeper. You can choose a shiny gloss or a subtle matte finish.
- To Seal in Stain: After you stain your wood, varnish is applied on top. It locks the color of the stain in place. This prevents the stain from fading or rubbing off.
Stain vs Varnish What Is The Main Difference Explained
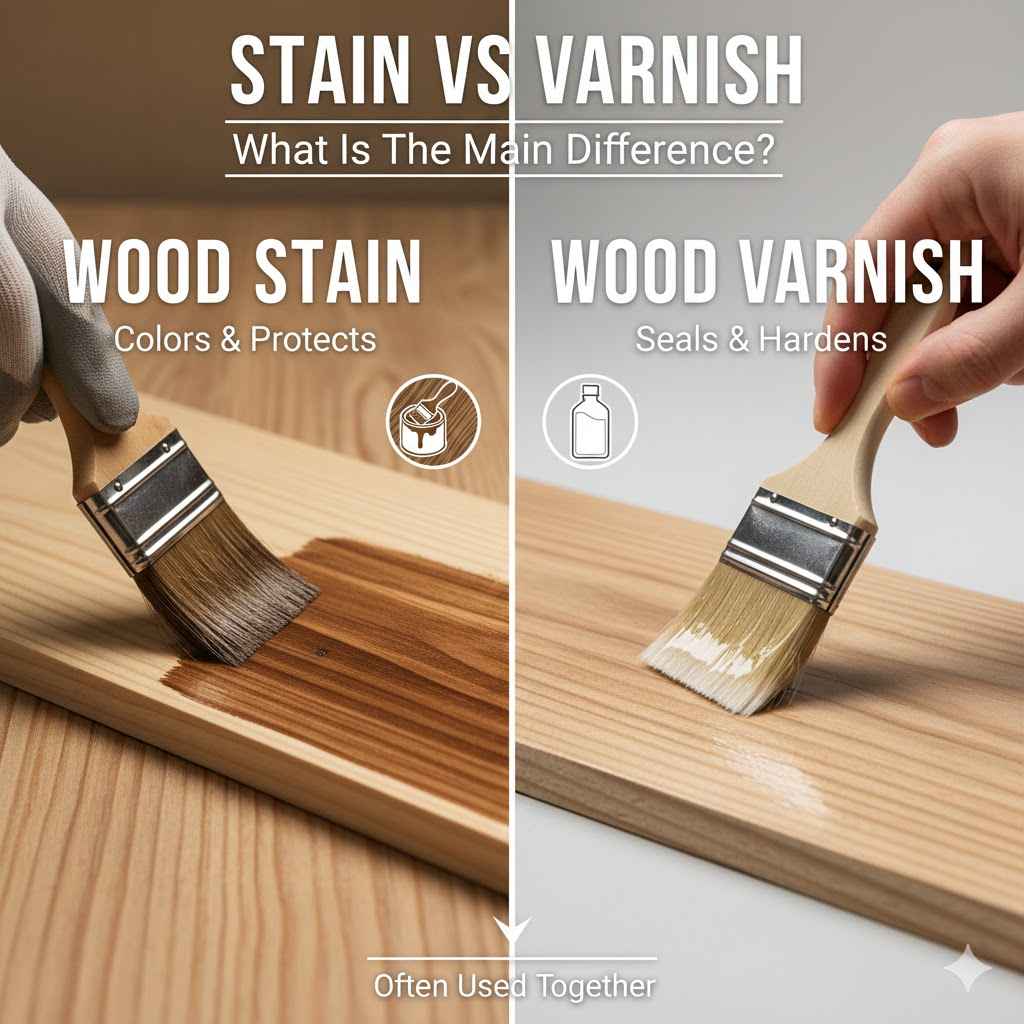
The core difference between stain and varnish is their purpose. Stain adds color to wood. Varnish protects the wood’s surface.
Think of it like this: stain is like makeup for your wood, giving it a new look. Varnish is like a shield or a clear coat of armor, keeping that look safe.
Stain goes into the wood. It colors the fibers from within. This means you can still feel the texture of the wood.
Varnish sits on top of the wood. It forms a visible, physical layer. This layer provides the protection.
You can often see a slight sheen from the varnish itself.
Many projects use both stain and varnish. First, you apply the stain to get the desired color. Then, once the stain is dry, you apply varnish.
The varnish seals the stain and adds durability. This combination gives you both a beautiful color and lasting protection.
Key Differences Table
| Feature | Wood Stain | Varnish |
|---|---|---|
| Primary Function | Adds color | Protects surface |
| How it Works | Penetrates wood fibers | Forms a surface film |
| Appearance | Changes wood hue, highlights grain | Adds sheen, depth, or matte finish |
| Protection Level | Very little to none | High durability and resistance |
| Texture Feel | Still feels like natural wood | Can feel smoother or slightly plastic-like |
| Application Order | Usually applied first | Usually applied after stain or on bare wood |
When To Use Stain Or Varnish
Deciding when to use stain or varnish depends on what you want to achieve for your wood. If your main goal is to change the wood’s color or enhance its natural grain, stain is your go-to product. If you need to protect the wood from damage and wear, varnish is essential.
For many woodworking projects, you will use both. You might want to give an old table a new, richer color. You would start by applying a wood stain.
After the stain dries, you would then apply several coats of varnish. This would protect the new color and make the table surface smooth and easy to clean.
Sometimes, wood might not need a color change. For instance, if you have beautiful, naturally colored wood that you want to preserve, you might skip the stain. In this case, you would apply varnish directly to the bare wood to protect it.
Using Stain Only
There are times when you might use stain by itself. This is less common because stain does not offer much protection. However, it can be done for decorative items that will not be handled much or exposed to moisture.
For example, a wooden picture frame that hangs on a wall might only need a coat of stain for color. It will not get wet or scratched often.
Another scenario is when you want the wood to look aged or rustic. A stain can give wood an antique look. If the piece is for display only, like a decorative carving, protection might not be a top concern.
The focus is purely on the aesthetic appeal the stain provides.
Using Varnish Only
Varnish is often used on its own when the wood already has a color you like. Perhaps you have a piece of furniture made from a beautiful hardwood like cherry or walnut. The natural color and grain are so appealing that you do not want to alter them.
In such cases, applying clear varnish directly to the wood is the best option.
This approach preserves the wood’s natural beauty. The varnish then provides all the necessary protection against damage. It adds a protective sheen that can make the wood’s natural colors pop.
This is common for high-quality furniture or decorative wood items where the wood’s inherent qualities are the main attraction.
Using Both Stain and Varnish
The most common and recommended approach for most wood projects is to use both stain and varnish. This method gives you the best of both worlds: color and protection.
Scenario 1: Refinishing a Wooden Deck
- Clean the deck thoroughly to remove old finishes and dirt.
- Apply a wood stain in your chosen color. This adds color and can offer some UV protection depending on the stain formulation.
- Once the stain is completely dry, apply multiple coats of a marine-grade spar varnish. This varnish is flexible and weather-resistant, providing excellent protection against sun, rain, and foot traffic.
In this case, the stain changes the deck’s appearance, and the spar varnish keeps it looking good despite harsh weather and use. The combined effect ensures the deck is both attractive and durable.
Scenario 2: Building a Custom Bookshelf
- Sand the wood smooth.
- Apply a wood stain to achieve the desired color, perhaps a rich oak or a dark walnut.
- After the stain dries, apply several coats of a clear polyurethane varnish. Polyurethane is very hard and resistant to scratches and spills, perfect for furniture that will be used often.
This process gives you a bookshelf that looks exactly how you envisioned it, with a durable finish that will protect it from books and everyday handling.
Statistic Highlight
A survey of DIY enthusiasts revealed that 78% of respondents use a combination of stain and a protective top coat for their furniture projects. Only 15% reported using stain alone, and 7% used a clear protective finish without stain. This shows the widespread preference for both color and protection.
Types Of Stain
Wood stains are mainly categorized by their solvent base, which affects how they are applied and how they look. Understanding these types helps you pick the right one for your project.
Oil-Based Stains
Oil-based stains use mineral spirits or other oils as their solvent. They are known for their ability to penetrate deep into the wood, resulting in rich, deep colors. These stains often have a longer working time, allowing more flexibility in application and blending.
The deep penetration makes them excellent for highlighting wood grain. They can also help to make softer woods look more like hardwoods. However, oil-based stains take longer to dry, often requiring 24 hours or more between coats.
Cleanup requires mineral spirits or similar solvents.
Pros
- Deep Penetration: Colors the wood deeply for a rich, long-lasting hue.
- Long Working Time: Allows for easier application and blending, reducing lap marks.
- Highlights Grain: Effectively brings out the natural beauty of wood grain.
Cons
- Longer Drying Time: Requires patience between coats, extending project time.
- Strong Odor: Fumes can be strong and require good ventilation.
- Difficult Cleanup: Requires special solvents for cleaning brushes and spills.
Water-Based Stains
Water-based stains use water as their solvent. They dry much faster than oil-based stains, often within a few hours. This makes them ideal for projects where time is a factor.
They are also easier to clean up, requiring only soap and water. Water-based stains tend to raise the wood grain slightly, which may require extra sanding. They may not penetrate as deeply as oil-based stains, so the color might be less intense.
However, they are low in VOCs (volatile organic compounds) and have less odor.
Pros
- Fast Drying Time: Allows for quicker project completion.
- Easy Cleanup: Simple to clean brushes and tools with soap and water.
- Low Odor and VOCs: Better for indoor use and easier on the environment.
Cons
- Faster Drying Time: Can lead to lap marks if not applied quickly and evenly.
- May Raise Grain: Often requires sanding after staining to smooth the surface.
- Less Penetration: Color might not be as deep or rich as oil-based stains.
Gel Stains
Gel stains are thicker than liquid stains. They have a gel-like consistency. This makes them easier to control, especially on vertical surfaces.
They are good for creating a more opaque color, almost like a thin layer of paint, but they still allow some wood grain to show through.
Gel stains are excellent for application over existing finishes or for giving dark woods a lighter color without extensive stripping. They are less likely to drip or run, which makes them beginner-friendly. They are available in both oil and water-based formulas.
Pros
- Excellent Control: Minimal dripping and running, making application easier.
- Good for Vertical Surfaces: Stays put on things like cabinet doors.
- Can Cover Existing Finishes: Useful for updating old furniture without complete stripping.
Cons
- Less Natural Look: May obscure some of the finer wood grain details.
- Can be Harder to Even Out: Needs careful application to avoid blotches.
Dye Stains
Dye stains are different from pigment stains. Instead of suspending particles, dyes dissolve in the liquid. This allows them to penetrate wood very deeply, creating vibrant and transparent colors.
They highlight the wood grain beautifully without obscuring it.
Dye stains are often used when a very intense or specific color is desired. They are particularly effective on woods that tend to blotch with pigment stains, like pine or maple. However, dyes can fade over time if exposed to direct sunlight.
They also offer no inherent protection.
Pros
- Vibrant Colors: Can achieve intense and unique color effects.
- Deep Penetration: Colors the wood thoroughly for a translucent look.
- Less Blotching on Some Woods: Good for porous woods like pine.
Cons
- Fading Potential: Can be sensitive to UV light.
- No Protection: Offers no physical barrier.
- Difficult to Repair: Patching can be challenging.
Types Of Varnish
Varnishes offer a range of protection and finishes. They are selected based on the item being finished and its intended use. The main types differ in their composition and performance.
Oil-Based Varnish
Oil-based varnishes, typically made with alkyd resins, are known for their toughness and durability. They form a hard, protective film that resists moisture, heat, and abrasion. These varnishes are often preferred for high-traffic surfaces like floors, tabletops, and exterior doors.
They tend to yellow slightly over time, which can give wood a warm, amber tone. This is sometimes a desired effect, especially when trying to achieve an antique look. Oil-based varnishes have a strong odor and require mineral spirits for cleanup.
They also have a longer drying time compared to water-based options.
Pros
- Exceptional Durability: Very hard and resistant to scratches and impacts.
- Good Water and Heat Resistance: Protects well against spills and hot items.
- Warm Amber Tone: Adds depth and a classic look to wood.
Cons
- Yellowing Over Time: Can alter lighter wood colors.
- Strong Odor and VOCs: Requires good ventilation.
- Longer Drying Time: Takes several hours to a day between coats.
- Solvent Cleanup: Needs mineral spirits or paint thinner.
Water-Based Varnish (Polyurethane)
Water-based varnishes, often called water-based polyurethanes, offer a clear, non-yellowing finish. They dry quickly and are easy to clean up with soap and water. While not as hard as oil-based varnishes, they still provide good protection for most indoor applications.
They are a popular choice for furniture, cabinets, and trim work. Their low odor and low VOC content make them a safer option for indoor projects, especially in homes with children or pets. They are available in gloss, semi-gloss, and satin sheens.
Pros
- Clear Finish: Does not yellow, preserving the natural wood color.
- Fast Drying: Allows for multiple coats in a single day.
- Easy Cleanup: Soap and water are all that is needed.
- Low Odor and VOCs: Safer for indoor use.
Cons
- Less Durable Than Oil-Based: May scratch more easily on very high-wear surfaces.
- Can Raise Grain Slightly: May require light sanding between coats.
Spar Varnish
Spar varnish is designed for exterior use. It contains more oil and a flexible resin, making it more resistant to expansion and contraction caused by temperature and humidity changes. This flexibility helps prevent cracking and peeling.
It offers good protection against UV rays, rain, and moisture. It is ideal for boats, outdoor furniture, doors, and window frames. Spar varnish typically has a glossier finish and can also yellow slightly over time.
It may require more frequent reapplication than interior varnishes.
Pros
- Excellent Weather Resistance: Protects against sun, rain, and temperature changes.
- Flexibility: Resists cracking and peeling due to wood movement.
- UV Protection: Helps prevent wood from graying or fading due to sun exposure.
Cons
- Shorter Lifespan Than Interior Varnishes: May need reapplication more often.
- Can Yellow Over Time: May alter the original color of the wood.
- Often Glossy Finish: May not be suitable if a matte look is desired.
Lacquer
While not strictly a varnish, lacquer is another clear finish often considered alongside them. Lacquer dries very quickly through evaporation of solvents. It forms a hard, durable film.
It is often sprayed on because of its rapid drying time.
Lacquer can be sensitive to heat and moisture, making it less suitable for kitchen countertops or dining tables compared to polyurethane or oil-based varnish. However, it is very popular for furniture and musical instruments due to its smooth, hard finish and ability to be buffed to a high gloss.
Pros
- Extremely Fast Drying: Allows for quick application and assembly.
- Hard, Smooth Finish: Can be buffed to a very high gloss.
- Good For Spray Application: Ideal for achieving a flawless finish.
Cons
- Susceptible to Heat and Moisture: Can be damaged by hot items or prolonged water exposure.
- Strong Solvents Required: Needs specific thinners and can have strong fumes.
- Less Impact Resistant Than Polyurethane: Can chip or crack under impact.
Application Tips For Stain And Varnish
Applying wood finishes correctly is crucial for a professional-looking result. Here are some essential tips for both stain and varnish.
Preparing The Wood Surface
This is the most important step for any finish. The wood must be clean, dry, and smooth. Sand the wood thoroughly, starting with a coarser grit sandpaper (like 80 or 100 grit) to remove any imperfections.
Then, move to finer grits (150, then 220 grit) to create a smooth surface. Always sand with the direction of the wood grain.
After sanding, wipe the wood down with a tack cloth or a damp rag to remove all dust. Any dust left behind will show up in the finish. Ensure the wood is completely dry before applying any product.
If you are staining wood that has a lot of pores, like oak, you might use a pre-stain wood conditioner. This helps the stain apply more evenly and prevents blotching.
Applying Wood Stain
Stir the stain gently. Avoid shaking, as this can create air bubbles. Apply the stain using a brush, rag, or foam applicator.
Work in small sections, applying the stain evenly along the grain.
For most stains, you will wipe off the excess after a few minutes. The longer you leave the stain on, the darker the color will be. Check the product instructions, as drying and wiping times can vary.
Always wipe with the grain. This removes excess pigment and helps create a uniform color.
Allow the stain to dry completely according to the manufacturer’s instructions, typically 24 hours for oil-based stains and a few hours for water-based stains. Ensure good ventilation during the drying process.
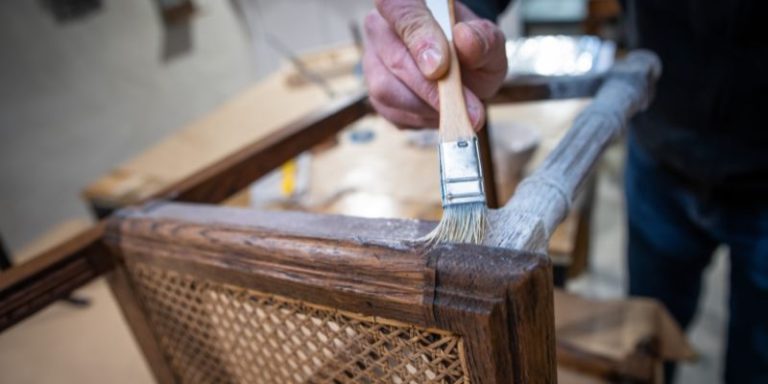
Applying Varnish
Ensure the stain is fully dry before applying varnish. Stir the varnish gently, just like the stain. Do not shake it.
Use a good quality brush designed for the type of varnish you are using.
Apply thin, even coats of varnish. Work with the grain. Avoid applying too much at once, as this can lead to drips and an uneven finish.
If you see any drips or uneven areas, smooth them out immediately.
Between coats of varnish, lightly sand the surface with very fine-grit sandpaper (around 320 grit). This creates a slightly rougher surface for the next coat to adhere to, resulting in a smoother final finish. Wipe away all sanding dust with a tack cloth before applying the next coat.
Most projects will require at least two or three coats of varnish for adequate protection. Allow each coat to dry completely before sanding and applying the next. The final coat usually does not require sanding.
Tips For A Smooth Finish
- Work in a Clean Environment: Dust is the enemy of a smooth finish. Work in a well-ventilated area that is as dust-free as possible.
- Use Quality Tools: Good brushes and applicators make a big difference.
- Apply Thin Coats: Multiple thin coats are always better than one thick coat. They dry more evenly and are less prone to runs and drips.
- Follow Drying Times: Patience is key. Rushing the process can ruin your hard work.
- Test First: Always test your stain and varnish on a scrap piece of the same wood to see how the color and finish will look.
Frequently Asked Questions
Question: Can I use stain and varnish on painted wood
Answer: Generally, you cannot apply stain directly to painted wood because stain needs to penetrate the wood to color it. Paint forms a solid barrier. You would need to remove the paint first to stain the wood.
Varnish can sometimes be applied over properly prepared paint to seal and protect it.
Question: How long does stain take to dry
Answer: Drying times vary. Water-based stains can dry in 1-3 hours, while oil-based stains typically take 24 hours. Always check the product label for specific drying times.
Question: Do I need to sand between coats of stain
Answer: No, you typically do not sand between coats of stain. Sanding is usually done before the first coat and between coats of varnish or other topcoats.
Question: Can I use varnish outdoors
Answer: Yes, but you must use a varnish specifically designed for outdoor use, such as spar varnish. These are formulated to withstand weather, UV rays, and temperature changes.
Question: What happens if I don’t wipe off excess stain
Answer: If you don’t wipe off excess stain, it can dry on the surface, creating a blotchy, uneven, and sticky finish. This makes it difficult to apply a topcoat and ruins the look.
Final Thoughts
Understanding the difference between stain and varnish is simple. Stain colors wood, and varnish protects it. Most projects benefit from both, giving you color and durability.
Choose the right products for your wood and enjoy your beautiful, protected creation.