Toilet, Tub and Sink Repair for Leaks and Clogs
Most toilet, tub, and sink problems come back to seven parts: flapper, fill valve, supply line, trap, pop-up assembly, cartridge, or drain stopper. You can fix many of them if you pin down the symptom before you buy parts. Guess, or let the problem run, and you can end up with water damage, mold, wasted water, stripped fittings, or a hidden leak that drives the repair bill up fast.
This symptom-first method saves time. A silent toilet leak can waste 200 gallons a day, and a running toilet can waste over $40 per month. A dripping faucet can add $20-50 to annual water bills. Common bathroom trouble spots include a leaky faucet, slow drain, and running toilet, so the quickest path is to confirm the failed part before you take anything apart.
Water control and damage limits


Find the shutoff before the failed part
Find the fixture shut-off valve before you put a wrench on anything. For a toilet, it is usually behind or beside the bowl near the floor. For a sink, look under the cabinet for the hot and cold stop valves. Many close clockwise.
If the fixture valve is corroded, frozen, or starts dripping around the stem when you turn it, do not rely on it. Shut water off at the home’s main valve instead, then put stop-valve replacement on the list for later. Forcing a worn valve can turn a small fixture repair into an active leak at the wall.
Protect the floor and catch residual water
Set a bucket under sink traps or supply lines before you loosen anything. Put rags around toilet supply nuts and under faucet bodies. Clear out the vanity cabinet so you can spot fresh drips instead of old stains.
For toilets, flush once after you shut off the valve to empty most of the tank. Sponge out the rest if you are changing a flapper, fill valve, or supply connector.
Know when water damage changes the plan
Stop and reassess if water is coming from the wall, the floor around the toilet stays wet after you dry it, or the subfloor feels soft. SaveOnWater says a hidden pipe leak can cost $300-1,000+ to fix professionally. DIY work makes sense when the leak is clearly at the fixture and the shutoff still works.
Bathroom repair decision table
| Symptom | Most likely failed part | Quick diagnostic test | Estimated DIY parts cost | Estimated time | Stop-and-call-a-pro red flags |
|---|---|---|---|---|---|
| Toilet runs between flushes | Flapper or flush valve seat | Add food coloring to the tank and wait about 15-20 minutes; if color appears in the bowl, that suggests a tank-to-bowl leak. | $5-15 for flapper | 15-30 minutes | Cracked tank, warped flush valve body, seized tank bolts |
| Toilet keeps filling after flush | Fill valve or float set too high | Check whether water rises into overflow tube; lower float and retest | $15-30 for fill valve | 30-60 minutes | Corroded shutoff, brittle supply line, brand-specific internals that do not fit universals |
| Water on floor by toilet | Supply line, tank bolts, or wax ring/base movement | Dry all surfaces, flush, then watch for first new drop at line, tank, or base | Often low if line or bolt washer; varies | 20-90 minutes | Loose toilet, cracked porcelain, stained subfloor, leak from wall |
| Sink faucet drips from spout | Cartridge, washer, or seat | Identify faucet type, then see whether drip changes with handle position | Usually low; varies by cartridge | 30-90 minutes | Frozen handle, stripped retaining nut, body crack |
| Water under sink after use | P-trap washer, pop-up assembly, or stop valve seepage | Dry everything, run water, then touch tissue to each joint to find first wet point | Usually low; varies by washer or gasket | 20-60 minutes | Corroded trap arm in wall, rotten cabinet floor, valve stem leak that worsens when turned |
| Low faucet flow with no drip | Clogged aerator | Unscrew aerator and compare flow with and without it | Usually none to low | 10-20 minutes | Poor flow at hot and cold fixtures throughout the room |
| Tub spout drips after shutoff | Faucet cartridge, stem washer, or tub spout diverter seat issue | See whether drip happens only after shower use or after every shutoff | Usually low to moderate; varies by valve | 45-120 minutes | No access to valve trim, old seized stems, leak behind wall |
| Shower will not switch cleanly from tub spout | Spout diverter gate | Pull diverter and watch for heavy flow continuing from spout while shower runs | Usually low to moderate | 20-45 minutes | Set-screw corrosion, spout stuck to pipe, damaged stub-out |
| Slow sink or tub drain | Hair clog in stopper, trap, or branch drain | Plunge first; if no change, remove stopper or open trap where accessible | Low if using plunger or drain snake | 15-60 minutes | Repeated backups, gurgling at other fixtures, sewage odor from multiple drains |
Say your toilet runs every ten minutes, but the bowl level never rises. The food-color test points to the flapper path, not the supply line. That means you can buy a $5-15 flapper first instead of a fill valve you may not need.
What is causing your running toilet?
A running toilet usually traces to a leaking flapper, a rough flush valve seat, a chain that holds the flapper open, or a fill valve that never shuts off at the right water level. Start with a dye test, then follow the water path from the flapper to the overflow tube before you buy parts.
Confirm a tank-to-bowl leak with food coloring
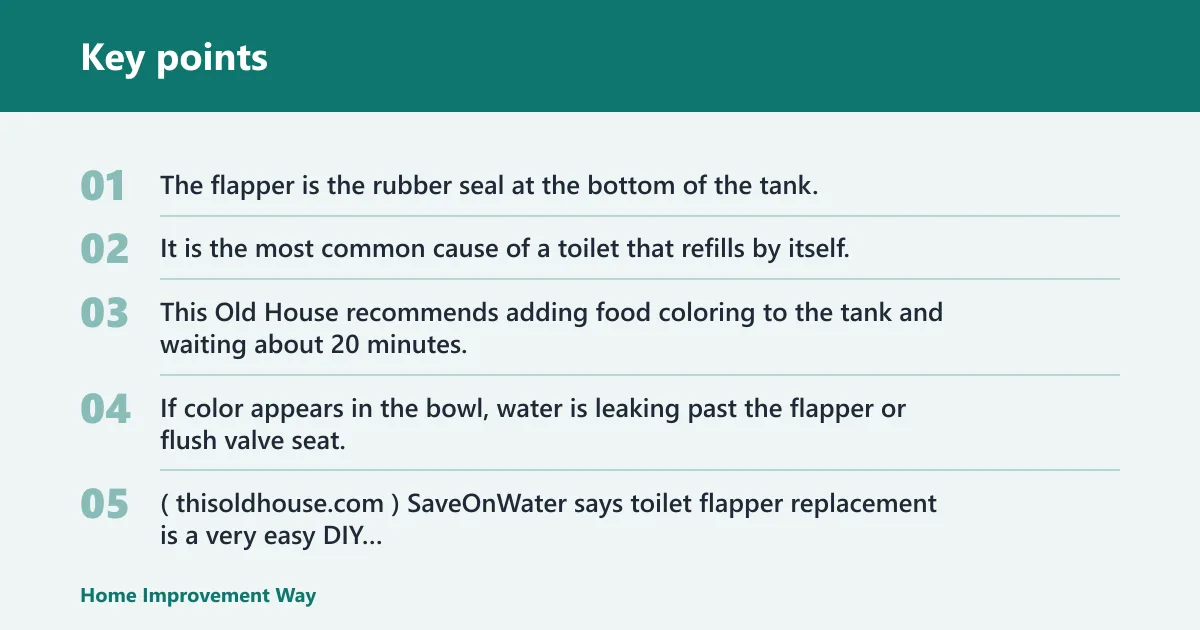
The flapper is the rubber seal at the bottom of the tank. It is the most common cause of a toilet that refills by itself. This Old House recommends adding food coloring to the tank and waiting about 20 minutes. If color appears in the bowl, water is leaking past the flapper or flush valve seat. (Thisoldhouse)
The same source says toilet flapper replacement is a very easy DIY repair costing $5-15 in parts. This Old House also notes that some toilet manufacturers use proprietary flapper designs, so match the old part by brand, model, shape, and mounting style before you leave the store.
Check the flapper, chain, and flush valve seat first
Lift the tank lid and check for obvious misalignment. The chain should have a little slack when the flapper is closed. If it is too tight, the flapper cannot sit flat on the seat.
Run a finger lightly around the flush valve seat after you drain the tank. If the surface feels rough or shows mineral buildup, clean it gently with emery cloth or fine sandpaper. The goal is to remove light corrosion, not reshape the seat.
If the seat cleans up and the flapper is soft, swollen, cracked, or misshapen, replace the flapper. Infinity Plumbing Services says flappers should be replaced every 3 to 5 years. This Old House says changing an old flapper can be a quick job costing $5 or less, though many replacements now fall in the $5-15 range depending on design.
Adjust the fill valve and float height before replacing it
The fill valve controls tank refill and shutoff. If water rises into the overflow tube, the toilet is not always leaking past the flapper. The fill valve may simply be set too high or may be failing to close all the way.
Lower the float height based on the valve style, then flush and watch the refill. The final water level should stop below the top of the overflow tube. If adjustment does not stop the overfill, replace the valve.
The same source lists toilet fill valve replacement as a medium DIY repair costing $15-30 in parts. Many replacements are sold as universal, but some toilets use brand-specific shapes or mounting heights, so compare the old valve carefully before you buy.
Know when replacing both parts makes more sense
If the flapper is worn and the fill valve is noisy, slow to shut off, or erratic, replacing both parts at once often saves you from shutting the tank down again later. That combined repair still costs less than a simple plumber visit in many cases, since SaveOnWater says typical plumber visits cost $150-300 for simple repairs.
Suppose the flapper fails the dye test and the tank also fills into the overflow tube. Replacing only the flapper would not stop the waste. In that case, the repair path is flapper plus fill valve, not one part at a time.
Why a toilet needs the handle held down
If your toilet only flushes when you keep the handle down, the fix usually comes down to a simple timing problem inside the tank: the flapper is dropping too early, the chain has too much slack or is snagged, or the water level is too low to finish the flush. The supporting guide explains how to spot each cause in order, so you can avoid replacing parts that are still working.
That matters because a weak flush can waste water, leave waste behind, and point to a small adjustment rather than a bigger repair. For a step-by-step breakdown, see toilet handle flush problems.
How do you tell where a toilet leak is coming from?
Dry the toilet completely, flush once, and watch for the first new water. A leak inside the bowl points to flapper or fill-valve issues, a drip on the supply connection points to the line or shutoff, and water at the base points to movement, seal failure, or condensation look-alikes.
Separate tank leaks from supply line leaks
Start with a dry paper towel on the supply nut, shutoff stem, and the underside of the tank. Flush, then check again in that order. If the towel at the supply nut turns wet first, the problem is outside the tank. If the bowl receives colored water with no outside drips, the leak is internal.
Do not crank down on old plastic nuts or braided connectors. If the line shows corrosion, kinks, or rust at the shutoff, stop there and replace the supply line only if the valve itself is sound.
Tell bowl seepage from base leaks
Water on the floor behind the bowl can fool you. Condensation on a cold tank can run down and look like a seal failure. Dry the porcelain, wait, then flush and check whether fresh water appears from the tank hardware, the supply line, or the toilet base.
If the toilet rocks when you push it gently, the base leak may involve the wax ring or a damaged flange. That is no longer a simple external leak. Pulling a toilet is possible for some homeowners, but a loose base with stained flooring is a sensible place to stop.
Hairline cracks in tanks or bowls can open only under flush pressure. If a leak appears after the flush and no fitting is wet, inspect the porcelain closely. Cracked porcelain is a replacement issue, not a patch job.
How to Set a Fluidmaster Fill Valve Correctly
If your toilet tank is refilling too high, too low, or with a weak flush, the fix is often a simple valve adjustment rather than a full replacement. The Fluidmaster fill valve guide explains how to set the water level about 1/2 to 1 inch below the overflow tube, how to match the adjustment to the symptom, and how to tell whether the valve is just mis-set or actually worn out.
That matters because a wrong setting can waste water, cause phantom refills, create noise, or leave the bowl underfilled. Knowing when to adjust, clean, or replace the valve helps you fix the problem faster and avoid chasing the wrong cause.
How do you stop a dripping sink or tub faucet?
Stop a faucet drip by identifying the valve type first, then replacing the worn sealing part that matches it: cartridge, washer, stem seal, or O-ring. Buy the exact replacement before full disassembly when possible, because similar-looking faucet parts often differ by a few grooves, tabs, or stem lengths.
Identify the faucet type before buying parts
A single-handle faucet often uses a cartridge or ceramic disk assembly. A two-handle faucet may use cartridges, stems, or compression washers. The repair depends on that internal design, not on whether the faucet is in a sink or tub.
If the faucet drips only from the spout, look at the shutoff mechanism. If water seeps around the handle, suspect an O-ring, packing, or cartridge seal instead of the spout seat alone.
Match cartridge, washer, and O-ring failures to the symptom
Cartridge faucets usually drip because the cartridge sealing surfaces wear out. Compression faucets more often fail at the washer on the stem end. Handle-base seepage often points to an O-ring or stem seal.
Lay parts out in removal order so reassembly follows the same sequence. Match the old cartridge by number, stem shape, tab placement, and length. For washers and O-rings, match inside diameter, outside diameter, and thickness if the old one is still intact enough to compare.
Rule out a clogged aerator before opening the faucet body
Low flow without a drip is often an aerator problem, not a valve problem. Unscrew the aerator, rinse out grit, and test flow with it removed. If pressure returns, clean or replace the aerator and stop there.
This small check matters because it keeps you from opening a faucet body that was never leaking. It also helps separate fixture trouble from wider supply issues.
Handle under-sink leaks differently from spout drips
If the cabinet floor gets wet during use, inspect the P-trap joints, supply stops, and pop-up drain assembly before you blame the faucet. A loose slip-joint washer, seepage at the stop valve stem, or a leaking pop-up gasket can all mimic a faucet leak.
Touch a dry tissue to each connection while the water runs. The first damp spot is usually the real source. Tightening a slip-joint nut slightly may stop a trap drip, but over-tightening can distort the washer and make the leak worse.
Why is the tub still dripping or not switching right?
A tub spout that keeps dripping usually points to a worn faucet cartridge or stem washer, while a shower that will not switch cleanly often points to the tub spout diverter. Tub drain problems follow a different path, usually at the stopper, linkage, or shoe connection.
Tub spout drips after shutoff
If the tub spout drips after every use, focus on the hot and cold shutoff parts inside the faucet valve. In a single-handle tub/shower valve, that usually means the cartridge. In an older two-handle setup, it may mean a worn washer or seat.
If the drip happens mainly after shower use, the diverter may not be returning cleanly. That is different from a valve that cannot shut water off fully.
Diverter problems that block shower-to-tub switching
A pull-up diverter on the tub spout should send most water to the shower head. If heavy flow still pours from the spout, the diverter gate inside the spout may be worn or stuck with mineral buildup.
Many tub spouts either thread on or lock with a small set screw. Remove the old spout carefully so the pipe stub-out is not twisted in the wall. If the spout will not budge or the set screw is stripped, that is a good place to stop.
Tub drain stoppers and overflow linkage faults
If the tub drains slowly only when the stopper is installed, pull the stopper first. Hair and soap buildup collect there long before they lodge deeper in the line. Lift-and-turn, toe-touch, and trip-lever designs come apart differently, so check the exact style before you force it.
Trip-lever drains can fail at the overflow linkage, leaving the stopper half-closed even when the lever says open. If the linkage is bent or the screws in the overflow plate are rusted in place, move slowly so you do not drop parts into the drain shoe.
How do you clear a slow sink or tub drain?
Start with the least invasive fixture-level fix: plunger first, then stopper or trap cleaning where accessible, then a drain snake or auger if plunging fails. Stop when resistance feels solid or the clog seems deeper than the fixture branch, because forcing a snake can damage old piping or jam fittings.
Use a plunger the right way first
A plunger is the first-line tool for toilets and sinks. For a sink, block the overflow opening with a wet rag so pressure builds in the drain instead of escaping. Use steady pressure rather than frantic jabs.
For a toilet, use a flange-style plunger if available and keep the cup fully submerged so the force goes into the trapway. Several controlled strokes work better than random pumping.
Clean the stopper, hair catch, and accessible trap parts
In bathroom sinks and tubs, the stopper often holds the clog. Pull it and remove the hair mat before you reach for a snake. For sinks, the P-trap is also a common catch point and can often be opened with a bucket underneath.
A common first-timer mistake is snaking a lavatory drain with the pop-up still down. The cable grabs hair at the stopper pivot, then kinks. Removing the stopper first changes one variable and often solves the problem in five minutes.
Use a drain snake or auger after plunging fails
A drain snake or auger is the next step once a plunger has done nothing. Feed the cable gently, rotate as needed, and pull back slowly so you do not leave debris behind. On old chrome trap arms or thin plastic fittings, stop if the tool binds hard.
If the snake reaches repeated resistance at the same depth and water still backs up, the clog may be beyond fixture level. Repeated force at that point risks loosening joints inside the wall.
Know the signs of a deeper drain problem
If the tub backs up when the sink drains, or if multiple bathroom drains gurgle together, the blockage may be farther down the branch or stack. That is beyond a basic fixture repair. The same goes for repeated clogs that return days after a successful snake run.
Which tools and parts should you have before opening anything?
Basic bathroom repair needs a small, specific kit: adjustable wrench, screwdrivers, channel-lock pliers, plunger, drain snake, bucket, rags, and emery cloth or fine sandpaper. Add replacement parts only after you identify the valve style or seal shape, because “universal” and “fits most” have limits.
Core tools and what each one does
- Adjustable wrench: supply nuts, mounting nuts, and shutoff connections
- Screwdrivers: tank hardware, trim plates, aerators, stop assemblies
- Channel-lock pliers: trap nuts and larger faucet retaining nuts
- Plunger: first pass for toilet, sink, and tub clogs
- Drain snake or auger: follow-up tool after plunging fails
- Bucket and rags: catch residual water and verify fresh leaks
- Emery cloth or fine sandpaper: light cleanup of a rough flush valve seat
Low-cost parts worth buying only after diagnosis
For toilets, keep a replacement flapper and fill valve in mind, but buy the right style after you check the old one. The same source lists flapper replacement at $5-15 and fill valve replacement at $15-30, so those are sensible first repairs when the tests point there.
For sinks, common low-cost items include slip-joint washers, a trap washer, and an aerator. Faucet cartridges are worth buying only after you have the brand, part number, or exact stem pattern.
Match parts before the fixture is out of service
- Photograph the old part in place.
- Measure the flapper or compare its exact shape if it is not a standard round style.
- For fill valves, compare height range, shank size, and refill tube layout.
- For cartridges, note brand marks, cartridge number, tab locations, and stem length.
- For traps and pop-ups, match thread type and washer profile, not just nut diameter.
Many common bathroom leaks can be fixed without replacing the whole fixture. Once the body casting is cracked, the porcelain is cracked, or the same internal part has failed again and again because the fixture itself is worn out, replacement starts to make more sense than another small repair.
When should you stop and call a plumber?
Stop when the shutoff valve is corroded, the fitting is seized, the porcelain is cracked, the leak appears to come from a wall or floor, or the clog affects more than one fixture. DIY saves money on clear fixture-level problems, but forced parts and hidden leaks are where damage starts.
High-risk shutoffs, fittings, and supply lines
If a stop valve stem leaks when you touch it, or the handle feels ready to snap, do not keep working under live pressure. The same goes for supply lines with visible corrosion or old compression fittings that twist instead of loosening.
Cracked toilet porcelain, a toilet that rocks at the base, and stains spreading from the wall or floor all push the problem past a routine fixture fix. The same source says typical plumber visits cost $150-300 for simple repairs, which is still cheaper than repairing water-damaged framing after a failed DIY attempt.
Repeated backups and replacement tipping points
If the same sink or tub clogs again soon after trap cleaning and snaking, the blockage may sit deeper in the line. If a faucet body is pitted, a tub valve will not accept a matching cartridge, or a toilet has repeated internal failures plus a failing shutoff, replacement may be the better budget choice.
Frequently asked questions
How do I fix a running toilet myself?
Start with food coloring in the tank and wait about 15-20 minutes. If color reaches the bowl, inspect the flapper, chain slack, and flush valve seat. If water rises into the overflow tube instead, adjust the float or replace the fill valve. Buy parts matched to brand and valve style.
What causes a toilet to keep running after I flush it?
The usual causes are a flapper that does not seal, a chain that holds the flapper open, a rough flush valve seat, or a fill valve set too high or failing to shut off. Watch whether water leaks into the bowl or into the overflow tube, then repair that exact path.
How do I tell if my toilet flapper is leaking?
Add food coloring to the tank and leave the toilet unused for about 15-20 minutes. If color appears in the bowl, the tank is leaking past the flapper or seat. Then inspect the flapper for swelling, cracks, stiffness, or poor alignment on the flush valve opening.
When should I replace a fill valve instead of adjusting it?
Adjust first if the water level simply stops too high. Replace the fill valve if lowering the float does not stop water from entering the overflow tube, if the shutoff is erratic, or if the valve is noisy and slow. Universal replacements often work, but some toilets need brand-specific parts.
How do I know whether the leak is from the toilet tank or supply line?
Dry the tank, supply nut, shutoff, and floor, then flush and watch where the first fresh water appears. Colored water in the bowl means an internal tank leak. Moisture at the connector or valve points to the supply side. Water only at the base suggests movement, seal failure, or condensation.
Can I fix common bathroom leaks without replacing the whole fixture?
Usually yes. Many leaks come from replaceable parts such as flappers, fill valves, cartridges, washers, aerators, trap washers, stop valves, or pop-up assemblies. Full fixture replacement makes more sense when porcelain is cracked, the faucet body is damaged, the valve casting is worn, or part failures keep repeating.
Sponsored / affiliate links. As an Amazon Associate I earn from qualifying purchases. I may earn additional commission from eligible campaigns.