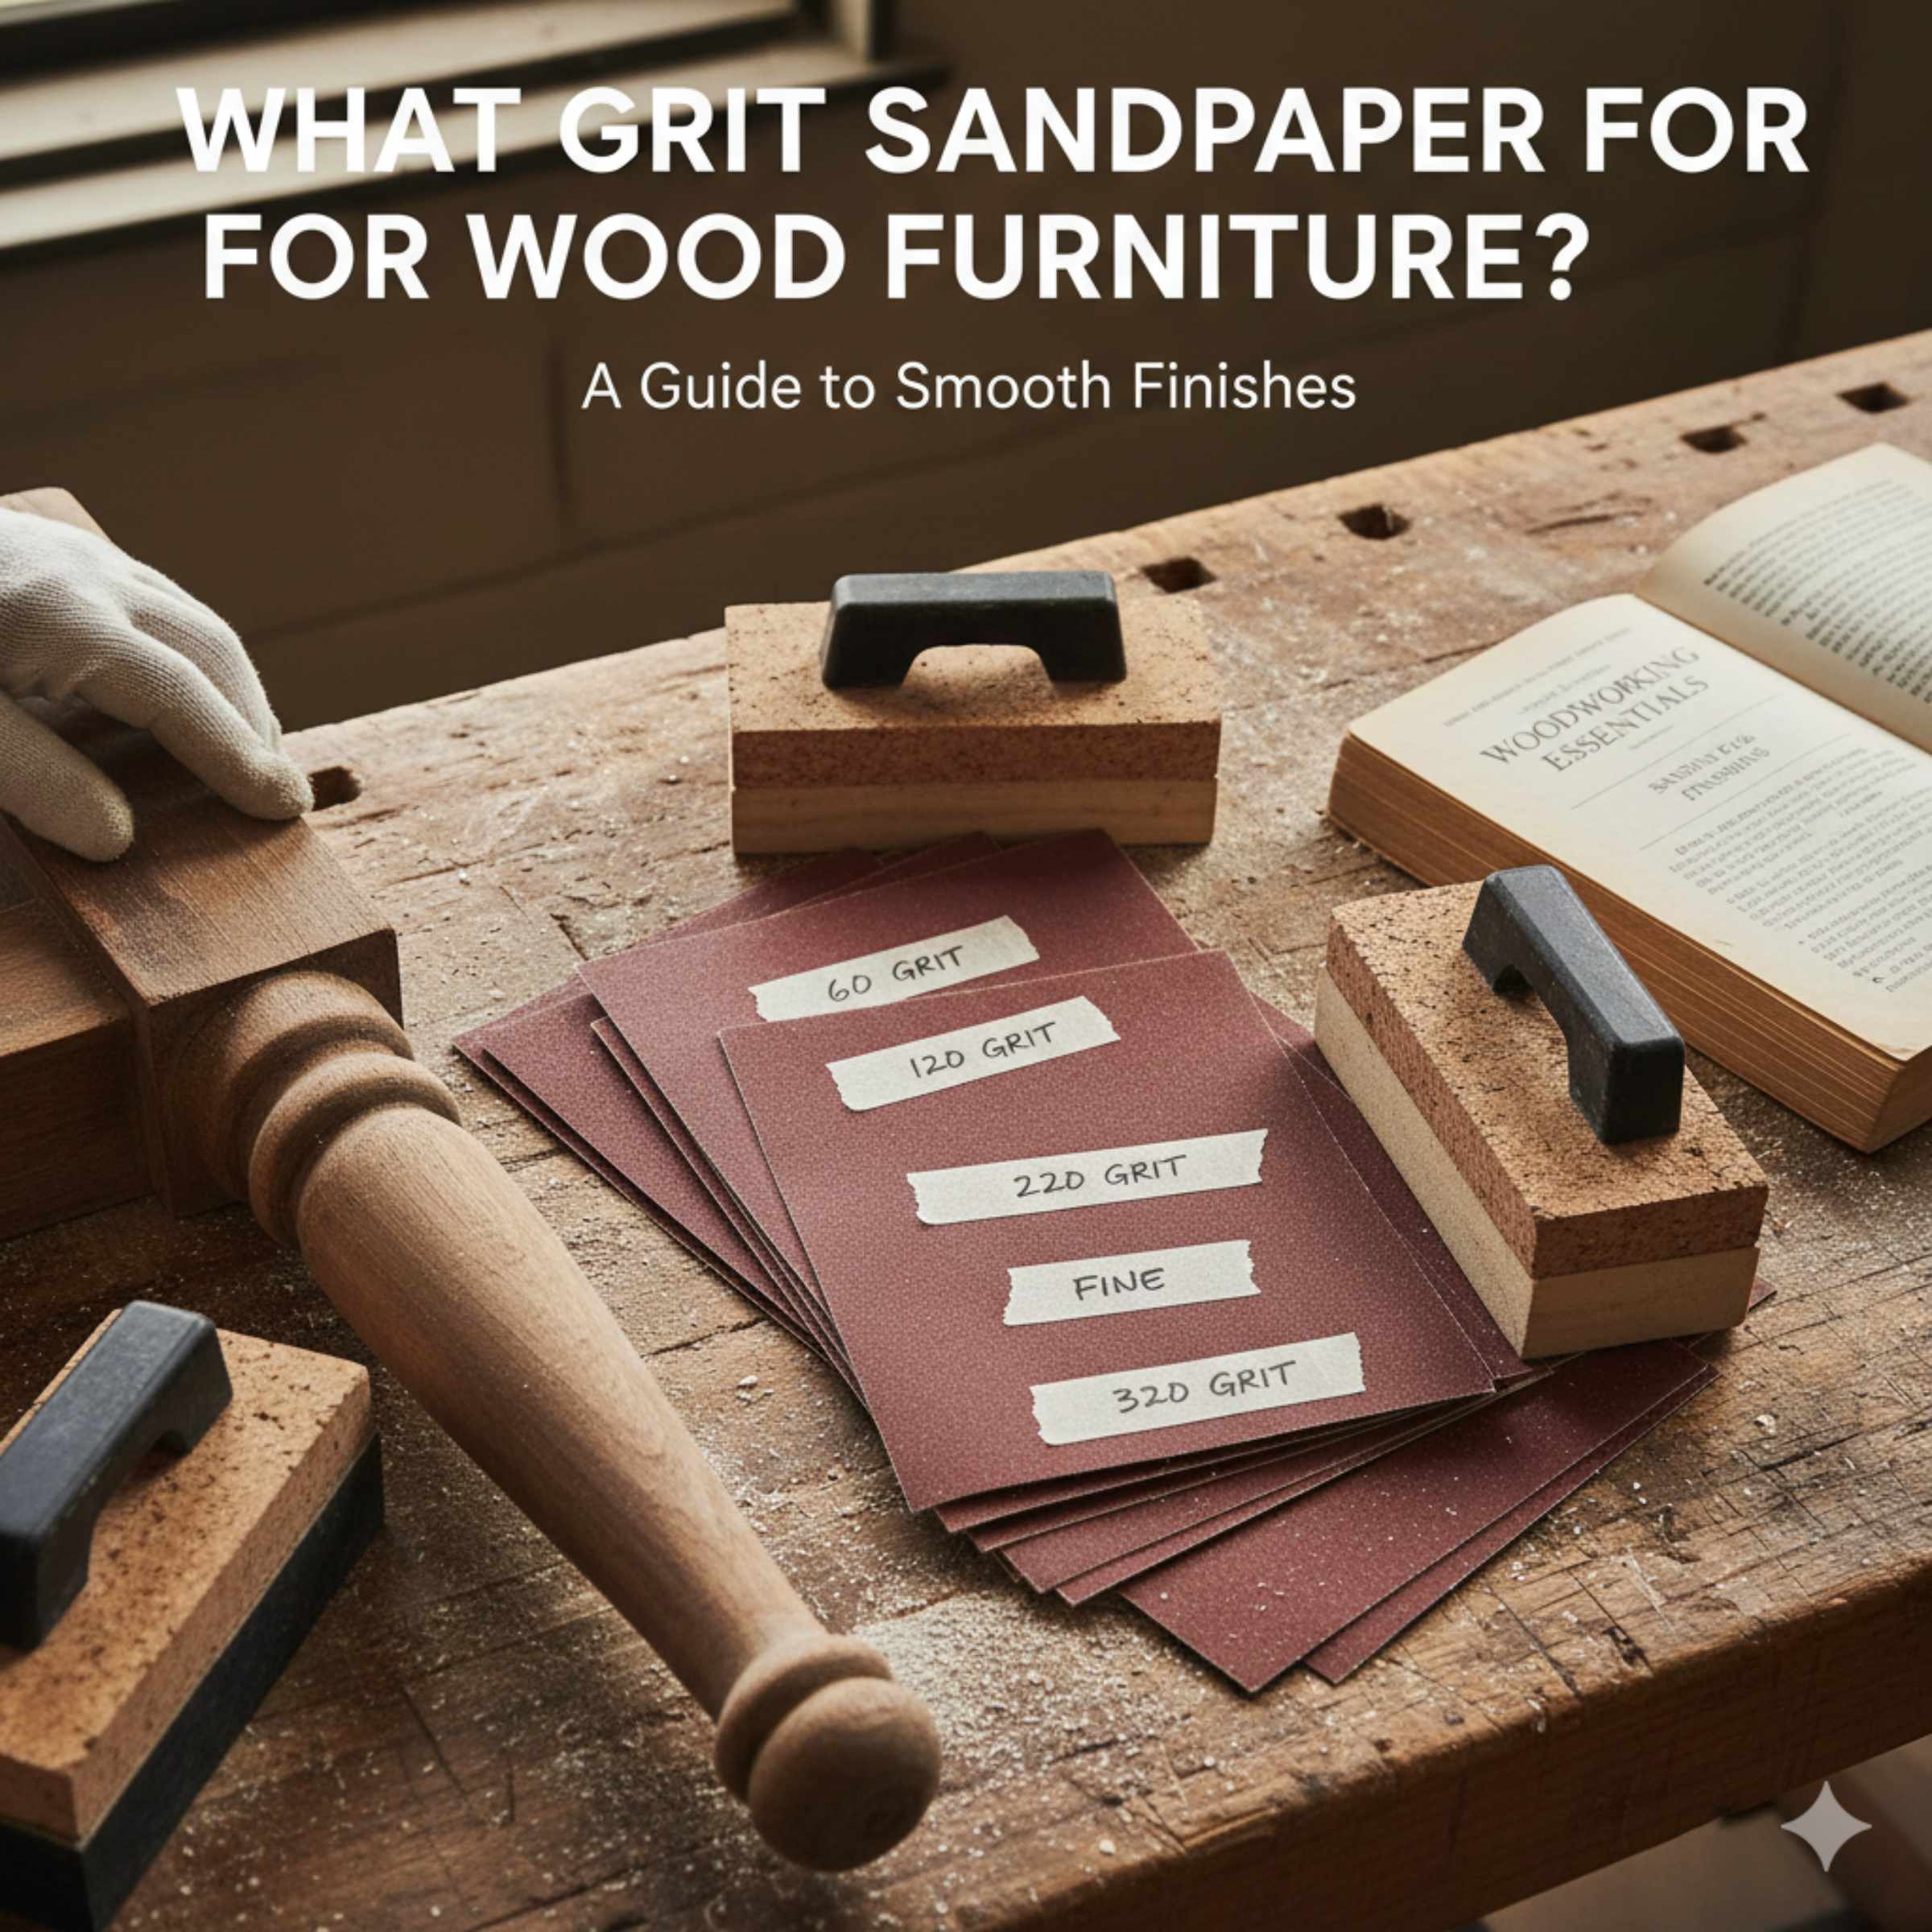
What Grit Sandpaper For Wood Furniture: Proven Best
For preparing wood furniture, start with 80 or 100 grit to remove old finish, move to 120 or 150 grit for smoothing, and finish with 180 or 220 grit before applying paint or stain. Choosing the right grit is key to a flawless finish!
Have you ever spent hours sanding a lovely piece of wood furniture, only to find the final paint job looks rough or uneven? It’s frustrating! Picking the right sandpaper grit can feel like guesswork. Too coarse, and you leave deep scratches; too fine, and your stain won’t soak in right.
Don’t worry, friend. Choosing the perfect sandpaper grit is much simpler than you think once you know the basic rules. I’m Md Meraj, and I’ve helped countless DIYers conquer their sanding fears. Together, we will walk through exactly which sandpaper grit works best for every stage of preparing your wood furniture—from stripping old paint to getting that final silky smooth surface ready for a beautiful new look. Let’s get sanding confidently!
Understanding Sandpaper Grit: What Do Those Numbers Mean?
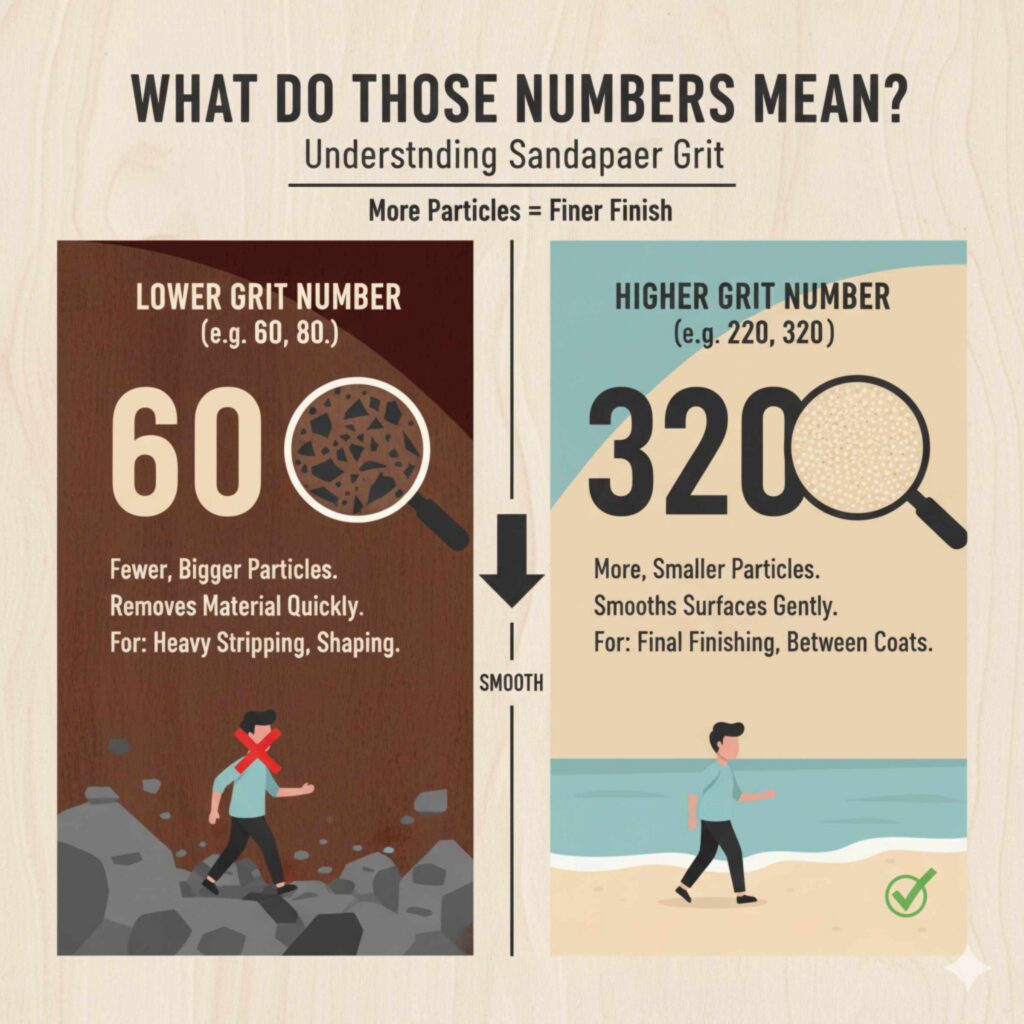
Before we dive into the “best” grits, we need to quickly understand what the number on the sandpaper back actually tells us. This number, called the “grit,” is the single most important piece of information you need.
Simply put, the grit number tells you how many tiny abrasive particles are packed into one square inch of that sandpaper sheet.
The rule is very easy to remember:
- Lower Grit Number (e.g., 60, 80): Means fewer abrasive particles. These particles are bigger and rougher. This sandpaper removes material quickly.
- Higher Grit Number (e.g., 220, 320): Means more abrasive particles. These particles are smaller and finer. This sandpaper smooths surfaces gently.
Think of it like walking on different surfaces: walking on large, rough gravel (low grit) is tough, but walking on fine beach sand (high grit) is soft.
The Sandpaper Grit Hierarchy for Furniture Refinishing
When working on wood furniture, you rarely use just one grit. A good refinishing job is a progression. You always start rough to take off the bad stuff and gradually move to finer grits to polish the surface smooth. This step-by-step approach ensures you remove the previous finish without leaving deep scratches that a later, finer grit cannot hide.
Choosing the Right Abrasive Material
While grit is key, the material the sandpaper is made from also matters for furniture work. For general wood furniture, you will most likely use one of these three types:
- Aluminum Oxide: This is the workhorse for wood. It’s durable, lasts a long time, and works well on both softwoods and hardwoods. It’s great for stripping and general shaping.
- Garnet: This is a softer mineral that breaks down slightly as you sand. It’s often preferred for the final sanding stages before staining or painting because it tends to produce a slightly smoother, less harsh finish than aluminum oxide.
- Silicon Carbide: This is the toughest and sharpest. It’s usually reserved for sanding plastics, metals, or when wet-sanding finishes. For most furniture prep, aluminum oxide or garnet is better.
The Proven Best Grit Progression for Wood Furniture
This section is the heart of our guide. We will break down the exact sequence you need to follow, whether you are completely stripping a piece or just cleaning up an existing finish.
Phase 1: Stripping and Leveling (The Heavy Lifters)
If your furniture has old paint, thick varnish, deep scratches, or rough areas, you must start here. The goal is to aggressively remove the old surface down to bare wood.
The Best Starting Grits: 60, 80, or 100 Grit
Which one you choose depends entirely on what you are removing:
- 60 Grit: Only use this if you are removing extremely thick, stubborn finishes (like multiple layers of paint or heavy epoxy) or if you need to radically reshape a piece of wood (like removing a deep dent). 60 grit leaves very noticeable scratches, so you must follow up with a finer grit immediately.
- 80 Grit: This is the standard starting point for most furniture stripping projects. It removes old finish efficiently without digging trenches into the wood immediately. It works well with an orbital sander.
- 100 Grit: If the current finish is thin, or if the wood is already fairly smooth and you just need to scuff it up for new paint, 100 grit is a great, slightly gentler start.
Pro Tip from Meraj: If you are painting, starting with 100 grit is often plenty. If you are staining, avoid anything lower than 80 grit unless absolutely necessary, as deeper scratches show through stain very easily.
Phase 2: Smoothing and Defect Removal (The Transition)
Once the old finish is gone, your wood will feel rougher than you expect because the 80 or 100 grit paper left its own sanding marks. This phase is crucial: smoothing out the scratches left by the previous, coarser paper.
The Best Transition Grits: 120 or 150 Grit
You must move up to a finer grit to remove the scratches left by the initial sanding.
- 120 Grit: This is excellent for taking out the scratches left by 80-grit paper. It offers a good balance of smoothing action and speed.
- 150 Grit: If you started with 100 grit, 150 grit is your next logical step. It’s perfect for achieving a nicely balanced surface ready for primer or light stain.
Important Safety Note: Never skip a grit size during this transition phase. If you jump straight from 80 grit to 220 grit, the 80-grit scratches will still be there, just hidden under the fine dust.
Phase 3: Final Prep Before Finish (The Polish)
This is where you prepare the surface for whatever you plan to put on it—paint, oil, or stain. This final sanding pass removes the very fine scratches from Phase 2 and smooths the wood fibers so they accept the finish evenly.
The Best Finishing Grits: 180 or 220 Grit
This is the most important decision point, as the final grit dictates how your chosen finish will look.
For Painting Furniture
When painting, you are covering the wood completely, so you don’t need an ultra-smooth surface, but you need smooth enough so you don’t feel the grain texture through the paint.
- Recommended Final Grit for Painting: 180 Grit. This is the sweet spot. It smooths out the 120/150 grit marks perfectly and gives the primer or paint just enough “tooth” (texture) to grip onto.
- Maximum Grit for Painting: 220 Grit. If you want an absolutely glass-smooth feel before applying a high-gloss paint, 220 grit works well. However, be cautious: going much finer than 220 grit can sometimes make the wood too slick, causing subsequent coats of paint to peel or adhere poorly.
For Staining Furniture
Staining is very unforgiving. Deeper scratches (lower grits) show up like dark streaks, and too-fine sanding (very high grits) can cause the stain to blotch.
- Recommended Final Grit for Staining: 150 Grit or 180 Grit. Most professionals recommend stopping at 180 grit maximum for staining. If you use 220 grit, the wood pores get polished shut, preventing the stain from soaking in evenly, which leads to a patchy, blotchy appearance.
Summary Table: The Essential Grit Progression
This table summarizes the proven best path for general furniture refinishing.
| Project Stage | Goal | Recommended Grit Range | Common Sandpaper Type |
|---|---|---|---|
| Stripping Old Finish | Aggressively remove paint/varnish | 80 – 100 Grit | Aluminum Oxide |
| Leveling Scratches | Remove marks from initial sanding | 120 – 150 Grit | Aluminum Oxide |
| Final Prep (Painting) | Smooth surface, leave tooth for primer | 180 – 220 Grit | Aluminum Oxide or Garnet |
| Final Prep (Staining) | Smooth surface while keeping pores open | 150 – 180 Grit | Garnet (preferred for soft wood) |
How to Choose Sandpaper Grit for Specific Furniture Tasks
The general progression is great, but sometimes you have specific challenges. Here is how to adjust your grit choices for common scenarios.
When Sanding Bare Wood for the First Time
If you have brand new, unfinished lumber or furniture that just needs a light clean-up before staining or painting (no finish removal needed), you can skip the lowest grits entirely.
- Start with 120 grit to level any milling marks or rough spots.
- Move to 150 grit for smoothing.
- Finish with 180 grit (for staining) or 220 grit (for painting).
Sanding Between Coats of Paint or Varnish
This is a completely different process than sanding bare wood. When sanding between coats of paint or lacquer, you are not trying to remove material; you are just knocking down dust nibs and smoothing out slight imperfections in the wet coat. Using too coarse a grit here will cause deep scratches that the thin topcoat cannot hide.
- For the first coat (after primer): Use 220 grit.
- For subsequent topcoats: Use 320 grit or even 400 grit.
These very high grits gently smooth the surface without digging into the cured paint underneath. You can often do this with a damp cloth (wet-sanding) for the finest results.
Dealing with Tough Hardwoods (Oak, Maple)
Hardwoods are dense and require slightly more aggressive tools initially, but they finish beautifully.
For hardwoods like Oak or Maple, you might find that 80 grit feels too slow. Don’t be afraid to use 60 grit initially if the piece is heavily varnished. However, you must ensure you thoroughly follow up with 100, then 150, then 180 to erase those initial aggressive marks. Hardwoods show sanding marks more clearly than soft pine.
Sanding Softwoods (Pine, Poplar)
Softwoods like pine are easy to sand quickly, but they are also very easy to gouge.
For pine, start lighter. An 80-grit paper might be too aggressive unless you are removing heavy damage. Starting with 100 grit, moving to 150, and finishing at 180 or 220 is usually perfect. Always use light, even pressure to avoid creating dents.
The Connection to Professional Standards
Understanding these grits aligns with standard finishing practices. For instance, the U.S. Forest Service Forest Products Laboratory often references these medium-to-fine grits as the standard for preparing wood surfaces before applying protective coatings to ensure maximum adhesion and aesthetic quality.
Tools of the Trade: Which Sander Matches Which Grit?
The tool you use dramatically impacts how effective a specific grit will be.
Hand Sanding vs Power Sanding
Hand Sanding
When sanding by hand, you have ultimate control, especially when following the grain around curved furniture legs or molding. Use a sanding block (a simple piece of wood or firm foam) to keep pressure even.
- Best for: Final smoothing (180 grit and up), curved areas, and delicate stripping where you don’t want to damage the underlying wood.
Random Orbital Sander (ROS)
This is the DIY homeowner’s best friend. It spins the sanding disc while oscillating it randomly, which minimizes swirl marks compared to older circular sanders.
- Best for: Phase 1 and Phase 2 (80 grit through 150 grit). It makes quick work of removing old finishes and leveling large, flat surfaces like tabletops or dresser sides.
Detail Sander / Sheet Sanders
Detail sanders are great for tight corners, but standard sheet sandpaper (cut to size) is best for detailed areas the ROS can’t reach.
- Best for: Getting into grooves, edges, and profiles where the orbital sander pad won’t fit. Always use a flexible foam sanding pad when hand-sanding moldings.
A Quick Note on Sandpaper Longevity
If your sandpaper seems to stop cutting quickly (it feels clogged or “loaded up”), it is likely clogged with paint or wood dust. Don’t throw it away immediately! You can often clean sandpaper by striking the abrasive side firmly against a clean piece of scrap wood or using a specialized sanding block cleaner (often made of hard rubber).
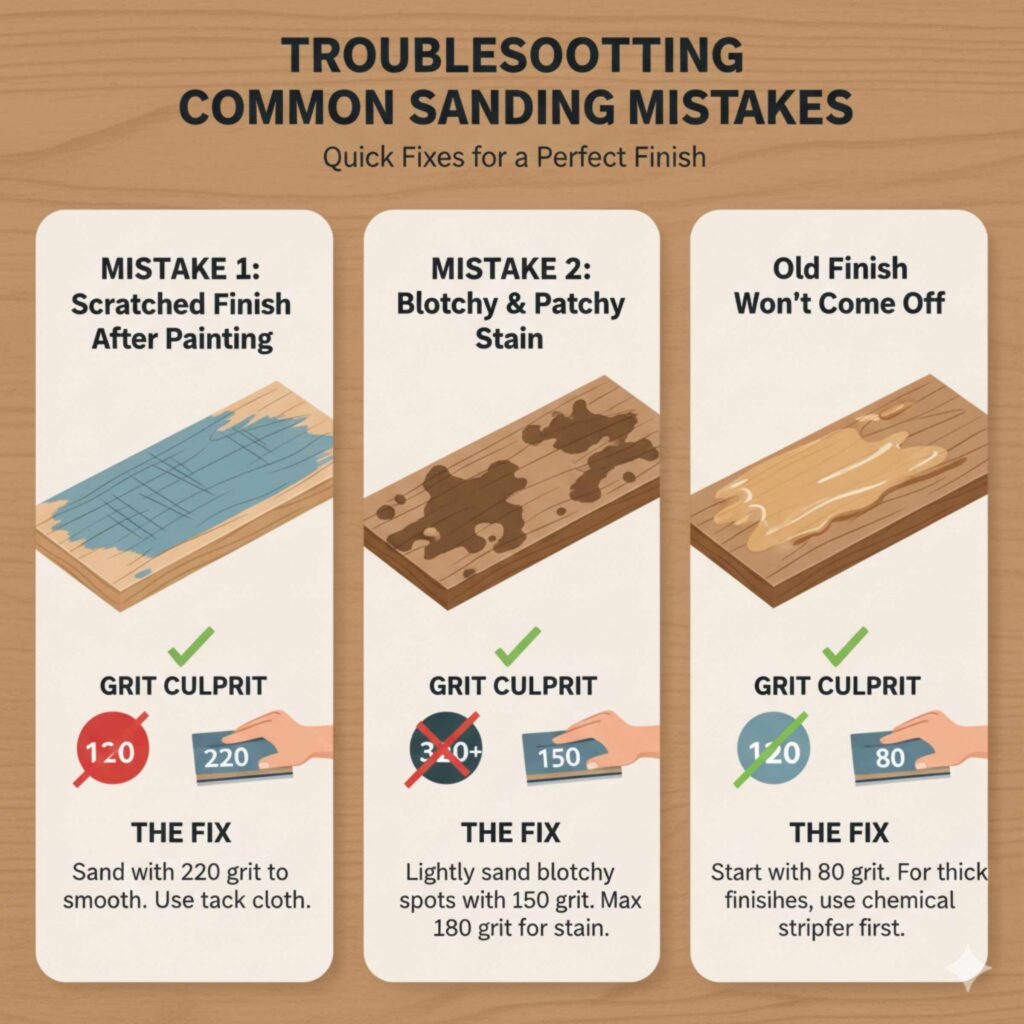
Troubleshooting Common Sanding Mistakes
It happens to everyone—a sanding project goes slightly sideways. Here are quick fixes related to grit selection.
Mistake 1: My Finish Looks Scratched After Painting
The Grit Culprit: You finished sanding with too low a grit (e.g., stopping at 120 grit) before painting. The low grit left deep scratches that the paint couldn’t fully fill in.
The Fix: Lightly sand the entire surface again using 220 grit to gently smooth out those noticeable scratches. Clean thoroughly with a tack cloth and apply a fresh coat of primer or paint. If the scratches are deep, you may need to lightly sand with 150 grit first, then finish with 220 grit.
Mistake 2: My Stain Looks Blotchy and Patchy
The Grit Culprit: You sanded too fine (using 320 grit or higher) or you sanded the wood unevenly.
The Fix: Staining is tricky because the stain absorbs differently into smooth versus rough areas. You need to give the rougher areas a chance to catch up. Lightly sand the blotchy areas using 150 grit, focusing only on those spots to raise the grain texture slightly. Wipe away dust and test the stain again. Remember, for stain, 180 grit is your safest top end.
Mistake 3: The Old Finish Won’t Come Off
The Grit Culprit: You started too fine (e.g., starting with 120 grit on thick varnish).
The Fix: Stop using fine paper and switch to 80 grit. If the finish is still fighting you, consider a chemical stripper first to dissolve the bulk of the finish, followed by 80 grit sandpaper to clean up the residue.
Frequently Asked Questions (FAQ) About Sandpaper Grit
Q1: What is the absolute best single grit sandpaper for getting wood ready for paint?
The best single grit for preparing wood immediately before priming or painting is 180 grit. It smooths out previous scratches while still providing enough texture (tooth) for paint or primer to grab onto securely.
Q2: Do I really need to sand furniture by hand after using a power sander?
Yes, for the final stage. Power sanders are great for speed, but hand sanding (using a block) allows you to feel the surface, apply even pressure on edges, and ensure you have fully removed the swirl marks left by the machine before applying your final finish.
Q3: Can I skip sanding if the furniture already feels smooth?
No, skipping sanding is risky—even if the surface feels smooth. Most finishes (paint, stain, or varnish) need a slightly rough surface to bond properly. Light sanding with 150–180 grit removes invisible residues, dulls old finishes, and ensures better adhesion. Skipping this step often leads to peeling paint or uneven stain later.
Q4: Should I always sand in the direction of the wood grain?
Yes, always sand with the grain, especially during the final sanding stages. Sanding against the grain can leave visible scratches that show through stain or paint. While power sanders move in multiple directions, your final hand-sanding pass should always follow the grain to create a clean, professional look.
Q5: How do I know when it’s time to switch to a finer grit?
A simple rule: switch grits once the surface looks uniform. When all the scratches or marks from the previous grit are gone and the surface feels evenly textured, it’s time to move up. If you still see deep lines or shiny patches, stay on the current grit a little longer before progressing.
Conclusion: Choose the Right Grit, Get the Perfect Finish
Sanding wood furniture doesn’t have to be confusing or frustrating. Once you understand how sandpaper grits work and follow a logical progression—from coarse to fine—you’re guaranteed better results.
To recap the proven method:
- 80–100 grit removes old paint, varnish, and heavy damage
- 120–150 grit smooths out rough sanding marks
- 180–220 grit prepares the surface perfectly for paint or stain
The key is patience. Never skip grit levels, always sand with the grain, and choose your final grit based on whether you’re painting or staining. A few extra minutes spent sanding correctly can mean the difference between a rough, disappointing finish and a piece of furniture that looks professionally restored.
With the right grit and the right approach, you’ll sand with confidence—and your wood furniture will thank you for it. Happy sanding!