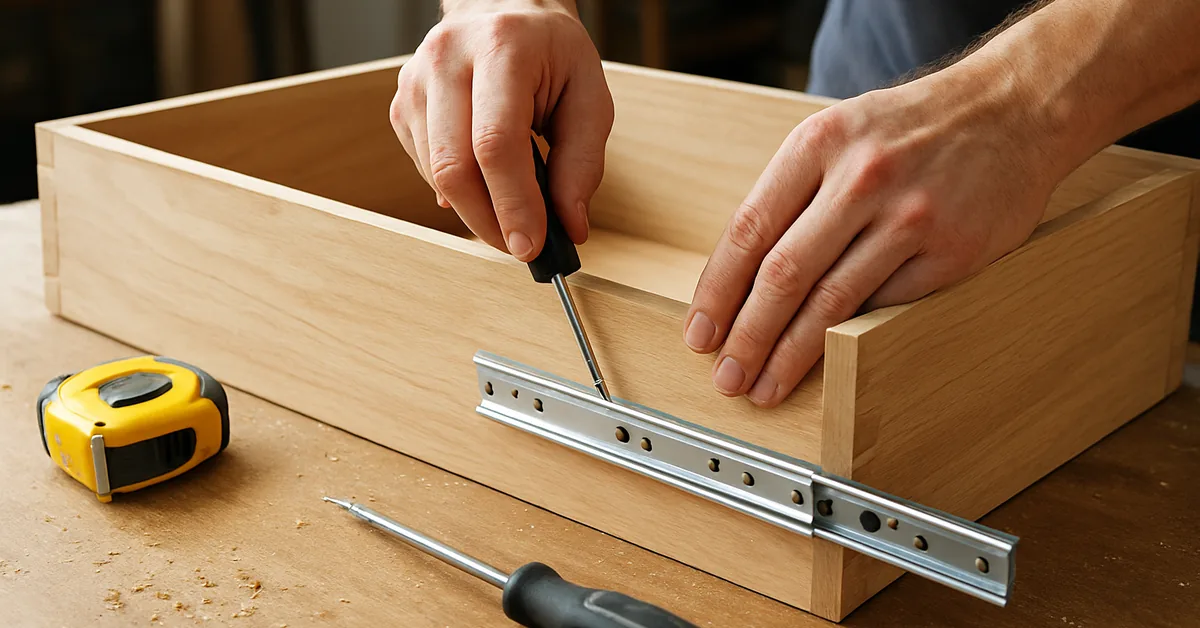
How to Repair or Replace Wooden Drawer Slides
Sticking wooden drawer slides usually need cleaning, lubrication, and tighter screws first — only replace the runner with new wood or a metal ball-bearing slide if it’s cracked, splintered, or worn through. Ignoring worn wood-on-wood friction leads to a drawer that eventually drops or jams completely. This guide covers quick repairs before replacement, removing the old wooden runner safely, and installing either matching wood slides or a metal upgrade.
How to Repair Sticking Wooden Drawer Slides Before Replacing Them
Before pulling the whole runner out, try these quick repairs — they solve most sticking or squeaking drawers without any new hardware.
- Clean Out Dust and Debris: Remove the drawer and wipe down both the wood runner and the cabinet track with a dry cloth. Built-up dust and grime is a common, easy-to-fix cause of sticking.
- Re-Tighten Loose Screws: Screws holding the runner strip loosen over time. A drawer that wobbles or sits unevenly often just needs its fasteners snugged back down.
- Apply Dry Lubricant: Rub a bar of dry soap or a stick of paraffin wax along the top edge of the wooden runner — the part that rubs against the cabinet rail. This alone often silences squeaks and stops minor sticking instantly.
- Check for Rubbing Spots: Look for shiny, polished patches on the wood — these mark exactly where friction is worst. Light sanding of just that spot can restore smooth movement without a full replacement.
If the drawer still sticks after cleaning, tightening, and lubricating — or if the wood is visibly cracked, splintered, or worn down to a groove — repair has reached its limit and it’s time for the full replacement process below.
Why Wooden Drawer Slides Fail and When It’s Time to Replace Them
Wooden drawer slides are a classic solution used for decades because they are cheap and easy to make. However, they have distinct weaknesses that lead to failure. Understanding these helps you choose the right replacement.
Common Problems with Wood Slides
The friction between wood rubbing on wood, especially under the weight of stored items, causes wear and tear that other materials don’t suffer from.
- Warping and Swelling: Wood naturally absorbs moisture from the air. If your dresser lives in a humid basement or bathroom, the wood can swell, causing the drawer to stick badly.
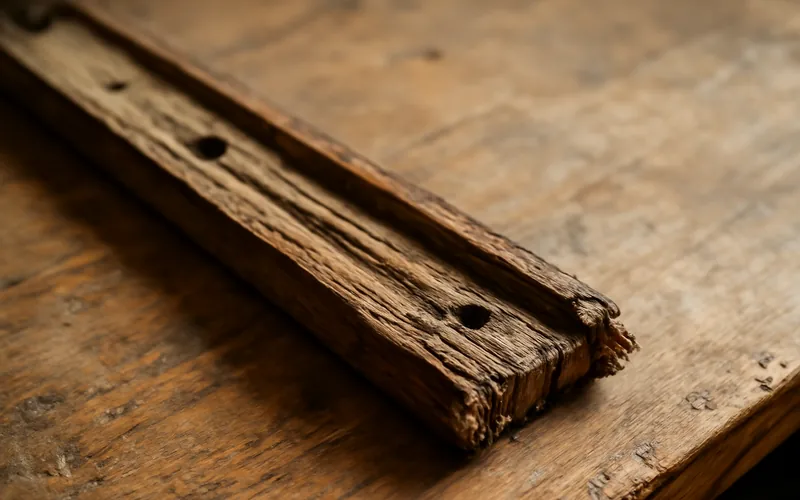
- Splintering and Grooves: Over time, the constant back-and-forth motion grinds grooves into the wood runners (both on the drawer box and inside the cabinet frame). These grooves catch and stop the drawer.
- Sagging or Dropping: If the slides are only secured by small nails or screws, the weight of the contents can cause the entire wooden runner to detach from the cabinet wall slightly, making the drawer droop.
- Noisy Operation: Dry, splintered wood rubbing together creates a terrible scraping or squeaking sound every time you open the drawer.
Planning Your Repair: Fix It or Upgrade?
Before you grab your tools, you need to decide: are you just replacing the worn wooden runner with a new piece of wood (the “Fix It” approach), or are you upgrading to smoother, more durable metal slides (the “Upgrade” approach)?
Option 1: Replacing with Identical Wood Slides (The Direct Fix)
This is the most affordable and simplest repair, best for antique pieces where preserving the original look is important. You simply match the thickness and width of the old wood piece.
Option 2: Upgrading to Modern Metal Slides (The Proven Fix)
This is what most DIYers choose for long-lasting performance. Modern metal slides, often ball-bearing or epoxy-coated, glide effortlessly, handle more weight, and resist humidity better.
If you choose the upgrade route, you’ll be learning how to replace wooden drawer slides with undermount hardware or side-mount metal hardware. We will focus on the general removal process applicable to both repairs. If your project also involves the drawer’s cabinet door hinges, it’s worth checking those for wear at the same time.
Tools and Materials You Will Need
Gathering everything upfront prevents frustrating trips to the garage mid-project. For a simple wooden slide replacement or even an upgrade, you won’t need heavy machinery.
| Category | Tool/Material | Purpose |
|---|---|---|
| Removal Tools | Pry Bar or Sturdy Putty Knife | Gently separating stuck slides without damaging the cabinet. |
| Measurement/Marking | Tape Measure | Crucial for ensuring new hardware aligns perfectly. |
| Fastening Tools | Cordless Drill/Driver | Driving out old screws and installing new ones. |
| Fasteners | Appropriate Screws (Wood screws or specific slide screws) | Securing the new runners; check slide packaging for recommended length. |
| Optional (If wood matching) | Wood Glue, Clamps, Sandpaper (Medium/Fine Grit) | Repairing damaged cabinet interior surfaces or smoothing new wood runners. |
Best Drawer Slide Upgrade Pick
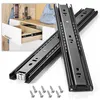
VAGUDE Full Extension Ball-Bearing Slides (1 Pair) – $12.89
Side-mount, 3-fold full extension so the drawer opens completely — matches the “Section B” upgrade path this guide covers, and needs the same roughly 1/2″ clearance per side described in the installation steps.
- Best for: upgrading one drawer from wood to smooth ball-bearing glide
- Why we picked it: available in 12-24″ lengths to match almost any drawer depth
- Main drawback: sold as a single pair — order separately for each drawer
Compare more drawer slide options
 100 LB Capacity BAIDICE Full Extension Slides – $13.40
|
 Soft-Close Ravinte Soft Close Slides – $11.99
|
 Bulk Pack 14″ Slides, 4-Pair Bulk Pack – $24.69
|
As an Amazon Associate we earn from qualifying purchases.
Step-by-Step Guide: Removing the Old Wooden Slides
Safety first! Always ensure the drawer is completely empty. If the slide is severely broken, place a piece of scrap wood underneath the drawer edge while you work to prevent it from crashing down unexpectedly.
Step 1: Remove the Drawer from the Cabinet
This is usually the trickiest part if the slide is already failing.
- Open the Drawer Fully: Pull the drawer out as far as it will go.
- Look for Stops or Hooks: Wooden slides often rely on gravity or a small wooden block/notch to keep the drawer in place. Gently lift the front edge of the drawer slightly while simultaneously pulling it toward you. You might hear a slight ‘pop’ as it disengages from the track.
- If Seriously Stuck: If it will not budge, look closely at the bottom corners of the drawer box where it meets the cabinet frame. You may need to use a small putty knife to gently wedge between the two pieces and wiggle them apart while pulling. Do not force it, or you risk breaking the cabinet face frame.
Step 2: Detach the Drawer-Side Runner
The wooden runner is usually attached either to the drawer box sides or screwed directly into the bottom of the drawer.
- Identify Fasteners: Examine how the runner is attached. Is it held by small finishing nails or short screws?
- Remove Fasteners: Use your drill/driver set to a low torque setting, or a hand screwdriver, to carefully back out all the screws or nails holding the slide strip to the drawer side. If using nails, gently pry the runner off once the fasteners are loose.
- Check the Wood Surface: Once removed, look at the wood underneath. If the wood is splintered or the screw holes are greatly enlarged, you will need to repair this area before installing anything new.
Step 3: Detach the Cabinet-Side Runner
This piece is mounted inside the cabinet or dresser shell. This is often where the most damage occurs, leading to sagging.
- Access the Runner: If the runner is low inside a deep cabinet, you might need a flashlight to see it clearly.
- Remove Fasteners: Remove all screws or nails holding the runner strip to the interior cabinet wall.
- Inspect the Mounting Surface: Pay close attention to the cabinet wall itself. If the screws tore out large chunks of wood, you will need to use wood filler or plug the old holes before mounting the new hardware (whether wood or metal). Structural integrity here is key for long-term function.
The Proven Fix: Installing New Drawer Slides
Now we move to installation. If you are sticking with wood-on-wood, you are simply replicating the old setup. If you are upgrading to metal hardware, follow the specific instructions provided by the hardware manufacturer, as measurements are crucial.
Section A: Installing New Wooden Runners (If Repairing Wood Only)
When replacing wood with wood, precise alignment ensures the drawer doesn’t bind.
Preparation: Sanding and Waxing
If the existing cabinet surfaces are rough where the old wood rubbed, take a piece of medium-grit sandpaper (around 120 grit) and smooth out any ridges or gouges inside the cabinet where the new slide will sit. For a very smooth glide, you can apply a thin layer of paraffin wax or beeswax to the contact surfaces of both the new runner and the interior cabinet rail. This classic trick reduces friction significantly.
Installation Steps for Wood Runners:
- Measure the Gap: If the original slide sat a specific distance up from the drawer bottom or the cabinet base, measure that distance accurately on both sides.
- Position the Cabinet Runner: Hold the new wooden runner strip against the cabinet interior wall, ensuring it is perfectly parallel to the floor (use a small level if you have one). Mark the screw holes lightly with a pencil.
- Pre-Drill (Crucial for Wood): To prevent the new wood runner from splitting, you must pre-drill pilot holes slightly smaller than your screws. This is especially important near the ends of the wood strip. For guidance on pilot hole sizing, This Old House’s pilot-hole drilling guide has clear visual references.
- Secure the Cabinet Runner: Drive the screws in, ensuring the runner is held tightly against the cabinet wall without warping.
- Install the Drawer Runner: Repeat the process, ensuring the slide strip on the drawer box matches the height of the cabinet strip exactly.
Section B: Upgrading to Metal Drawer Slides (The Long-Term Solution)
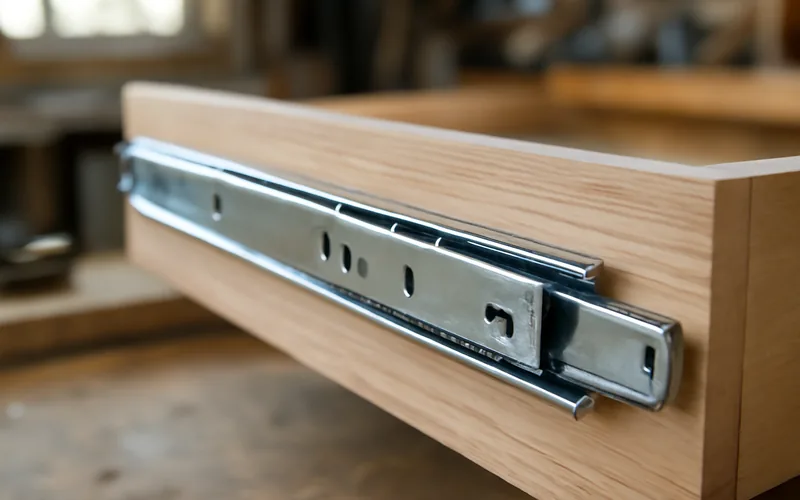
Upgrading is the most effective way to solve sticky drawer problems permanently. Most modern drawer slides come in pairs: one for the cabinet (the cabinet member) and one for the drawer box (the drawer member).
For beginners, side-mount ball-bearing slides are often the easiest to install.
Key Measurement Tip for Metal Slides
Metal slides require exact positioning. Most manufacturers provide templates. If yours did not, you must measure the ‘reveal’ — the distance between the slide and the edge of the drawer box or cabinet opening. Most side-mount slides need about 1/2″ (0.5″) of clearance per side, but always defer to the manufacturer’s specific instructions for required clearances.
📊 Most side-mount drawer slides require 1/2″ to 17/32″ of clearance on each side of the drawer, meaning the drawer box should be roughly 1″ to 1-1/16″ narrower than the cabinet opening — Source: cabinet-hardware manufacturer fitting specifications, 2026 (no single government or manufacturer page covers this consistently across brands, so no link is included here — check your specific slide’s packaging for exact clearance).
Installation Steps for Metal Slides:
- Remove Old Hardware Completely: Sand or clean off any old glue or debris from the inside of the cabinet and the drawer sides. The wood must be flat and solid.
- Install Drawer Member: Attach the thinner part of the metal slide (the drawer member) to the bottom edge of the drawer box sides, using the specific screw holes provided by the hardware. Pre-drill pilot holes as necessary. Ensure the slide is flush with the front edge of the drawer, or offset according to the required ‘reveal’ measurement.
- Install Cabinet Member: Hold the thicker part of the slide (the cabinet member) inside the cabinet, making sure it is perfectly level and positioned the correct distance from the cabinet floor/base. Mark your screw holes.
- Secure Cabinet Member: Drill pilot holes, then firmly attach the cabinet member. Double-check that the slides on both sides align perfectly at the front edge.
- Reinstall the Drawer: Carefully align the metal runners on the drawer with the tracks inside the cabinet. Push gently until you feel the mechanism engage. It should slide smoothly back and forth.
Troubleshooting Common Drawer Slide Replacement Issues
Even with careful planning, little issues can pop up. Here are a few quick fixes from firsthand workshop experience.
Issue 1: The Drawer Rubs or Binds After Installation
This almost always means the slides are not perfectly aligned, or the new hardware is too thick for the opening.
- Check for Obstructions: Remove the drawer and look closely inside the cabinet. Is a stray screw head sticking out? Is there a splinter?
- Re-Check Level: Measure the distance from the cabinet floor to the top edge of the installed slide on both the left and right sides. If the measurements are off by even 1/16th of an inch, the drawer will bind. Adjust the less secure side.
- If Upgrading: If you moved from thin wood to thick metal slides, the drawer might now be too wide for the opening. You may need to carefully shave a tiny amount of wood off the sides of the drawer box itself using a hand plane or an orbital sander. Go slow!
“The alignment check catches almost every binding complaint: measure both sides from the cabinet floor to the top of the slide. Anything more than 1/16 inch off between the two sides, and the drawer will bind no matter how many times you reinstall it.”
Issue 2: The New Metal Slide Won’t Engage
If you upgraded to full-extension slides, they often have a lever or clip that must be manipulated to connect the two parts.
Usually, you pull the drawer partway out, squeeze a small plastic tab or lever underneath the slide, and then push the drawer gently back in until it clicks. Check your slide packaging for specific release mechanisms.
Issue 3: Drawer Box Sides Are Too Thin or Weak
If the original drawer sides were thin particleboard, drilling screws directly into them might cause them to crumble.
The Solution: Use Backing Plates. Purchase small, thin squares of plywood or hardwood (about 2″ x 3″). Mount these ‘backing plates’ to the inside of the drawer side wall first. Then, install your drawer slide hardware onto these strong backing plates. This distributes the load across a wider, more stable area.
Maintenance Tips for Long-Lasting Drawer Operation
Once your drawer is sliding perfectly, you want to keep it that way! Good maintenance prolongs the life of any slide system, whether you stuck with wood or upgraded to metal.
For Wooden Slides:
The key here is friction reduction.
- Apply Wax Regularly: Every six months, take the drawer out and lightly rub the contact points with beeswax or bar soap. This keeps the wood lubricated.
- Watch Humidity: Avoid placing wooden dressers near high-humidity sources like radiators or AC vents, as rapid swelling and shrinking degrades the wood.
For Metal Slides (Ball-Bearing or Epoxy):
Metal slides need cleanliness and lubrication.
- Keep them Clean: Wipe down the tracks periodically. Dust and debris can stop bearings from rolling smoothly.
- Use the Right Lubricant: If you hear squeaking, use a small amount of white lithium grease or silicone spray designed for metal moving parts. Avoid WD-40 as a slide lubricant — it’s a water-displacing solvent rather than a true lubricant, and it evaporates quickly while attracting dust, so the squeak often returns within weeks.
Drawer Slide Types Comparison Summary
Understanding the options helps validate your replacement choice. While you started with wood, knowing the alternatives is valuable knowledge for future projects, including keeping the rest of the cabinet in good shape.
| Slide Type | Pros | Cons | Best For |
|---|---|---|---|
| Wooden Runners | Cheap, authentic to older furniture. | Prone to sticking, warping, and low weight capacity. | Antique restoration where original look is paramount. |
| Side-Mount Metal (Epoxy/Simple) | Affordable upgrade, good improvement over wood. | May not offer full extension, noisier than ball-bearing. | General cabinet upgrades where budget is a concern. |
| Ball-Bearing Slides (Undermount/Side-Mount) | Smoothest operation, high weight capacity, full extension usually available. | Most expensive, requires precise alignment during installation. | Heavy drawers (linens, tools) and high-use areas. |
Frequently Asked Questions (FAQ) About Wooden Drawer Slide Replacement
Can I just use wood glue to fix a cracked wooden slide instead of replacing it?
For minor hairline cracks, wood glue and clamps can work temporarily. However, if the crack is where the screw holds the slide, or if the wood is badly gouged, replacement is necessary. Glue will not stand up to the friction and weight long-term.
How do I know which size metal slide to buy if I’m upgrading?
Measure the thickness of the drawer side and the width of the opening. Most side-mount slides require about 1/2 inch clearance on either side of the drawer box. Also, measure the depth of the cabinet opening to ensure the slide length will allow full extension.
Is it necessary to pre-drill pilot holes when installing new wood slides?
Yes, absolutely. Especially if you are screwing into the end grain of the wood runner or into older, drier wood in the cabinet. Pre-drilling prevents splitting and ensures your screws seat tightly, which is vital for stability.
What if my drawer is much deeper than the standard cabinet opening?
You will need specialized “extension” or “heavy-duty” slides that are longer than the depth of the drawer box itself. These often rely on precise mounting locations indicated by the manufacturer to reach full extension.
How can I make my wooden drawer slides stop squeaking without replacing them?
Try applying a dry lubricant. A bar of dry soap or a stick of paraffin wax rubbed firmly onto the top edge of the bottom wooden runner (the part that rubs against the cabinet rail) can often silence squeaks instantly.
Do I need to replace the slides on both sides of the drawer at the same time?
Yes, this is a best practice. Even if only one side looks worn, replacing both simultaneously ensures the drawer remains level and glides evenly. Mismatched friction points will always cause the drawer to pull crookedly.
Conclusion: Glide Confidently Into Your Next Project
Replacing those stubborn wooden drawer slides might seem like a small repair, but it restores a huge amount of functionality and satisfaction to your furniture. Start with the quick repairs — cleaning, tightening, and lubricating — before assuming a full replacement is needed. When replacement is necessary, you now have the proven steps to remove the old runners, prepare your surfaces, and install either simple wood replacements or robust, modern metal hardware. Remember, the key to success in any DIY project lies in careful measurement and not rushing the removal or installation process. Once the drawers glide again, see also: restoring the rest of the cabinet and removing cabinet doors for a deeper clean.
Sponsored / affiliate links. As an Amazon Associate I earn from qualifying purchases. I may earn additional commission from eligible campaigns.