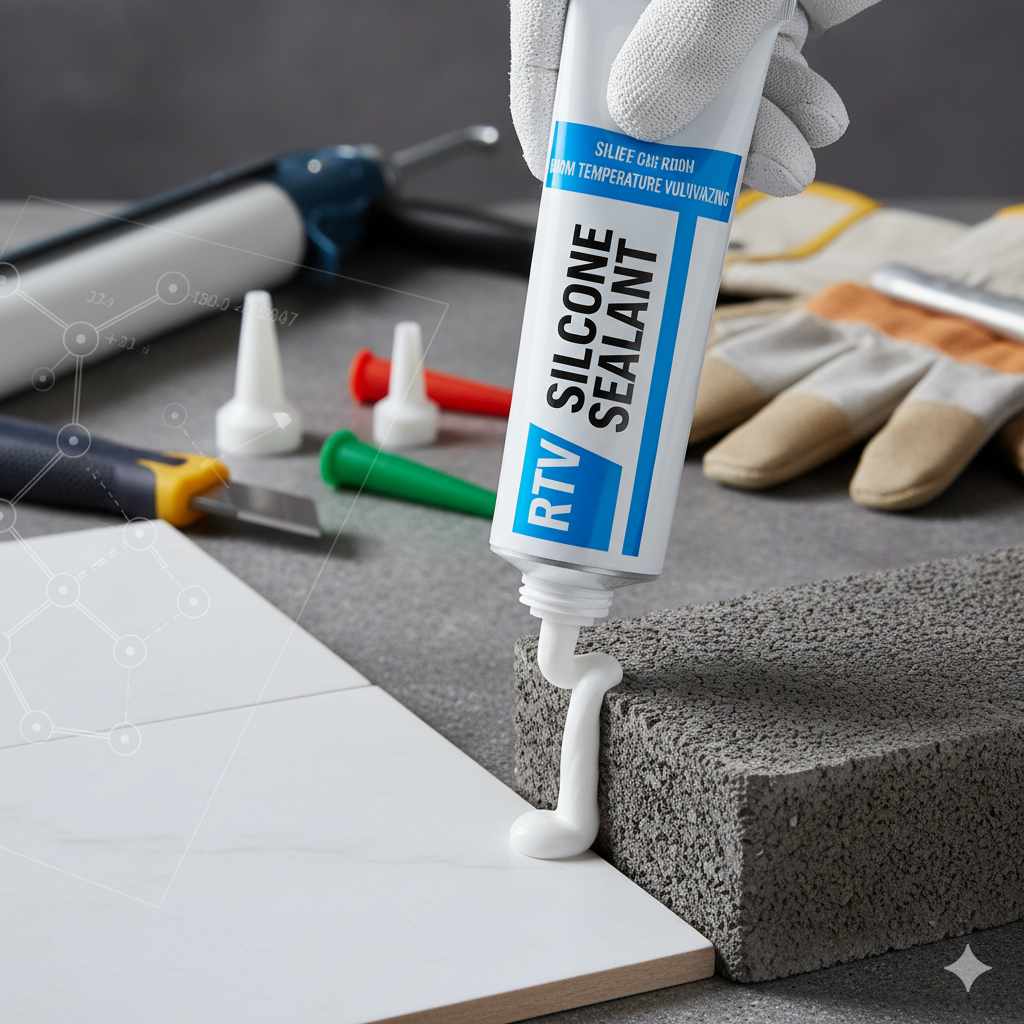
What Is RTV Silicone Sealant: Your Essential DIY Guide
RTV silicone sealant is a room temperature vulcanizing (RTV) flexible adhesive known for its excellent resistance to extreme temperatures, moisture, and chemicals. It cures into a durable, rubber-like seal, making it the go-to choice for sealing engine components, plumbing fixtures, and gaps where flexibility and high performance are mandatory.
Welcome to the workshop! If you’ve ever tried to fix a leaky engine gasket or needed a truly waterproof seal on an outdoor project, you’ve probably run into terms like “silicone” and “sealant.” Things get even more confusing when you see “RTV” attached to it. Don’t worry—that just sounds fancy!
Decoding the Acronym: What Does RTV Really Mean?
The key to understanding this product is right in the name: RTV. It’s a simple concept, but it defines how this sealant behaves compared to other glues or caulks you might have used.
RTV: Room Temperature Vulcanizing
Let’s break down those three letters:
- R (Room): This means the sealant doesn’t need high heat (like an oven or special heating element) to harden.
- T (Temperature): It cures perfectly well sitting right on your workbench or under the hood of your car, usually between 50°F and 90°F (10°C and 32°C).
- V (Vulcanizing): This is the magic word. Vulcanizing is the process where the sealant chemically changes from a soft paste into a strong, elastic solid—just like rubber. It does this by reacting with the moisture present in the air.
So, simply put, RTV silicone sealant is a paste that turns into durable rubber simply by being exposed to normal room air. This process is what gives it its fantastic flexibility and long-lasting seal.

Silicone vs Other Sealants: Why RTV Stands Out
You might have plumber’s putty or acrylic caulk lying around. Why grab the RTV silicone instead? It all comes down to chemistry and performance. Traditional caulks dry out or crack when they flex, but RTV silicone keeps its rubbery nature.
RTV silicone is generally superior for high-stress, high-temperature, or wet environments because of its core ingredient: silicone polymers.
- Flexibility: It can handle movement between two materials (like engine parts vibrating) without breaking the seal.
- Temperature Range: It resists extreme heat and cold far better than most other sealants.
- Durability: It resists UV rays, water, weathering, and many common oils and chemicals.
Types of RTV Silicone Sealant: Finding the Right Tube
Just walking down the sealant aisle can be overwhelming. Not all RTV silicones are created equal! They are categorized primarily by their chemical makeup, which affects how they cure and what color they are. For DIYers, the two most common types you’ll see are Acetoxy and Oxime cure systems.
1. Acetoxy Cure (Vinegar Smell)
This is often the most common and affordable type you find at hardware stores for general household sealing (like around windows or tubs). As it cures, it releases acetic acid, which smells distinctly like vinegar.
- Pros: Fast curing, excellent adhesion to glass and non-porous surfaces.
- Cons: The strong vinegar smell means it needs good ventilation. It can corrode sensitive metals like copper or brass over time.
2. Oxime Cure (Milder Smell)
Oxime-cure silicones are very popular for automotive and industrial applications. They release methanol or a similar chemical as they cure, resulting in a much milder, less offensive odor than the vinegar-smelling type.
- Pros: Better adhesion to plastics and metals, less corrosive to sensitive materials, often preferred for high-performance sealing.
- Cons: Sometimes takes slightly longer to fully cure than acetoxy types.
3. Other Specialized Types (For Advanced Users)
You might also see specialized RTVs, often identified by color:
- Red RTV: Usually designed for high-heat applications, often used as a replacement for traditional paper or cork gaskets in engines.
- Black RTV: Often used for general weatherproofing or where the seal needs to be inconspicuous.
- Clear/White RTV: Best for visible applications where you want the seal to blend in or be invisible (like glass enclosures).
Pro Tip for Beginners: If you are working on plumbing or general bathroom sealing, standard 100% silicone caulk (which is often acetoxy cure) is fine. If you are sealing anything metal, automotive, or electronic, opt for an Oxime or specialized RTV labeled for “Gasket Maker” use.
The Power of Color: Understanding RTV Applications
Color isn’t just cosmetic; it often tells you what the sealant is designed to handle. Here is a quick comparison of the most common colors you’ll encounter when buying RTV:
| Color | Primary Use Case | Key Property |
|---|---|---|
| Clear/Neutral Cure | Glass, windows, general weatherproofing. | Aesthetics, UV resistance. |
| White | Kitchens, bathrooms, plumbing fixtures. | Mold/mildew resistance (often). |
| Black | Outdoor applications, base plates, low-temperature sealing. | Weather resistance, discretion. |
| Red/Copper | Automotive engine components, exhaust manifolds. | Extreme high-temperature resistance (often 500°F+). |
When to Choose RTV Silicone: Project Suitability
RTV silicone sealant shines when other materials fail. It’s perfect for places that experience movement, significant temperature swings, or constant exposure to moisture.
Top 5 DIY Projects for RTV Silicone
- Automotive Gasket Making: This is the classic use. RTV replaces paper or cork gaskets on things like oil pans, valve covers, and water pumps. It creates a seal that handles heat and engine vibration better than rigid gaskets alone.
- Sealing Outdoor Lighting & Fixtures: Because it resists UV rays and moisture degradation better than acrylics, it’s great for sealing the housing of exterior lights or junction boxes.
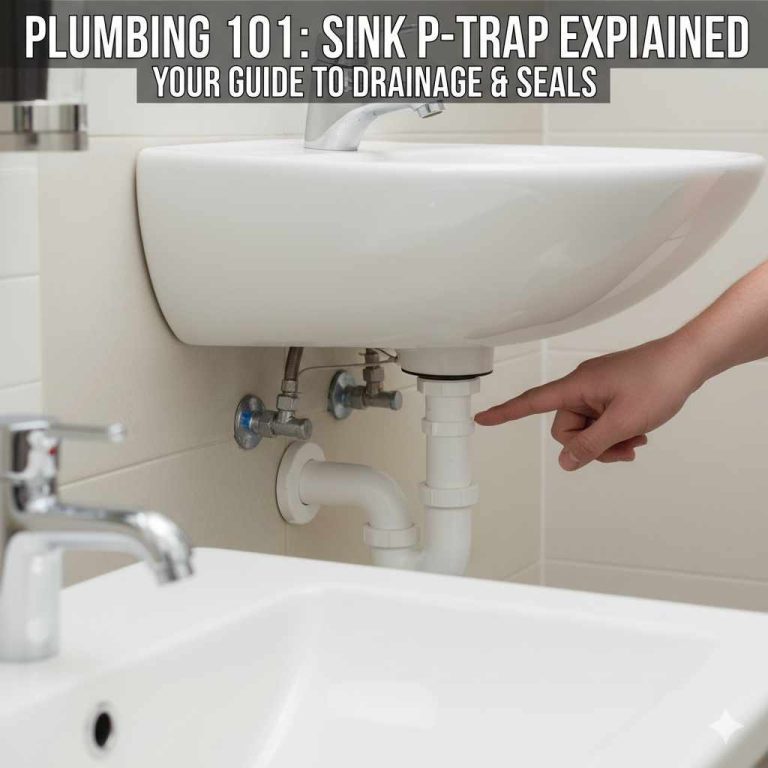
- Plumbing Penetrations: Use it to seal around pipes where they enter walls or floors, especially where movement might occur, ensuring a waterproof barrier that won’t crack with seasonal temperature changes.
- Aquarium Sealing (Special Grade): For large tanks, you must use a specific, non-toxic, 100% silicone sealant that is fully cured, as RTV handles water beautifully.
- Weatherproofing Expansion Joints: Where two different building materials meet (like wood siding meeting a brick foundation), RTV’s flexibility allows the materials to expand and contract without the seal breaking apart.
When NOT to Use RTV Silicone
While RTV is tough, it’s not a universal glue. Knowing its limitations saves you headaches later. Always check the manufacturer’s guidelines, but generally, avoid RTV where:
- High Structural Load is Required: RTV is flexible, not rigid. It’s a sealant, not a structural adhesive meant to hold heavy weight permanently.
- Painting is Necessary: Most RTV silicones cannot be painted over. If you need a paintable seal, look for specialized silicone-acrylic hybrids or latex caulk.
- Contact with Certain Plastics: Some RTVs (especially acetoxy types) can cause clouding or etching on sensitive plastics or polycarbonate.
- High Oil Contact (Non-Automotive Grade): Standard household silicone will break down quickly if exposed constantly to oils or solvents not rated for it.
For more guidance on material compatibility in construction and home repair, resources like the National Park Service technical briefs often offer excellent, deep-dive material science insights applicable to DIY repair choices.
How to Apply RTV Silicone Sealant Like a Pro: Step-by-Step
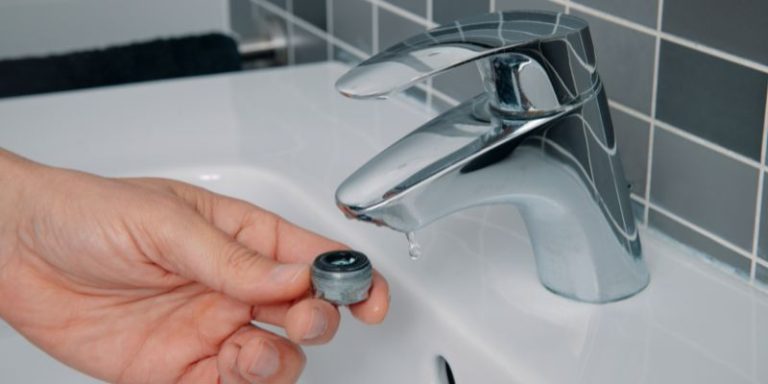
The application is everything. A $5 tube of the best RTV will fail if you don’t prep the surface correctly. This process is often called “Surface Preparation,” and it is the most important step.
Tools You Will Need
Gathering your supplies first makes the job smooth and quick!
- The correct RTV Silicone Sealant (in a caulking gun cartridge).
- Caulking Gun (a standard manual or battery-powered one).
- Razor blade or plastic scraper.
- Clean, lint-free rags.
- Solvent (like Acetone, mineral spirits, or Isopropyl Alcohol—check the RTV instructions!).
- Protective gloves and eye wear.
Step 1: Safety First and Surface Removal
Put on your safety glasses and gloves. If you are removing an old gasket or old caulk:
- Carefully use a plastic scraper or razor blade held at a very shallow angle to remove the bulk of the old material.
- Scrape away all visible residue. Leftover silicone prevents the new RTV from bonding properly.
Step 2: Surface Cleaning (The Critical Step)
This is where 90% of sealant failures happen. The surface must be completely clean, dry, and oil-free.
- Wipe the area down with a rag dampened with the recommended solvent (e.g., acetone for automotive, rubbing alcohol for general use).
- For engine work, you often need to get the metal perfectly clean so the RTV can adhere directly to the metal surface.
- Allow the solvent to fully flash off (evaporate). The surface must be bone dry before proceeding.
Step 3: Preparing the Tube and Gun
If you are using a standard cartridge:
- Use the puncture tool built into your caulking gun (or a long nail) to pierce the inner seal of the cartridge tip.
- Use a utility knife to carefully cut the nozzle tip. Cut at a 45-degree angle, making the opening slightly smaller than the gap you intend to fill. It is always better to cut less and trim more later.
Step 4: Applying the Bead
This takes practice, but you’ll get the hang of it. The goal is a continuous, even layer.
- Load the cartridge into the gun and apply steady pressure to start the flow.
- Hold the gun at a 45-degree angle, keeping the tip pressed lightly against the surface.
- Move the gun smoothly and steadily along the joint. Don’t stop or pause mid-bead, as this creates thick spots.
- For a gasket replacement, apply a thin, uniform bead (usually 1/16 to 1/8 inch thick) to one of the two mating surfaces.
Step 5: Tooling and Curing
Tooling means smoothing the bead for a neat finish and ensuring good surface contact.
- If creating a gap seal (caulking): Immediately after application, use a plastic caulk tool or a gloved finger dipped in soapy water to smooth the bead. This pushes the material into the joint.
- If creating a gasket: Immediately bring the two parts together. The RTV is designed to squeeze out under pressure. Do not wipe it away yet!
- Curing Time: Check the label! RTV needs time to react with air moisture. A typical seal might be tack-free (dry to the touch) in an hour, but it might need 12 to 24 hours to fully cure before being exposed to heat, pressure, or water. Do not rush this step.
- Gasket Squeeze-Out: After the sealant has set slightly (often 30-60 minutes, check the label), you can gently remove the excess material that squeezed out with a razor blade before it fully vulcanizes.
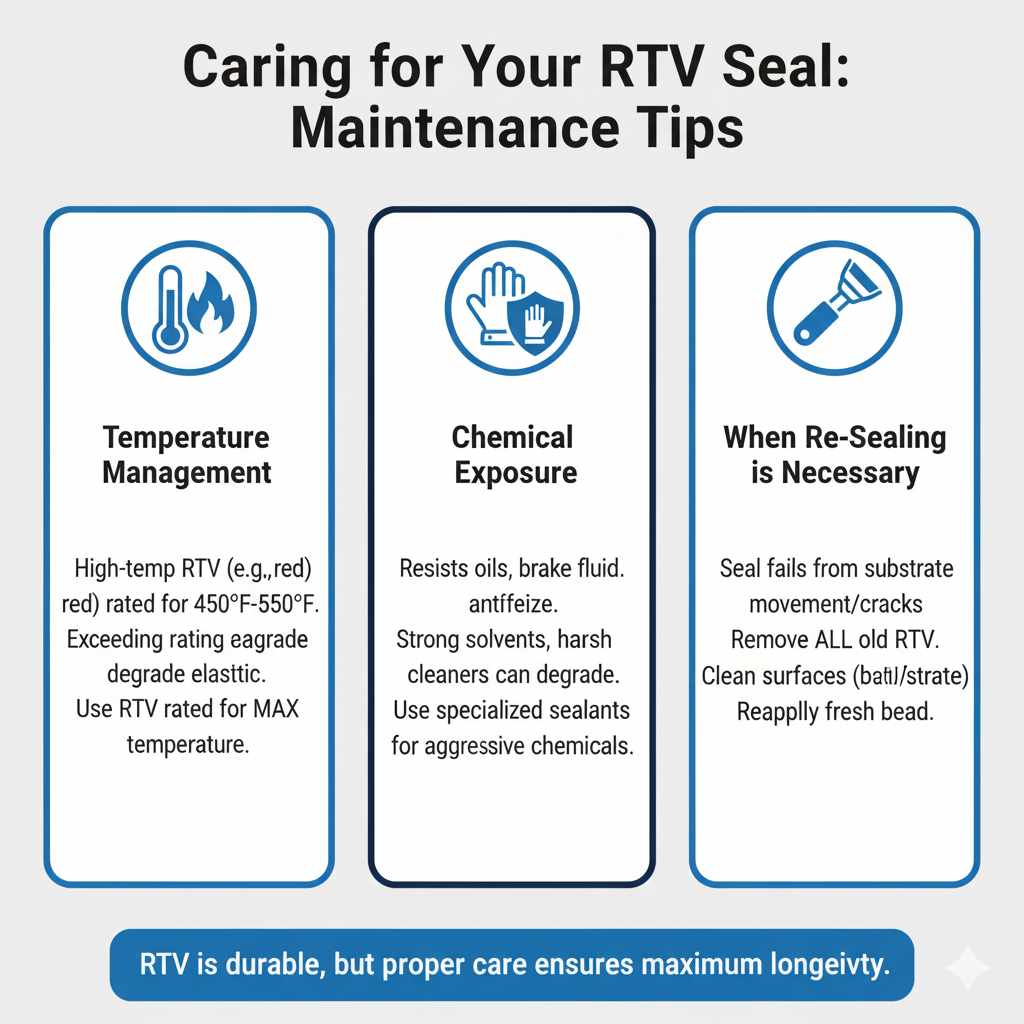
Caring for Your RTV Seal: Maintenance Tips
Once cured, RTV is very low maintenance. Its durability means it often outlasts the materials surrounding it! However, here are a few things to keep in mind for maximum longevity.
Temperature Management
If you used a high-temp RTV (like red) for an engine application, it’s rated for specific sustained temperatures (often 450°F to 550°F). If the temperature exceeds this rating consistently, the silicone can begin to degrade and lose elasticity over many years. Always use the RTV rated for the maximum expected operating temperature of your project.
Chemical Exposure
While RTV resists common oils, brake fluids, and antifreeze, prolonged contact with strong industrial solvents, gasoline, or harsh cleaning agents can soften or degrade the seal. For areas exposed to aggressive chemicals, use a sealant specifically formulated to resist those substances.
When Re-Sealing is Necessary
Unlike older gaskets that crumble, RTV usually fails because the substrate (the part it’s stuck to) moves, cracks, or warps. If you notice a leak, the best practice is usually to completely remove the old RTV layer, clean the surfaces thoroughly (back to bare metal/substrate), and reapply a fresh bead.
FAQ: Beginner Questions About RTV Silicone
Here are some common questions, I hear from folks just starting out with RTV sealants:
Q1: Can I use RTV silicone sealant instead of regular caulk around my bathtub?
A: Yes, if you buy 100% silicone caulk specifically designed for bathrooms. While technically a form of RTV, standard RTV “gasket maker” might not have the necessary mold inhibitors that bathroom-specific caulk includes, and it can sometimes be harder to clean up.
Q2: How long does RTV silicone take to cure completely?
A: This varies widely based on humidity, temperature, and thickness. Most RTVs are “tack-free” (dry to the touch) within 30 minutes to a couple of hours. However, full vulcanization—where it gains its maximum strength and heat resistance—often takes 12 to 24 hours. Always follow the specific cure time listed on your product tube.
Q3: Is RTV silicone safe for projects involving drinking water (like a new water heater connection)?
A: Only if the product is explicitly labeled as NSF-approved or safe for potable (drinking) water contact. Most automotive or high-temperature RTV silicone sealants are not designed for drinking water systems and may contain additives that are unsafe for consumption.
Q4: Can RTV silicone be removed once it has cured?
A: Yes, but removal requires mechanical effort. RTV silicone does not dissolve easily once cured. The best method is to cut and scrape it away using a razor blade or plastic scraper. For stubborn residue, a silicone remover gel or mineral spirits can help soften the remaining film, but complete removal usually requires patience and careful surface cleaning before reapplication.
Q5: Does RTV silicone expire or go bad in the tube?
A: Yes. RTV silicone sealant has a shelf life, typically between 12 to 24 months from the manufacturing date. Over time, exposure to moisture in the air can cause the sealant to partially cure inside the tube. If the sealant feels grainy, lumpy, or won’t flow smoothly, it should not be used. Always check the expiration date and store unused tubes tightly sealed in a cool, dry place.
Conclusion: RTV Silicone Sealant—A Small Tube with Big Capabilities
RTV silicone sealant is one of the most versatile and reliable sealing solutions available to DIYers and professionals alike. Its ability to cure at room temperature, remain flexible under extreme heat and cold, and resist moisture, chemicals, and vibration makes it indispensable for automotive, plumbing, outdoor, and household projects.
Understanding the different cure types, colors, and application methods is the key to using RTV correctly. When paired with proper surface preparation and adequate curing time, RTV silicone creates long-lasting seals that outperform traditional gaskets and rigid caulks in demanding environments.
Whether you’re sealing an engine component, waterproofing an outdoor fixture, or tackling a home repair that requires flexibility and durability, choosing the right RTV silicone for the job ensures professional-level results—even for beginners. Seal smart, follow the product guidelines, and your RTV application will last for years with confidence!