What Is The Best Wood For Butcher Block Countertops
The best wood for butcher block countertops balances hardness, durability against moisture, aesthetic appeal, and cost. Generally, hard maple is considered the top choice for its density and closed grain, offering a great mix of performance and affordability for most home chefs.
Choosing the right wood for your butcher block countertop can feel overwhelming. You want something beautiful that lasts for years, resists those dreaded water rings, and doesn’t break the bank. It’s easy to get lost in jargon about Janka hardness ratings or grain patterns. Don’t worry! I’m here to walk you through the options just like we were looking at wood samples together in the shop.
We will break down the top contenders simply, focusing on what really matters for a busy kitchen. By the end of this guide, you’ll know exactly which wood gives you that perfect, confident kitchen upgrade. Let’s find the perfect top for your cooking space!
The Butcher Block Basics: What Makes Wood Good for Kitchens?
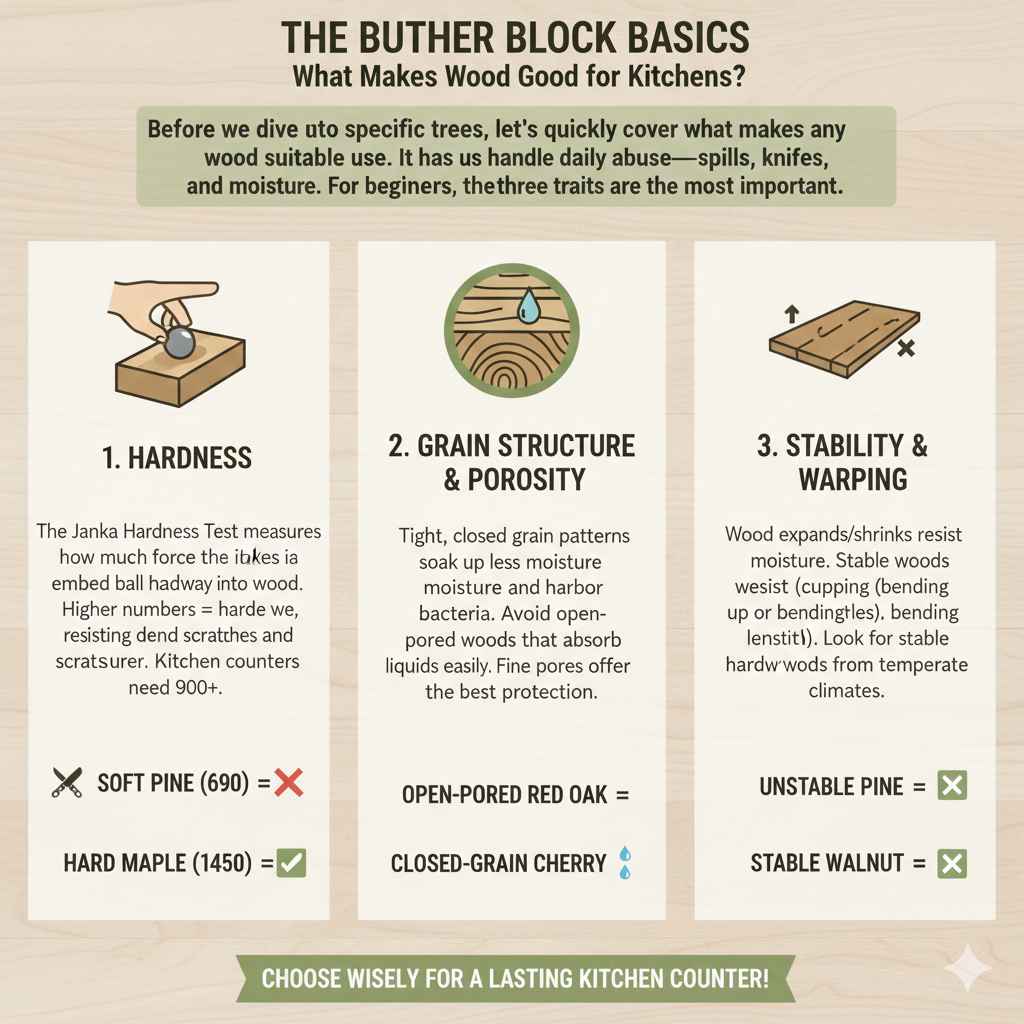
Before we dive into specific trees, let’s quickly cover what makes any wood suitable for countertop use. It’s not just about looking nice; it has to handle daily abuse—spills, knives, heat, and moisture. For beginners, these three traits are the most important.
1. Hardness (The Janka Rating Explained Simply)
The Janka Hardness Test measures how much force it takes to embed a steel ball halfway into a piece of wood. Higher numbers mean harder wood. Harder woods resist dents and scratches better. For a kitchen counter, you generally want a Janka rating of 900 or higher. Think of it this way: a soft pine (around 690) will show knife marks easily, while a hard maple (around 1450) stands up much better. You don’t need the absolute hardest wood, but avoiding the soft stuff is key.
2. Grain Structure and Porosity
This is super important for hygiene. Woods with very tight, closed grain patterns are less likely to soak up moisture and harbor bacteria. Open-pored woods, like red oak, can absorb liquids and oils easily, making them harder to keep clean and seal properly in a wet kitchen environment. We look for woods that have fine pores for the best protection.
3. Stability and Warping
Wood expands when wet and shrinks when dry. A good countertop wood resists dramatic changes. Woods that are very stable won’t cup (bend upwards) or bow (bend lengthwise) easily once they are properly sealed and installed. This stability usually comes from hardwoods grown in temperate climates.
The Top Contenders: What Is The Best Wood For Butcher Block Countertops?
There are many beautiful woods available, but only a few truly shine as the best options for home builders. We are focusing on the tried-and-true favorites that balance performance, availability, and cost. Here are the top three champions.
1. Hard Maple (The Gold Standard)
If you ask professionals what the best wood for butcher block countertops is, most will point straight to hard maple (Sugar Maple). It’s the traditional choice for high-end cutting boards and classic butcher blocks for a reason.
- Janka Hardness: Around 1450. This is very durable for everyday chopping and light banging.
- Grain: Closed, tight grain. It’s naturally resistant to moisture penetration and easy to sanitize.
- Appearance: Light, creamy color that brightens up a kitchen. It takes stains well if you want a different look, but it shines naturally.
- Affordability & Availability: Very common, especially in North America, which keeps the price reasonable compared to exotic woods.
My take: For beginners, maple offers the best mix of toughness and ease of maintenance. You get professional-grade results without paying exotic wood prices.
2. Cherry (The Beautiful, Warmer Option)
Cherry is a favorite for those prioritizing aesthetics. It’s softer than maple but incredibly beautiful and works wonderfully in a kitchen setting, especially if you want a warmer tone from the start.
- Janka Hardness: Around 950. It’s noticeably softer than maple, so you might see more surface marks over time, but it’s still solid.
- Grain: Fine and straight. It finishes beautifully and evenly.
- Appearance: Cherry starts as a light pinkish-brown and darkens significantly over time (a process called patination) to a rich, reddish-brown glow when exposed to light. This aging process is a huge selling point.
- Finishing Note: Cherry darkens beautifully when treated with natural oil finishes like Tung or Walrus oil.
3. Walnut (The Luxurious Dark Choice)
If you want that rich, dark, dramatic look straight out of the box, black walnut is your premium choice. It’s often used in high-end custom kitchens.
- Janka Hardness: Around 1010. It offers a great middle-ground hardness—tougher than cherry but softer than maple.
- Grain: Varies, often with beautiful, wavy patterns.
- Appearance: Ranges from dark brown to almost black. It requires less aging to reach a deep, satisfying color, making it instant luxury.
- Cost Consideration: Walnut is almost always significantly more expensive than maple or oak because it’s less abundant.
Comparative Analysis Table: Choosing Your Perfect Top
To help you compare apples to apples (or maple to walnut!), here is a straightforward look at the most popular choices. This table focuses on the characteristics that matter most to a DIY installer.
| Wood Type | Approximate Janka Hardness | Grain Porosity | Color Tone | Best For |
|---|---|---|---|---|
| Hard Maple | 1450 | Very Tight (Closed) | Light/Creamy | Maximum durability and budget-friendliness. The ultimate workhorse. |
| Red Oak | 1290 | Open/Porous | Medium Brown/Tan | Budget projects where appearance is secondary to toughness (requires excellent sealing). |
| Black Walnut | 1010 | Medium-Tight | Deep Chocolate Brown | High-end looks; prefers oil finishes; easier on knives than maple. |
| American Cherry | 950 | Tight | Pinkish-Brown (Darkens with Age) | Warm aesthetics and rich patina over time. |
| Teak | 1070 | Oily/Tight | Golden Brown | Excellent moisture resistance (often used in boats), but costly and sourcing can be tricky. |
Understanding Construction Styles: Edge Grain vs. End Grain
Once you pick the wood species, you have to decide how the wood pieces are put together. This affects both the look and the functionality of your counter, especially if you plan to use it as an actual cutting surface.
Edge Grain Butcher Block
This is the most common style you will find. Long, wide strips of wood are glued edge-to-edge. Imagine looking at the side of a 2×4—that’s the grain you see running along the length of the counter.
- Pros: It’s the most affordable option because it uses wider cuts of wood. It’s also the most stable style against warping.
- Cons: Because the grain runs lengthwise, it shows knife cuts and scratches more easily than end grain.
End Grain Butcher Block
This is the classic, high-end butcher block look, made famous by professional meat-cutting blocks. Small, square blocks are arranged so that the end grain—the tips of the wood fibers—faces upward.
- Pros: When you cut into it, the knife blade slides between the wood fibers rather than slicing through them. This makes it self-healing (fewer visible knife marks) and easier on your knives.
- Cons: It is significantly more expensive to produce. It requires more frequent oiling because the exposed end grain sucks up oil faster.
Beginner Tip: If this is your first DIY project and you plan to use a decorative top (like granite or laminate) next to it, an Edge Grain style is the simplest to purchase, install, and maintain. If you want to chop directly on it daily, save up for the End Grain style.
The Less Common but Still Viable Options
While maple rules the roost, other woods are great if they fit your local availability or budget. Here are a couple of solid alternatives.
Red Oak (The Budget Workhorse)
Red Oak is incredibly hard and very affordable. It’s often the cheapest hardwood available. However, it has a major drawback for countertops: its pores are very open.
You must use a very high-quality waterproof seal (like an epoxy finish, not just oil) to prevent liquids and bacteria from sinking into those visible pores. If you are just using it for a decorative side counter that won’t see heavy moisture, it’s a great value. Check out the U.S. Forest Service data on wood properties for comparative hardness scores on Oak species.
Hickory (The Super Hard Option)
Hickory is one of the hardest woods available (often scoring above 1800 on the Janka scale). It’s incredibly tough, making it highly resistant to dents.
- The Catch: It can be so hard that it dulls knives quickly if used for chopping. Also, it can be harder to work with during installation (sanding and routing) than maple.
- Use Case: Best for areas that need extreme durability but won’t see heavy direct cutting, perhaps an island end or a baker’s station used mainly for rolling dough.
Finishing: The Secret Sauce for Butcher Block Longevity
No matter what wood you choose, the finish determines how well it survives your kitchen. As a beginner, choosing the right finish saves you headaches later. There are two main paths: Food-Safe (Oiled) or Waterproof (Sealed).
Option 1: Penetrating Oil Finish (Food-Safe)
This is the traditional choice, best for surfaces intended for direct chopping (end grain blocks are ideal here). The oil soaks deep into the wood fibers, hardening them from the inside out and repelling moisture.
- Materials: Food-grade mineral oil (simple and cheap), or blends like Tung oil or Walrus oil finish.
- Maintenance: High. You must reapply oil generously every 1–3 months initially, then every 3–6 months once it’s seasoned.
- Pros: Completely food-safe. You can sand out scratches and re-oil easily.
- Cons: Offers minimal protection against standing water rings. Requires constant upkeep.
Option 2: Film-Forming Sealant (Waterproof Barrier)
This method involves creating a hard, plastic-like barrier over the wood surface. This is generally recommended for edge grain blocks or perimeter counters that won’t see direct, heavy chopping.
- Materials: Water-based polyurethane, oil-based polyurethane, or specialized countertop epoxy kits.
- Maintenance: Low. Once cured (usually 30 days for full cure), it requires very little maintenance aside from wiping down.
- Pros: Excellent water resistance. It prevents most liquids from penetrating, offering peace of mind.
- Cons: If the seal chips or scratches deeply, you have to sand down the entire area and refinish that section perfectly to blend it in, which can be tricky for DIYers. It is generally not recommended for surfaces where you plan to do intense cutting, as you are cutting into plastic coating.
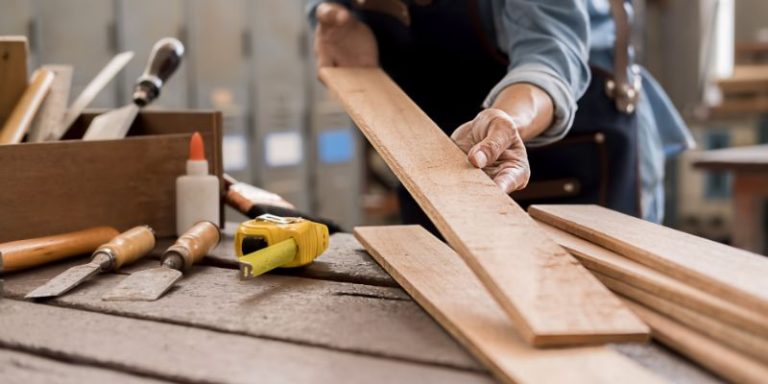
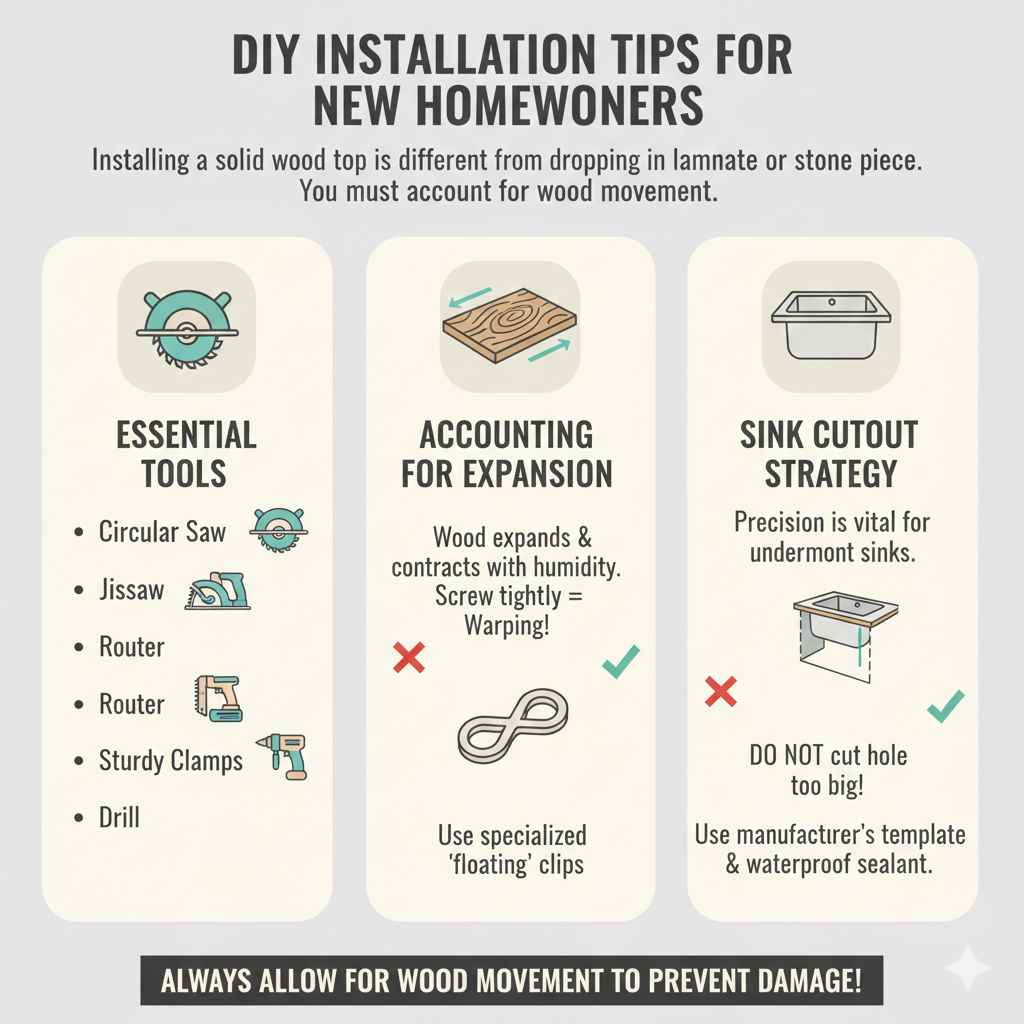
DIY Installation Tips for New Homeowners
Installing a solid wood top is different from dropping in a laminate or stone piece. You must account for wood movement.
Essential Tools for Installation
Make sure you have these basics ready before you start cutting or setting the counter:
- Circular Saw with a fine-tooth carbide-tipped blade (essential for clean, chip-free edges).
- Jigsaw (for curves around sinks).
- Router with a flush trim bit (to perfectly match any template).
- Sturdy clamps and plenty of straight edges for accurate marking.
- Drill and appropriate bits for securing clips.
Crucial Installation Step: Accounting for Expansion
This is where most beginner countertop projects fail. Wood expands across the width (perpendicular to the grain) and contracts as humidity changes. If you screw the counter down tightly to the cabinets without room to move, it will warp, bow, or crack your cabinets.
The Fix: Always use specialized clips or figure-eight fasteners when attaching the butcher block to the cabinet tops. These allow the top to “float” slightly as it adjusts to the environment. Never fasten it down with fixed screws drilled straight through the top into the base!
Sink Cutout Strategy
If you are installing an undermount sink (a sink mounted beneath the counter), precision is vital. Do not cut the hole bigger than necessary. Because wood moves, too large of a gap around the sink flange allows water to pool at the weakest point. Always use the sink manufacturer’s template and secure it with waterproof adhesive/sealant around the edge.
FAQ: Quick Answers for Butcher Block Beginners
Q1: Which wood is the absolute cheapest for a butcher block countertop?
A: Typically, Red Oak or soft maple will be the most budget-friendly choices. However, remember that cheaper woods often require more intensive sealing effort to match the durability of premium woods like hard maple.
Q2: Can I use regular construction lumber (like 2x4s) to make a butcher block?
A: While technically possible, it is highly discouraged. Construction lumber is often low-grade, contains knots, and may have been treated with chemicals unsuitable for kitchen surfaces. You must use kiln-dried, solid hardwood intended for cutting board construction.
Q3: Is hard maple too hard to cut on if I don’t plan to chop directly on it?
A: No. While it’s tough against knives, for general prep work, setting down hot pots (on trivets!), and everyday use, its hardness means it will hold its smooth, flat appearance longer than softer woods. It’s great even if you use it decoratively.
Q4: How often do I need to oil my butcher block counter?
A: This depends entirely on your finish. If you use a food-safe oil (like mineral oil), plan on monthly maintenance for the first six months, then quarterly thereafter. If you use a hard waterproof sealant (like polyurethane), maintenance is only needed if the seal is damaged.
Q5: Should I choose a light wood (like maple) or a dark wood (like walnut)?
A: This is purely aesthetic and related to maintenance visibility. Maple shows crumbs and minor surface imperfections more easily. Walnut hides stains and crumbs very well, but any light scratch or ding will stand out sharply against the dark background.
Q6: Can I place a hot pan directly onto my butcher block?
A: No matter how durable the wood, never place a very hot pan directly onto it, especially if using a food-grade oil finish. The rapid heat can scorch the surface or cause the oil to break down locally, leading to a white, damaged spot. Always use a trivet or hot pad.
Conclusion: Building Confidence with Your Wood Choice
As we wrap up, remember that the “best” wood for your butcher block countertop truly depends on your budget, your kitchen style, and how much maintenance you’re willing to commit to. If you value bulletproof durability and a reasonable price, Hard Maple is the clear winner and the choice I recommend for most first-time installers.
If you’re willing to spend a little more for instant warmth, American Cherry is gorgeous, and Walnut offers unmatched deep color. By understanding the Janka rating and committing to the right finish—oiled for chopping, sealed for protection—you are setting yourself up for success. Take your time selecting your wood, practice your cuts on scrap pieces first, and you will have a stunning, custom kitchen upgrade that you built with your own hands. You’ve got this!