What Size Hole Saw For 6 Inch Recessed Light: Essential Guide
Quick Summary:
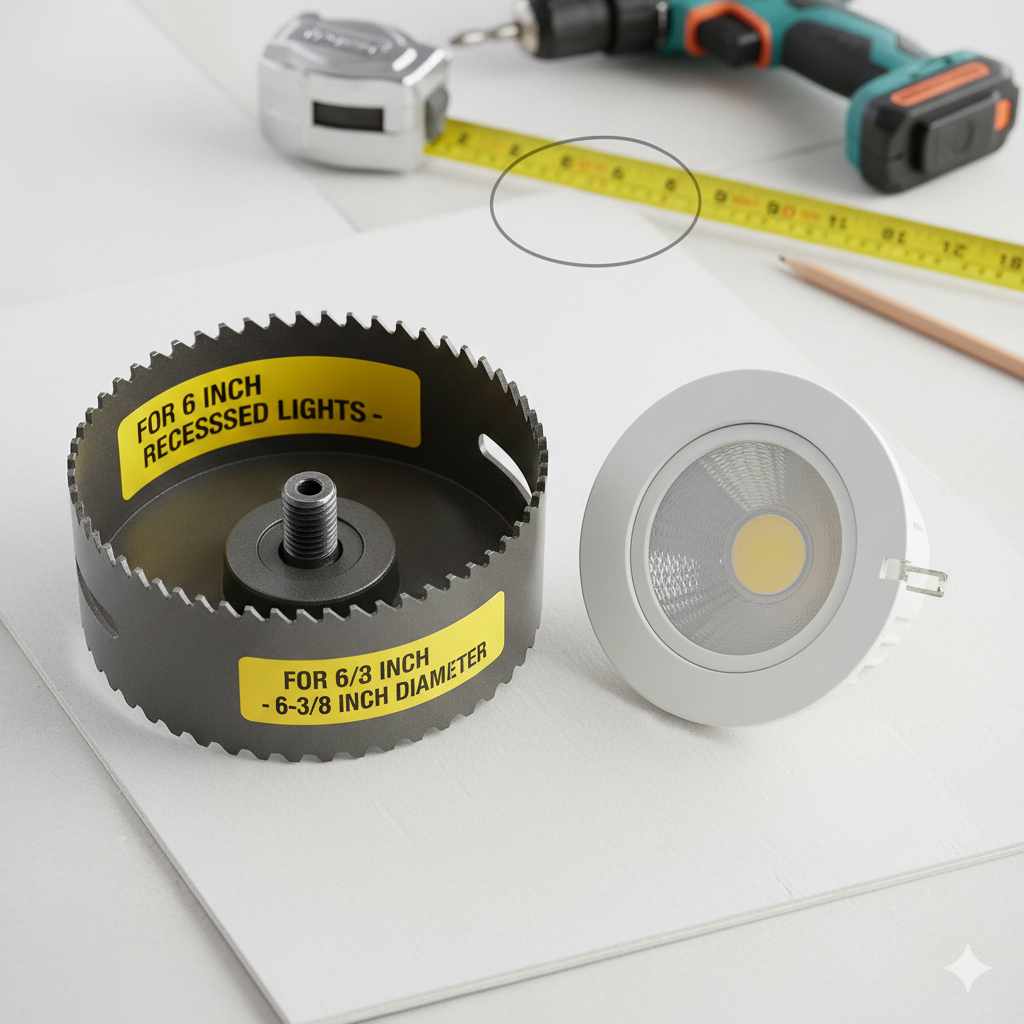
For a standard 6-inch recessed light, you’ll typically need a 6-inch hole saw. Always double-check your light fixture’s specifications, as some may require a slightly different size. Using the correct hole saw ensures a snug, professional fit for your lighting project.
Installing recessed lighting can dramatically change the look and feel of your home, making spaces brighter and more modern. But when it comes to cutting those perfect holes in your ceiling, a common question pops up: “What size hole saw do I need for a 6-inch recessed light?” It’s a question that can cause a bit of head-scratching, especially if you’re new to DIY projects. Don’t worry, though! Getting this right is simpler than you think, and with the right guidance, you’ll be well on your way to a beautifully lit room. We’re here to break down exactly what you need to know to pick the perfect hole saw size and make your installation smooth and successful.
This guide is designed to be your go-to resource. We’ll walk through the standard sizes, explain why precision matters, and give you the confidence to tackle this step of your lighting project. Let’s get your recessed lighting project off to a brilliant start!
Understanding Recessed Light Sizes: It’s Not Always About the Visible Trim
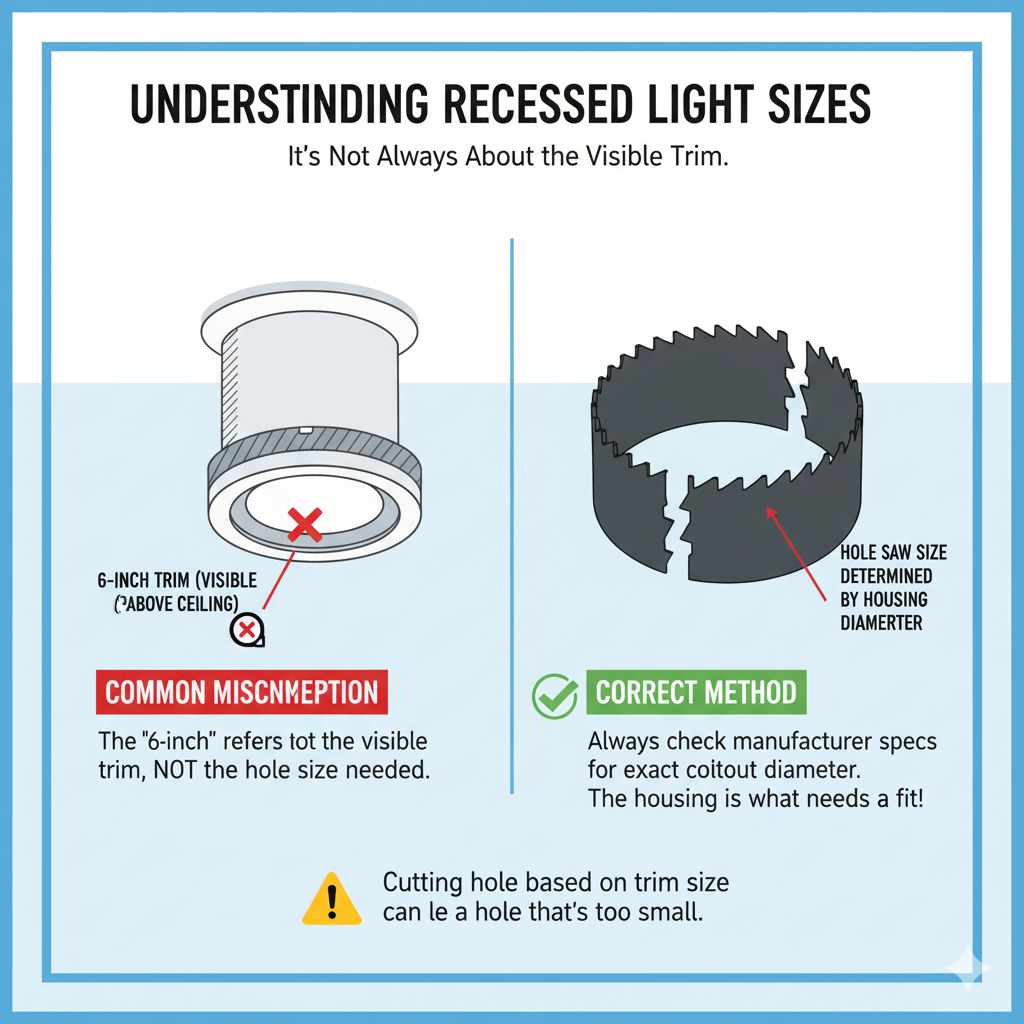
When we talk about a “6-inch recessed light,” it’s important to clarify what that measurement refers to. Most often, the “6-inch” designation refers to the size of the visible trim that you see from below the ceiling, not the actual size of the can or housing that sits above the ceiling. This is a crucial distinction because the hole saw size you need is determined by the outer diameter of the can, not the outer diameter of the trim.
Why is this important? Because the can is what needs to fit through the hole you cut. If you cut a hole based on the trim size, the can might be too large to pass through, leading to frustration and potentially damaged drywall. Always refer to the manufacturer’s specifications for your specific recessed light fixture to find the exact cutout diameter required.
The Standard Hole Saw Size for 6-Inch Recessed Lights
In most cases, for a recessed light fixture with a 6-inch visible trim, the actual can housing will require a cutout diameter that is slightly smaller. However, the most common hole saw size used for what is marketed as a “6-inch recessed light” is indeed a 6-inch hole saw. This is a widely adopted standard in the industry, making it the most likely size you’ll need.
Think of it this way: manufacturers design the cans so that when installed with a 6-inch trim, the cutout needed is generally around 6 inches. The trim then covers any slight gaps, providing a clean finish. However, as mentioned, there are exceptions.
When to Deviate from the Standard 6-Inch Hole Saw
While 6 inches is the go-to, there are a few scenarios where you might need a different size:
- Specific Fixture Designs: Some manufacturers might design their 6-inch trim fixtures with slightly larger or smaller housings. Always check the product packaging or the manufacturer’s website for the precise cutout diameter. This information is usually found in the installation instructions or specifications sheet.
- Older or Non-Standard Fixtures: If you’re replacing old recessed lights or using fixtures from a less common brand, their sizing might not adhere to the typical standard.
- Adjustable Housings: Some advanced recessed lighting systems might have housings that can accommodate slight variations, but the initial cutout size is still critical.
It’s always better to be safe than sorry. A quick check of your fixture’s documentation can save you a lot of potential headaches.
Tools You’ll Need for the Job
To successfully install your recessed lights and cut those precise holes, you’ll need a few essential tools. Having the right tools makes the job easier, safer, and results in a much cleaner finish.
- Cordless Drill or Hammer Drill: A powerful drill is essential for driving the hole saw. A cordless drill offers portability, while a hammer drill can be helpful for tougher materials, though usually not necessary for standard drywall.
- Hole Saw (6-inch, or as specified): This is your primary cutting tool. Make sure it’s sharp and designed for cutting through drywall. For most 6-inch recessed lights, a 6-inch diameter hole saw is the standard. You can find these at any hardware store.
- Measuring Tape: For accurate placement of your lights.
- Pencil: To mark your cut lines.
- Safety Glasses: Absolutely crucial to protect your eyes from falling debris.
- Dust Mask: Drywall dust can be irritating to breathe.
- Stud Finder: To locate ceiling joists and avoid cutting into them.
- Utility Knife: For scoring drywall or making minor adjustments.
- Drop Cloths or Plastic Sheeting: To protect your furniture and floors from dust and debris.
- Ladder: A stable ladder is necessary to safely reach your ceiling.
How to Choose the Right Hole Saw
When selecting a hole saw, especially for drywall, consider these factors:
- Material Compatibility: Ensure the hole saw is designed for cutting through drywall. Most general-purpose hole saws will work well.
- Arbor Type: Hole saws attach to a drill via an arbor. Make sure the arbor is compatible with your drill chuck. Most common hole saws use a standard chuck arbor.
- Pilot Bit: A hole saw typically has a pilot drill bit in the center. This bit helps guide the hole saw and keeps it from wandering, ensuring a cleaner cut.
- Blade Quality: Look for hole saws with sharp, durable teeth for efficient cutting and a longer lifespan.
For a 6-inch recessed light, you’re looking for a 6-inch diameter hole saw. It’s as straightforward as that, provided your fixture calls for it!
Step-by-Step Guide: Cutting the Hole for Your Recessed Light
Now that you have your tools and know the size, let’s get to the actual cutting. Precision and safety are key here.
Step 1: Plan Your Lighting Layout and Mark Locations
Before you cut anything, carefully plan where each light will go. Consider:
- Even Spacing: Ensure lights are spaced evenly for consistent illumination.
- Obstructions: Use your stud finder to identify ceiling joists, pipes, or electrical wiring. You’ll need to position your lights so they don’t interfere with these.
- Room Functionality: Place lights where they will be most effective for the room’s purpose (e.g., over countertops, task areas, or general living space).
Once you’ve finalized the positions, use your measuring tape and pencil to mark the exact center point for each light on the ceiling. Double-check your measurements!
Step 2: Measure and Mark the Cutout Circle
This is where you transfer the fixture’s required cutout size to your ceiling.
- Consult Fixture Specs: Refer to your recessed light’s installation manual for the exact cutout diameter. For a typical 6-inch fixture, this is often 6 inches.
- Mark the Center: Use your pencil to mark the center point of where the light will go.
-
Draw the Circle:
- Method A (Using the Hole Saw): Many hole saws have a template or can be used to lightly score a circle. Place the pilot bit of the hole saw at your center mark and gently rotate it to create a faint guideline.
- Method B (Using a Compass or Template): If you have a large compass, set it to half the diameter of your required cutout (e.g., 3 inches for a 6-inch hole) and draw a circle around your center mark. Alternatively, some recessed light kits come with a cardboard template for marking.
Ensure the circle is as perfectly round as possible and centered on your mark.
Step 3: Prepare for Cutting
Safety first! And a little preparation goes a long way in keeping your workspace clean.
- Clear the Area: Move any furniture or valuable items from directly below where you’ll be cutting.
- Lay Down Protection: Cover your floors and any remaining furniture with drop cloths or plastic sheeting. Drywall dust can be messy!
- Wear Safety Gear: Put on your safety glasses and dust mask.
- Position Ladder: Ensure your ladder is stable and positioned correctly so you can comfortably and safely operate the drill.
Step 4: Attach the Hole Saw to Your Drill
Securely attach the hole saw to your drill’s chuck. Make sure it’s tightened firmly to prevent it from detaching during operation.
- Loosen the drill chuck.
- Insert the arbor shaft of the hole saw into the chuck.
- Tighten the chuck firmly around the arbor shaft.
- Give the hole saw a gentle tug to ensure it’s secure.
Step 5: Cut the Drywall
This is the main event! Take your time and let the tool do the work.
- Position the Drill: Place the pilot bit of the hole saw directly on your marked circle’s outline, at your center point.
- Start Slowly: Begin drilling at a slow speed. This helps the pilot bit engage the drywall and prevents the hole saw from skipping.
- Apply Steady Pressure: Once the pilot bit has started cutting, you can gradually increase the speed. Apply steady, even pressure. Don’t force it; let the sharp teeth do the cutting.
- Maintain a Straight Angle: Keep the drill as straight and perpendicular to the ceiling as possible. This ensures a clean, straight cut.
- Listen and Feel: You’ll feel the drill cut through the drywall. As you approach the end of the cut, you might feel the material break through. Ease up on the pressure to prevent the hole saw from plunging too aggressively and potentially damaging the other side of the drywall or whatever is above it.
- Remove the Plug: Once the cut is complete, you can carefully pull the drill and hole saw away. The drywall plug should either remain in the hole saw or fall out. If it’s stuck, you can usually pry it out with a screwdriver.
Step 6: Clean Up and Test the Fit
Once the hole is cut, it’s time for a quick cleanup and a fit test.
- Remove Debris: Carefully remove any loose drywall pieces from the hole.
- Inspect the Cut: Check the edges of the hole. If they are a bit rough, you can use a utility knife to trim any stray pieces for a cleaner finish.
- Test the Fit: Gently insert your recessed light fixture (or just the can part if the trim is separate) into the hole. It should fit snugly but without needing excessive force. If it’s too tight, you may need to carefully widen the hole slightly with your utility knife or a rasp, but avoid making it too loose.
If the fit is good, you’re ready to proceed with wiring and securing your recessed light fixture according to its specific installation instructions. For more in-depth electrical work, always consult local building codes and consider hiring a qualified electrician.
Hole Saw Sizes for Different Recessed Light Trims: A Quick Reference
While this guide focuses on 6-inch lights, it’s helpful to see how hole saw sizes generally correspond to common recessed light trim sizes. Remember, these are typical, and checking your fixture’s specs is always paramount.
| Visible Trim Size (Nominal) | Typical Cutout Diameter (Approximate) | Recommended Hole Saw Size |
|---|---|---|
| 3 inches | 2.5 – 3 inches | 3 inches |
| 4 inches | 3.5 – 4 inches | 4 inches |
| 5 inches | 4.5 – 5 inches | 5 inches |
| 6 inches | 5.5 – 6 inches | 6 inches |
| 8 inches | 7.5 – 8 inches | 8 inches |
As you can see, the nominal trim size often directly corresponds to the recommended hole saw size. However, the actual required cutout diameter can vary by manufacturer. Always verify your specific fixture’s requirements.
Safety First: Essential Precautions When Using a Hole Saw
Working with power tools, especially overhead, requires a strong focus on safety. Here are some key precautions:
- Read Your Tool Manuals: Familiarize yourself with the operation and safety features of your drill and hole saw.
- Wear Safety Gear: Always wear safety glasses and a dust mask. Hearing protection can also be beneficial for prolonged use.
- Secure Your Ladder: Ensure your ladder is on a stable, level surface and properly positioned. Never overreach.
- Maintain a Firm Grip: Hold your drill with both hands when possible, especially when starting the cut.
- Avoid Loose Clothing and Jewelry: These can get caught in the drill.
- Keep the Work Area Clear: Remove tripping hazards and ensure good lighting.
- Unplug When Changing Bits: Always disconnect the power source from your drill before attaching or removing a hole saw.
- Be Aware of What’s Above: Before cutting, confirm there are no unexpected wires, pipes, or joists where you plan to drill. A reputable source like the U.S. Department of Energy provides excellent tips on energy-efficient lighting, underscoring the importance of proper installation.
By following these safety guidelines, you can significantly reduce the risk of accidents and injuries.
Common Mistakes to Avoid
Even with careful planning, DIYers can sometimes run into issues. Here are common mistakes to steer clear of:
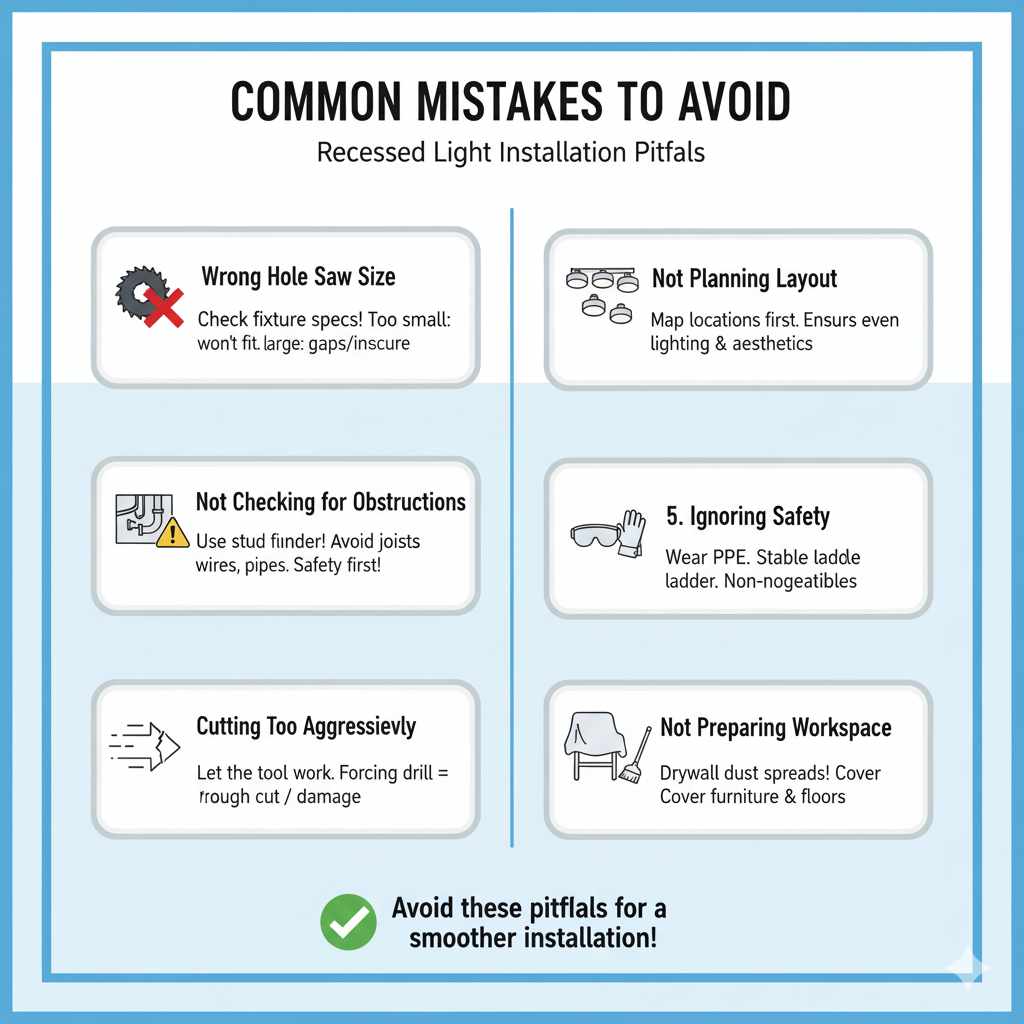
- Using the Wrong Size Hole Saw: This is the most frequent error. Always check your fixture’s specifications. A hole that’s too small means the light won’t fit; too large and you’ll have gaps that the trim might not cover, or the fixture might not be secure.
- Not Checking for Obstructions: Cutting into a ceiling joist, electrical wire, or plumbing pipe can lead to costly repairs and safety hazards. Always use a stud finder and be cautious.
- Cutting Too Aggressively: Forcing the drill can lead to a rough cut, damage to the drywall, or the hole saw binding. Let the tool work at its own pace.
- Not Planning the Layout: Placing lights haphazardly can result in uneven lighting and an unappealing look.
- Ignoring Safety Precautions: This is non-negotiable. Always wear protective gear and ensure your ladder is stable.
- Not Preparing the Workspace: Drywall dust gets everywhere. Taking time to cover furniture and floors will save you a lot of cleaning later.
Avoiding these pitfalls will contribute to a smoother installation and a more professional-looking result.
Frequently Asked Questions (FAQ)
Q1: Do I really need a 6-inch hole saw for a 6-inch recessed light?
A: Typically, yes. The “6-inch” in a recessed light refers to the visible trim. The housing that fits into the ceiling usually requires a cutout around 6 inches. However, it’s always best to check the specific installation instructions for your light fixture to confirm the exact cutout diameter required.
Q2: Can I use a utility knife to cut the hole instead of a hole saw?
A: While it’s possible to cut drywall with a utility knife, it’s not recommended for recessed light holes. It’s very difficult to achieve a perfectly round, clean cut, and it’s much more time-consuming and labor-intensive. A hole saw is the correct tool for this job.
Q3: What if my hole is slightly too big?
A: If the hole is only slightly too big (e.g., by 1/8 to 1/4 inch), the trim of your recessed light fixture should cover it. If it’s significantly too large, you might need to patch the drywall and re-cut the hole, or consider using a larger trim ring if available for your fixture. For best results, aim for a precise cut the first time.
Q4: What if my hole is slightly too small?
A: If the hole is a bit too small, you can carefully use a utility knife or a rasp to shave off a small amount of drywall from the edges until the fixture fits snugly. Be cautious not to enlarge it too much.
Q5: Can I use a hole saw with a standard drill?
A: Yes, most standard corded or cordless drills with a sufficient power rating (check your drill’s specifications) can handle a 6-inch hole saw for cutting drywall. Ensure your drill has a chuck that can securely grip the arbor of the hole saw.
Q6: How do I ensure the hole is perfectly round and centered?
A: Carefully measure and mark the center point. Use the pilot bit of the hole saw to make a faint guide mark first, or use a compass to draw a precise circle. Start the cut slowly and maintain a steady, perpendicular angle with the drill.
Q7: Where can I find information on cutting holes in ceilings?
A: The manufacturer’s instructions for your specific recessed lighting fixture are the best source for cutout information. For general construction and home improvement guidance, reputable websites like This Old House or the National Association of Home Builders (NAHB) offer valuable resources.
Conclusion
Installing recessed lighting is a rewarding DIY project that can beautifully enhance your home. Understanding the correct hole saw size is a fundamental step to achieving a professional and seamless finish. For most 6-inch recessed lights, a 6-inch hole saw is your go-to tool. However, always remember to verify the specific cutout diameter required by your fixture’s manufacturer, as this is the ultimate guide to ensuring a perfect fit.
By gathering the right tools, prioritizing safety with measures like wearing protective gear and securing your ladder, and following a methodical approach to marking and cutting, you can confidently tackle this part of your lighting installation. Take your time, let the tools do the work, and don’t hesitate to consult your fixture’s manual. With this guide, you’re well-equipped to make precise cuts and bring brighter, more stylish illumination to your living spaces. Happy installing!