Why Is My Bathtub Not Draining: Essential Fixes
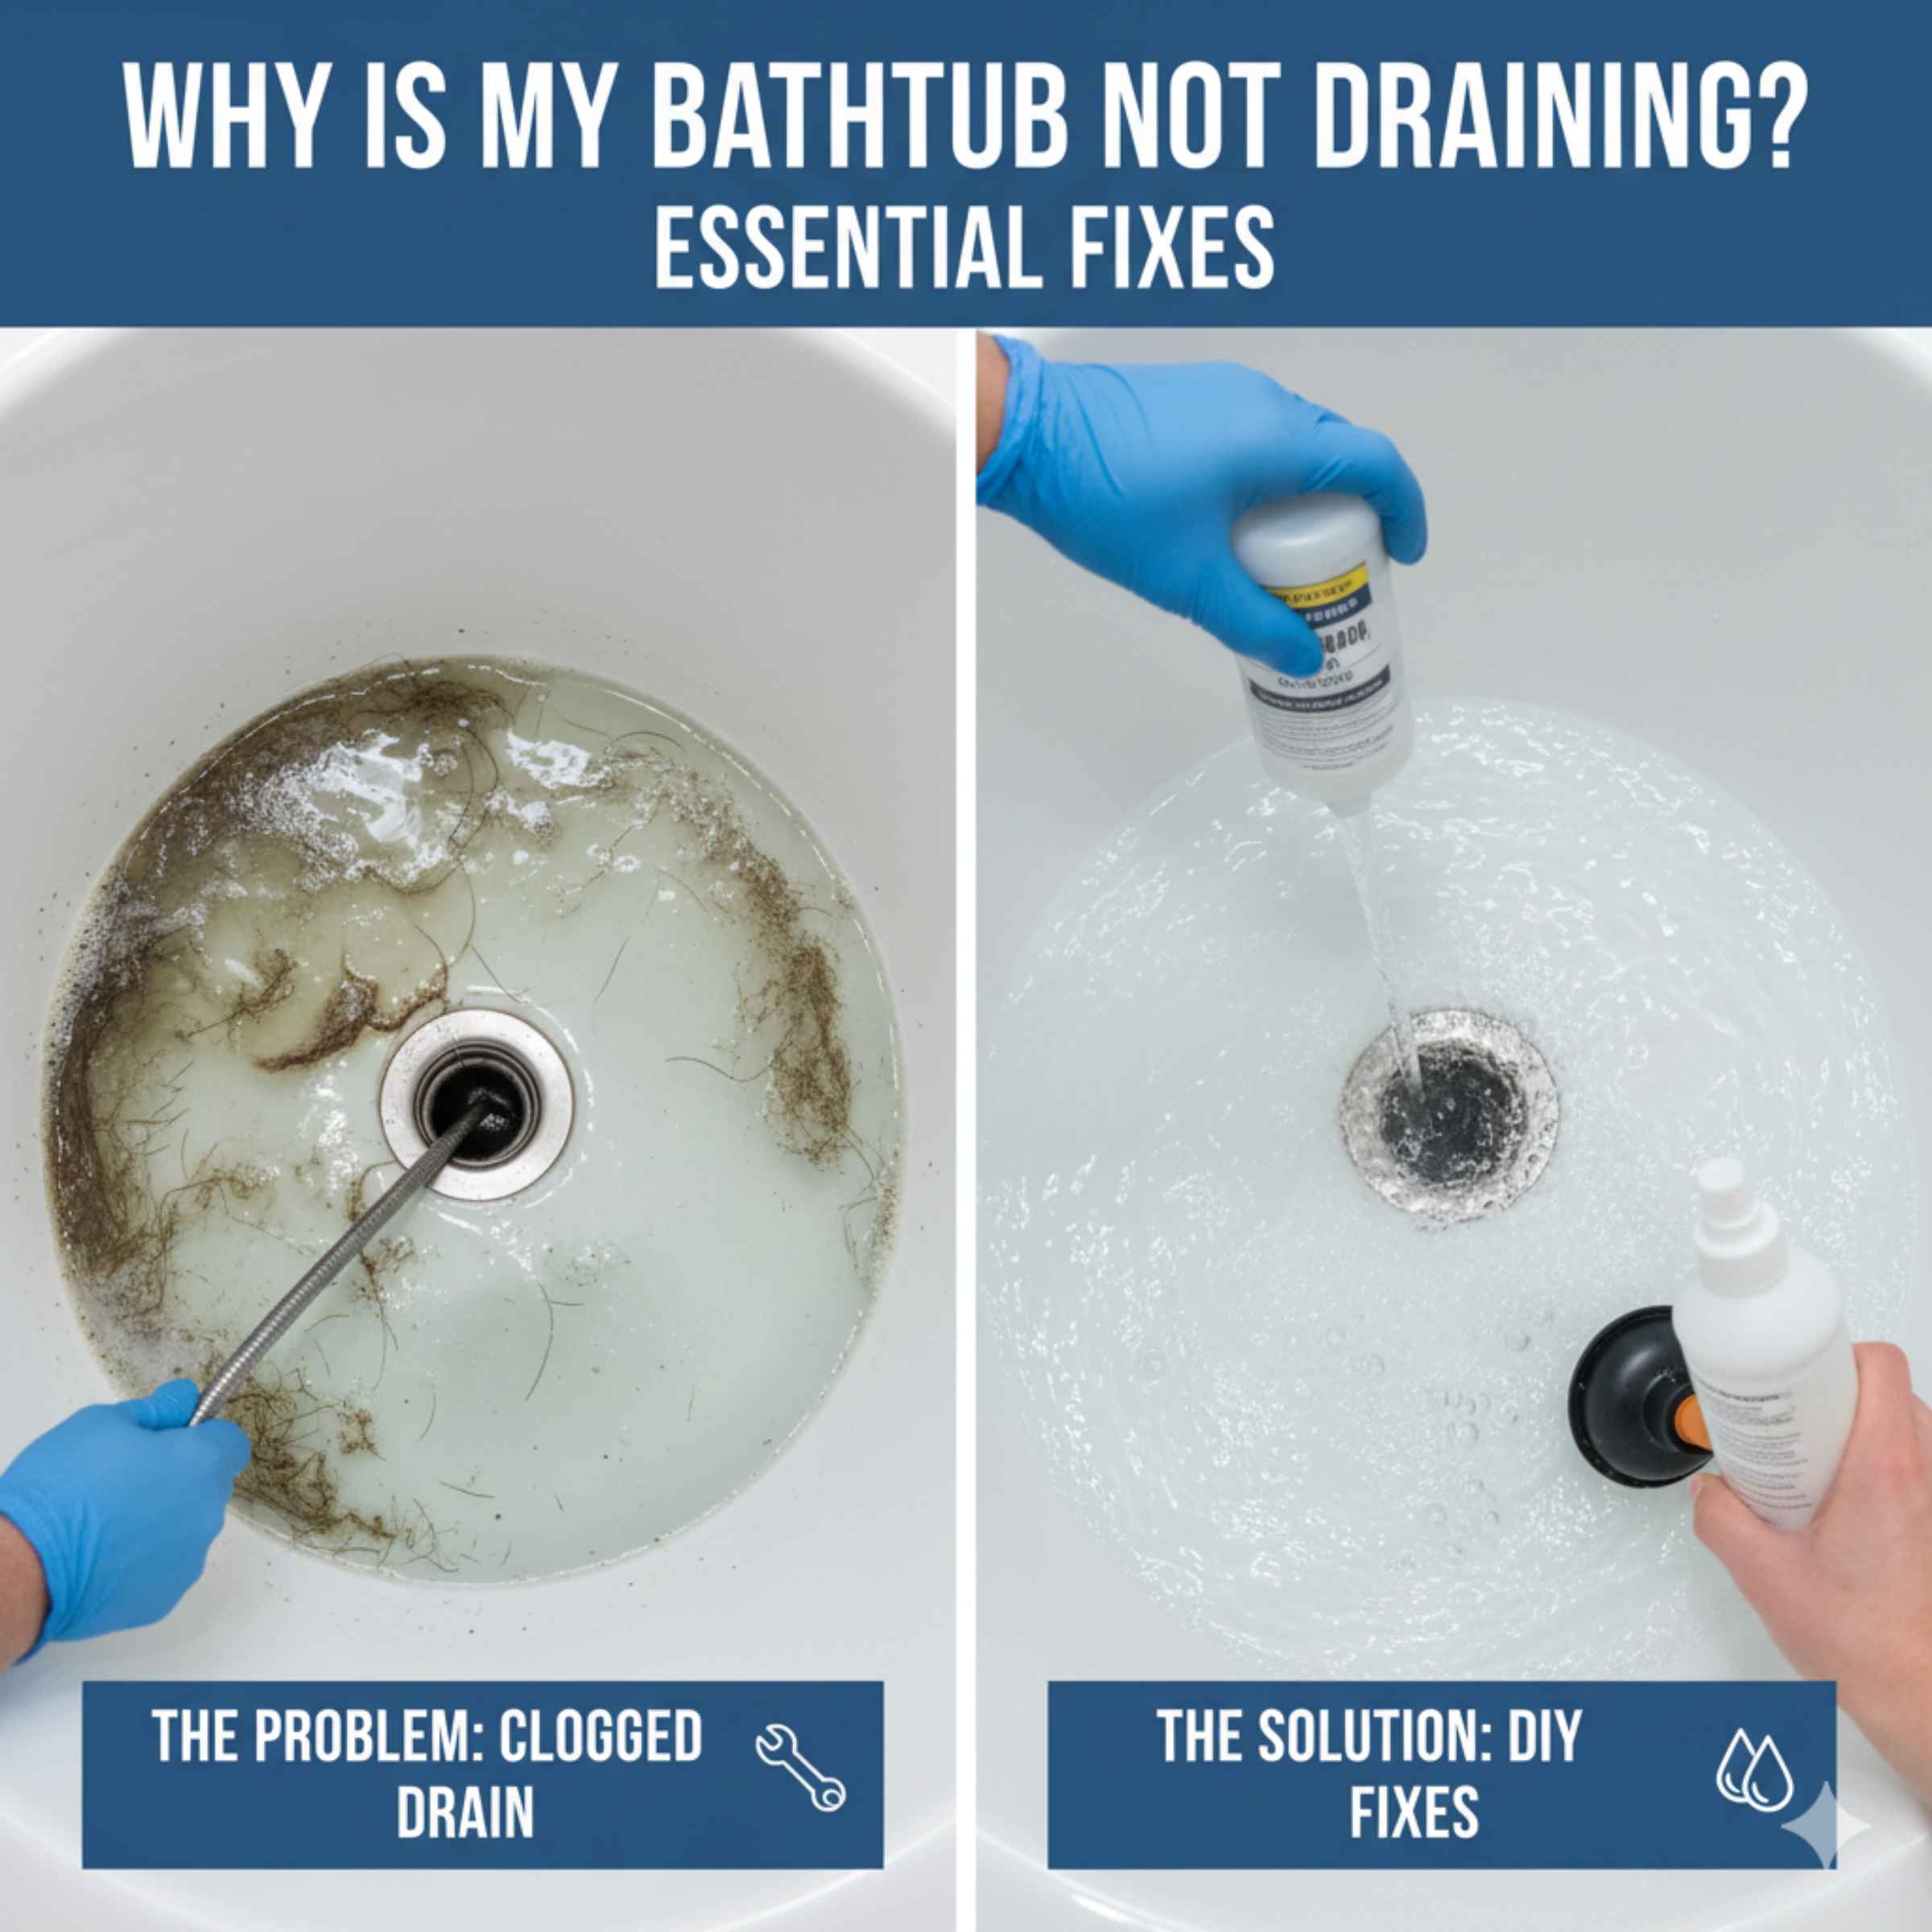
If your bathtub is not draining, the cause is almost always a clog made of hair, soap scum, and sludge trapped in the drain assembly or P-trap. The fix usually involves simple tools like a drain snake, a plunger, or a baking soda and vinegar mixture. You can clear most slow or stopped tubs yourself without calling a plumber.
That slow, gurgling bathtub that refuses to empty is one of the most frustrating things in a home. You step out of your shower, and suddenly you are standing in an inch of murky water. Don’t worry! This happens to almost everyone, and it is rarely a sign of a major disaster. Most bathtub draining issues come from simple clogs right under the stopper. You have the skills to tackle this! As your home guide, I’m going to walk you through easy, safe steps to clear that blockage and get your tub draining like new. We will start with the easiest fixes first, using tools you likely already own.
Understanding the Culprit: Why Bathtubs Clog
Before we start plunging and snaking, it helps to know what we are fighting. Bathtub drains rarely clog due to structural problems; they clog because of routine use. Think about what goes down your drain every day.
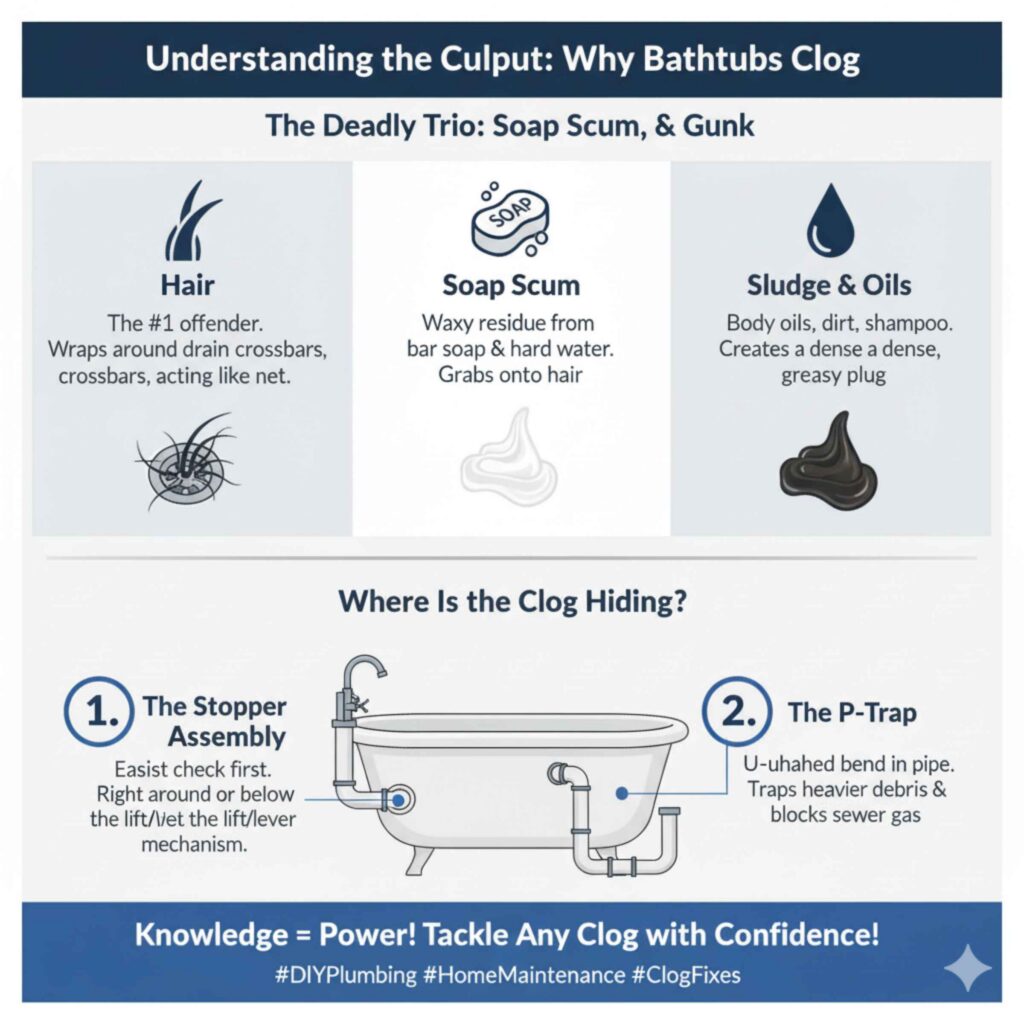
The Deadly Trio: Hair, Soap Scum, and Gunk
The vast majority of bathtub clogs are made up of three main ingredients that work together to form a sticky, stubborn blockage:
- Hair: This is the number one offender. Human hair, especially long hair, easily wraps around the crossbars inside the drain or the stopper mechanism, acting like a net to catch everything else.
- Soap Scum: Bar soap, combined with hard water minerals, creates a waxy, sticky residue called soap scum. This residue grabs onto the hair fibers.
- Sludge and Oils: Body oils, dirt, and residue from shampoos and conditioners mix with the hair and soap scum, creating a dense, greasy plug that slows the water flow significantly.
Where Is the Clog Hiding?
The blockage usually sits in one of two main locations. Knowing where to aim your efforts saves time and frustration.
- The Stopper Assembly: If you have a lift-and-turn, toe-touch, or lever-style stopper, the clog often happens right around or just beneath that mechanism. This is the easiest place to check first.
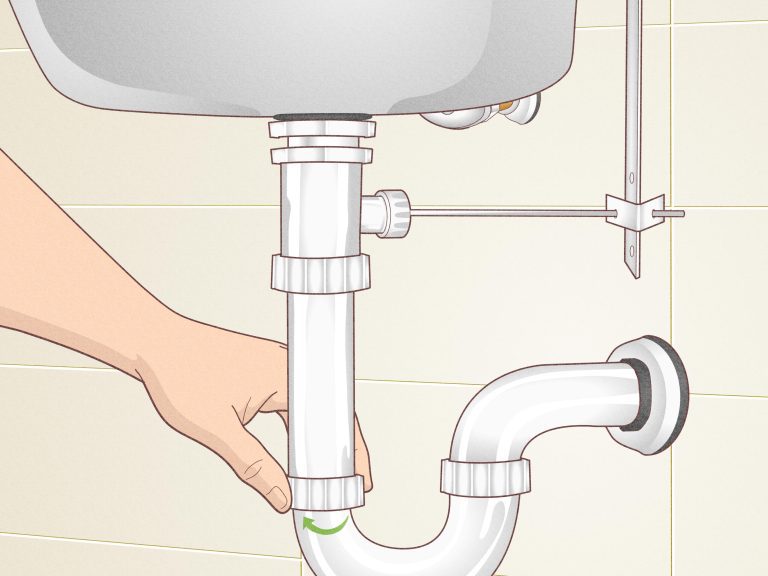
- The P-Trap: This is the U-shaped bend in the pipe directly beneath your tub drain, usually accessible from the access panel or if you crawl underneath. Its job is to hold water to block sewer gas, but it often traps heavier debris.
Step 1: The Quick and Easy Fixes (No Tools Required)
We always start simple. Before grabbing any specialty tools, let’s try the easiest, least invasive methods first.
Test the Flow with Hot Water
Sometimes, the blockage is just softened soap scum. A good flush might break it up.
- Boil a large pot of water (about a gallon). Be very careful handling boiling water.
- Slowly pour the boiling water directly down the drain opening. Do not pour it near the porcelain edge of the tub, as extreme temperature changes can sometimes crack old enamel.
- Wait five minutes. If the water drains faster, you might have solved a minor soap scum issue! Repeat if necessary.
The Baking Soda and Vinegar Volcano
This classic, safe, and inexpensive mixture creates a gentle chemical reaction that can dissolve grease and loosen hair tangles without damaging your pipes.
- Remove the stopper or strainer if possible.
- Pour 1 cup of baking soda down the drain. Use a funnel if needed to ensure it goes down the opening.
- Follow immediately with 1 cup of plain white vinegar. It will fizz and foam immediately.
- Cover the drain opening tightly with a stopper or a damp rag to force the reaction downward into the pipe, not up into the air.
- Let it sit for at least 30 minutes, or even an hour for tough clogs.
- Flush the drain with another kettle of very hot (or boiling) water.
Step 2: Using Mechanical Force (The Plunger)
If the chemical reaction didn’t work, it’s time to introduce some physical force. A cup plunger creates a vacuum that can often dislodge a stubborn plug.
Safety Note on Plungers
Make sure you are using the right tool. A sink plunger (cup-shaped) is best for flat surfaces like a tub drain. A toilet plunger (flange-shaped) is designed for the curved bowl of a toilet and won’t seal well on a tub.
How to Plunge Effectively
This method works best if you can create a good seal and a water column.
- Block the Overflow Drain: This is critical! Your overflow drain (the second opening on the side of the tub) must be completely blocked, or the pressure you build will just escape there. Stuff a wet rag firmly into the overflow opening.
- Fill the Tub Slightly: You need enough water to cover the bell of the plunger completely. Add a few inches of water to the tub basin.
- Position the Plunger: Place the plunger cup squarely over the main drain opening, ensuring the entire rim seals against the tub surface.
- Plunge Firmly: Push down gently first to expel the air, then pull up sharply with vigorous up-and-down motions for about 20 seconds. The goal is to push and pull the clog loose.
- Check the Drain: Pull the plunger away quickly. If the water rushes out, you succeeded! If it drains slowly, repeat the plunging process two or three more times.
Step 3: Addressing the Stopper Mechanism
If plunging fails, the clog is likely caught directly on or around your stopper mechanism. This requires physically removing the obstruction. Different tubs have different stopper types, but the goal is the same: remove the mechanism blocking the flow.
Identifying Your Stopper Type
Knowing what kind of stopper you have dictates how you remove it.
| Stopper Type | Appearance | Removal Tip |
|---|---|---|
| Lift-and-Turn | A knob on top that you turn to close and pull up to open. | Turn to the open position, then unscrew the center screw or lift the knob straight up after releasing the set screw. |
| Toe-Touch (Push-Pull) | You push down with your toe to close, and push again to open. | Push down firmly, and while held down, try to unscrew the top cap counter-clockwise. |
| Trip Lever (Pop-Up) | A lever on the overflow plate that moves a linkage rod inside the pipe. | Remove the overflow plate screws, carefully pull the entire linkage assembly out. Be gentle! |
Clearing Hair Around the Stopper
Once the stopper is out, you will almost certainly see a nasty hairball wrapped around the stem or linkage rod.
- Use an old rag or paper towel to pull off the visible debris.
- If you can see the opening, use a bent wire coat hanger or needle-nose pliers to carefully snag any remaining hair strands stuck deep inside the drain shoe.
- Reinstall the stopper mechanism, making sure it operates smoothly.
- Test the drain with running water.
Step 4: Snaking the Drain (The Heavy-Duty DIY Solution)
If removing the stopper didn’t clear the blockage, the clog has likely moved further down into the drain line, past the drain shoe and into the main drainpipe. This requires a drain snake, often called a drain auger. You can buy a simple, inexpensive plastic zipper tool or a more robust hand-crank metal auger at any hardware store.
Tool Spotlight: The Drain Snake
For beginner tub work, I highly recommend the plastic zipper clog remover (sometimes called a “drain hair removal tool”). They are cheap, disposable, and excellent at snagging hair just below the opening without risking damage to your plumbing.
How to Use a Drain Snake Safely
When snaking, remember: you are trying to hook the clog, not push it further down.
- Remove the stopper completely as described in Step 3.
- Gently feed the snake tip into the open drain. Do not force it. If you meet solid resistance immediately, stop and try to pull back slightly to clear the path.
- If using a plastic zipper tool, push it down until you feel resistance, then slowly twist and pull it back up. It should pull out a nasty wad of hair and scum.
- If using a metal auger, feed the cable until you hit the blockage. Lock the cable, then crank the handle clockwise. This action causes the tip of the snake to coil around the clog.
- Once you feel tension, slowly pull the auger back out, bringing the clog with it. Be prepared—this part is messy!
- Repeat the snaking process until you feel no more resistance and the snake moves freely through the pipe.
- Flush the drain thoroughly with hot water to wash away any remaining small debris.
Step 5: Chemical Drain Cleaners (Use with Caution)
Chemical drain cleaners are strong and effective, but they should be a last resort before calling a professional. Why? They can damage older pipes, ruin your garbage disposal (if you have one near the tub drain, which is rare but possible), and they are very hazardous to handle.
When to Use Chemicals
Only use these if the hair clog is too deep or too dense for mechanical tools to grab, and you feel hesitant about dismantling pipes under the tub.
Key Safety Rules for Chemical Cleaners
If you decide to proceed, follow these rules precisely as outlined by the manufacturer and safety guidelines, such as those recommended by the U.S. Environmental Protection Agency (EPA) regarding drain openers:
- Never Mix Chemicals: If you used baking soda/vinegar or another cleaner, flush the pipe thoroughly with water before pouring in a chemical cleaner. Mixing chemicals can release toxic gas.
- Wear Protective Gear: Always wear safety goggles and rubber gloves. These liquids can cause serious burns.
- Follow Directions Exactly: Do not leave the chemical in longer than recommended, as it can start to etch the metal or plastic pipes.
- Flush Heavily: After the recommended time, flush with copious amounts of cold water.
When to Call a Professional Plumber
Sometimes, the issue isn’t just hair in the drain shoe. If you have tried the first four steps and the tub still won’t drain, it is time to stop and call a licensed professional.
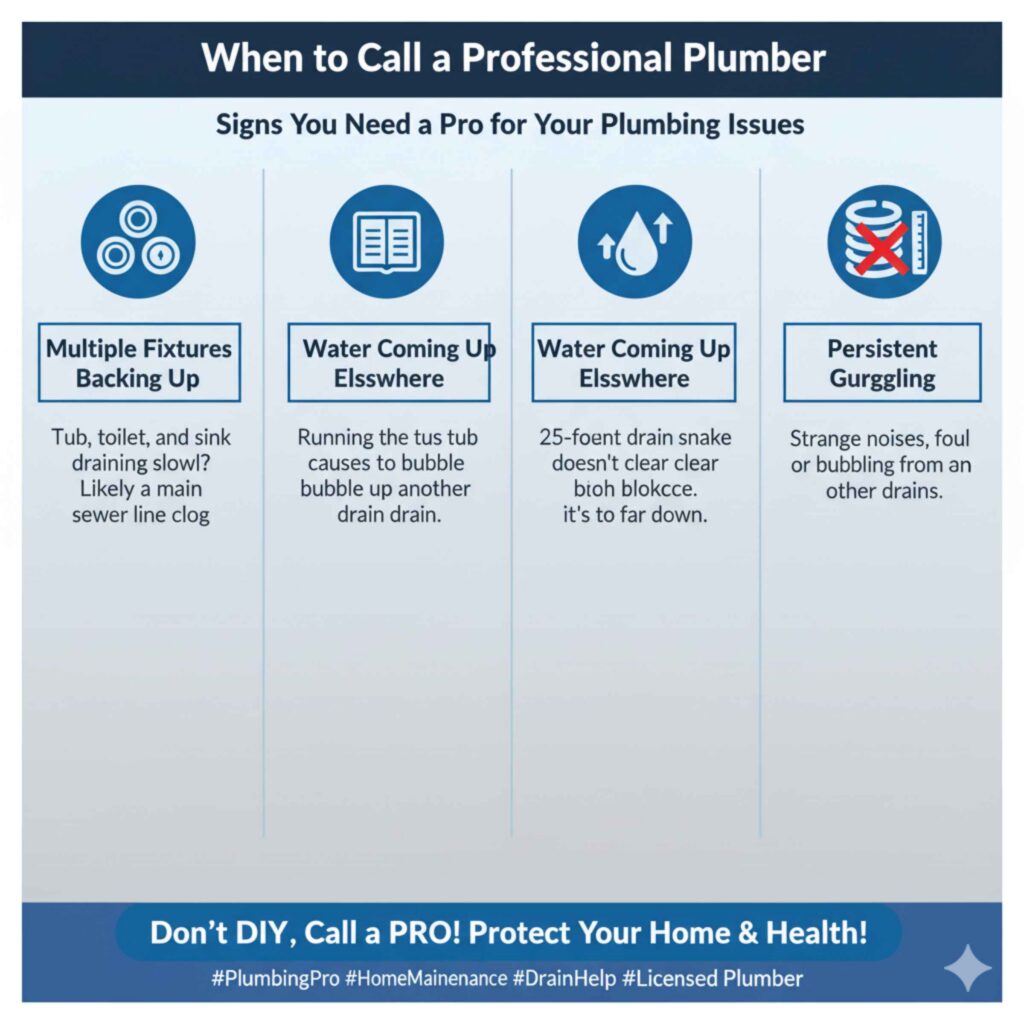
Signs You Need a Pro
- Multiple Fixtures Backing Up: If your bathtub, toilet, and sink are all draining slowly or backing up at the same time, you likely have a main sewer line clog, which is beyond beginner DIY repair.
- Water is Coming Up Elsewhere: If you see water bubbling up in a different drain when you run the tub, this indicates a serious blockage deep in your plumbing system.
- You Can’t Reach the Clog: If your 25-foot drain snake doesn’t reach the blockage, it is too far down for standard home equipment.
- Persistent Gurgling: Strange noises, gurgling from other drains, or foul odors suggest a deeper vent or trap issue.
Preventing Future Bathtub Clogs
Once your tub is draining freely, you want to keep it that way! Prevention is always easier than repair.
Top 3 Prevention Tips
| Prevention Method | What It Catches | DIY Tip |
|---|---|---|
| Install a Hair Catcher | Nearly all hair before it enters the pipe. | Use a simple mesh or silicone screen that sits over the drain opening. Clean it after every shower. |
| Monthly Maintenance Flush | Softens soap scum and grease buildup. | Use the baking soda and vinegar method (Step 2) once a month, followed by a hot water flush. |
| Avoid Bath Oils/Heavy Shampoos | Reduces greasy buildup in the P-trap. | If you use heavy bath oils or moisturizers, take a shower instead, or flush the tub drain with extra hot water immediately after the bath. |
Frequently Asked Questions (FAQ) About Bathtub Drains
Q1: How long should a bathtub normally take to drain?
A bathtub should drain completely in under two minutes. If it takes longer than three minutes, you have a slow clog that needs attention before it stops completely.
Q2: Can a clog in the sink affect my bathtub drain?
It depends on your home’s plumbing layout. In many homes, the sink and tub share the same vertical drain line before connecting to the main sewer pipe. If one clogs, it can sometimes affect the other.
Q3: Is it safe to pour bleach down a slow drain?
No, it is generally not recommended. Bleach is corrosive and hazardous, especially if it mixes with other chemicals. Hot water and baking soda are much safer for pipe health.
Q4: What is the best tool for removing hair from a tub drain?
For beginners, the small, flexible plastic zipper tools are the best. They cost only a few dollars, grab hair easily, and don’t risk damaging the pipes like harsh chemicals or heavy metal snakes might.
Q5: Do professional drain cleaners work better than household remedies?
Chemical cleaners often work faster on grease and scum, but they are harsh. For hair clogs, mechanical removal (snaking) is often more effective and safer for your pipes long-term.
Q6: If I remove the stopper and see no clog, what do I check next?
If the stopper is clear, the clog is deeper in the pipe leading toward the wall or floor. Your next best step is using a drain snake (auger) to probe that deeper area.
Conclusion: Taking Control of Your Plumbing
Seeing that tub water stand still is certainly an unwelcome sight, but as we have walked through today, fixing a slow or stopped bathtub drain is a totally achievable DIY task. Remember, the vast majority of the time, the culprit is just a stubborn wad of hair clinging to the stopper or lurking just past the P-trap.
By starting with the gentle power of baking soda and vinegar, moving to the suction of a plunger, and finally using a simple drain snake, you build confidence with each step. You are now equipped with the knowledge to diagnose the problem and apply the right fix safely. Don’t hesitate to tackle this—you save money, learn a valuable home skill, and enjoy the satisfaction of watching that water swirl away quickly once again! Keep those drains clear with simple monthly maintenance, and you’ll avoid that frustrating standing water for good.