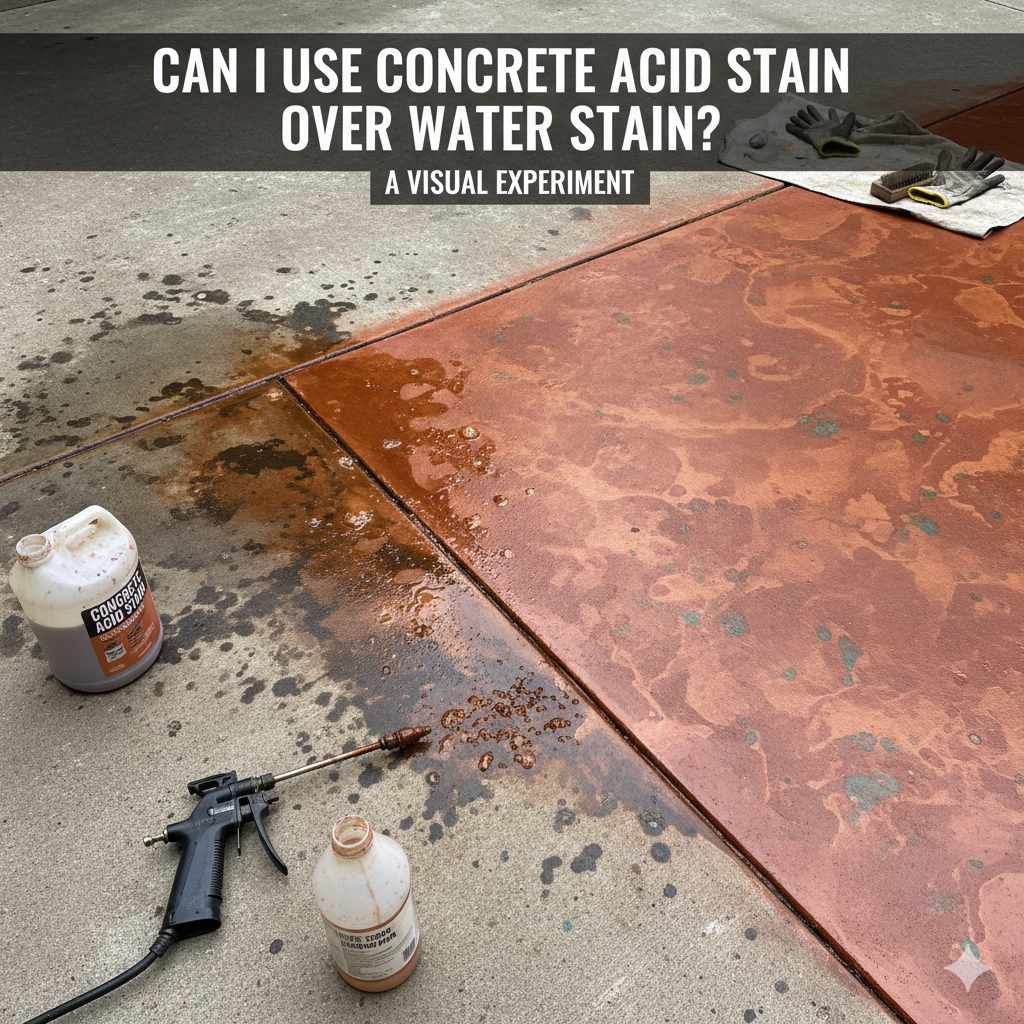
Can I Use Concrete Acid Stain Over Water Stain? Essential Guide
Can I Use Concrete Acid Stain Over Concrete Water Stains? Yes, but with crucial preparation and understanding. While acid stain reacts chemically with the concrete itself, existing water stains can interfere with this reaction, leading to uneven color or missed spots. This guide will show you how to prepare your concrete properly for a beautiful, uniform acid stain finish, even with previous water issues.
Dealing with concrete can sometimes feel like a puzzle, especially when you’re aiming for a beautiful, finished look. One common question that pops up is about how stains interact with each other on concrete. Specifically, many DIYers wonder, “Can I use concrete acid stain over a water stain?” It’s a valid concern because you want your finished project to look fantastic, not patchy or uneven. Water stains can be stubborn and mysterious, leaving behind discoloration that makes you pause before applying a new finish. The good news is that with the right approach, you can often overcome these challenges. This guide is here to demystify the process, giving you the confidence and clear steps needed to tackle your concrete acid staining project, even when water stains are present. We’ll walk through everything you need to know to achieve a professional-looking result you’ll be proud of.
Understanding Acid Stains and Concrete
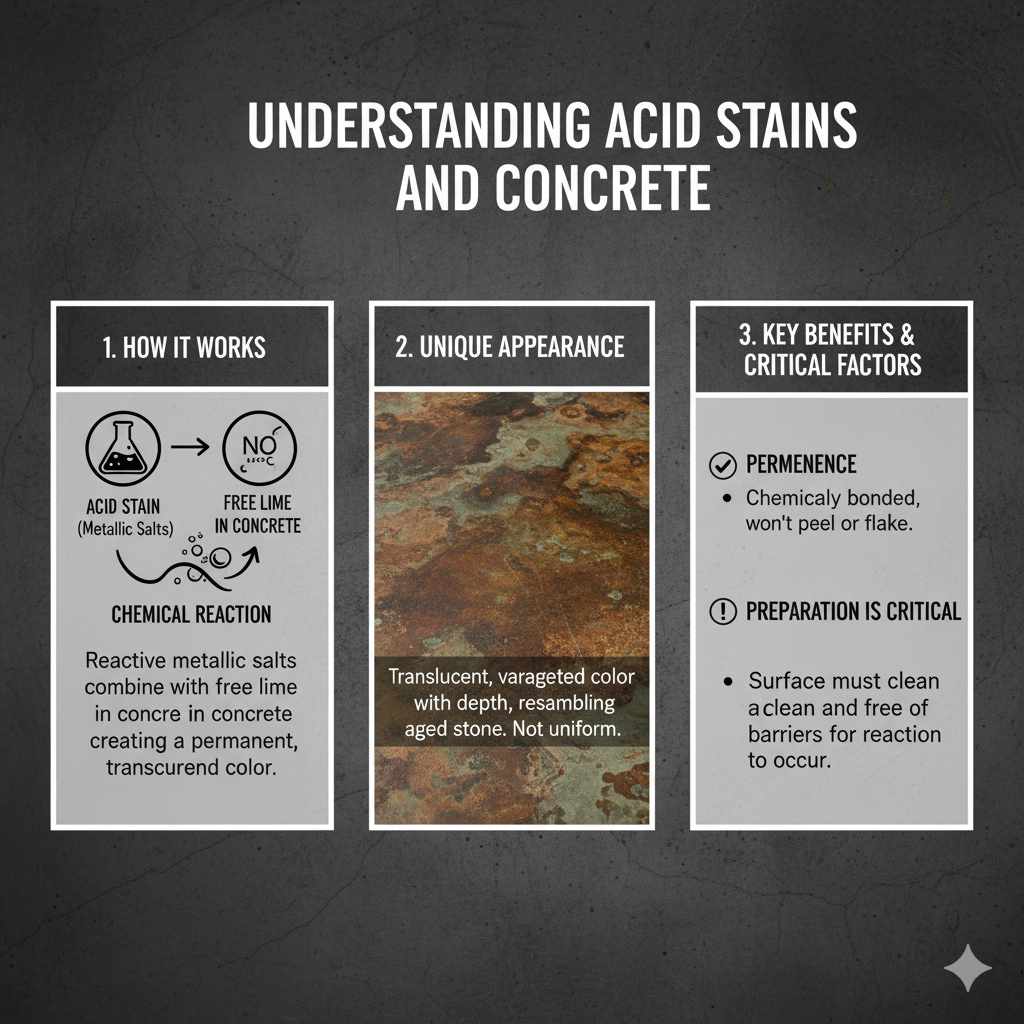
Before we dive into tackling water stains, it’s helpful to understand how acid stains work. Unlike topical stains or paints that sit on the surface, acid stains are reactive. They contain metallic salts that react with the free lime in the concrete. This chemical reaction creates a translucent, variegated (meaning it has variations in color and depth) and permanent color that looks like it’s part of the concrete itself. Think of it like aging concrete; the color isn’t uniform, and that’s part of its charm.
The beauty of acid staining lies in its permanence and unique appearance. Because it’s a chemical reaction, it’s not prone to peeling or flaking like a surface coating. However, this chemical reaction is also why preparation is so critical. Anything that prevents the stain from reaching the concrete’s surface or interferes with the lime in the concrete can affect the final outcome.
What Are Concrete Water Stains?
Concrete water stains are typically caused by minerals or impurities in the water that are absorbed into the porous surface of the concrete. When the water evaporates, these dissolved substances are left behind. Common causes include:
Hard Water: Water with a high mineral content (like calcium and magnesium) can leave white or chalky deposits.
Leaking Pipes or Drainage: Water seeping from underground or through cracks can carry various minerals and soil elements.
Spills: Even simple water spills, if left to dry repeatedly, can contribute to mineral buildup, especially if the water source is mineral-rich.
Efflorescence: This is a crystalline deposit of salts visible on the surface of concrete or masonry. It occurs when water is present and then evaporates, leaving the salts behind.
These stains can range from light, almost invisible marks to dark, unsightly patches. They are essentially deposits on or within the concrete’s surface pores.
The Big Question: Can You Acid Stain Over Water Stains?
The short answer is: Yes, but it’s not as simple as just pouring the stain on. You cannot directly apply acid stain over an active or significant water stain without proper preparation.
Here’s why:
Surface Barrier: Some water stains, especially those with heavy mineral deposits or efflorescence, can create a thin barrier on the concrete’s surface. This barrier can prevent the acid stain from penetrating and reacting evenly with the concrete.
Inconsistent Reaction: The metallic salts in the acid stain need direct contact with the free lime in the concrete to create color. If the water stain is blocking this contact, you’ll end up with patchy, uneven coloring.
Altered Chemistry: While acid stain reacts with lime, strong mineral deposits from water stains might subtly alter the concrete’s surface chemistry in that specific spot, potentially leading to a different color reaction.
Therefore, the key to successfully acid staining over areas with water stains is thorough cleaning and neutralization to remove the offending deposits and ensure a clean, receptive concrete surface.
Essential Preparation Steps: Your Roadmap to Success
This is where the magic happens! Proper preparation is non-negotiable for any concrete staining project, but it’s especially crucial when dealing with water stains. Think of it as giving your concrete a fresh start.
Step 1: Clean Thoroughly – The Foundation of Your Stain
This is the most critical step when dealing with water stains. You need to remove any mineral deposits, efflorescence, and contaminants.
Initial Sweep and Wash: Start by sweeping or blowing away all loose debris. Then, wash the concrete with a good quality concrete cleaner or degreaser. Follow the product’s instructions carefully. For stubborn mineral deposits, you might need a cleaner specifically designed for efflorescence or hard water stains.
Acidic Wash (Neutralizing Acid): For mineral-heavy water stains, a diluted acid wash is often necessary. A common and effective solution is a 1:10 mixture of muriatic acid (hydrochloric acid) and water, or a stronger solution of phosphoric acid or citric acid.
Safety First! Always wear appropriate personal protective equipment (PPE) when working with acids. This includes chemical-resistant gloves, safety glasses or goggles, a respirator mask rated for acid fumes, and protective clothing. Ensure good ventilation.
Application: Apply the diluted acid solution using a plastic watering can or a garden sprayer (ensure it’s acid-resistant). Work in small sections. You’ll see a slight fizzing reaction, which is the acid working to dissolve the mineral deposits.
Scrubbing: Use a stiff-bristled brush (not wire, as it can leave rust marks) to scrub the areas with water stains.
Rinsing: Thoroughly rinse the concrete with clean water. You may need to repeat this process for particularly stubborn stains. Use a hose with good pressure or a pressure washer (on a low setting, if you’re new to it, to avoid damaging the concrete).
You can find more detailed information on cleaning concrete from resources like the International Code Council (ICC), which provides standards related to building materials and their preparation.
Step 2: Neutralize the Acid
After using an acidic cleaner, it’s vital to neutralize the surface. If you leave acid residue, it can continue to react with the concrete or interfere with the acid stain’s application.
Neutralizing Solution: A common and effective neutralizer is a solution of baking soda and water (about 1 cup of baking soda per gallon of water) or a dedicated concrete neutralizer product. Ammonia can also be used (about 1 cup per gallon of water).
Application: Apply the neutralizing solution generously to the entire surface where you used the acid. You might see a slight fizzing as the solution neutralizes any remaining acid.
Scrubbing and Rinsing: Scrub the surface again with a stiff brush and then rinse thoroughly with clean water. Repeat the rinsing process multiple times to ensure all residue is gone.
Step 3: Let it Dry Completely
This is a crucial step that’s often overlooked. Concrete needs to be bone dry before applying acid stain.
Drying Time: Depending on humidity, temperature, and air circulation, this can take 24-48 hours, sometimes longer.
Checking for Moisture: You can check for dryness by placing a small piece of plastic wrap (about 2ft x 2ft) on the concrete, taping down the edges. Leave it for 24 hours. If you see condensation on the underside of the plastic, the concrete is still too wet.
Step 4: Etch (Optional but Recommended for Uniformity)
While acid staining itself is a form of etching, a light, uniform etch before staining can ensure maximum adhesion and a more consistent color. This is particularly helpful if you suspect the water stains might have slightly altered the concrete’s surface texture.
Method: You can use a milder acid solution (like a phosphoric acid-based concrete etcher) or a mechanical method like a floor grinder with a fine grit diamond.
Purpose: Etching opens up the pores of the concrete, allowing the acid stain to penetrate more deeply and react more uniformly.
Rinsing and Drying: After etching, you must thoroughly rinse and dry the concrete again, just as you did after the cleaning and neutralizing steps.
Step 5: Masking and Protection
Before you start staining, protect anything you don’t want stained. This includes walls, doors, windows, and nearby landscaping.
Materials: Use plastic sheeting and painter’s tape. For more robust protection, consider using Ram Board or similar protective coverings for high-traffic areas or delicate surfaces.
Thoroughness: Be meticulous. Acid stain can travel and is permanent.
Applying the Concrete Acid Stain
Once your concrete is impeccably clean, completely dry, and protected, you’re ready to apply the stain!
Choosing Your Acid Stain Color
Acid stains come in a range of earthy tones, typically browns, tans, reds, and blues. The final color is unpredictable to some extent because it depends on the concrete’s unique composition and its reaction with the stain. Always test your chosen color in an inconspicuous area first.
Application Methods
Spraying: The most common method is using a plastic garden sprayer or a specialized acid-stain sprayer.
Technique: Apply the stain in a random, overlapping pattern to achieve a natural, variegated look. Avoid spraying in a uniform, crisscross pattern, which can lead to a less desirable, artificial appearance.
Drips and Runs: Don’t worry about drips and runs; they contribute to the unique character of acid-stained concrete.
Brushing or Rolling: For smaller areas or specific effects, you can use acid-resistant brushes or rollers.
Working in Sections
Apply the stain in manageable sections. This helps ensure you can maintain a wet edge and achieve consistent results.
Allowing the Reaction Time
Acid stains need time to react with the concrete. Typically, you’ll let the stain sit for 4-8 hours, or as per the manufacturer’s instructions. During this time, the metallic salts are working their magic.
Neutralizing and Rinsing the Stain
This is a crucial step to stop the chemical reaction and remove the stain residue.
Neutralizer: Use a dedicated concrete neutralizer or a baking soda/water solution.
Application: Apply the neutralizer generously to the stained surface.
Scrubbing: Scrub the concrete with a stiff brush to lift the residue.
Rinsing: Rinse thoroughly with clean water. A pressure washer on a low setting is very effective here. You may need to repeat the rinsing and scrubbing process multiple times until the rinse water runs clear and there’s no slimy residue.
Drying and Sealing
After the final rinse, allow the concrete to dry completely. Once dry, it’s highly recommended to apply a concrete sealer.
Purpose of Sealer: A sealer protects the stain from abrasion, UV damage, and future staining (including water stains!). It also enhances the color and provides a desired sheen (matte, satin, or gloss).
Application: Apply the sealer according to the manufacturer’s instructions, usually with a roller or sprayer.
Table: Common Water Stain Causes and Solutions
Here’s a quick reference for common water stain issues and how to address them before acid staining:
| Type of Water Stain | Likely Cause | Preparation Steps |
|---|---|---|
| White, Chalky Residue (Efflorescence) | Minerals in water migrating to the surface and drying. | Mechanical removal (scrubbing), followed by an acidic cleaner (muriatic or phosphoric acid solution) to dissolve remaining salts. Thorough rinsing and neutralization are critical. |
| Dark or Discolored Patches | Minerals, soil, or organic matter dissolved in water absorbed by concrete. | Thorough cleaning with a concrete degreaser/cleaner. For stubborn organic stains, a stronger cleaner or a poultice might be needed. If mineral-based, an acid wash is likely required. |
| General Water Rings or Spots | Repeated evaporation of mineral-rich water. | Standard concrete cleaner and degreaser. If persistent, a diluted acid wash may be necessary to lift the mineral deposits. |
Tools and Materials You’ll Need
Having the right tools makes any DIY project smoother and safer. Here’s a checklist:
Safety Gear:
Chemical-resistant gloves
Safety glasses or goggles
Respirator mask (acid-rated)
Protective clothing (long sleeves, pants)
Rubber boots
Cleaning & Preparation:
Stiff-bristled brushes (plastic or nylon)
Broom or leaf blower
Garden hose with spray nozzle
Plastic watering can or acid-resistant sprayer
Concrete cleaner/degreaser
Acidic cleaner (e.g., muriatic acid, phosphoric acid, citric acid)
Neutralizer (baking soda or dedicated concrete neutralizer)
Buckets
Plastic sheeting and painter’s tape
Floor grinder (optional, for aggressive etching)
Staining & Finishing:
Acid stain (your chosen color)
Acid-resistant sprayer (if not used for cleaning)
Stiff brushes or acid-resistant rollers (for specific applications)
Concrete sealer
Applicator for sealer (roller, squeegee, or sprayer)
Common Mistakes to Avoid
Even with the best intentions, a few common pitfalls can derail your acid staining project. Being aware of them can save you a lot of hassle:
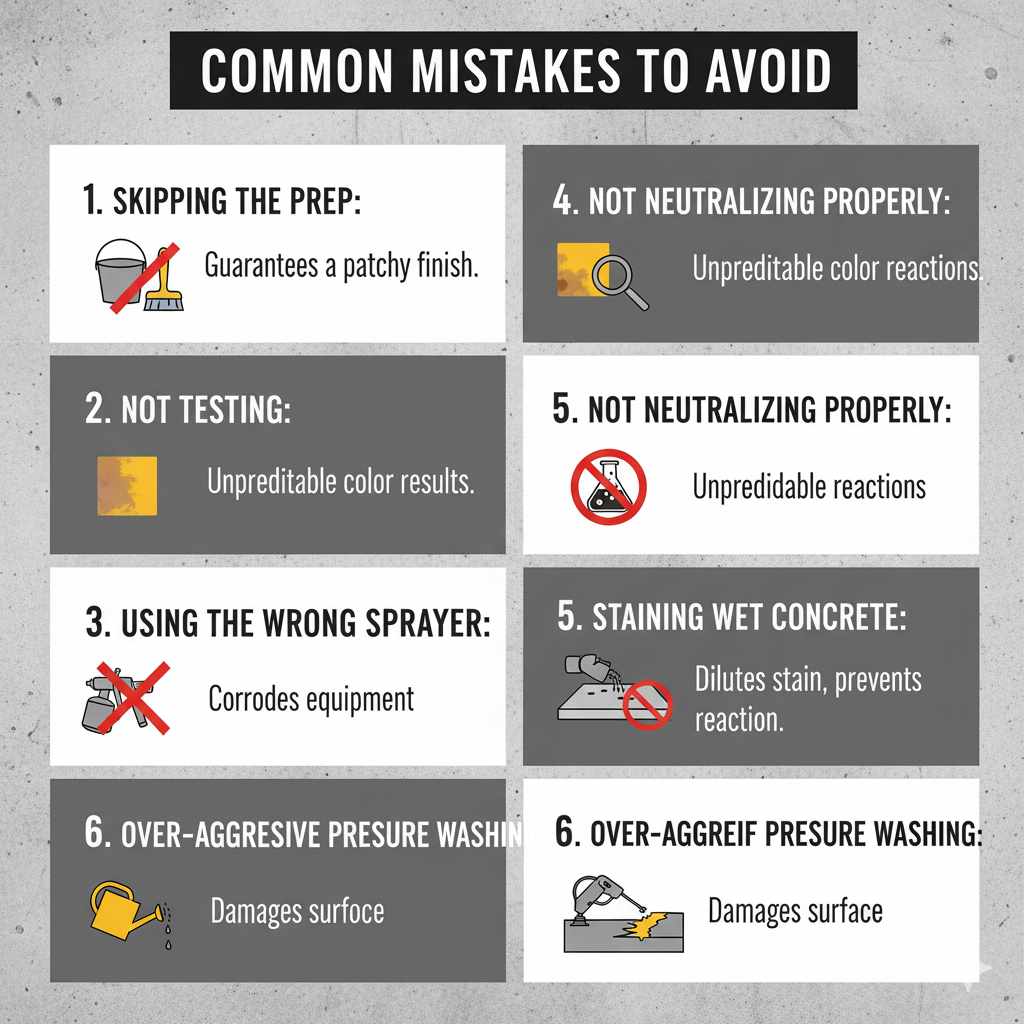
Skipping the Prep: This is the number one mistake. Not cleaning, neutralizing, and drying properly will almost guarantee a patchy, undesirable finish.
Not Testing: Always test your stain color and application technique in an inconspicuous area. Concrete is unique, and your test patch will show you how the stain will look.
Using the Wrong Sprayer: Standard metal sprayers will corrode when exposed to acid. Always use plastic or acid-resistant sprayers.
Not Neutralizing Properly: Leaving acid residue can cause unpredictable reactions or damage the concrete over time.
Staining Wet Concrete: This is a recipe for failure. The water in the concrete will dilute the stain and prevent it from reacting correctly.
Over-Aggressive Pressure Washing: While rinsing is important, too much pressure can damage the surface of the concrete, especially if it’s older or weaker.
Frequently Asked Questions (FAQ)
Can I use a water-based concrete stain over a water stain?
Yes, generally. Water-based stains are more like paints and sit on the surface. While good preparation is always recommended for adhesion, they are less sensitive to underlying surface conditions than acid stains. However, cleaning is still crucial to ensure the stain adheres properly and doesn’t peel.
Will acid stain cover up the water stain completely?
Acid stain doesn’t “cover” in the way paint does. It reacts chemically to create color within the concrete. Because the color is translucent and varies based on the concrete’s reaction, it can mask the appearance of a water stain by creating a new, uniform color layer. However, if the underlying concrete is heavily compromised or the stain isn’t properly prepared, the water stain’s influence might still show as variations in color.
How long does concrete need to cure before acid staining?
New concrete typically needs to cure for at least 28 days before it can be stained. This allows the concrete to reach its maximum strength and for most of the free lime to react. Staining too early can lead to poor adhesion and unpredictable results.
What if I can still see the water stain after cleaning?
If the stain persists after cleaning and an acid wash, it might be that the minerals have penetrated deeper into the concrete, or the concrete itself has a different porosity in that area. In such cases, you might need a more aggressive etching process or consider using a concrete overlay or a different type of coating (like epoxy or a thicker topical stain) that can mask imperfections better than acid stain. However, thorough cleaning and a good etching process often resolve most issues.
Do I need to seal acid-stained concrete?
Absolutely. Sealing acid-stained concrete is essential. The sealer protects the stain from wear and tear, UV rays, and future staining. It also brings out the richness of the color and can provide a desired sheen. Without a sealer, your beautiful acid-stained concrete will be vulnerable.
Can I use bleach to remove water stains before acid staining?
While bleach can help clean and disinfect, it’s not generally effective at removing mineral-based water stains or efflorescence from concrete. Acidic cleaners are much better suited for dissolving these types of deposits. Always use specialized concrete cleaners or acids for these issues.
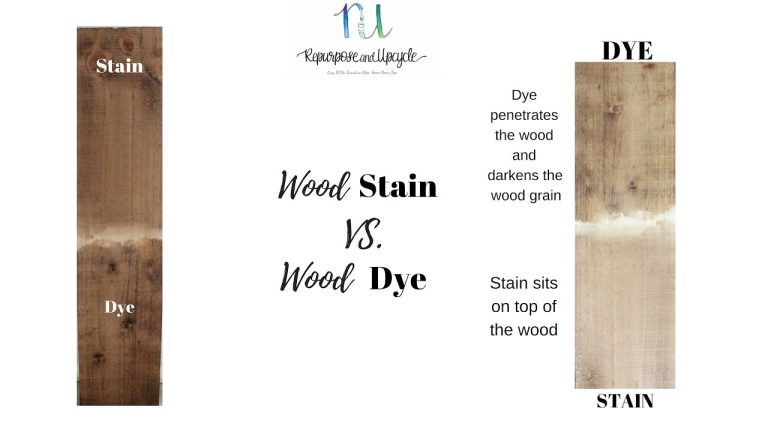
What is the difference between acid stain and water-based stain?
Acid stains react chemically with the concrete, creating a permanent, translucent, and variegated color that looks like part of the concrete itself. Water-based stains are topical coatings that sit on the surface and provide more opaque and uniform color, similar to paint. Acid stains offer a more natural, aged look, while water-based stains offer more predictable color coverage.
Conclusion
So, can you use concrete acid stain over water stains? The answer is a resounding yes, provided you are willing to put in the essential preparation work. By thoroughly cleaning, neutralizing, and ensuring your concrete is completely dry, you can overcome the challenges posed by water stains and achieve a beautiful, permanent, and unique finish. Remember, acid staining is a chemical process, and its success hinges on the integrity of the concrete surface it reacts with.
Don’t let those water stains deter you from creating a stunning concrete surface. With careful planning, the right safety precautions, and diligent execution of the steps outlined in this guide, you can confidently transform your concrete. Embrace the process, be patient, and enjoy the rewarding experience of a DIY project done right. Your beautifully stained concrete will be a testament to your effort and a source of pride for years to come. Happy staining!