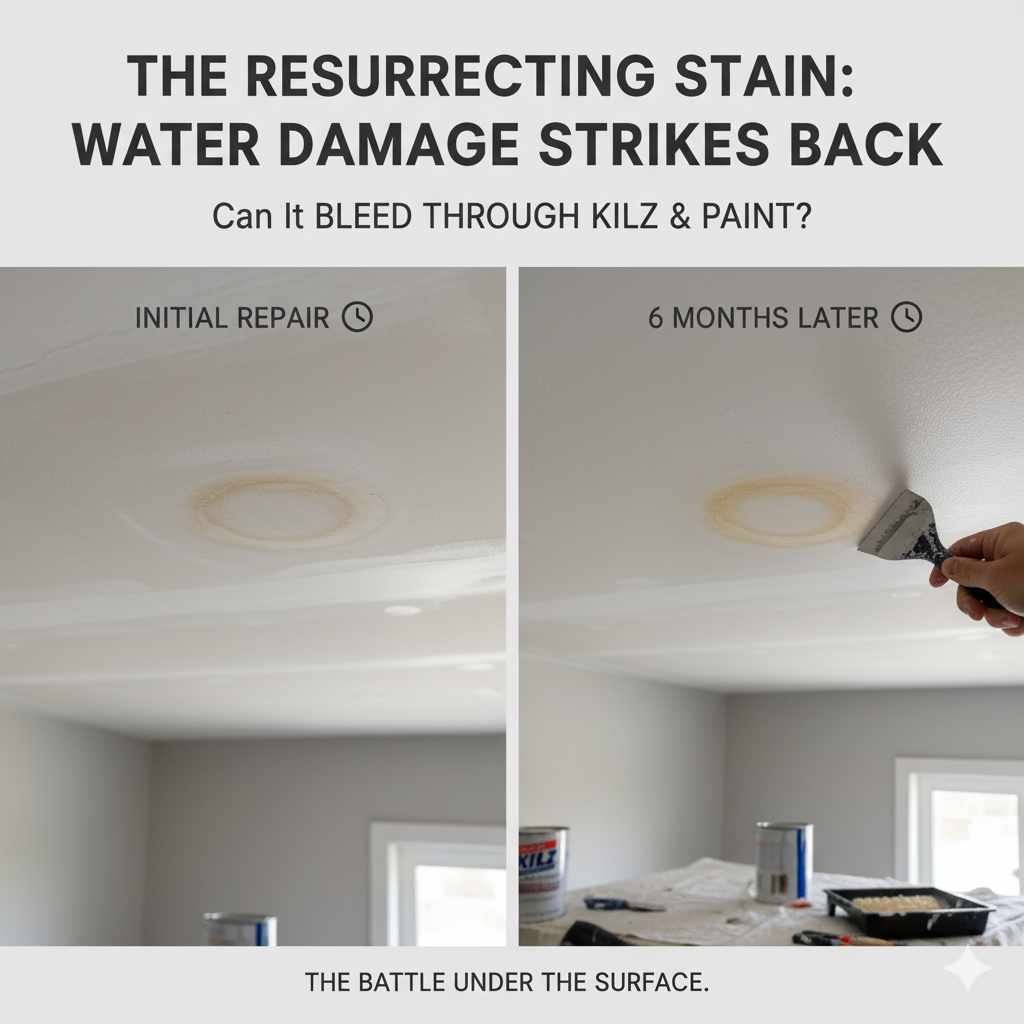
Can Water Stains Bleed Through Paint And Kilz Over Time: Essential Guide
Yes, water stains can bleed through paint and even KILZ primer over time if not properly sealed. While KILZ is an excellent stain blocker, older or severe stains, or inadequate application, can allow them to reappear. This guide will show you how to prevent it for good.
Dealing with stubborn water stains on your walls can be frustrating. You paint over them, thinking they’re gone, only to see those tell-tale yellow or brown marks reappear days or weeks later. It’s a common problem that can make even a freshly painted room look dingy. But don’t worry, this doesn’t have to be a never-ending battle! With the right approach and a few simple steps, you can effectively tackle these stains and ensure your paint job stays looking fresh and clean for years to come. We’ll walk you through exactly what you need to do to banish those water stains for good.
Understanding Water Stains and Paint
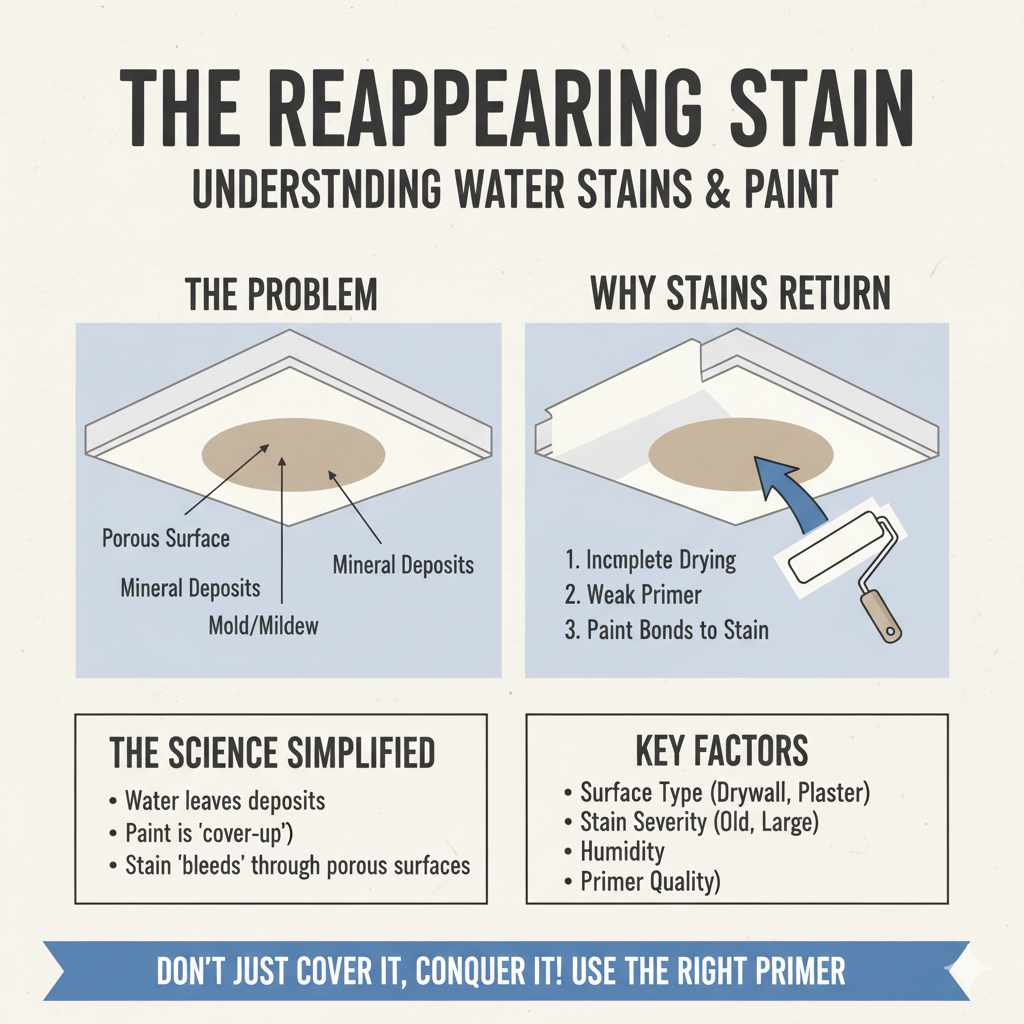
Water stains, often called “ghosting” or “water marks,” happen when water seeps into your drywall or plaster. As the water dries, it leaves behind mineral deposits and sometimes mold or mildew. These deposits are often discolored and can stubbornly resist being covered by regular paint.
Even the best paints are designed to adhere to a surface and provide color, not necessarily to act as a barrier against deeply embedded stains. Think of paint as a beautiful outfit; it covers what’s underneath, but if the underlayer is discolored, it can sometimes show through, especially if the underlayer is porous or the stain is particularly potent.
Why Do Stains Come Back?
- Porous Surfaces: Drywall and plaster are porous. When water penetrates, it carries dissolved minerals and pigments from whatever it touched (like wood, insulation, or even old leaks). These can settle into the pores.
- Incomplete Drying: If the wall isn’t completely dry before painting, moisture trapped within can reactivate the stain.
- Insufficient Primer: Standard primers aren’t always strong enough to block these types of stains. They might cover them temporarily, but the pigments can eventually migrate through.
- Severe Stains: Very old, large, or deeply set stains have more “power” to bleed through a less robust barrier.
The Role of KILZ Primer
KILZ is a brand of primer known for its stain-blocking capabilities. Many homeowners and DIYers rely on it to cover up tough stains, including water marks, smoke damage, and even crayon marks. KILZ primers create a barrier that seals the stain, preventing it from bleeding through the topcoat of paint. However, it’s important to understand that not all KILZ products are created equal, and proper application is key.
Different KILZ Products for Different Needs
KILZ offers a range of primers. For water stains, you’ll typically want to use a dedicated stain-blocking primer. The most common and effective for this job is:
- KILZ Original (Oil-Based): This is a heavy-duty primer that excels at blocking tough stains and odors. It’s oil-based, which makes it very effective at sealing porous surfaces and preventing bleed-through. It has a strong odor and requires mineral spirits for cleanup, but its performance for stain blocking is top-notch.
- KILZ 2 All-Purpose (Water-Based): This is a good all-around primer that can block some stains, but it might not be sufficient for severe or old water stains. It’s easier to work with and clean up than oil-based options.
- KILZ 3 Premium (Water-Based): A higher-hiding, water-based primer that offers better stain blocking than KILZ 2. It’s a good option if you prefer water-based products but need more power than a basic primer.
For water stains, especially those that have reappeared before, the KILZ Original (oil-based) is often the most reliable choice. It forms a robust seal that is less likely to be compromised over time.
Can Water Stains Bleed Through KILZ Over Time?
Yes, under certain circumstances, water stains can eventually bleed through KILZ. This is not a reflection of KILZ being a poor product, but rather a testament to how persistent some stains can be, or issues with application.
Factors Contributing to Bleed-Through Even with KILZ:
-
Application Issues:
- Thin Coats: Applying KILZ too thinly can leave gaps in the protective barrier.
- Incomplete Coverage: Missing spots during application is a common oversight.
- Improper Surface Prep: If the surface isn’t clean and dry, the primer might not adhere properly, creating weak points.
- Severity of the Stain: Very old, deep, or large water stains might contain pigments or mineral concentrations that are exceptionally difficult to block. In rare cases, multiple coats of primer might be needed.
- Type of KILZ Used: As mentioned, water-based KILZ primers (like KILZ 2) are less potent stain blockers than the oil-based KILZ Original. If a water-based KILZ was used on a stubborn stain, it has a higher chance of bleeding through over time compared to the oil-based version.
- Ongoing Moisture: If the original source of the water stain is not fixed, and the wall continues to get damp, the moisture can reactivate the stain and potentially push it through the primer and paint.
Essential Steps to Prevent Water Stains from Bleeding Through Paint and KILZ
To ensure your paint job lasts and water stains stay hidden, follow these crucial steps. This process is designed to give you confidence that your hard work will pay off.
Step 1: Identify and Fix the Source of the Water Stain
This is the most critical step. Painting over a water stain without fixing the leak is like putting a bandage on a deep wound – it hides the problem temporarily but doesn’t solve it. Water stains are symptoms of a larger issue.
- Common Sources: Leaky pipes, faulty roof flashing, overflowing gutters, condensation from poorly insulated pipes or windows, appliance leaks (washing machine, dishwasher), or even a past plumbing issue that wasn’t fully dried out.
- Inspection: Carefully examine the area around the stain. Look for any signs of dampness, mold, or damage to the wall or ceiling. If you can’t find the source, you may need to consult a plumber or a roofing professional.
- Drying: Once the leak is fixed, ensure the affected area is completely dry. This might take several days or even weeks, depending on the extent of the moisture. You can speed up the drying process using fans and a dehumidifier. For more extensive dampness, consider professional drying services. You can check for dryness using a moisture meter, which are available at most hardware stores.
Step 2: Prepare the Surface
Proper surface preparation is the foundation of any successful painting project, especially when dealing with stains.
- Clean the Area: Gently wash the stained area with a mild detergent and water. Rinse thoroughly and let it dry completely. If there’s any mold or mildew, use a solution of 1 part bleach to 10 parts water (or a commercial mold remover). Wear gloves and eye protection, and ensure good ventilation. For detailed safety information on mold remediation, consult resources like the EPA’s guide on mold cleanup.
- Scrape and Sand (If Necessary): If there’s any loose paint, peeling wallpaper, or rough texture from the water damage, carefully scrape it away with a putty knife. Then, lightly sand the area to create a smooth surface for the primer to adhere to. Feather the edges of the sanded area so they blend into the surrounding wall.
- Wipe Down: After sanding, wipe the entire area with a damp cloth to remove any dust. Let it dry completely.
Step 3: Apply a High-Quality Stain-Blocking Primer
This is where you create the barrier that will keep the stain hidden.
- Choose the Right Primer: As discussed, for stubborn water stains, KILZ Original (oil-based) is often the best choice. If you strongly prefer a water-based option, KILZ 3 Premium is a good alternative. Read the product label to ensure it’s specifically designed for stain blocking.
-
Application:
- Stir the primer thoroughly.
- Apply a generous, even coat of primer to the entire stained area, extending a few inches beyond the stain’s edges.
- Use a high-quality brush for cutting in edges and a roller for larger areas.
- Ensure complete coverage. Don’t skimp on the primer.
- Drying Time: Allow the primer to dry completely according to the manufacturer’s instructions. This is crucial for the primer to form its protective seal. Rushing this step can lead to bleed-through later.
Step 4: Inspect and Reapply Primer if Necessary
After the first coat of primer has dried, take a close look at the stained area. Sometimes, especially with older or more severe stains, one coat might not be enough.
- Check for Bleed-Through: Look for any faint outlines or discoloration of the stain that might still be visible through the primer.
- Apply a Second Coat: If you see any signs of the stain trying to peek through, apply a second, even coat of primer. Make sure to cover the entire previously primed area.
- Allow to Dry: Let the second coat dry thoroughly.
This two-coat approach is often the secret to ensuring the stain is completely blocked and won’t resurface. For extreme cases, some professionals might recommend up to three coats, but two is usually sufficient with a good quality primer like KILZ Original.
Step 5: Apply Your Topcoat of Paint
Once you are confident that the stain is completely sealed by the primer, you can apply your paint.
- Choose Quality Paint: Use a good quality interior paint for your topcoat. Semi-gloss or satin finishes are often recommended for areas prone to moisture or staining, as they are more durable and easier to clean than flat finishes.
- Application: Apply your paint in even coats, following the manufacturer’s recommendations for drying time between coats.
- Two Coats are Best: Most painting projects benefit from two topcoats of paint for optimal coverage, durability, and a uniform finish.
Tools and Materials You’ll Need
Gathering the right supplies before you start will make the process smoother and more enjoyable.
| Item | Purpose | Notes |
|---|---|---|
| KILZ Original Primer (or KILZ 3 Premium) | To block and seal the water stain. | Oil-based KILZ Original is generally best for tough stains. |
| High-Quality Interior Paint | For the final color and finish. | Choose your desired color and sheen. |
| Paint Brushes (2-inch angled sash brush) | For cutting in edges and detail work. | Synthetic bristles for water-based primer/paint, natural for oil-based. |
| Paint Roller (9-inch roller with appropriate nap) | For covering larger wall areas efficiently. | Choose nap based on wall texture (e.g., 3/8-inch for smooth walls). |
| Paint Tray and Liners | To hold primer and paint for the roller. | Liners make cleanup easier. |
| Putty Knife | To scrape away any loose paint or debris. | A flexible blade is useful. |
| Sandpaper (medium grit, e.g., 120-150 grit) | To smooth the surface after scraping. | For light texturing and feathering edges. |
| Cleaning Supplies (mild detergent, sponges, rags) | To clean the stained area. | Ensure the area is free of dirt and grime. |
| Drop Cloths or Plastic Sheeting | To protect floors and furniture from paint drips. | Essential for a clean workspace. |
| Painter’s Tape | To mask off trim, windows, and ceilings. | Use high-quality tape for crisp lines. |
| Safety Gear (gloves, eye protection, mask) | For protection during cleaning, sanding, and painting. | Especially important when working with oil-based products. |
| Mineral Spirits (if using oil-based primer) | For cleaning brushes and rollers used with oil-based primer. | Dispose of properly according to local regulations. |
| Moisture Meter (optional) | To confirm the wall is completely dry. | Helps ensure the underlying issue is resolved. |
Common Mistakes to Avoid
Even with the best intentions, a few common slip-ups can lead to water stains reappearing. Being aware of these will help you achieve a lasting finish.
- Painting Over a Damp Wall: Always ensure the wall is bone dry before applying primer or paint. Trapped moisture will hinder adhesion and can reactivate stains.
- Skipping the Primer: Trying to cover water stains with just paint is a recipe for disappointment. Primer is essential for blocking.
- Using the Wrong Primer: Not all primers are stain blockers. Always choose a product specifically designed for blocking tough stains like water marks.
- Applying Primer Too Thinly: A thin, patchy coat of primer won’t create a sufficient barrier. Apply it generously and evenly.
- Not Fixing the Leak: This is the most critical mistake. If the water source isn’t addressed, the stain will likely return, regardless of how well you paint.
- Not Allowing Adequate Drying Time: Primers and paints need time to cure. Rushing the process can compromise their integrity and effectiveness.
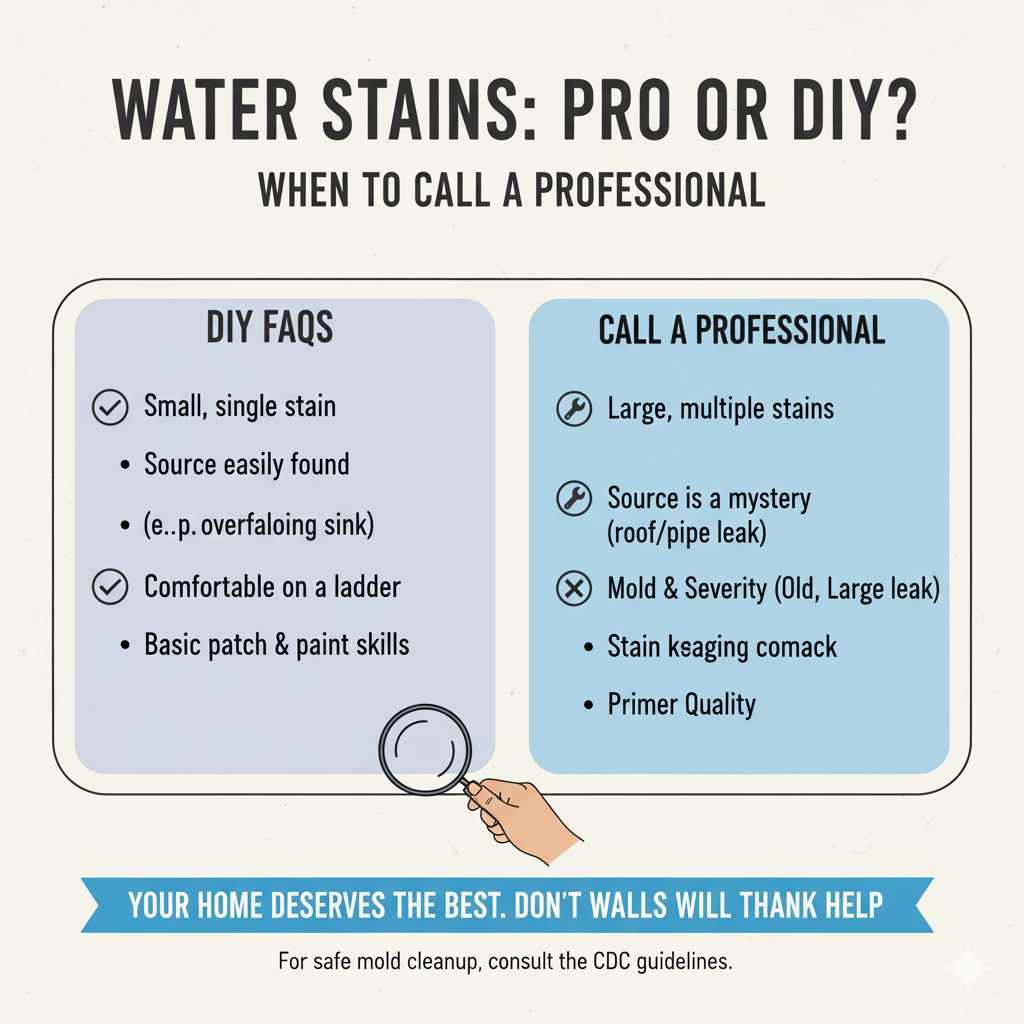
When to Call a Professional
While many water stain issues can be handled with DIY effort, there are times when professional help is the best course of action. Don’t hesitate to reach out to experts if:
- You Can’t Find the Source: If you’ve looked everywhere and can’t identify the origin of the water damage, a professional plumber or roofer can diagnose and fix the problem.
- The Damage is Extensive: Large areas of water damage, sagging drywall, or significant mold growth might require structural repairs or professional remediation services. You can find more information on safe mold cleanup practices from the CDC.
- You’re Uncomfortable with the Process: If you’re not confident in your ability to properly repair the damage, apply primer correctly, or if you have a significant fear of heights when working on ceilings, hiring a painter or handyman is a wise choice.
- The Stain Persists After Multiple Attempts: If you’ve followed all the steps, used a quality stain-blocking primer, and the stain still bleeds through, a professional painter might have specialized tools or techniques to handle it.
Hiring a professional doesn’t mean you’ve failed; it means you’re making a smart decision to ensure a high-quality, long-lasting result for your home.
Frequently Asked Questions (FAQ)
Q1: How long does it take for water stains to bleed through paint?
It can vary. Some stains might show through within days, while others might take weeks or even months. It depends on the severity of the stain, the type of paint and primer used, and the environmental conditions.
Q2: Can I use a regular interior primer instead of a stain-blocking primer?
While a regular primer might cover the stain temporarily, it’s not designed to block the pigments that cause water stains. For reliable, long-term results, a dedicated stain-blocking primer like KILZ Original is highly recommended.
Q3: What is the best way to clean a water-stained ceiling?
First, ensure the leak is fixed and the ceiling is completely dry. Then, you can try cleaning with a mild detergent and water. If that doesn’t work, you may need to apply a stain-blocking primer directly to the ceiling before repainting. Always wear safety glasses and consider using a drop cloth to protect your floor.
Q4: Does KILZ Original primer have a strong odor?
Yes, KILZ Original is oil-based and has a strong, solvent-like odor. It’s essential to work in a well-ventilated area, use a respirator mask, and wear gloves. The odor dissipates once the primer is fully dry and the topcoat is applied.
Q5: Can I paint directly over a water stain without primer?
No, this is not recommended. Water stains contain minerals and pigments that will almost certainly bleed through regular paint, even with multiple coats. Primer is a necessary step to seal the stain.
Q6: How do I know if my wall is completely dry after fixing a leak?
You can wait several days and feel the wall for any dampness. For a more accurate assessment, use a moisture meter. These devices can detect moisture levels within the drywall and ensure it’s safe to paint.
Conclusion
Tackling water stains on your walls can seem daunting, but with the right knowledge and approach, you can achieve a clean, refreshed finish that lasts. Remember, the key is to always address the source of the water, prepare your surface meticulously, and use a high-quality stain-blocking primer like KILZ, often with two coats for maximum protection. By following these steps, you’re not just covering up a problem; you’re solving it and building confidence in your home improvement skills. Enjoy your beautifully painted walls, knowing they are protected against those pesky stains for years to come!