Can You Paint a Refrigerator With Regular Paint
Many people wonder, Can You Paint a Refrigerator with Regular Paint? It can seem tricky, especially for those new to DIY projects. You might worry about getting the right look or if the paint will even stick. But don’t let that stop you!
It’s actually quite doable with the right steps. We’ll walk you through exactly how to do it so you can give your old fridge a fresh new look without any fuss. Let’s get started on transforming your appliance.
Painting Your Refrigerator A Step By Step Guide
This guide will take you through the entire process of painting a refrigerator. We will cover everything from preparing the surface to applying the final coat. Our goal is to make this project easy to follow.
You will learn about the best types of paint and tools to use. We aim to demystify the process so anyone can achieve a professional-looking finish. This section is all about laying the groundwork for a successful paint job.
Choosing The Right Paint For Your Refrigerator
Deciding on the correct paint is the first major step. Not all paints are created equal, especially when it comes to appliances. You need something that is durable, adheres well, and can withstand cleaning.
Regular house paint often isn’t up to the task because it can chip easily. For refrigerators, you need a paint specifically designed for metal or appliances. These paints offer better adhesion and a harder finish.
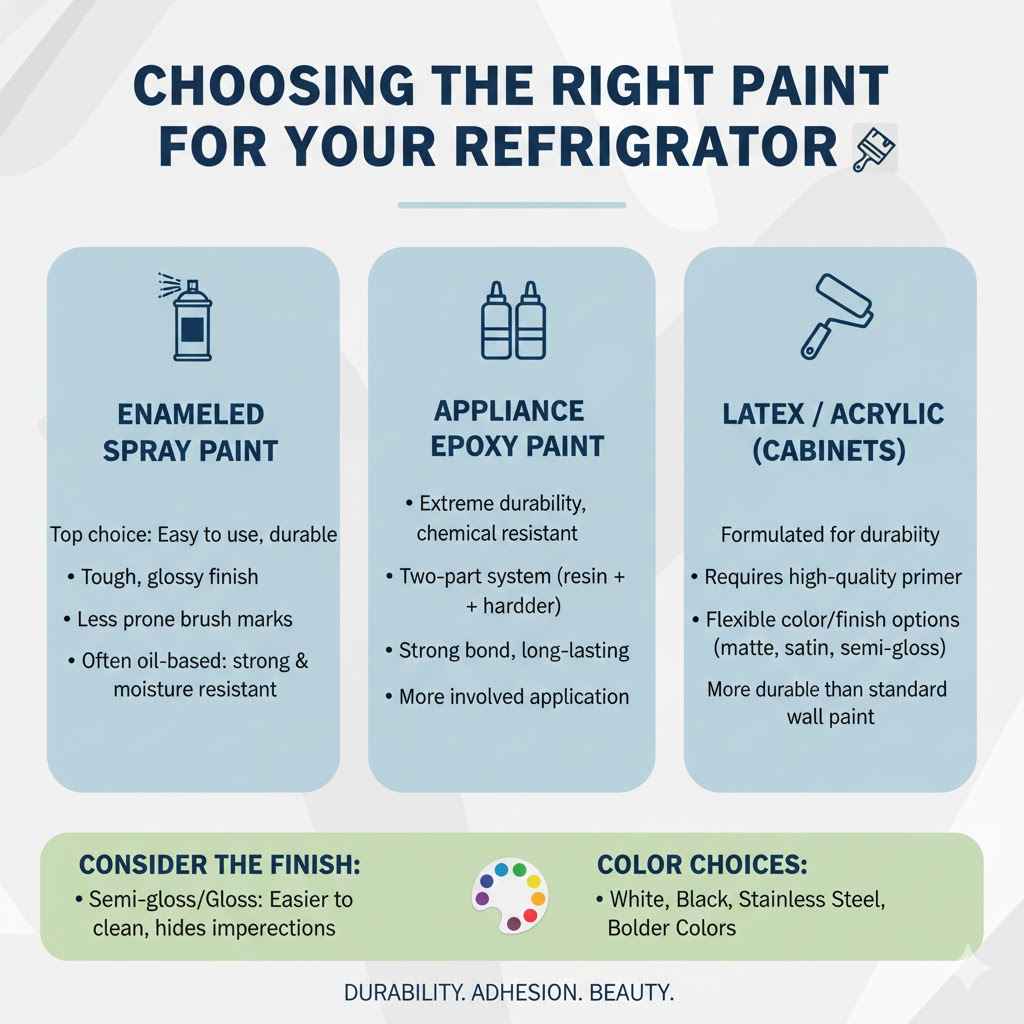
There are a few main types of paint that work well for refrigerators. Enameled spray paints are very popular. They come in a wide range of colors and are easy to apply.
They dry quickly and provide a smooth, hard finish that is resistant to scratches. Another good option is latex or acrylic paint formulated for cabinets or appliances. These might require a primer, but they offer a lot of flexibility in color choice and finish.
Enameled Spray Paint is a top choice for its ease of use and durability. It’s a type of paint that contains enamel, which is known for its toughness and glossy finish. When sprayed, it creates a uniform layer that is less prone to brush marks than brush-on paints.
It’s often oil-based, which contributes to its strength and resistance to moisture and stains. This makes it ideal for a high-traffic item like a refrigerator.
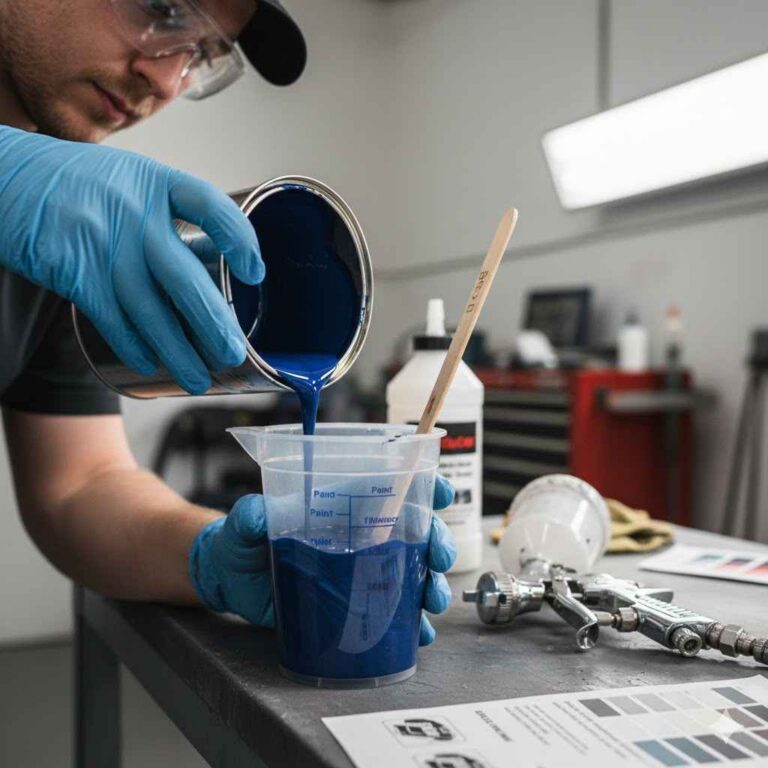
Appliance Epoxy Paint is another excellent option. Epoxy paints are known for their extreme durability and resistance to chemicals and abrasion. They are often a two-part system, meaning you mix a resin and a hardener.
This creates a very strong bond and a tough, long-lasting finish. While they can be a bit more involved to use, the results are often superior in terms of toughness.
Latex or Acrylic Paint for Cabinets can also be used. If you choose this route, look for paints specifically labeled for cabinets or furniture. These are generally more durable than standard wall paint.
You will almost always need to use a high-quality primer first. This ensures the paint adheres properly to the smooth metal surface of the refrigerator. The finish can be matte, satin, or semi-gloss.
When selecting your paint, consider the finish you want. A semi-gloss or gloss finish is often recommended for refrigerators because it is easier to clean. It also hides minor imperfections better than a matte finish.
Think about the color too. White, black, and stainless steel are common, but you can be adventurous with bolder colors to make a statement.
Preparing Your Refrigerator For Painting
Proper preparation is key to a great paint job. This step ensures the paint will stick well and last a long time. Skipping preparation can lead to paint peeling or chipping later on.
It might seem like a lot of work, but it’s worth it for the final outcome. We need to make sure the surface is clean, smooth, and ready to accept new paint.
First, you need to clean the refrigerator thoroughly. Use a degreaser or a mild soap and water solution to remove any grease, grime, or food residue. Pay close attention to areas around the handles and seals.
After cleaning, rinse the surface with clean water and let it dry completely. A clean surface is essential for paint adhesion.
Next, you’ll need to remove any parts that you don’t want to paint. This includes door handles, magnetic decorations, and any other detachable pieces. Some people even remove the doors themselves if they feel it will make the job easier.
This allows for a more even application of paint and avoids messy edges.
Once clean and dry, you need to lightly sand the surface. This creates a slightly rough texture that helps the primer and paint adhere better. Use a fine-grit sandpaper, like 220-grit.
You don’t need to remove the original finish, just scuff it up a bit. After sanding, wipe the entire surface down with a tack cloth or a damp cloth to remove all dust particles. This is a crucial step; any dust left behind will show up in your paint job.
Finally, mask off any areas you don’t want painted. This includes the rubber seals around the doors, hinges, and any control panels. Use painter’s tape for clean, sharp lines.
Make sure the tape is pressed down firmly to prevent paint from bleeding underneath. If you removed any parts like handles, keep them separate until it’s time to reassemble.
Priming The Refrigerator Surface
Priming is a vital step when painting a refrigerator, especially if you are using certain types of paint like latex or acrylic. Primer acts as a bonding agent, helping the topcoat of paint stick firmly to the appliance’s surface. It also helps to cover any existing stains or minor imperfections, providing a uniform base for your new color.
Without primer, you might find that your paint doesn’t adhere well and can peel off easily.
For refrigerators, you’ll want to use a high-quality primer that is designed for metal surfaces or is a general-purpose bonding primer. A good primer will also help to prevent rust from forming, which is especially important if your refrigerator has any minor scratches or is an older model. Look for a primer that is quick-drying so you can move on to the painting stage without long delays.
When applying the primer, use the same technique you will use for painting. If you are spray painting, use light, even coats. If you are using a roller or brush, apply thin, smooth layers.
Two thin coats of primer are usually better than one thick coat. Allow each coat to dry completely according to the manufacturer’s instructions before applying the next or moving to the paint.
A common mistake is to skip priming or to use a primer not suitable for metal. This can lead to poor adhesion, a less durable finish, and potential rust issues down the line. The goal of priming is to create a surface that is ready to accept paint and will hold onto it for years.
It’s an essential foundation for your refrigerator’s new look.
Adhesion Primer is specifically formulated to bond to difficult surfaces like metal, plastic, and laminate. It creates a microscopic grip that helps subsequent layers of paint adhere securely. Without this strong bond, the paint would simply sit on top of the surface and could be easily scratched or chipped away.
Many appliance paints actually have built-in primer properties, but a separate coat offers extra insurance.
Rust-Inhibiting Primer is a great choice if your refrigerator is older or has any areas that might be prone to rust. This type of primer contains additives that help to prevent oxidation and corrosion. It provides an extra layer of protection, especially important for metal appliances that are exposed to moisture.
This can extend the life of your refrigerator’s finish.
The application process for primer is similar to painting. If you’re using spray primer, hold the can about 10-12 inches away from the surface and apply in long, even strokes. Overlap each stroke by about half.
If you’re using a brush or roller, apply thin, even coats, working in one direction as much as possible to avoid streaks. Always allow adequate drying time between coats.
Applying The Paint Coats
Now comes the exciting part: painting your refrigerator! This is where your appliance starts to get its new look. Patience and careful application are key to achieving a smooth, professional finish.
You’ll want to apply multiple thin coats rather than one thick one. This prevents drips and ensures even coverage.
If you’re using spray paint, shake the can well for about two minutes. Hold the can about 10-12 inches away from the refrigerator. Move your hand in a steady, sweeping motion, overlapping each stroke by about 50%.
Start spraying before the edge of the surface and finish spraying after the edge. This helps to avoid splatters at the start and end of each stroke.
Apply the first coat lightly. Don’t worry if it doesn’t look perfect or fully cover the surface yet. The goal is to build up thin layers.
Allow the first coat to dry for the time recommended by the paint manufacturer, usually at least 15-30 minutes for spray paint. Check the can for specific drying times.
After the first coat has dried, inspect it for any missed spots or drips. Lightly sand any drips with a fine-grit sandpaper and wipe away the dust. Then, apply a second light coat.
Continue this process of applying light coats, allowing drying time in between, until you achieve the desired coverage and finish. This typically involves 2-4 coats of paint.
If you are using brush or roller-on paint, use a high-quality synthetic brush for smooth finishes or a foam roller designed for smooth surfaces. Apply paint in thin, even strokes, working in one direction as much as possible. Avoid applying too much pressure, which can lead to uneven coverage or roller marks.
Again, multiple thin coats are better than one thick coat. Allow ample drying time between each layer.
Light Coats vs. Heavy Coats: Applying paint in light, thin coats is essential for several reasons. Firstly, it helps prevent runs and drips.
Thick coats of paint tend to sag and create uneven puddles, which are difficult to fix once dry. Secondly, light coats allow for better adhesion. The paint can cure properly, creating a stronger bond with the surface.
Multiple thin coats build up a durable finish that is less likely to chip or scratch. Think of it like layering thin films of paint rather than one thick blob.
Drying and Curing Times: It’s important to understand the difference between drying time and curing time. Drying time is when the paint feels dry to the touch and you can apply another coat. Curing time is when the paint reaches its maximum hardness and durability.
While your refrigerator might feel dry to the touch after a few hours, it can take several days or even weeks for the paint to fully cure. During the curing period, be gentle with the painted surface. Avoid harsh cleaning or bumping into it vigorously.
Spray Painting Technique: For spray paint, the technique is crucial for a smooth, factory-like finish. Holding the can at the correct distance (10-12 inches) prevents the paint from being applied too heavily or too lightly. A consistent distance ensures even thickness.
Moving the can in steady, overlapping strokes creates a uniform layer without noticeable lines or marks. Starting and ending the spray motion off the surface prevents globs of paint at the beginning and end of each pass. This controlled application is what makes spray painting so effective for appliances.
Finishing Touches And Reassembly
Once the final coat of paint has dried, it’s time for the finishing touches. This is where you bring your newly painted refrigerator back to its fully functional and attractive state. It’s important to wait long enough for the paint to be truly dry before you start reassembling everything.
Carefully remove all the painter’s tape you used to mask off different areas. Do this slowly and gently to avoid pulling off any of the new paint. If any edges aren’t as sharp as you’d like, you can sometimes carefully go over them with a very fine brush and a little bit of the paint color, or even a bit of touch-up paint if you have any left over.
Now, it’s time to reattach any parts you removed. This includes door handles, decorative elements, or anything else you took off at the beginning. Make sure to reattach them securely.
If you painted them, ensure they are completely dry before handling them vigorously.
After reassembly, give your refrigerator a final wipe down with a soft, damp cloth to remove any dust or smudges from the process. Avoid using harsh cleaning chemicals for at least a week or two, as the paint needs time to fully cure and harden. Gentle cleaning will help protect your new paint job.
You might notice a slight difference in texture or sheen between the painted surface and any original components you didn’t paint, like the control panel or logos. This is normal. The goal is a cohesive and appealing look for your appliance.
Inspect your work and admire your accomplishment!
Reattaching Handles and Trim: When putting door handles and trim back on, make sure to use the original screws and hardware. If you painted the handles, ensure the paint is fully dry and cured before re-installing them. Be careful not to overtighten screws, as this could crack the new paint.
The goal is to secure these parts firmly without damaging the painted surface.
Allowing Full Curing Time: As mentioned, paint doesn’t just dry; it cures. Curing is the process where the paint hardens completely, reaching its maximum durability. This can take anywhere from 24 hours for some spray paints to up to 30 days for certain enamel or epoxy coatings.
During this period, the paint is still vulnerable to scratches, dents, and damage from harsh cleaning agents. Treat your freshly painted refrigerator with care. Avoid aggressive scrubbing or using abrasive cleaners.
This patience will pay off in a long-lasting, beautiful finish.
Final Inspection and Cleaning: Once everything is reassembled and the paint has had sufficient time to cure, take a step back and look at your work. Check for any areas that might need a little touch-up. Then, give the entire refrigerator a gentle wipe-down.
Use a soft cloth and a mild soap solution. This removes any fingerprints or dust accumulated during the painting process. Avoid strong chemicals, as they can damage the paint, especially when it’s still new.
Can You Paint a Refrigerator With Regular Paint?
The question, Can You Paint a Refrigerator with Regular Paint?, is one that many people ask before starting a DIY project to refresh their kitchen. While technically you can apply regular house paint to a refrigerator, it is highly unlikely to yield satisfactory or lasting results. Standard latex or oil-based wall paints are not formulated to adhere to the smooth, often glossy surface of a refrigerator.
They are also not designed to withstand the regular cleaning, potential impacts, and temperature fluctuations an appliance experiences. This leads to common issues like peeling, chipping, scratching, and a generally unprofessional appearance.
Regular paints lack the necessary bonding agents and durability required for such a demanding application. The metal surface of a refrigerator is slick, and standard paints struggle to get a good grip. Furthermore, the kitchen environment can be humid, and refrigerators often experience condensation.
These conditions can cause regular paint to bubble or degrade. Therefore, while the idea might be appealing for its simplicity, the reality is that using regular house paint on a refrigerator is a recipe for disappointment. Specialized appliance paints or epoxy coatings are designed precisely to overcome these challenges, offering adhesion, durability, and a finish that can withstand the rigors of daily use in a kitchen.
This leads us to understand why using specialized products is so important. The technology in appliance paints ensures they bond to metal, resist staining, and are easy to clean. It’s not just about color; it’s about performance.
For instance, a study by a paint manufacturer indicated that appliance paints offer up to 3 times the chip resistance of standard enamels when applied correctly to metal surfaces. This resilience is what you need for a high-contact item like a refrigerator.
When considering a project like painting a refrigerator, the investment in the right materials pays dividends. You save yourself time, effort, and the frustration of having to redo a project that failed due to using the wrong type of paint. The answer to Can You Paint a Refrigerator with Regular Paint? is a firm no if you want it to look good and last.
You need paints specifically formulated for appliances.
Why Regular Paint Fails On Refrigerators
Regular paint, the kind you might use on your walls or trim, is not designed for the unique surface of a refrigerator. Refrigerators are typically made of metal, often with a smooth, enameled, or powder-coated finish. This type of surface is very non-porous and slick.
Standard paints have trouble adhering to such smooth surfaces. They rely on some level of porosity to create a strong bond. Without this, the paint can easily peel or flake off.
Additionally, refrigerators are subjected to a lot of wear and tear. They are touched constantly, often with dirty hands. They can get bumped, and they are exposed to moisture and temperature changes.
Regular house paint is simply not durable enough to withstand this kind of abuse. It’s much softer and more flexible than specialized appliance paints, making it prone to scratches, scuffs, and chips. Imagine trying to paint a car with wall paint; it wouldn’t last long outdoors.
A refrigerator, while indoors, faces its own set of challenges.
Adhesion Issues: The primary reason regular paint fails is poor adhesion. Surfaces like metal, especially when coated with enamel or baked finishes, are very smooth. Paint needs something to “grab onto” to stick properly.
Regular wall paint doesn’t have the chemical formulation to create a strong, lasting bond with these slick surfaces. This results in paint that can be easily scraped or peeled away, often just by wiping it down or by normal use.
Lack of Durability: Refrigerators are high-traffic items. They are touched multiple times a day. They can be accidentally bumped by carts, grocery bags, or even just people walking by.
Standard interior paint is not designed to withstand this level of impact and abrasion. It’s too soft and will quickly show scuffs, scratches, and chips, making your appliance look worn and neglected in a very short period.
Environmental Factors: Kitchens can be humid environments. Refrigerators, by their nature, deal with temperature changes and condensation. Regular paints are not typically formulated to be resistant to moisture or drastic temperature shifts.
Exposure to humidity can cause them to blister or peel, while temperature fluctuations can stress the paint film, leading to cracks and delamination. Appliance paints, however, are designed with these specific environmental factors in mind.
Example Scenario: Imagine Sarah decides to paint her old white refrigerator a vibrant red using a standard latex wall paint. She cleans it, sands it lightly, and applies two coats. For the first week, it looks great!
But then, she notices a small scratch near the handle from her keys. A few days later, while wiping down the front after cooking, a corner of the paint starts to lift. Within a month, she sees chips around the handle area, and the paint around the door seals begins to look gummy from condensation.
The beautiful red paint job is quickly turning into a peeling mess, and she regrets not using specialized paint.
Best Paint Alternatives For Refrigerators
Since regular paint is not a good option, what should you use instead? The good news is that there are several excellent alternatives designed specifically for appliances. These paints offer the durability, adhesion, and finish that your refrigerator needs to look great and last.
The key is to select a product made for this specific purpose.
Appliance Epoxy Paint is a fantastic choice. It’s known for its toughness and resilience. Many appliance epoxies are two-part systems, meaning you mix a resin and a hardener before applying.
This creates an incredibly hard, durable finish that resists scratches, chemicals, and moisture. It’s often available in spray cans or as a brush-on product. The finish is usually glossy or semi-gloss, which is ideal for easy cleaning.
Enamel Spray Paint for Appliances is another popular and easy-to-use option. These paints are formulated for direct application on metal and appliances. They offer good adhesion and a durable finish that can withstand cleaning.
They come in a wide variety of colors and finishes, making it easy to find exactly what you’re looking for. The spray application ensures a smooth, even coat with minimal effort.
High-Quality Cabinet Paint can also be used in some cases, but it’s crucial to pair it with a strong bonding primer specifically designed for metal. While cabinet paints are more durable than wall paints, they might still not offer the same level of scratch and chip resistance as dedicated appliance paints. However, if you have a specific color in mind that isn’t available in appliance paints, this is a viable, though more careful, option.
Always follow the manufacturer’s recommendations for priming and application on metal surfaces.
Spray Paint for Metal and Multi-Surface: Some multi-surface spray paints are formulated to adhere to metal and offer good durability. If you choose this route, ensure the can specifically states it’s suitable for metal appliances. It’s still advisable to use a metal primer first for the best results.
Always test the paint on an inconspicuous area if possible before committing to the entire refrigerator.
Comparison Table of Paint Types:
| Paint Type | Durability | Adhesion | Ease of Use | Finish Options | Best For |
|---|---|---|---|---|---|
| Appliance Epoxy | Excellent | Excellent | Moderate (two-part mixing) | Glossy, Semi-Gloss | Maximum toughness and chemical resistance |
| Enamel Spray Paint for Appliances | Very Good | Very Good | Easy | Glossy, Satin, Matte | Quick and easy application, good all-around performance |
| Cabinet Paint (with metal primer) | Good | Good (with primer) | Moderate | Matte, Satin, Semi-Gloss, Gloss | Specific color needs not met by appliance paints |
Appliance Epoxy Paint is often recommended for its superior toughness. Many professional appliance refinishers prefer it for its ability to withstand heavy use and frequent cleaning. The two-part nature means you get a chemically bonded coating that is very hard and resistant to almost anything a kitchen can throw at it, from grease splatters to accidental knocks.
Enamel spray paint for appliances offers a fantastic balance of ease of use and durability. The spray can format means anyone can get a relatively smooth and even finish without specialized equipment. It dries quickly and provides a tough, chip-resistant coating that is ideal for most home DIYers.
The availability of many colors also makes it a very attractive option for customizing your kitchen.
Example Scenario: Mark wanted to update his old refrigerator from a dated almond color to a sleek modern black. He considered using regular spray paint but remembered reading that it wouldn’t last. Instead, he purchased an appliance epoxy spray paint kit.
He followed the preparation steps carefully, including cleaning, sanding, and priming with a rust-inhibiting primer. Then, he applied several light coats of the black appliance epoxy spray paint. The result was a smooth, professional-looking, matte black finish that was incredibly durable.
Six months later, it still looked as good as new, with no scratches or chips, even with regular use.
Tips For A Successful Refrigerator Paint Job
Painting a refrigerator can seem intimidating, but with the right approach, you can achieve a fantastic result. The key is attention to detail and patience. Follow these tips to ensure your project goes smoothly and your refrigerator looks fantastic.
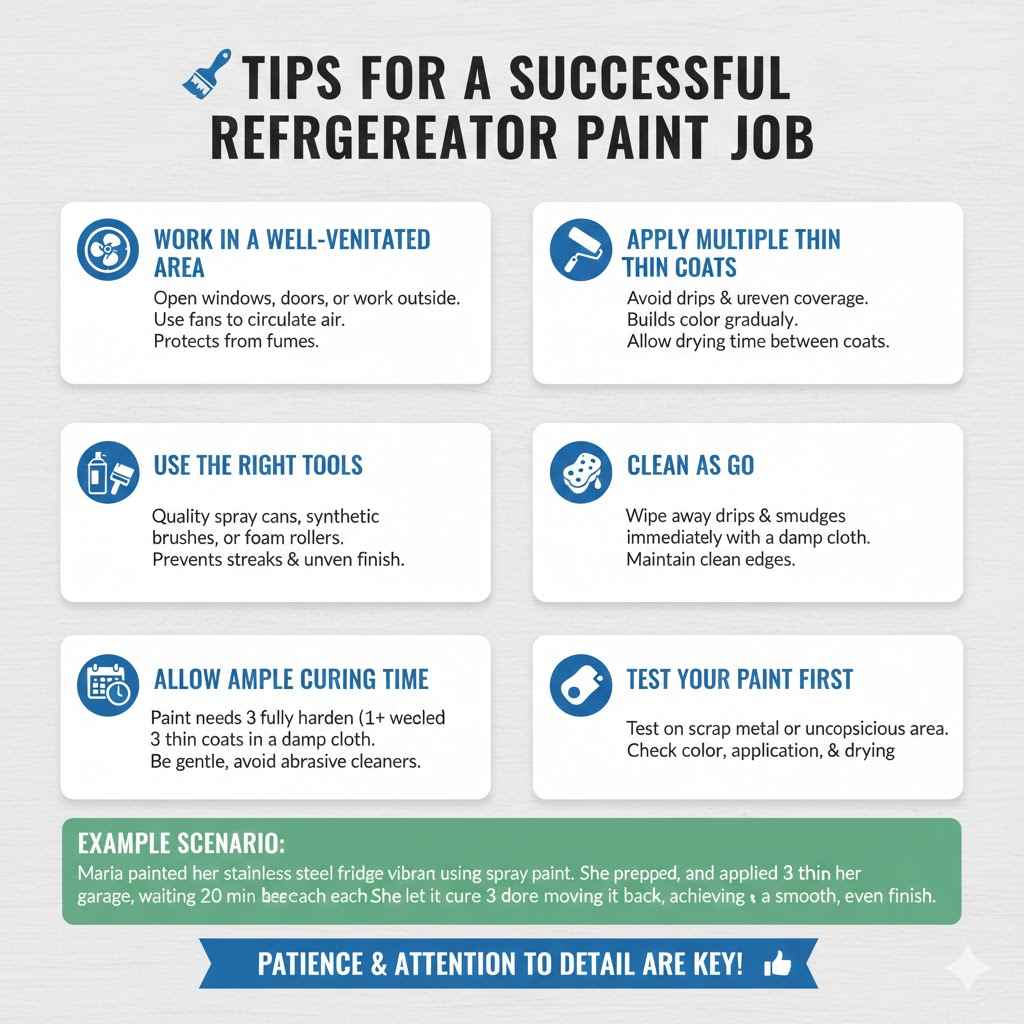
Work in a well-ventilated area: Whether you’re using spray paint or brush-on paint, good ventilation is crucial. Open windows and doors, or work outside if weather permits. This helps the paint dry faster and also protects you from inhaling fumes.
If working indoors, consider using fans to circulate air.
Apply multiple thin coats: This is the golden rule of painting, especially on appliances. Thick coats lead to drips, uneven coverage, and a less durable finish. Thin coats build up the color and protection gradually, resulting in a smooth, professional look.
Allow adequate drying time between each coat as recommended by the paint manufacturer.
Use the right tools: For spray paint, use quality cans that provide an even spray pattern. For brush or roller application, invest in high-quality synthetic brushes or foam rollers designed for smooth surfaces. Poor quality tools can leave streaks, drips, and an uneven finish, no matter how good the paint is.
Clean as you go: Keep a damp cloth handy to wipe away any accidental drips or smudges immediately. It’s much easier to clean up wet paint than dried paint. This also helps maintain the clean edges you created with your painter’s tape.
Allow ample curing time: Remember that paint needs time to fully harden, not just dry to the touch. Be gentle with your freshly painted refrigerator for at least a week, and ideally longer, to prevent scratches and damage. Avoid abrasive cleaners during this period.
Test your paint first: If possible, test your chosen paint on a scrap piece of metal or an inconspicuous area of the refrigerator. This allows you to see how the color looks, how it applies, and how it dries before you commit to the entire appliance. This can save you from unexpected issues.
Example Scenario: Maria wanted to give her stainless steel refrigerator a bold makeover. She chose a vibrant teal appliance spray paint. She meticulously cleaned and prepped the fridge, then taped off all the areas she didn’t want painted.
Working in her garage on a calm day, she applied the first light coat, holding the can at the recommended distance and using overlapping strokes. She let it dry for 20 minutes before applying the second coat, and then a third. After removing the tape, she was thrilled with the smooth, even finish.
She let the fridge sit in the garage for three days before bringing it back into the kitchen, ensuring it had plenty of time to cure before use.
Frequently Asked Questions
Question: Can I paint over a textured refrigerator surface?
Answer: Yes, you can paint over a textured refrigerator surface, but preparation is even more important. You’ll need to clean it very well, and potentially use a filler or sand it down slightly to reduce the texture if you want a smoother finish. Specialty spray paints or paints designed for textured surfaces can work well.
Question: How long does it take to paint a refrigerator?
Answer: The actual painting process might only take a few hours, but when you factor in cleaning, sanding, priming, drying time between coats, and reassembly, the entire project can take 1-2 full days, or longer if you allow for extended drying and curing.
Question: Will painting my refrigerator void the warranty?
Answer: Yes, painting your refrigerator will almost certainly void any manufacturer’s warranty. If your appliance is still under warranty and you’re concerned about this, it’s best to consult the warranty terms or avoid painting.
Question: Can I paint the interior of my refrigerator?
Answer: It is generally not recommended to paint the interior of a refrigerator. The paint may not be food-safe, can emit fumes, and might not withstand the cold temperatures and moisture inside. Stick to using specialized coatings or replacing shelves if needed.
Question: What if I get paint on the rubber seals of my refrigerator?
Answer: If you get paint on the rubber seals, try to wipe it off immediately with a damp cloth or a bit of mineral spirits (check paint instructions for what solvent to use). If the paint has dried, you may need to carefully scrape it off with a plastic scraper or razor blade, being careful not to damage the seal.
Conclusion
So, Can You Paint a Refrigerator with Regular Paint? The answer is a definite no if you want a durable, attractive finish. Regular paints simply won’t adhere properly or withstand daily kitchen life. For a successful and lasting makeover, always choose specialized appliance paints or epoxy coatings.
With proper preparation, the right materials, and careful application, you can easily transform your refrigerator’s look.