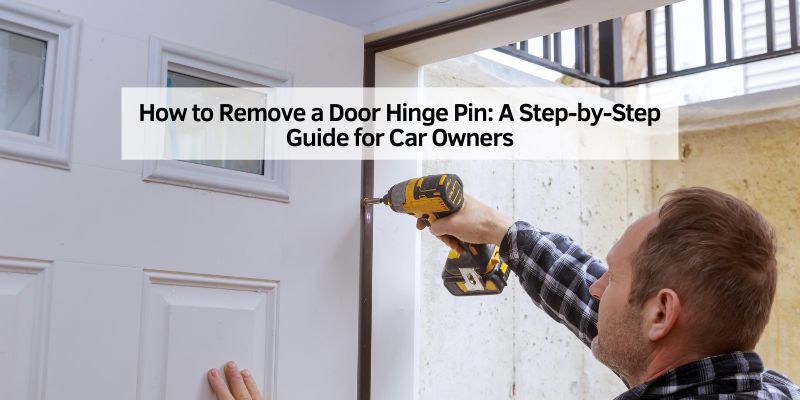
How to Remove a Door Hinge Pin: A Step-by-Step Guide for Car Owners
Hey, friend! So, you’re wondering how to remove a door hinge pin on your car? I love that you’re ready to dive into this hands-on project. That squeaky door or misaligned hinge can be such a pain, right? I’ve been there with my old Ford Focus, wrestling with a stubborn hinge pin that just wouldn’t budge. After a few tries, some research, and a bit of elbow grease, I figured it out—and now I’m excited to share my experience with you.
Removing a door hinge pin might sound tricky, but with the right tools and know-how, it’s totally doable. Whether you’re fixing a creaky door, replacing a worn hinge, or just curious about car maintenance, I’ve got your back. Let’s roll up our sleeves and get started!
Why You Might Need to Remove a Door Hinge Pin
Let’s start with why you’d even want to mess with a hinge pin. For me, it was that awful squeak every time I opened my car door. No amount of WD-40 could fix it—the hinge pin was just too worn out. Removing the pin let me clean it, lubricate it properly, or replace it if needed.
Another reason is a sagging door. I noticed my Focus’s door didn’t close smoothly—it was rubbing against the frame. That’s a sign the hinge pin is loose or the hinge is damaged. Taking out the pin can help you inspect or replace the hinge to fix the alignment.
Sometimes, you need to remove the entire door. I helped a buddy swap out a dented door on his Chevy Silverado, and we had to pop the hinge pins to lift the door off. It’s also common when painting a car or doing bodywork. Whatever your reason, removing the pin is the first step to getting your door working like new.
Tools and Materials You’ll Need
Before we jump in, let’s talk tools. I learned the hard way that having the right gear saves a ton of frustration. When I first tried removing a hinge pin without a proper punch, I ended up with a scratched door and a sore hand. Here’s what I recommend keeping handy.
You’ll need a flathead screwdriver to pry the pin or clips. A hammer is essential for tapping out the pin—any household hammer works, but a small ball-peen hammer is ideal. A punch or drift pin helps drive the pin out cleanly. I got a cheap punch set for $10 at a hardware store, and it’s been a game-changer.
A pair of pliers, like needle-nose, is great for grabbing clips or stubborn pins. WD-40 or a similar penetrating oil loosens rusty pins—I swear by it. You’ll also want a clean rag to wipe away grime and a small container for screws or clips. I use an old coffee can to keep tiny parts from rolling away.
Optional but helpful: a door spring compressor tool if your car has a check strap (that thing that holds the door open). Some gloves protect your hands from sharp edges, and a flashlight helps you see inside the hinge. If you’re replacing the pin, grab a new one that matches your car’s make and model—auto parts stores or dealerships carry them.
Here’s a quick table of the essentials:
| Tool/Material | Purpose | Where to Get It |
|---|---|---|
| Flathead Screwdriver | Remove the clips or the grab pin | Hardware store, auto parts store |
| Hammer | Tap out the hinge pin | Hardware store, home |
| Punch or Drift Pin | Drive pin out cleanly | Hardware store, auto parts store |
| Needle-Nose Pliers | Wipe grime, keep the area tidy | Hardware store |
| WD-40 | Loosen rusty or stuck pins | Auto parts store, supermarket |
| Clean Rag | Wipe grime, keep area tidy | Home, auto parts store |
| Small Container | Hold clips or screws | Home (e.g., coffee can) |
| New Hinge Pin (Optional) | Replace worn or damaged pin | Dealership, auto parts store, online |
Preparing to Remove the Hinge Pin
Preparation is key to making this job smooth. I skipped this step once and ended up with a wobbly door that was a nightmare to realign. Here’s how I set up now.
Park your car on a flat surface, like your driveway, and make sure it’s in park with the emergency brake on. I work in a well-lit area—daylight is best, but a work light helps if it’s dark. Open the door you’re working on and prop it securely. I use a jack stand or a sturdy box to keep the door from swinging, but a friend holding it works too.
Inspect the hinge. Most car doors have two hinges, each with a pin. Check for rust, dirt, or damage. If the pin looks rusty, spray it with WD-40 and let it sit for 10 minutes. I did this on my Focus, and it made the pin slide out way easier. Wipe away excess oil with a rag to keep things clean.
If your door has a check strap or spring, you might need to disconnect it. I used a door spring compressor tool on my buddy’s truck—it saved us from a pinched finger. Check your car’s manual for specifics, as some check straps are bolted on and need a wrench.
Gather your tools and lay them out. I keep everything on a towel next to the car so I’m not hunting for a screwdriver mid-job. Take a deep breath—this isn’t rocket science, but it takes a bit of patience. I set aside about 30–60 minutes per hinge, just to be safe.
Step-by-Step Guide to Removing a Door Hinge Pin
Alright, let’s get to the good stuff. I’ll walk you through how I removed the hinge pin on my Focus. Every car is a bit different, so check your manual, but this process works for most vehicles.
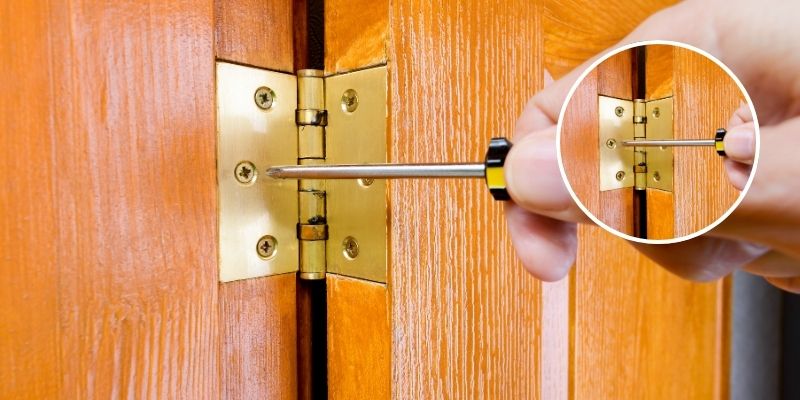
Start by removing any clips or caps. Some hinge pins have a small clip or washer at the top or bottom to keep them in place. I used my flathead screwdriver to gently pry off the clip on my hinge. Be careful—it can fly off and disappear. I lost one in the grass once and spent 10 minutes searching! Use pliers if the clip’s stubborn.
Next, position your punch or drift pin. Place the punch on the bottom of the hinge pin (most pins are removed by driving them upward). I held the punch steady with one hand and tapped it lightly with the hammer. Start with gentle taps to get the pin moving. If it’s stuck, spray more WD-40 and wait a few minutes. My Focus pin was rusty, so it took a few extra taps.
Drive the pin out. Once it starts moving, keep tapping with the hammer. I switched to slightly harder hits as the pin slid up. If you’re removing the top hinge pin, have someone hold the door or prop it securely—it can sag without the pin. The pin should pop out of the top of the hinge. I caught mine with pliers, so it didn’t fall.
Remove the pin completely. If it’s stuck near the top, use pliers to wiggle it out. I had to twist gently on my buddy’s truck because the pin was bent. Clean the pin with a rag and inspect it for wear. If it’s damaged, grab a new one. My Focus pin was reusable after some sanding and grease.
If you’re removing both hinge pins to take off the door, repeat the process for the other hinge. I recommend doing one hinge at a time to keep the door stable. When I helped remove a door, we marked the hinge position with a marker to make reinstallation easier.
Reinstalling or Replacing the Hinge Pin
Once you’ve got the pin out, you might want to clean it, lubricate it, or replace it. Here’s how I handle this part.
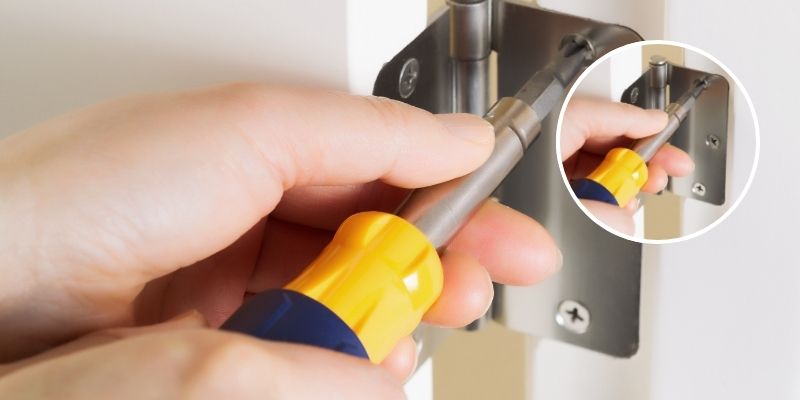
If you’re reusing the pin, clean it with a wire brush or sandpaper to remove rust. I soaked mine in WD-40 and scrubbed it until it was smooth. Apply a thin layer of white lithium grease or silicone spray to prevent future squeaks. I used grease on my Focus, and it’s been quiet for over a year.
To reinstall, slide the pin back into the hinge from the top. I tapped it gently with the hammer to seat it fully. Make sure it’s aligned properly—my first try was crooked, and the door wouldn’t close right. Replace any clips or washers you removed earlier. I used pliers to snap the clip back on.
If you’re replacing the pin, make sure the new one matches the old one’s size and shape. I ordered a replacement for my buddy’s truck from an auto parts store for $15. Slide the new pin in, tap it into place, and secure it with the clip. Test the door by opening and closing it a few times. I was so relieved when my door swung smoothly with no squeak!
If you removed the door, have a friend help you lift it back into place. Line up the hinges with your marks, insert the pins, and secure them. I found this part tricky, so we took our time to get the alignment right.
Common Challenges and How to Handle Them
I hit a few bumps along the way, so let me share some common issues and how I dealt with them. Rusty pins are the worst. My Focus pin was stuck tight, even after WD-40. I let it soak for 20 minutes and used a bigger hammer for more force. If it’s still stuck, heat the hinge with a hairdryer (not a torch—too risky!) to expand the metal slightly.
Another issue is a bent pin. I found one on an old Jeep I worked on. If the pin won’t come out straight, use pliers to twist it gently. If it’s too bent, replace it—bent pins can damage the hinge. I had to order a new one for $20.
Clips can be tricky. Some are tiny and hard to grip. I used needle-nose pliers and a flashlight to see better. If you lose a clip, auto parts stores sell replacements for a couple of bucks.
If the door sags during removal, it’s because it’s not supported well. I had this happen when I didn’t prop the door properly. Use a jack stand or have a friend hold it steady. If the door’s already sagging, check the hinge for wear—it might need replacing too.
When to Call a Professional
I’m all about DIY, but sometimes a pro is the way to go. If your hinge is welded on (some older cars have this), removing the pin might require cutting tools I don’t mess with. I saw this on a vintage Mustang my friend was restoring—we left it at a shop.
If the door is heavily misaligned or the hinge is damaged, a mechanic can realign it properly. I tried fixing a sagging door once and made it worse because the hinge bolts were stripped. A pro fixed it for $150.
Expect to pay $100–$300 for a mechanic to remove and replace hinge pins, depending on your car and location. It’s pricier than DIY, but worth it for complex jobs or if you’re short on tools.
Maintaining Your Hinges After Pin Removal
Once the pin’s out and back in, you want to keep those hinges happy. I learned a few tricks to prevent squeaks and wear. Lubricate the hinges every 6–12 months with white lithium grease or silicone spray. I do mine twice a year—spring and fall—and it keeps them quiet.
Clean the hinges regularly. I wipe them down when I wash my car, especially after driving in mud or snow. A damp rag removes dirt that can cause friction. If you live near the coast, rinse hinges with fresh water to prevent salt buildup.
Check for rust. I inspect my hinges every few months. If I spot rust, I clean it with a wire brush and apply lubricant. Rust can seize the pin again, so stay on top of it.
Avoid slamming the door. I used to close my doors hard, but it wears out the pins faster. Close them gently to extend the hinge’s life.
Cost of Removing and Replacing Hinge Pins
This is one of the cheapest car fixes you can do. A new hinge pin costs $10–$25, depending on your car. I paid $15 for my Focus pin. Tools are a one-time cost—a punch set is $10, a hammer is $10–$20 if you don’t have one, and WD-40 is $5. If you already have basic tools, you’re looking at just the pin cost.
Total DIY cost is usually $15–$50, even with a new pin. Hiring a pro costs $100–$300 per hinge, including parts and labor. I saved about $200 by doing it myself, but it took me an afternoon.
If you need to replace the entire hinge, expect $20–$50 per hinge, plus $100–$200 in labor if you go to a shop. I stuck with just the pin to keep costs down.
Tips for First-Time DIYers
If this is your first car repair, don’t sweat it—I was nervous too! Watch a YouTube video for your car model before starting. I found one for my Focus that showed every step, and it gave me confidence.
Work slowly and keep track of parts. I use a magnetic tray for clips and screws—saves so much time. Take photos at each step to remember how things go back together. If you get stuck, online forums like Reddit’s r/MechanicAdvice are full of helpful folks.
Don’t force anything. If the pin won’t budge, soak it in WD-40 or try a bigger punch instead of hammering harder. I dented a hinge once by being impatient.
Have fun! There’s something awesome about fixing your own car. I felt like a pro when my door stopped squeaking.
Conclusion
Wow, we’ve covered a ton about removing door hinge pins! From gathering tools to tackling rusty pins, I hope you’re pumped to try this yourself. Fixing my car’s hinge was such a rewarding project—it saved me money and taught me so much. Whether you’re silencing a squeak, realigning a door, or swapping one out, you’ve got the know-how now. Thanks for hanging out with me through this guide—I had a blast sharing my story. If you give it a shot or have a funny hinge tale, drop it in the comments. Here’s to smooth, quiet car doors and the joy of DIY!
FAQ: Common Questions About Removing Car Door Hinge Pins
Why would I need to remove a door hinge pin?
You might remove a pin to fix a squeaky hinge, realign a sagging door, or take the door off for repairs or painting. It’s a common fix for worn or rusty hinges.
Can I remove a hinge pin myself?
Yes, it’s a DIY-friendly job with basic tools like a hammer, punch, screwdriver, and WD-40. Follow a guide for your car model and take your time.
How long does it take to remove a hinge pin?
It takes 30–60 minutes per hinge for a beginner. My first try took about an hour, but with practice, it’s faster. Rusty pins might take longer.
What if the hinge pin is stuck?
Soak it with WD-40 for 10–20 minutes and tap gently with a hammer and punch. If it’s still stuck, try heating the hinge with a hairdryer or using a bigger punch.
Do I need to replace the hinge pin?
Not always. Clean and lubricate the pin if it’s in good shape. Replace it if it’s bent, rusted through, or worn. New pins cost $10–$25.
How much does it cost to remove a hinge pin?
DIY costs $15–$50, including a new pin and basic tools. A mechanic charges $100–$300 per hinge. Doing it yourself saves a lot!
Can I lubricate the hinge after removing the pin?
Yes, it’s a great idea! Clean the pin and hinge, then apply white lithium grease or silicone spray. I do this every 6–12 months to prevent squeaks.