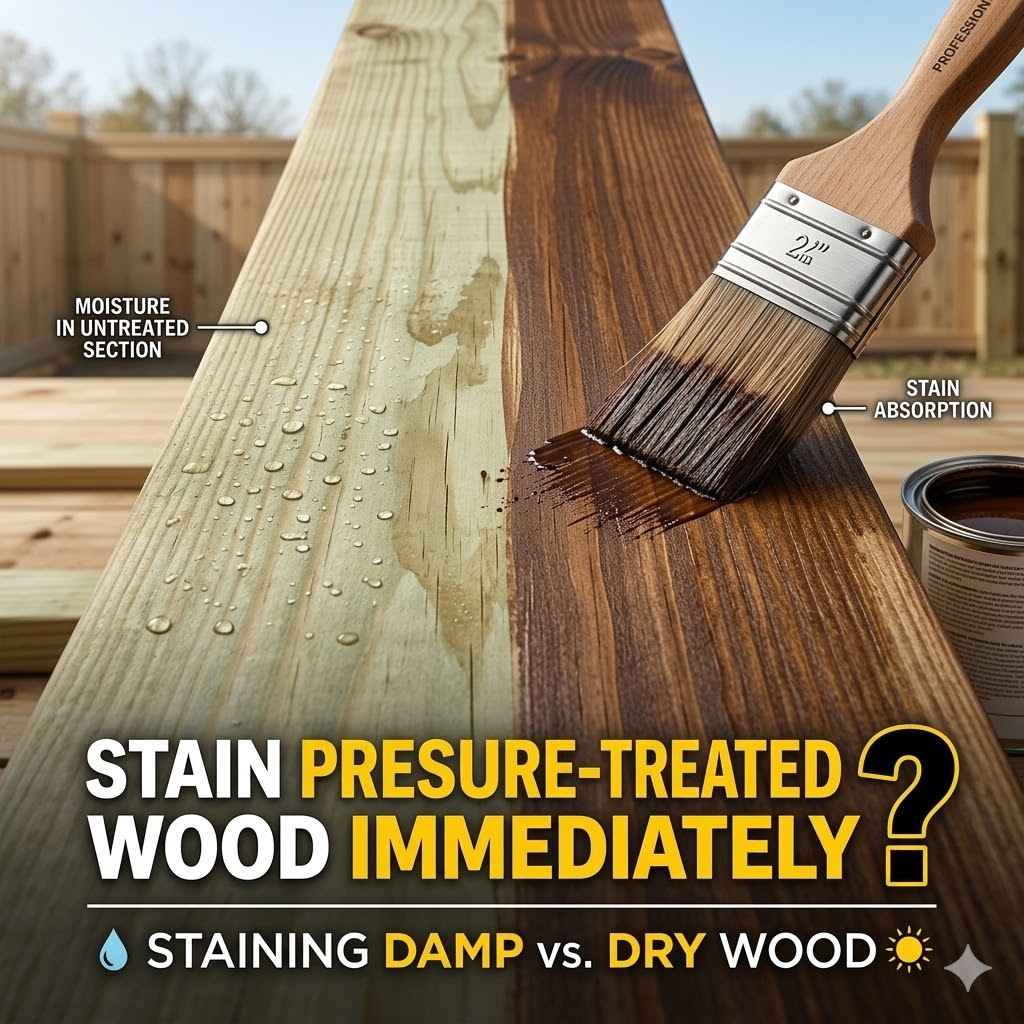
Can You Stain Pressure Treated Wood Immediately
Many folks wonder about staining their brand new pressure treated wood projects. It seems like a simple question, but the answer can be tricky. Can you stain pressure treated wood immediately after it’s built?
This common challenge often leaves beginners feeling a bit lost. Don’t worry, we’re here to make it easy. We’ll walk you through exactly what you need to know with simple steps.
Get ready to learn the best way to get your wood looking great.
When Can You Stain Pressure Treated Wood
Figuring out the right time to stain your pressure treated wood is key to a lasting finish. It might seem like a good idea to get that fresh wood protected right away, but patience is often rewarded. This section will explain why waiting is important and what signs to look for to know your wood is ready for a beautiful stain.
Understanding Pressure Treated Wood
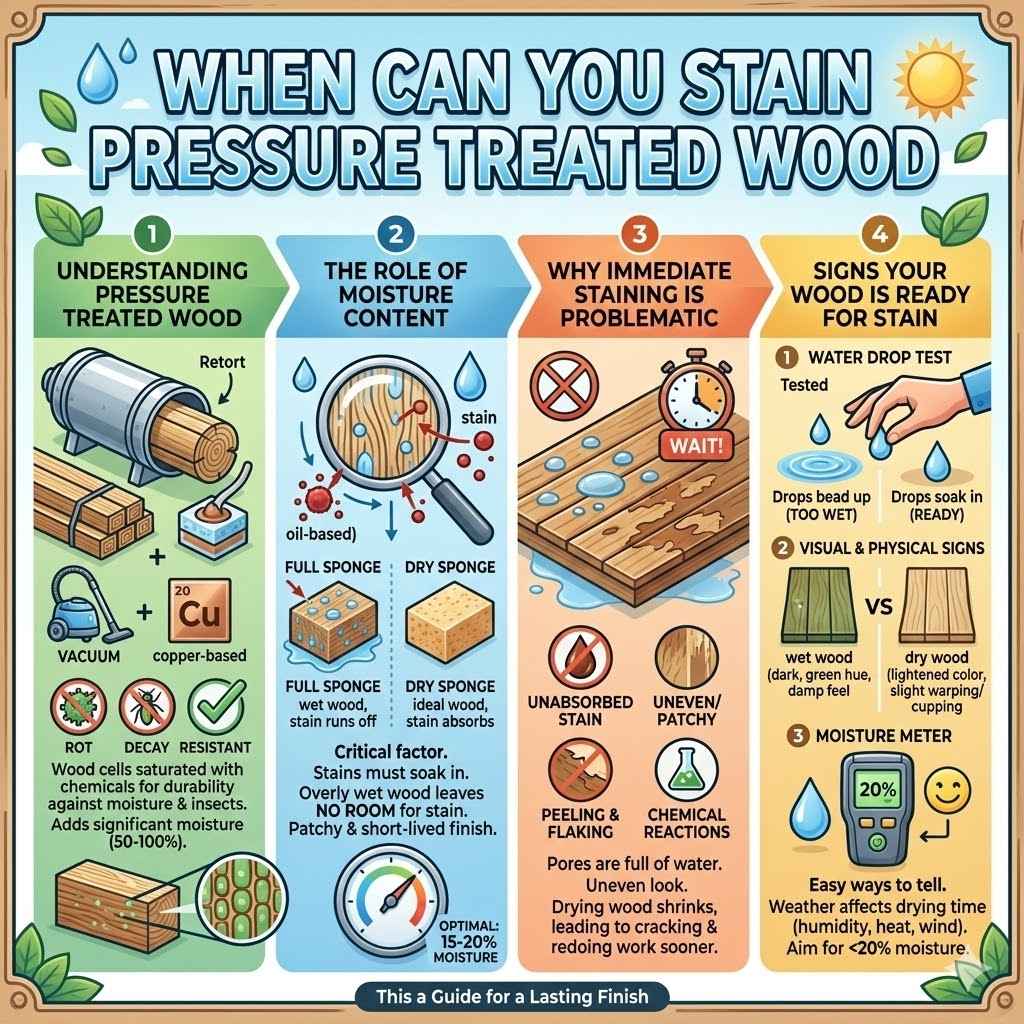
Pressure treated wood is wood that has been forced to absorb chemicals deep into its fibers. This process makes it resistant to rot, decay, and insect damage. The chemicals used are typically copper-based.
They help the wood last much longer, especially when exposed to moisture or in contact with the ground. This makes it a popular choice for outdoor projects like decks, fences, and play structures.
The treatment process involves placing the wood in a large cylinder. Then, a vacuum is applied to remove air from the wood cells. After that, the treatment solution is pumped into the cylinder under pressure.
This pushes the chemicals deep into the wood. Once the process is complete, the wood is removed and often left to dry.
It’s important to note that the treatment process adds a significant amount of moisture to the wood. This moisture needs to evaporate before you can apply a stain effectively. If you try to stain wood that is still too wet, the stain will not penetrate properly.
It may bead up, peel, or not adhere well, leading to a patchy and short-lived finish.
The Role of Moisture Content
Moisture content is perhaps the most critical factor determining when you can stain pressure treated wood. Freshly treated wood can contain a lot of water, sometimes as much as 50% to 100% of its dry weight. Stains, especially oil-based ones, need to soak into the wood fibers to provide protection and color.
If the wood is saturated with water, there’s no room for the stain to enter.
Think of it like trying to soak a sponge that’s already full of water. The new water just runs off. The same happens with stain on overly wet wood.
The stain will sit on the surface, and as the wood dries and shrinks, the stain will likely crack and peel. This can happen even with high-quality stains.
For most stains to work correctly, the moisture content of the wood should ideally be between 15% and 20%. Lower is even better for some products, but this range is generally considered optimal. Achieving this moisture level requires time for the wood to air dry after treatment.
Why Immediate Staining Can Be Problematic
Many people want to stain their projects right away to protect them and make them look good. However, Can You Stain Pressure Treated Wood Immediately is usually a no. If you stain pressure treated wood before it has a chance to dry out sufficiently, you’re likely to face several problems.
The stain won’t absorb properly into the wood’s pores because they are already filled with water from the treatment process.
This leads to a finish that looks uneven and patchy. It might appear as though you’ve applied the stain inconsistently, even if you tried your best. Furthermore, as the wood naturally dries and shrinks over time, any stain that has only adhered to the surface will likely peel, flake, or crack.
This means you’ll have to redo the work much sooner than you’d like.
The chemicals in pressure treated wood also play a role. They can sometimes react with stain if the wood is too wet, leading to undesirable color changes or poor adhesion. Waiting allows these chemicals to settle and the wood to become receptive to the stain’s formulation.
Signs Your Wood Is Ready for Stain
There are a few easy ways to tell if your pressure treated wood is ready to be stained. One of the most common tests is the “water drop test.” Sprinkle a few drops of water on the wood surface. If the water beads up and sits on top, the wood is still too wet and needs more drying time.
If the water soaks into the wood within a few minutes, it’s likely dry enough.
Another indicator is the wood’s appearance. Freshly treated wood often looks dark, sometimes with a greenish hue, and feels damp or slick to the touch. As it dries, it will lighten in color and feel drier.
You might also notice a slight cupping or warping in some boards as they dry, which is a natural process.
The time it takes for your wood to dry can vary greatly depending on the weather. Humid, cool conditions mean longer drying times. Hot, dry, and breezy conditions speed up the process.
You can also use a moisture meter, a tool that measures the water content in wood. Aim for a moisture reading below 20% for most stains.
The Drying Process Explained
After the pressure treatment, your wood is essentially saturated. This drying phase is critical for a successful staining project. It’s not just about letting it sit; it’s about allowing the wood to acclimate and release excess moisture naturally.
This section will break down why this happens and how long it typically takes.
How Pressure Treatment Affects Moisture
The pressure treatment process forces a large volume of water-soluble preservatives deep into the wood structure. This is what protects the wood from decay and insects. However, this process also means the wood becomes very wet.
The amount of water absorbed can be substantial, sometimes doubling the weight of the wood compared to its dry state.
These preservatives are carried into the wood by the water. Once the pressure is released, the wood is still filled with this water, along with the treatment chemicals. This moisture needs to evaporate from the wood for it to be ready for staining.
The chemicals themselves do not prevent the drying process; it is the sheer volume of water that must dissipate.
Think of the wood as a sponge that has been thoroughly soaked. Before you can absorb anything else, like paint or stain, the sponge needs to dry out considerably. The wood cells themselves are holding onto this water, and it needs time to evaporate into the surrounding air.
This natural evaporation is what prepares the wood’s surface for further treatment.
Factors Influencing Drying Time
The time it takes for pressure treated wood to dry sufficiently for staining is not a set number. It depends on several environmental factors. The most significant are temperature, humidity, and airflow.
Warmer temperatures increase the rate of evaporation. Higher humidity levels slow down drying because the air is already holding a lot of moisture and can’t take much more from the wood.
Good airflow is crucial. If wood is stacked tightly or covered, moisture can get trapped, significantly increasing drying time. Direct sunlight can also help speed up drying, but be aware it can also lead to more rapid warping or cracking if the wood dries too quickly and unevenly.
The type of wood itself can also play a minor role, with denser woods taking longer to dry.
On average, you might expect to wait anywhere from a few weeks to several months. In hot, dry, and breezy conditions, it might be ready in as little as 2-4 weeks. In cooler, humid, or shaded conditions, it could take 3-6 months or even longer.
It’s always best to test the moisture content rather than guess based on time alone.
The Recommended Waiting Period
The general recommendation for staining pressure treated wood is to wait until it has dried out considerably. Most manufacturers and experts suggest a waiting period of at least 2 to 6 months after purchase. Some recommend even longer, up to a year, especially if you live in a region with high humidity or if the wood was treated with a newer generation of preservatives that might retain moisture longer.
This waiting period allows the wood to air dry naturally. It also gives the wood time to weather slightly. This weathering process helps to open up the wood’s pores.
This makes it more receptive to accepting stain evenly. Rushing this process is the most common mistake people make, leading to a disappointing finish.
It’s vital to remember that this is a guideline. The actual drying time can be shorter or longer based on the environmental conditions mentioned earlier. Always perform the water drop test or use a moisture meter to confirm readiness.
Waiting the recommended time is a crucial step in ensuring your stain job looks great and lasts for years.
Preparing Your Wood for Stain
Once your pressure treated wood is dry, it’s not quite time to grab the brush. There are still a few important steps to take to ensure the stain adheres properly and provides the best possible finish. This part of the process is about making the surface clean and ready to accept the stain.
Cleaning the Wood Surface
Even after drying, your wood might have accumulated some dirt, dust, or mildew. It’s essential to clean the surface before staining. You can use a specialized wood cleaner designed for decks and fences, or a milder solution of warm water and a small amount of laundry detergent or oxygen bleach.
Avoid using harsh chemicals like chlorine bleach, which can damage wood fibers.
For cleaning, a stiff-bristled brush or a broom is usually sufficient. If you’re dealing with stubborn dirt or mildew, you might consider a pressure washer, but use it on a low setting and keep it moving to avoid damaging the wood. Always rinse the wood thoroughly with clean water after cleaning to remove any soap residue.
Any residue left behind can prevent the stain from adhering properly.
Allow the wood to dry completely after cleaning before moving on to the next step. This is another point where patience is important. Ensure the surface is dry to the touch and that no residual moisture remains trapped in the grain.
A clean surface is the foundation for a beautiful and durable stain job.
Sanding for Better Adhesion
Sanding is an optional but often beneficial step, especially if your wood feels a bit rough or if you want to ensure the smoothest possible finish. A light sanding with medium-grit sandpaper (around 80-100 grit) can help to open up the wood’s surface. This provides a better grip for the stain to adhere to.
It also helps to remove any minor imperfections or raised grain.
If your wood is already smooth, you might be able to skip this step. However, if it feels fuzzy or rough, sanding is highly recommended. Always sand in the direction of the wood grain.
This will prevent unsightly scratches. After sanding, sweep or vacuum away all the dust. You can also wipe the surface with a tack cloth or a damp rag to pick up any remaining fine particles.
Sanding is particularly helpful if you’re using a semi-transparent or transparent stain, as these finishes show the wood grain more clearly. A smoother surface will result in a more uniform and professional-looking color application. Don’t over-sand; the goal is just to prep the surface, not to change its texture significantly.
Choosing the Right Stain
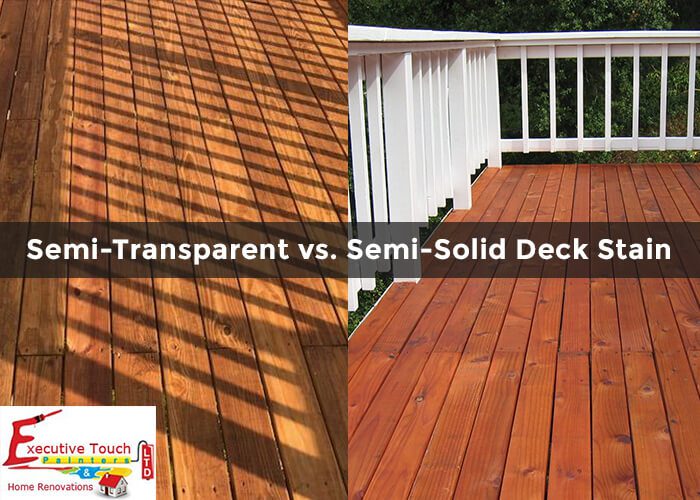
The type of stain you choose will also impact your project. There are several types, including transparent, semi-transparent, semi-solid, and solid stains. Transparent stains offer the least color but highlight the natural wood grain.
Semi-transparent stains add more color while still allowing some grain to show through. Semi-solid stains cover more of the grain, and solid stains act more like paint, completely obscuring the wood grain.
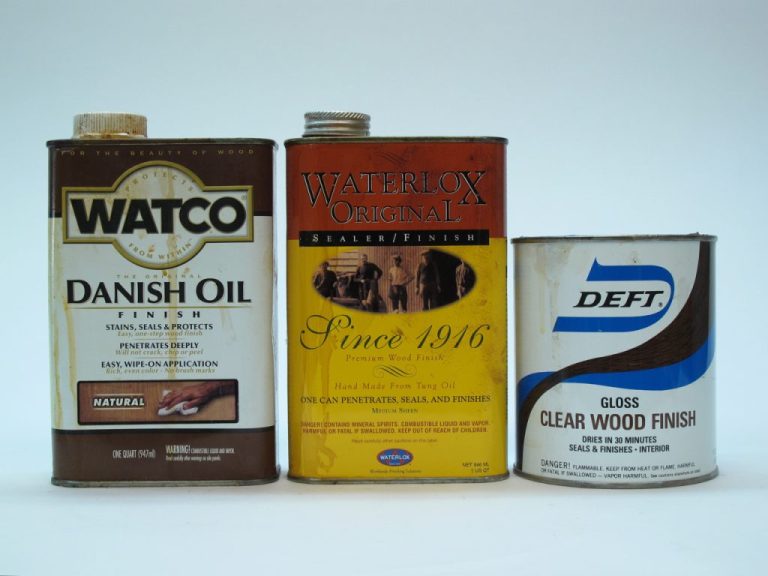
For pressure treated wood, oil-based stains are often recommended. They tend to penetrate the wood better and offer excellent protection against moisture and UV rays. Water-based stains have improved significantly and can also be a good choice, especially for ease of cleanup.
Always check the stain manufacturer’s recommendations for use on pressure treated wood.
Consider the look you want to achieve. If you love the natural look of wood, go for a more transparent option. If you want to add a significant pop of color or cover up some imperfections, a semi-solid or solid stain might be better.
Remember, once you apply a solid stain, it’s very difficult to go back to a more transparent finish.
Applying the Stain Correctly
Now that your wood is dry, clean, and prepped, it’s time to apply the stain. This is where you’ll see your project come to life. Following the right application techniques will ensure a beautiful and long-lasting finish.
Best Application Methods
There are a few effective ways to apply stain to pressure treated wood. Brushing is a popular method, especially for smaller projects or detailed areas. It allows for good control and ensures the stain is worked into the wood grain.
Use a good quality brush that won’t shed bristles.
Rolling is another option, particularly for larger, flat surfaces like decks. A roller can cover a lot of area quickly and evenly. Use a roller with a nap thickness appropriate for the texture of your wood.
A common recommendation is a 1/4 inch to 1/2 inch nap roller.
Spraying is the fastest method and can provide a very uniform finish, but it requires more prep work to mask off surrounding areas. It also uses more stain, and you might still need to back-brush to ensure even penetration. Whichever method you choose, work in manageable sections and try to maintain a wet edge to avoid lap marks.
Working with the Grain
Always apply stain in the direction of the wood grain. This is crucial for achieving a natural and professional look. When brushing, use long, even strokes following the grain.
If you’re rolling, apply the stain in sections, rolling with the grain. If you’re spraying, aim your spray gun along the grain.
If you notice any areas where the stain looks uneven or has started to dry too quickly, you can often go back and blend it in with your brush or roller. This is where maintaining a “wet edge” is important. A wet edge means you are applying the new stain next to an area that is still wet, allowing you to blend them together seamlessly without leaving noticeable lines.
For decks, work one or two boards at a time, from the edge of the deck to the other. This helps to prevent lap marks where one section of stain ends and another begins. If you’re staining vertical surfaces like fences, start at the top and work your way down, again following the grain.
Handling Excess Stain
It’s common to apply a bit more stain than the wood can absorb, especially with the first coat. After you’ve applied the stain to a section of wood, let it sit for about 15-20 minutes. During this time, the wood will absorb what it can.
Then, you’ll need to wipe off any excess stain that remains on the surface.
Use a clean, lint-free rag to wipe off the excess stain. Again, wipe in the direction of the wood grain. This step is very important.
If you leave excess stain on the surface, it can become sticky, tacky, and prone to peeling or attracting dirt. It can also lead to an uneven finish.
This process is sometimes called “back-wiping.” It ensures that the stain is properly absorbed into the wood rather than sitting on top. Some stains are formulated as “wiping stains,” meaning they are designed to be applied and then immediately wiped off. Always read the manufacturer’s instructions on the stain can for specific application and removal times.
Second Coats and Drying Times
Depending on the type of stain and the desired color depth, you may need to apply a second coat. If you’re using a transparent or semi-transparent stain and want a richer color, a second coat is often recommended. For semi-solid or solid stains, one coat might be sufficient, but check the product’s coverage.
Always allow the first coat to dry thoroughly before applying a second coat. The drying time between coats will vary depending on the stain manufacturer and the environmental conditions. Typically, it can range from 24 to 48 hours.
Again, consult the product label for specific recommendations.
Once the final coat is applied, the total drying and curing time before the wood can be used or exposed to heavy traffic can be several days, sometimes up to 72 hours or more. Curing is the process where the stain fully hardens and develops its maximum durability. Rushing this can damage the finish.
Maintaining Your Stained Wood
Once your project is stained and looks fantastic, you’ll want to keep it that way. Regular maintenance will extend the life and beauty of your stained pressure treated wood. This section covers how to keep your project looking its best over the years.
Regular Cleaning and Inspections
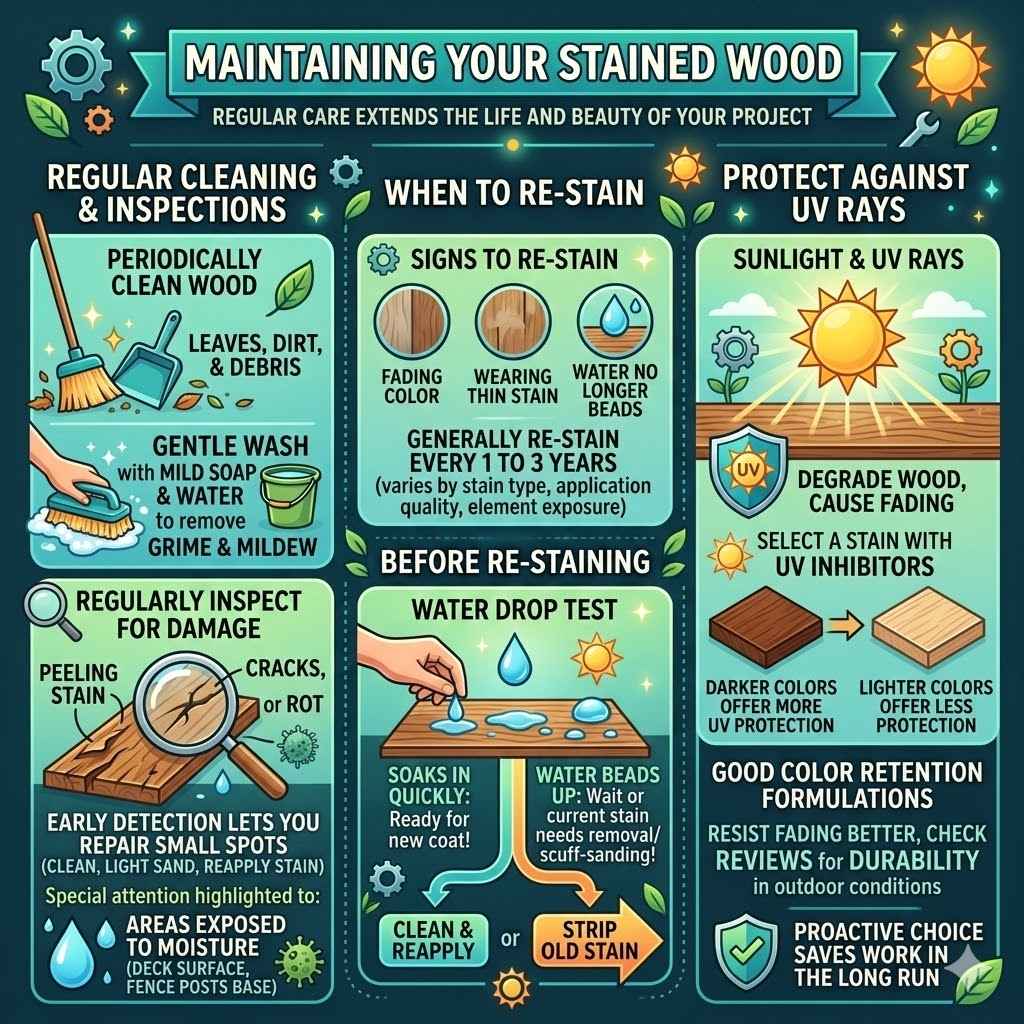
Periodically cleaning your stained wood is essential. This involves sweeping away leaves, dirt, and debris. You can also give it a gentle wash with mild soap and water to remove grime and mildew that might start to form.
Inspect your wood regularly for any signs of damage, such as peeling stain, cracks, or rot.
Early detection of problems allows you to address them before they become major issues. For example, if you notice a small spot of peeling stain, you can often repair it by cleaning the area, lightly sanding it, and then reapplying stain just to that spot. For larger areas of wear, a more extensive re-staining might be needed.
Pay special attention to areas that are constantly exposed to moisture, like the surface of a deck or the base of fence posts. These areas are more prone to mildew and wear. Keeping them clean and dry will help to prolong the life of the stain and the wood itself.
When to Re-Stain
The frequency with which you’ll need to re-stain your pressure treated wood project depends on several factors, including the type of stain used, the quality of the application, and the exposure to the elements. Generally, you can expect to re-stain every 1 to 3 years.
Signs that it’s time to re-stain include fading color, the stain wearing thin, or water no longer beading up on the surface. If the stain is peeling or flaking significantly, you may need to strip the old stain before reapplying a new coat. If the existing stain is still in good condition, you might be able to simply clean the wood and apply a new coat over the top.
Before re-staining, perform the water drop test again. If water soaks in quickly, it’s a good sign that the wood is ready for a new coat. If the water beads up, the current stain is still providing protection, and you might be able to wait a bit longer, or it might indicate that the previous stain was water-repellent and needs to be removed or scuff-sanded to ensure adhesion of the new stain.
Protecting Against UV Rays
Sunlight, and the UV rays it contains, can degrade wood and cause the stain to fade over time. Many stains contain UV inhibitors to help protect against this. When selecting a stain, look for one that specifically mentions UV protection.
Darker colors tend to offer more UV protection than lighter colors because they absorb more of the sun’s rays.
Even with UV inhibitors, some fading is inevitable, especially in areas with intense sun exposure. Regular cleaning and re-staining will help to maintain the color and protect the wood. If your project is in a particularly sunny location, consider a stain with higher UV protection.
This will help your project maintain its vibrant appearance for longer.
Choosing a stain with good color retention properties is also important. Some stains are formulated to resist fading better than others. Always check product descriptions and reviews to find stains that are known for their durability and color stability in outdoor conditions.
This proactive choice will save you work in the long run.
Frequently Asked Questions
Question: How long does pressure treated wood need to dry before staining?
Answer: Most experts recommend waiting at least 2 to 6 months. However, the actual drying time depends on weather conditions. Always perform a water drop test or use a moisture meter to ensure the moisture content is below 20%.
Question: Can I use any type of stain on pressure treated wood?
Answer: While many stains can be used, oil-based stains are often preferred for their better penetration. Water-based stains have also improved. Always check the stain manufacturer’s recommendations for use on pressure treated wood.
Question: What happens if I stain pressure treated wood too soon?
Answer: If you stain too soon, the stain will not penetrate properly. It can lead to a patchy finish, peeling, and cracking as the wood dries and shrinks. This results in a finish that doesn’t last.
Question: Does sanding pressure treated wood help with staining?
Answer: Yes, a light sanding can open up the wood’s pores and provide a better surface for the stain to adhere to. It helps to create a smoother, more uniform finish, especially for transparent or semi-transparent stains.
Question: How often should I re-stain my pressure treated wood?
Answer: Typically, you will need to re-stain every 1 to 3 years. This depends on the type of stain, application quality, and exposure to the elements. Look for signs like fading color or water no longer beading up.
Summary
So, can you stain pressure treated wood immediately? No, you cannot. It needs to dry out first.
Patience is key for a great finish. Wait at least a few months, test with water, clean, and then stain. This simple process ensures your wood looks beautiful and lasts.