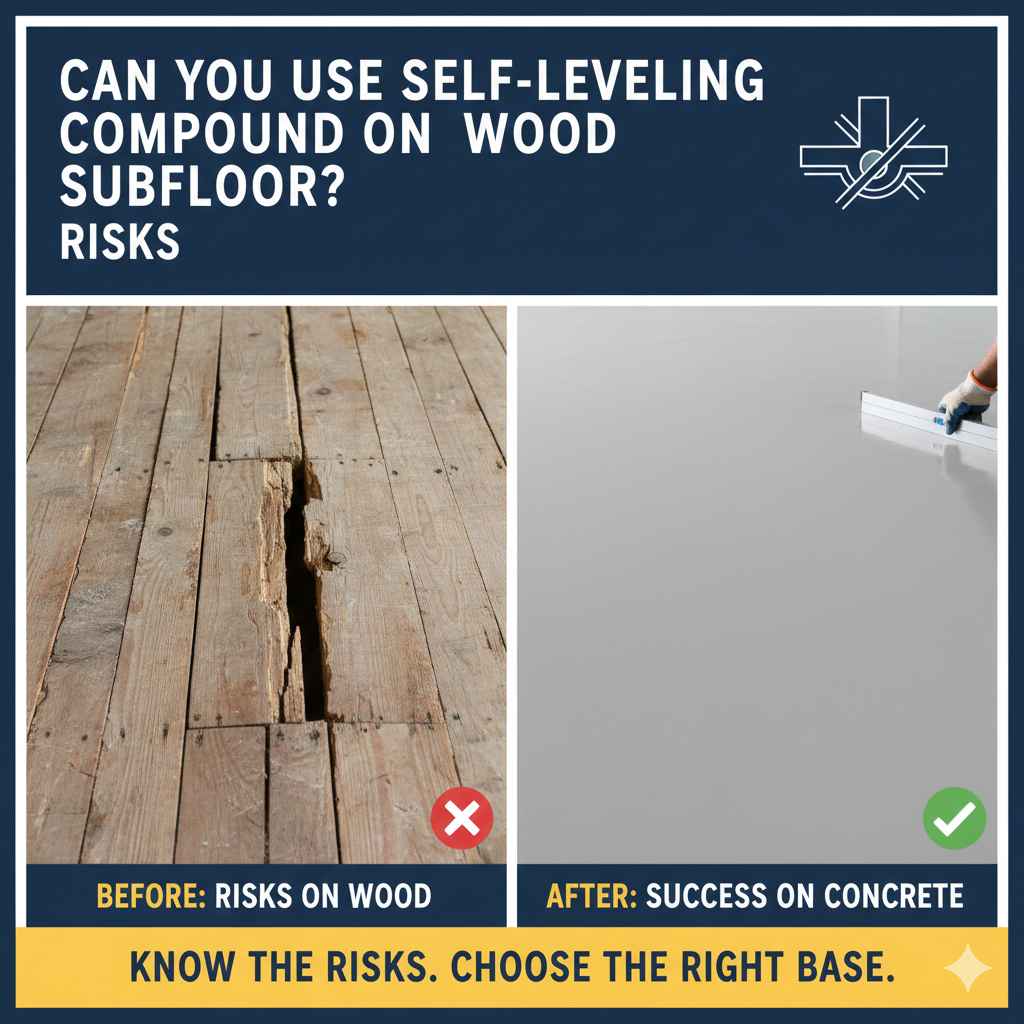
Can You Use Self Leveling Compound On Wood Subfloor Risks
Yes, you can use self-leveling compound on a wood subfloor, but it requires careful preparation to avoid risks like cracking and moisture damage. You must ensure the subfloor is rigid, clean, and properly primed. Using a reinforcing metal lath and a flexible, polymer-modified leveler designed for wood is essential for a durable, long-lasting result.
Have you ever walked across a floor and felt a dip or a slope? It’s a common frustration, especially in homes with wood subfloors. You have plans for beautiful new tile, vinyl, or laminate flooring, but that uneven surface stands in the way. It can feel like a project-stopping problem, making you wonder if you need to call in a pro.
But here’s the good news: you can absolutely fix this yourself! Leveling a wood subfloor is a manageable DIY project when you know the right steps. The key is understanding the unique challenges wood presents and how to prepare it properly. Forget the stress and confusion. In this guide, I’ll walk you through everything, step-by-step, from picking the right product to pouring a perfectly smooth surface. Let’s get that floor flat and ready for its new look!
Why Wood Subfloors Are Different (And A Little Tricky)
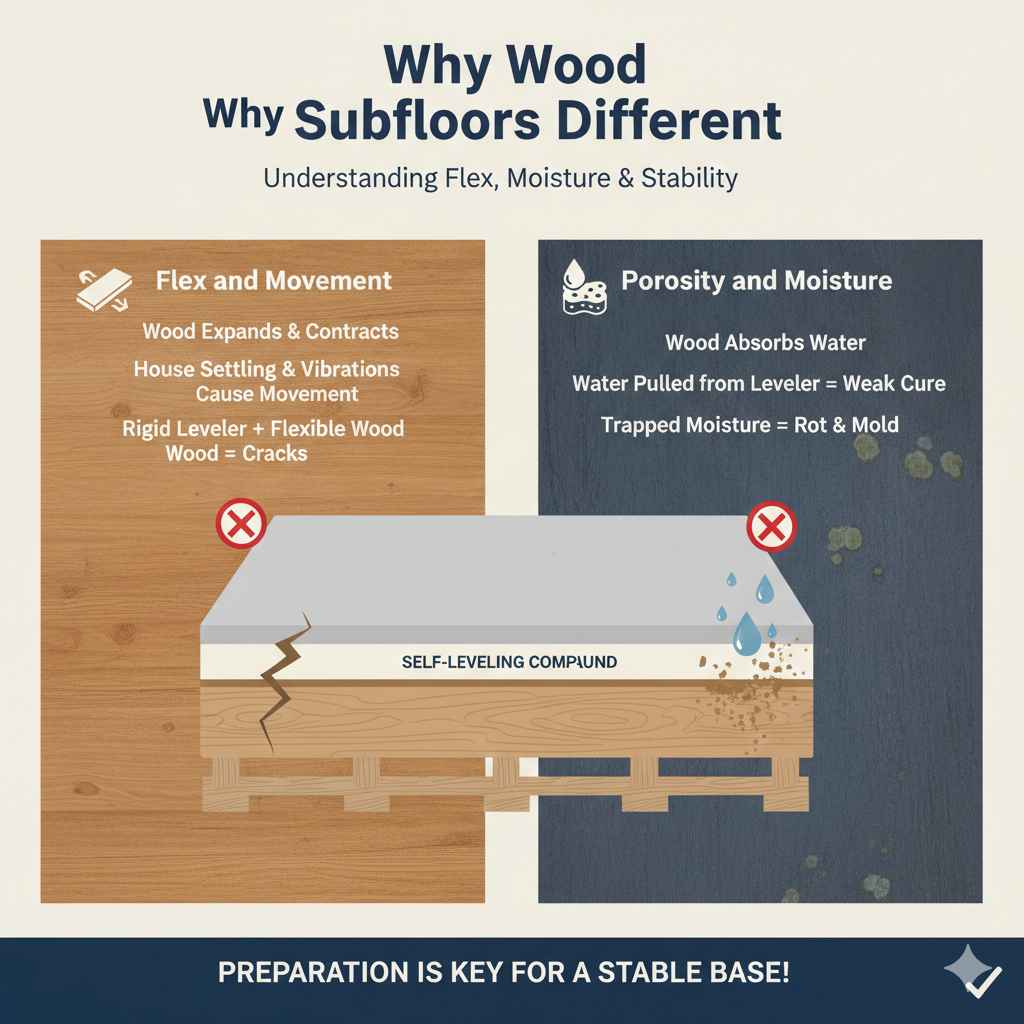
Before we grab a bucket and start mixing, it’s important to understand why wood subfloors need special treatment. Unlike a concrete slab, which is solid and stable, a wood subfloor is a living, breathing part of your home. It has two main characteristics that we need to manage.
Flex and Movement: Wood naturally expands and contracts with changes in temperature and humidity. Your house settles, and people walking across the floor causes tiny movements and vibrations. Standard self-leveling compounds are often rigid and brittle when they cure. If you pour a rigid layer over a flexible surface, any movement in the wood can cause the leveler to crack and break apart.
Porosity and Moisture: Wood is like a sponge; it absorbs water. Self-leveling compounds are mixed with a lot of water. If you pour it directly onto raw wood, the wood will suck the water out of the mix too quickly. This prevents the compound from curing correctly, making it weak and crumbly. It can also trap moisture against the wood, leading to rot, mold, and mildew over time.
Don’t let this scare you! Acknowledging these challenges is the first step to overcoming them. With the right preparation, we can create a stable surface that works with the wood, not against it.
The Biggest Risks of Using Self-Leveler on Wood (And How to Avoid Them)
Putting self-leveler on an unprepared wood subfloor can lead to a flooring disaster. But the good news is that every single one of these risks is completely avoidable with the right prep work. Let’s look at the main problems and their simple solutions.
Risk 1: Cracking and Crumbling
This is the most common failure. The leveler looks great at first, but soon hairline cracks appear, which can grow until chunks of the underlayment break loose. This happens because the flexible wood subfloor moves underneath the rigid, cured compound.
How to Avoid It:
Reinforce the Subfloor: First, make sure your subfloor is solid. Walk around and feel for any bounce or squeaks. Screw down any loose plywood or OSB sheets to the joists to minimize movement. A solid foundation is non-negotiable.
Use Metal Lath: This is your secret weapon! Metal lath is a grid of expanded metal that you staple over the entire wood subfloor. When you pour the leveler, it flows into the lath and cures around it, creating a reinforced, unified slab that “floats” over the wood. It’s like adding rebar to concrete, providing incredible strength and crack resistance.
Choose a Flexible Leveler: Look for a self-leveling compound that is specifically labeled “polymer-modified” or “for use on wood.” These products have additives that give them more flexibility to handle slight movements.
Risk 2: Debonding or Lifting
Debonding is when the layer of self-leveler doesn’t stick properly to the wood subfloor. It can lift at the edges or sound hollow when you tap on it. This is almost always caused by a poor bond between the primer and the wood.
How to Avoid It:
Clean Meticulously: The subfloor must be completely free of dust, dirt, grease, paint, or any other contaminant that could prevent the primer from adhering. Sweep, vacuum, and if necessary, scrub the floor and let it dry completely.
Use the Right Primer: Primer is not optional! It serves two critical functions: it seals the porous wood to prevent water from being absorbed too quickly, and it creates a tacky surface for the leveler to grip onto. Always use the primer recommended by the manufacturer of your self-leveling compound. Apply it evenly with a roller and let it dry to the specified tackiness.
Risk 3: Moisture Damage and Mold
If moisture gets trapped between the cured leveler and the wood subfloor, you’re creating a perfect environment for mold, mildew, and wood rot. This can compromise the structural integrity of your floor and create unhealthy air quality.
How to Avoid It:
Seal All Gaps: Before priming, use an acoustic or caulk to seal all the seams between plywood sheets, as well as any knotholes, screw holes, or cracks. This prevents the wet leveler from seeping through to the space below.
Ensure Proper Curing: Allow the self-leveling compound to cure fully according to the manufacturer’s instructions. Don’t rush to cover it with flooring. Trapping uncured moisture under a non-breathable floor covering like vinyl is a recipe for disaster. You can check out resources from the Environmental Protection Agency (EPA) to learn more about how mold grows in damp environments.
Choosing the Right Self-Leveling Compound for Wood
Walking into the flooring aisle at a home improvement store can be overwhelming. You’ll see bags of different compounds, and they are not all the same. For a wood subfloor, you need to be selective. The main types are gypsum-based and cement-based.
| Feature | Gypsum-Based Leveler | Polymer-Modified Cement-Based Leveler |
|---|---|---|
| Flexibility | Generally more flexible and lightweight, making it a good choice for wood subfloors that have some movement. | Can be more rigid, but the polymer additives give it the necessary flex to resist cracking on wood. |
| Strength | Good compressive strength, but not as high as cement-based options. Suitable for most residential flooring. | Very high compressive strength. Excellent for supporting heavy flooring like ceramic or stone tile. |
| Moisture Sensitivity | Highly sensitive to moisture. Must be used in dry areas and must be completely dry before covering. | More resistant to moisture, making it a better choice for areas like bathrooms, kitchens, or basements. |
| Best Use on Wood | Ideal for leveling plywood or OSB in living rooms, bedrooms, and hallways under carpet, laminate, or vinyl. | The go-to choice for wood subfloors that will be covered with tile, or for any application in moisture-prone areas. |
The Golden Rule: Always look for a product that explicitly states it is suitable for use over wood, plywood, or OSB subfloors. These will be polymer-modified, meaning they contain special latex or acrylic additives that provide the flexibility and strong adhesion needed for a successful application.
Your Toolkit: Essential Supplies for the Job
Getting your tools and materials ready before you start makes the whole process smooth and stress-free. There’s nothing worse than running to the store mid-pour! Here’s what you’ll need:
Safety Gear: Safety glasses, dust mask (mixing powder is messy!), and gloves.
Cleaning Supplies: Broom, dustpan, shop vacuum, and cleaning rags.
Subfloor Prep Tools: A drill/driver with screws, caulk gun, and acoustic sealant or caulk.
Reinforcement: Expanded metal lath and a heavy-duty construction stapler with 1/2-inch staples. Tin snips for cutting the lath.
Primer and Application: The specific primer recommended for your self-leveler and a 3/8-inch nap paint roller with an extension handle.
Mixing Station: Several 5-gallon buckets (one for water, one for mixing), a measuring bucket for water, and a heavy-duty, low-speed drill with a paddle mixer attachment.
Spreading Tools: A gauge rake (to spread the leveler to a uniform depth) and a smoothing trowel (to help guide the material and touch up edges).
The Leveler: The polymer-modified, self-leveling compound itself. Calculate the square footage of your room and check the bag’s coverage to buy the right amount. It’s always smart to buy one extra bag, just in case.
Step-by-Step Guide: How to Apply Self-Leveling Compound on a Wood Subfloor
Alright, you’ve done your homework and gathered your tools. Now it’s time for the fun part! Follow these steps carefully for a perfect, flat floor.
Step 1: Inspect and Secure the Subfloor
Your finished floor is only as good as the foundation beneath it. Walk every inch of the room. Do you feel any bounce, sag, or give? Do you hear squeaks? This is your chance to fix it.
Use 1 5/8-inch or 2-inch construction screws to fasten any loose sheets of plywood or OSB to the floor joists below. Place screws every 6-8 inches along the seams and every 10-12 inches in the middle of the board.
If there are any heavily damaged, soft, or water-stained boards, they must be cut out and replaced. Do not pour leveler over compromised wood.
Step 2: Clean and Seal Everything
Get out your shop vac and be thorough. The floor needs to be completely free of sawdust, drywall dust, debris, and dirt. Any loose material will prevent the primer from bonding correctly.
Next, take your caulk gun and sealant and fill every seam between the subfloor panels. Fill any large screw holes, knotholes, or cracks. You’re creating a “bathtub” to ensure the liquid leveler doesn’t leak through to the ceiling below.
Step 3: Install the Metal Lath
This step is the key to preventing cracks. Roll out your expanded metal lath over the entire floor.
Cut it to fit with tin snips. Overlap the edges of adjoining pieces by at least one inch.
Use your construction stapler to secure the lath to the wood subfloor. Place staples every 6-8 inches in all directions. The lath should lie flat and not curl up at the edges. Be careful, as the cut edges of the lath can be very sharp. Wearing gloves is a must here. The Occupational Safety and Health Administration (OSHA) provides great guidelines on using personal protective equipment.
Step 4: Apply the Primer
Pour some of the recommended primer into a paint tray. Using your roller with an extension handle, apply a thin, even coat over the entire floor, including the metal lath. Don’t let it puddle. The primer will seal the wood and provide the necessary grip for the leveler. Follow the manufacturer’s instructions for drying time. It usually needs to dry to a tacky, but not wet, finish.
Step 5: Set Up and Mix the Compound
This stage is time-sensitive, so be prepared. Self-leveling compound has a limited “pot life,” usually only 10-20 minutes before it starts to set.
Measure the exact amount of cool, clean water specified on the bag and pour it into your mixing bucket. Do not guess!
Turn on your drill with the paddle mixer and slowly add the powdered compound to the water while mixing. Adding the powder to the water (not the other way around) helps prevent clumps.
Mix for about two minutes, or until the consistency is smooth, creamy, and lump-free. It should look like a thick pancake batter.
Step 6: Pour and Spread the Leveler
Start at the corner of the room furthest from the door and work your way out.
Pour the mixed leveler onto the floor in long ribbons.
The product will start to level itself, but you need to help it along. Use the gauge rake to gently guide the material into corners and across the floor to the desired thickness.
Use the smoothing trowel to lightly guide the edges and blend the pours together. Work quickly and confidently. Once you start pouring, you need to continue until the room is done to ensure a seamless surface.
Step 7: Let It Cure
Patience is key. The self-leveler needs to cure without being disturbed. Keep foot traffic, pets, and children out of the room. The initial set may be walkable in a few hours, but the full cure time before you can install flooring on top can be anywhere from 24 hours to several days. This depends on the product, the thickness of the pour, and the humidity in your home. Read the bag and follow the instructions to the letter.
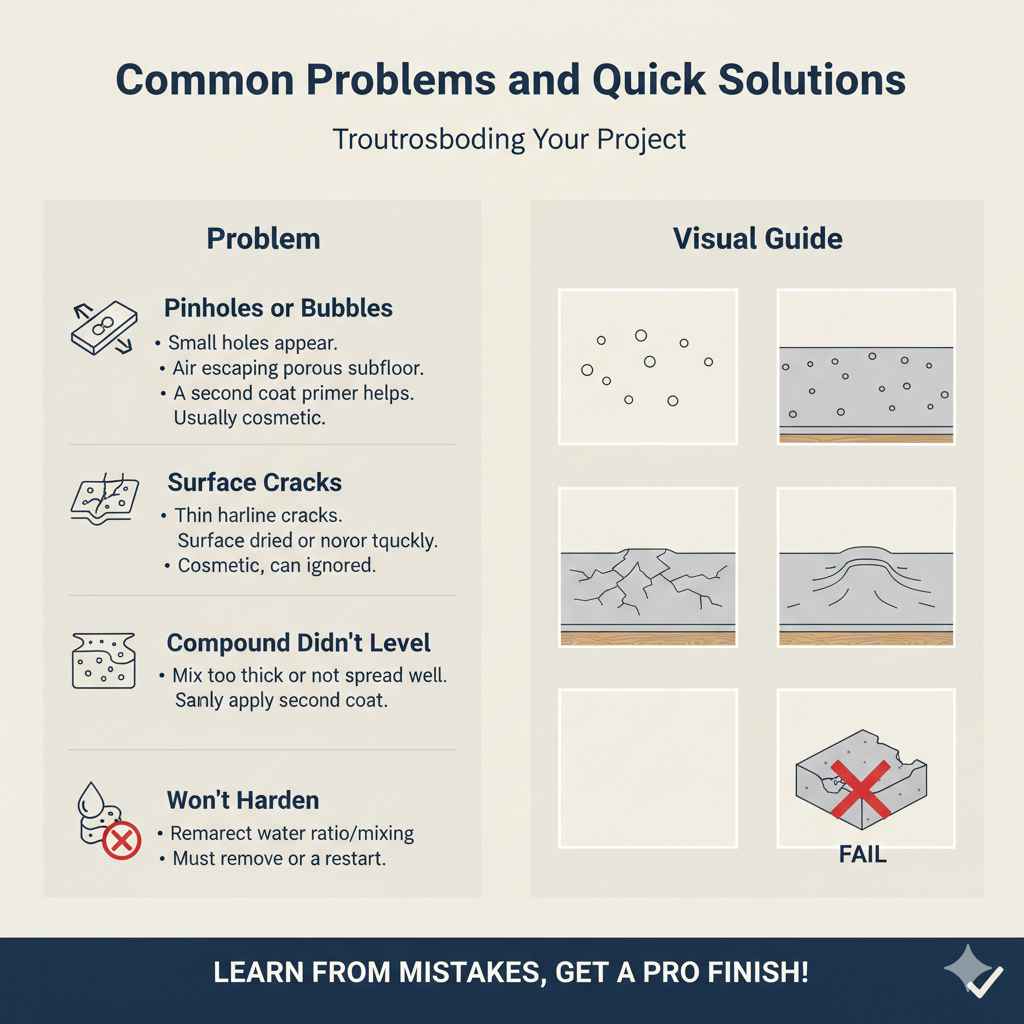
Common Problems and Quick Solutions
Even with the best preparation, you might run into a small issue. Here’s a quick guide to troubleshooting.
| Problem | What It Looks Like | How to Fix It |
|---|---|---|
| Pinholes or Bubbles | Small holes or bubbles appear on the surface as it dries. | This is usually caused by air escaping the porous subfloor. A second coat of primer often prevents this. Minor pinholes are generally not a structural concern. |
| Surface Cracks | Thin, hairline cracks (craze cracking) appear on the surface. | Often caused by the surface drying too quickly from a draft or direct sunlight. As long as they are only on the surface, they are usually cosmetic and can be ignored or skim-coated. |
| Compound Didn’t Level | There are high spots or ridges left after it cured. | The mix may have been too thick (not enough water) or wasn’t spread properly. You can sand down small high spots or, if needed, apply a second, thinner pour after re-priming the surface. |
| Won’t Harden | The leveler remains soft or chalky long after the specified cure time. | This is a serious issue, usually from an incorrect water ratio, expired product, or improper mixing. Unfortunately, the only solution is to scrape up and remove the failed material and start over. |
Frequently Asked Questions (FAQ)
How thick can I pour self-leveling compound on a wood subfloor?
Most standard polymer-modified levelers can be poured from a featheredge up to about 1 inch thick in a single pour. However, you must always check the product’s technical data sheet. For deeper fills, you may need to pour in multiple layers (priming between each) or use a deep-fill specific product.
Do I always need to use primer on a wood subfloor?
Yes, absolutely. Primer is not an optional step on wood. It seals the porous surface to prevent the wood from absorbing water from the mix, which ensures a slow, strong cure. It also acts as a bonding agent, creating a powerful grip between the subfloor and the leveler to prevent lifting.
What happens if I don’t use metal lath?
Skipping the metal lath is a huge risk. Without it, the normal flex and movement in the wood subfloor will likely cause the rigid self-leveler to crack and fail over time. The lath creates a reinforced “concrete-like” slab that adds immense tensile strength and distributes the load, protecting the leveler from movement below.
Can I use self-leveling compound on particle board or OSB?
Yes, you can use it on Oriented Strand Board (OSB) following the same steps: ensure it’s structurally sound, clean, prime, and use metal lath. Particle board is more problematic because it is extremely susceptible to moisture and can swell and disintegrate. Most manufacturers do not recommend applying self-leveler directly to particle board. It’s often better to remove it and replace it with plywood or OSB.
How long does self-leveler take to dry on wood?
Drying and curing are different. It may be dry to the touch and ready for light foot traffic in 4-6 hours. However, it needs to fully cure before you can cover it with flooring. Full cure time can be 24 hours for some products, while others might require several days, depending on the thickness and ambient conditions. Always follow the manufacturer’s specific timeline.
Is self-leveling compound waterproof?
No, most self-leveling compounds are not waterproof. They are water-resistant, but they are not a waterproofing membrane. If you are installing flooring in a wet area like a bathroom, you must apply a separate roll-on or sheet waterproofing membrane over the cured self-leveler before you install your tile.
Conclusion: You’ve Got This!
Leveling a wood subfloor might seem intimidating at first, but as you can see, it’s all about careful and methodical preparation. By understanding the nature of wood and taking the right steps to reinforce, seal, and prime the surface, you can avoid all the common pitfalls and achieve a perfectly flat, professional-quality result.
Remember, the metal lath and the correct primer are your best friends in this project. Don’t skip them! Taking the time to do the prep work will pay off with a durable, solid foundation that will last for years to come. So go ahead, plan your project, gather your tools, and get ready to create that perfect surface for your new floor. You have the knowledge and the steps to do it right. Happy renovating!