DIY Turkey Fan Mount: Ideas, Costs & the Borax Method
A DIY turkey fan mount costs $10-$50 in materials versus $150-$300+ for a professional taxidermist, using Borax to dry and preserve the fan instead of true tanning. Mount a fall bird before it finishes molting and the feathers can fall out of the skin entirely – spring birds are far more forgiving. This guide covers field prep, Borax drying, mounting the plaque, and the different display styles hunters actually use, from a basic fan-on-a-plaque to a shadow box.
I’ve spent years perfecting my own mounts – the tips below are what actually worked, including a few mistakes I won’t repeat.
Why Choose a DIY Turkey Fan Mount?
I remember my first turkey hunt like it was yesterday. The gobble, the strut, and finally, the moment I bagged my bird. I wanted to honor that memory, but a full taxidermy mount was way out of my budget. That’s when I discovered the magic of a DIY turkey fan mount. It’s affordable, doesn’t require advanced skills, and looks amazing on the wall. Unlike a full-body mount, a fan mount is subtle enough to please even the non-hunters in your family. Plus, it’s a hands-on way to connect with your hunt. You’re not just preserving feathers—you’re keeping a story alive. This project lets you showcase the turkey’s vibrant plumage while adding a personal touch to your home decor.
Turkey Mount Ideas: Beyond the Basic Plaque
A fan-on-a-plaque isn’t the only display style. Real options range from a $10 DIY plaque up to a $2,500+ full taxidermy scene, and picking one comes down to budget, wall space, and how much of the bird you want on display.
| Style | What It Includes | Typical Cost |
|---|---|---|
| Classic fan mount | Tail fan + plaque, optional beard/spurs | $10-$50 DIY |
| Shadow box | Glass-fronted case with fan, spurs, beard | $100+ |
| Adjustable bracket mount | Reusable hardware you can re-position or swap birds onto each season | $40-$60 |
| Turkey cape mount | Tanned neck/back hide, wall-mounted | $10-$20 DIY / $250+ pro |
| Full strut or flying mount | Entire bird, professionally taxidermied | $500+ |
| Hanging beard display | Multiple beards from several seasons on one holder | $20-$40 |
The DIY plaque method covered in this guide works for the classic fan mount and the shadow box (just build the fan the same way, then set it in a case instead of hanging it bare). If you’d rather not commit to a fixed plaque, adjustable bracket-style hardware lets you reposition the fan, beard, and legs, or swap in a new bird next season without rebuilding the whole mount.
Best Adjustable Mount Pick
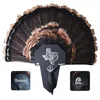
FeatherLok No-Screw Adjustable Mount Kit
Skip the plaque entirely – this holds the fan, beard, and legs with no screws or glue, so you can reposition everything or swap in next season’s bird without rebuilding the mount.
- Best for: hunters who want to remount a new bird every season
- Why we picked it: fully customizable, no permanent fasteners into the fan itself
- Main drawback: costs more than a basic plaque kit
Compare more turkey mounting essentials
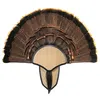 Option 1 Basic Mount Kit
|
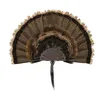 Option 2 Stackable Multi-Season Mount
|
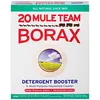 Option 3 20 Mule Team Borax
|
As an Amazon Associate we earn from qualifying purchases.
Gathering Your Supplies
Before we get started, let’s talk about what you’ll need. I like to keep things simple, using items I already have at home or can grab cheaply. Here’s a list of the essentials:
| Item | Purpose | Where to Find |
|---|---|---|
| Sharp knife or scissors | For removing the fan and cleaning excess flesh | Kitchen or hardware store |
| Borax or salt | To preserve and dry the fan and prevent decay | Grocery store (laundry aisle) |
| Cardboard or plywood | To spread and dry the fan in the desired shape | Home or hardware store |
| Push pins or tacks | To hold feathers in place during drying | Office supply or craft store |
| Wooden plaque | For mounting the finished fan | Craft store or online |
| Hot glue gun and glue | To secure feathers, beard, or spurs to the plaque | Craft store |
| Optional: Beard and spurs | To add extra elements to your display | From your harvested turkey |
| Optional: Shotgun shell | For a sentimental touch, like attaching the beard | From your hunt |
| Optional: Decorative items | Beads, leather, or paint to customize the mount | Craft store |
I usually have most of these lying around, but a quick trip to the store can fill any gaps. Borax is my go-to for preserving because it’s great at preventing bugs and odors, but table salt works in a pinch. The wooden plaque is optional—if you’re on a tight budget, you can even use a piece of scrap wood or leather. See more woodworking tips and guides for finishing and staining the plaque itself.
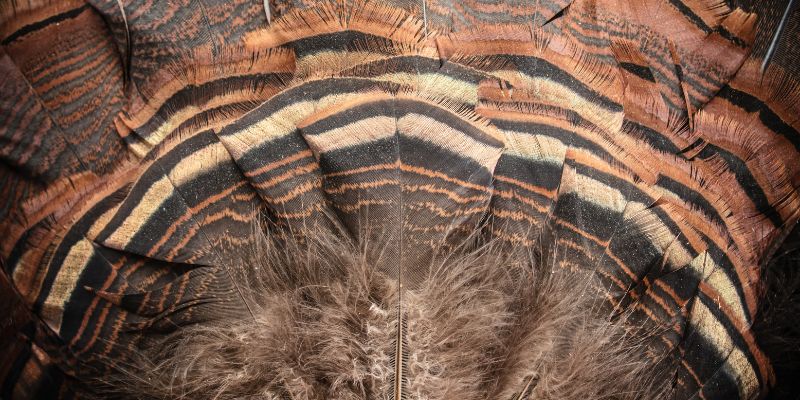
📊 A mature tom’s tail fan averages 18 feathers, and by November roughly 90% of turkeys still carry unrooted “pin feathers” from their fall molt. Fall-harvested birds are far riskier to mount than spring birds – pull a pin feather still rooted in the skin and it can fall right out of your finished mount. Source: National Wild Turkey Federation
Preparing the Turkey Fan in the Field
The first step happens right after your hunt. I learned the hard way that how you handle the turkey in the field makes a big difference. As soon as I bag a bird, I focus on keeping the fan clean and intact. Blood, dirt, or rough handling can damage those gorgeous feathers, so be gentle. Here’s how I do it:
Start by folding the tail feathers together like a fan to keep them from getting ruffled. Find the base of the tail, often called the “Pope’s nose,” a fleshy triangle where the feathers connect. Using a sharp knife or poultry shears, cut just above the anus to remove the fan. I like to leave a bit of extra skin and feathers around the base—you can always trim later, but you can’t add feathers back! If the fan is dirty, gently rinse it with water and a mild dish soap. I use my wife’s hairdryer on low heat to dry it, smoothing the feathers with my fingers to keep them neat.
Once it’s clean, I pop the fan into a plastic bag and store it in the freezer. This step is crucial. Freezing not only preserves the fan but also kills any lice or mites that might be hiding in the feathers. Trust me, you don’t want those critters on your wall. I usually keep it in the freezer for a few days until I’m ready to start the project.
“If you look, you’ll see immature feathers everywhere… It isn’t rooted in the skin yet. So, all the feathers fall out.”
— Josh West, taxidermist, via National Wild Turkey Federation
Cleaning and Preserving the Fan
Now comes the part that takes a bit of patience—cleaning the fan. I set up a workspace in my garage with good ventilation because this can get a little messy. Lay the fan on a flat surface and inspect the base. You’ll see flesh, fat, and maybe a small bone called the pygostyle. Your goal is to remove as much of this as possible without damaging the feather quills.
Using a sharp knife or scissors, carefully trim away the excess flesh and fat. I take my time here, as rushing can cause feathers to pull out. If you’re including the beard or spurs, do the same for those—scrape off any tissue, but leave enough skin to keep the beard strands together. Once everything is cleaned, I apply a generous layer of Borax to all exposed tissue. Borax is a lifesaver—it dries the fan, prevents decay, and keeps bugs away. If you’re using salt, it works too, but I’ve found it can attract ants if not monitored.
Spread the fan out on a piece of cardboard or plywood, fanning the feathers to your desired shape. I like to mimic the turkey’s natural strut, with the feathers spread wide. Use push pins to hold each feather in place, pinning just in front of the quills to avoid piercing them. This step determines how your mount will look, so play around until it’s perfect. Cover the base with more Borax, then place the fan in a dry, safe spot away from pets or pests. Let it dry for about two to three weeks, checking every few days to refresh the Borax if needed.
Crafting the Mount
Once the fan is fully dry, it’s time to turn it into a display. This is where the fun begins! I love this part because it’s where your creativity shines. First, remove the pins and shake off excess Borax. If the base looks bare, I sometimes hot glue some of the smaller feathers I trimmed earlier to cover any gaps. For extra stability, I’ve used auto body filler or Bondo to lock the feathers in place, but hot glue works just as well for most projects.
Next, choose your mounting surface. I usually go for a wooden plaque because it’s sturdy and looks polished. You can find these at craft stores or make your own from scrap wood. Sand and stain the plaque for a professional finish—I like a dark walnut stain for a rustic vibe. If you’re feeling fancy, leather or even a slice of tree branch can give your mount a unique look.
To attach the fan, I use a screw or hot glue to secure the base to the plaque. Make sure it’s centered and secure, as feathers can be delicate. If you’re adding a beard or spurs, now’s the time. I love incorporating the shotgun shell from my hunt—it’s a sentimental touch. I cut the plastic off the shell, glue the beard into the brass, and attach it to the plaque with a leather string. For spurs, I cut them from the leg, clean out the bone, and hang them with string or glue them directly to the plaque.
Adding Personal Touches
This is where your mount becomes truly yours. I’ve seen hunters add all sorts of creative elements to their displays. One friend of mine attached a small photo of his hunt to the plaque, which I thought was genius. You can also add beads, feathers, or even engrave the date and location of your hunt on the wood. I once made a mount with a braided leather cord to hang the spurs, giving it a rugged, handmade feel.
If you’re displaying multiple fans, consider arranging them in a pattern or adding labels to mark each hunt. I’ve also experimented with staining the plaque in different colors or using spray polyurethane for a glossy finish. Just make sure any decorative elements are secure and won’t damage the feathers over time.
Displaying Your Turkey Fan Mount
Now that your mount is complete, it’s time to show it off! I hang mine in my den, where it’s a conversation starter for guests. Choose a dry, indoor spot away from moisture or direct sunlight, as these can fade or damage the feathers. A simple sawtooth hanger on the back of the plaque makes hanging easy. If you’re using a tabletop display, like one made from barnwood, ensure it’s stable and won’t tip over.
Every few months, I check my mount for dust or loose feathers. A soft cloth dampened with rubbing alcohol works great for cleaning—just wipe in the direction of the feathers. Never use water, as it can mat the feathers and ruin your hard work. With proper care, your mount will last for years, bringing back memories of your hunt every time you see it.
Tips for Success
Over the years, I’ve picked up a few tricks to make the process smoother. First, don’t rush the cleaning step—removing all the flesh is key to preventing odors or decay. If you’re unsure about the drying process, err on the side of more Borax and longer drying time. I also recommend practicing with a spare piece of cardboard before pinning your fan to get the shape just right.
If you’re new to this, start simple. You don’t nee a fancy plaque or expensive kit to make a beautiful mount. My first one was just a fan tacked to a piece of plywood, and I still love it. Finally, take photos as you go. It’s fun to document your progress and share it with fellow hunters.
Conclusion
Creating a do-it-yourself turkey fan mount is more than just a craft—it’s a way to honor your hunt and bring a piece of the wild into your home. I’ve loved every moment of making my mounts, from the careful cleaning to the thrill of hanging the finished piece on my wall. There’s something deeply satisfying about turning a handful of feathers into a stunning display with your own hands. This project is perfect for hunters of all skill levels, and with a few household items, you can create something that lasts for years. So, grab your supplies, take your time, and let your creativity shine. I can’t wait for you to experience the pride of showcasing your trophy. Happy mounting!
Frequently Asked Questions
Is Fall or Spring Better for Mounting a Turkey Fan?
Spring birds are safer to mount. By November, roughly 90% of fall turkeys still carry unrooted pin feathers from their annual molt, and a pin feather can fall right out of a finished mount. Spring birds have typically completed their molt, so the feathers are fully rooted and far less likely to shed after mounting.
How long does it take to make a turkey fan mount?
It depends on how much time you can dedicate, but the active work takes about 2-3 hours spread over a few days. The drying process is the longest part, usually 2-3 weeks. I like to check the fan every few days to ensure it’s drying properly.
Can I make a turkey fan mount without a plaque?
Absolutely! You can tack the fan directly to a wall or use a piece of leather or cardboard as a backing. I’ve seen some hunters use a tree branch slice for a rustic look. It’s all about what fits your style and budget.
What’s the best way to clean the feathers?
If the feathers are dirty, gently wash them with mild dish soap and water. I use a hairdryer on low heat to dry them, smoothing the feathers with my fingers. Be careful not to soak them too long, as wet feathers can lose their shape.
Do I need Borax, or can I use something else?
Borax is my favorite because it’s effective at preserving and preventing bugs. But table salt works too, especially if you’re in a pinch. Just be aware that salt can attract insects, so keep an eye on it during drying.
How do I prevent bugs from damaging my mount?
Freezing the fan right after the hunt kills any lice or mites. Using Borax during the drying process also helps. Once the mount is done, store it in a dry place and clean it occasionally with a cloth and rubbing alcohol to keep pests away.
Can I include the turkey’s beard and spurs in the mount?
Yes, and I highly recommend it! The beard and spurs add a personal touch. Clean them the same way as the fan, using Borax to preserve them. You can glue them to the plaque or hang them with string for a custom look.
Sponsored / affiliate links. As an Amazon Associate I earn from qualifying purchases. I may earn additional commission from eligible campaigns.