Easy Woodworking Projects for Absolute Beginners
Choose a first project that needs about three tools or fewer, uses only straight cuts, and can finish in about one afternoon. A simple shelf or box with butt joints and pre-cut lumber is the easiest win. Pick the wrong first build and you waste money, make avoidable cuts, and lose confidence fast. This guide ranks easy woodworking projects for absolute beginners by tool count, cut difficulty, and failure risk.
What makes a first project easy?


Start with straight cuts, simple fasteners, and forgiving wood. Pine or cedar are often good practice choices because they cut easily, tend to cost less, and are usually easy to find at home centers. Projects get harder fast when they need angled cuts, tight miters, hidden hardware, or exact symmetry.
Choose straight cuts over angled cuts
Square cuts are easier to measure, mark, and check. Angled corners add layout errors and make gaps more obvious. If you want a first win, choose rectangles and simple boxes before frames or anything that must fit flush on all four sides.
Favor simple fasteners or glue joints
Butt joints, screws, and wood glue are easier to manage than complex joinery. Glue works best with clamps and flat mating surfaces. Screws are useful when you need a mechanical hold right away, especially for a birdhouse, a tray, or a simple box.
Pick forgiving wood and scrap-friendly layouts
Softwood lumber such as pine and cedar is better for practice builds than dense hardwoods. It cuts faster, sands faster, and costs less to replace if a piece goes wrong. Scrap-friendly projects also let you recover from a bad cut without restarting the whole build.
What tools do I need to start woodworking as a complete beginner?
You do not need a full shop to begin. A starter set should include a tape measure, a hand saw or circular saw, a drill and drill bits, sandpaper or a sander, wood glue, clamps, and safety goggles. Those tools cover layout, cutting, drilling, assembly, and cleanup.
Tape measure and marking basics
The tape measure is the basic layout tool. Pair it with a pencil and a square if you have one, because square marks help keep cuts and assemblies aligned. Most beginner mistakes start with a bad measurement or a line that is hard to see.
Saw, drill, sandpaper, glue, and clamps
A hand saw works well for small projects and apartment-safe work. A circular saw is faster for long, straight cuts. The drill and drill bits handle pilot holes and screw holes. Sandpaper or a sander removes splinters and sharp edges. Wood glue adds strength, and clamps hold parts square while the glue sets.
Safety goggles and basic shop protection
Safety goggles are the minimum eye protection for cutting and drilling. Keep the work area stable, clear of clutter, and bright enough to see your layout lines. If you are sanding, dust control matters too, especially in a small room or shared space.
What type of wood should beginners use for easy projects?
Begin with softwood lumber such as pine or cedar. Both are easy to cut, affordable, widely available, and suitable for practice builds. They are also more forgiving when you need to sand out a small mistake or replace a bad piece without wasting expensive material.
Why pine and cedar work well
Pine is common for boxes, shelves, and birdhouses. Cedar is also easy to work and often used where moisture resistance helps. For a first project, either wood gives you a lower-risk way to learn measuring, cutting, drilling, and assembly.
How to prevent splitting and tear-out
Predrill before driving screws near an edge. Keep screws away from the end grain when possible. Support the board under the cut line so the saw does not chew out the back edge. If a board is prone to tear-out, score the cut line lightly and use a fine-tooth blade or fine-tooth hand saw.
Suppose you are driving a screw into a pine board for a box side. Without a pilot hole, the board can split at the end of the cut. A quick predrill usually costs less time than replacing the piece. In principle, use a pilot hole slightly smaller than the screw’s root diameter, and keep fasteners far enough from edges that the wood still has strength around the hole.
Common first-build failures and recovery tips
Mis-cuts usually mean a shorter part, not a ruined project. For a box or tray, you can often trim the matching part to the same length and keep going. Wobble usually means one corner is out of square. Dry-fit before gluing, then adjust the clamp pressure until the parts sit flat.
First project selector table
This selector ranks beginner builds by tool burden, cut difficulty, joinery difficulty, finish difficulty, scrap tolerance, and likely failure points. Lower numbers are easier. Use it to choose a first project that matches the tools you already have and the space you have to work in.
| Rank | Project | Estimated time | Cost range | Required tools | Cut complexity | Joinery difficulty | Finish difficulty | Best for | Likely failure points |
|---|---|---|---|---|---|---|---|---|---|
| 1 | Coaster set | 1 to 2 hours | $5 to $20 | 2 to 3 | 1 | 1 | 2 | hand-tool-only beginners | Uneven sanding, rounded corners, finish blotchiness |
| 2 | Simple box | 2 to 3 hours | $10 to $30 | 3 | 1 | 2 | 2 | Drill-only beginners | Out-of-square corners, miscut sides, weak glue clamp-up |
| 3 | Birdhouse | 2 to 4 hours | $10 to $35 | 3 | 2 | 2 | 2 | small-space beginners | Poor roof fit, wrong hole size, missed drainage or venting |
| 4 | Serving tray | 2 to 4 hours | $15 to $40 | 3 | 2 | 2 | 3 | Small-space or apartment-safe beginners | Handle placement, uneven bottom panel, finish streaks |
| 5 | Cutting board | 2 to 4 hours | $15 to $45 | 3 to 4 | 1 | 1 | 4 | beginners ready for careful sanding | Poor sanding, rough edges, unsuitable finish, glue-line gaps if built from strips |
| 6 | Picture frame | 1 to 3 hours | $10 to $35 | 3 to 4 | 3 | 3 | 3 | small-space beginners | Angle errors, gaps at corners, fragile joints |
| 7 | Small wall shelf | 3 to 5 hours | $15 to $50 | 4 | 2 | 3 | 3 | beginners with mounting confidence | Wobble, weak mounting, load problems, out-of-level install |
| 8 | Planter box | 3 to 5 hours | $20 to $60 | 4 | 2 | 3 | 3 | beginners who want a bigger simple build | Leakage, corner gaps, poor drainage, uneven sides |
| 9 | Simple bench-style storage crate | 4 to 6 hours | $25 to $75 | 4 to 5 | 3 | 3 | 3 | small-space beginners with more patience | Out-of-square assembly, weak bottom support, rough edges |
| 10 | Step stool | 4 to 6 hours | $25 to $80 | 4 to 5 | 3 | 4 | 3 | avoid as a first load-bearing project | Weak leg joints, rocking, unsafe load path, uneven feet |
Drill-only beginners: start with a birdhouse or simple box built from pre-cut lumber and screw assembly.
Hand-tool-only beginners: start with hand-tool-only beginners projects like coasters or a simple tray, because both tolerate slow, careful hand cutting.
Small-space or apartment-safe beginners: start with a picture frame or coaster set, since they create less dust and need less stock. small-space beginners should also favor projects that can be clamped on a table and packed away quickly.
Beginner projects to try first
The easiest first builds are the ones that use straight cuts, tolerate small errors, and do not demand precision joinery. A good sequence is coaster set, simple box, birdhouse, serving tray, cutting board, picture frame, small wall shelf, then step stool. That order moves from the fewest failure points to the most demanding layout and safety checks.
1. Coaster set
Coasters teach measuring, square cuts, sanding, and finishing with almost no joinery burden. They are also forgiving because each piece is small and a slight size mismatch does not ruin the set. Keep the corners consistent, sand all edges smooth, and stop before you overwork the surface.
2. Simple box
A box is one of the best early projects because it teaches four matching sides, dry-fitting, glue, and screw placement. For a beginner, that makes it a strong first confidence build. Use pine, predrill near edges, and check for square before the glue grabs.
If a box side ends up short, shorten the opposite side to match and adjust the bottom panel instead of forcing the corners closed. That recovery keeps the project usable.
3. Birdhouse
A birdhouse is a classic starter project and a good kid-friendly build. Keep the roof sloped so water sheds off. Use wood about 1/2 inch thick, leave a drainage hole in the floor, add small vent holes near the top sides, and size the entrance hole to the species you want to attract rather than guessing. For species-specific entrance guidance, use a reputable birdhouse chart such as NestWatch’s birdhouse guide.
For birdhouse details, the safest approach is simple: follow a species guide for entrance diameter, keep the floor dry, and provide ventilation near the top. As a rule, avoid making the hole larger “just in case,” because the wrong opening can invite predators or unwanted species. Use a weather-resistant design, but do not seal the interior so tightly that moisture cannot escape.
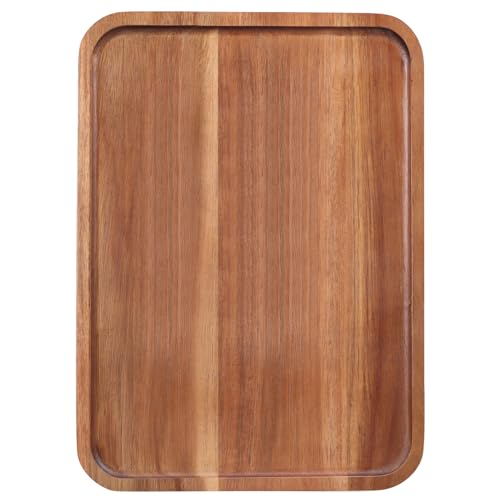
4. Serving tray
A serving tray teaches simple assembly without the load concerns of a shelf or stool. Straight sides, a flat bottom, and a pair of handles or cutouts are enough. Clamp the frame while the glue sets so the tray stays square. Many beginner tray plans can be completed in an afternoon, but sanding and finish time can stretch that window.
5. Cutting board
A cutting board is a good choice only if you are ready to spend time sanding well and choosing a finish that is explicitly intended for food contact. Keep the board flat, smooth the edges, and avoid finishes that are not labeled for cutting boards or food-safe use. For food-contact guidance, see the FDA’s food contact substances page.
6. Picture frame
A picture frame rewards accurate angle cuts and careful dry-fitting. The corners must meet cleanly, so this project is harder than it looks even though it is small. If your saw control is still shaky, put this project after a box or tray. It is a strong fit for a small-space beginners setup because it makes little dust and uses short stock.
7. Small wall shelf
A shelf must be square, securely mounted, and matched to the load it will carry. Confirm the mounting method and load guidance for your exact hardware before use. A shelf that only looks sturdy can still fail if the wall anchors, cleats, or screws are undersized. Keep the first shelf small and light-duty.
8. Planter box
A planter box is still beginner-friendly, but it adds moisture, drainage, and larger parts. Leave drainage openings in the base and avoid overbuilding the corners with complicated joinery. Keep the box simple and square. This is a better second-wave project after you have already made a box or tray.
9. Simple bench-style storage crate
A storage crate looks simple, but its larger footprint makes alignment and bottom support more important. Use straight cuts, check diagonals, and do not rush the base attachment. This is a good bridge project between small boxes and sturdier furniture-like builds. It is not ideal if you only want one easy afternoon project.
10. Step stool
A step stool is the most demanding project on this list because it must stay stable under weight. Check the joinery, check the feet for rocking, and confirm load and construction guidance before anyone stands on it. A stool that flexes on the floor is not ready. If the design does not clearly state load limits, do not treat it like a safe first build.
Projects to avoid first: chairs, large shelves, complex mitered frames, and anything load-bearing without verified plans. These builds need stronger joinery, more exact layout, and more confidence in load paths than most beginners have on day one.
A common beginner mistake is building a simple shelf that seems square but wobbles because the side panels were cut unevenly. Fix the feet before finish, not after. A thin shim can solve a small wobble during fitting, but the final piece should sit flat without it. For shelves and stools, do not trust appearance alone: verify mounting, span, and load before use.
What can you build with only basic tools?
If you only have one power tool, choose projects that match that tool instead of forcing a more complicated build. Drill-only beginners should choose screw-together boxes or birdhouses made from pre-cut boards. Hand-tool-only beginners should start with coasters, trays, or a simple box. Small-space beginners should favor quiet, low-dust projects that fit on a table.
Drill-only beginner projects
A drill can carry a surprising amount of a first project if you buy lumber already cut to manageable lengths. Use the drill for pilot holes and assembly, then rely on pre-cut stock from the store. A simple box and a birdhouse are the cleanest fits for that setup. Keep predrill sizing modest: the pilot hole should be enough to guide the screw without removing so much wood that the joint weakens.
Hand-tool-only beginner projects
A hand saw, tape measure, sandpaper, glue, and clamps are enough for small projects. Coasters, trays, and simple storage boxes work well because the cuts are short and forgiving. Use a bench hook or a stable work surface so the saw has a firm reference. For hand-tool-only beginners, a slow, accurate cut is more valuable than a fast one.
Small-space and apartment-safe project picks
Choose projects that create little noise and limited dust. Coasters and picture frames are the simplest fits, followed by a small tray. If you need to cut indoors, hand tools are usually easier to manage than a circular saw, but you still need stable clamping and good cleanup.
How do you keep beginner projects from failing?
Most beginner failures come from three things: weak layout, rushed assembly, and poor edge prep. You can avoid many of them by dry-fitting every part, predrilling near ends, and sanding before finish. If a project is meant to support weight, check the joinery and mounting method before anyone uses it.
Avoid wobble and weak joints
Dry-fit the whole build before glue goes on. Clamp parts until they sit flush, then check diagonals or corner squareness. If the piece rocks on a flat surface, do not assume finish will hide it. Fix the fit first.
For shelves and stools, do not trust appearance alone. A shelf needs secure mounting and a stool needs stable leg joints and a flat stance. If the exact load rating is not given by the design or hardware manufacturer, confirm it before use. Shelf and stool projects are where beginner mistakes turn into safety problems, so treat load guidance as non-optional.
Keep cuts square and repeatable
Mark every part from the same reference edge. Cut one piece, compare it to the next, and make adjustments before you keep going. For a first project, repeatability matters more than speed. A batch of matching pieces is easier to assemble than one “perfect” board and three mismatched ones.
When to sand, predrill, and dry-fit
Sand after cutting and before finish. Predrill before screws go near an edge or into thin stock. Dry-fit before glue, especially on any project with four corners. Those three habits prevent splinters, split ends, and the most common assembly mistakes. As a rule, keep enough edge distance that the fastener has wood on both sides of the hole instead of splitting the board.
Frequently asked questions
What is the easiest woodworking project for a beginner?
A simple box is usually the easiest first project because it uses straight cuts, basic butt joints, and a short parts list. Coasters are even simpler in tool burden, but a box teaches more transferable skills. If you only want the least risky start, choose the project with the fewest cuts and the least demanding alignment.
How do I prevent wood from splitting on beginner projects?
Predrill screw holes near edges, keep fasteners away from the end grain when possible, and use clamps so the board does not shift while you drive screws. Support the cut line so the wood does not tear out at the back edge. These steps matter most on pine and other softwoods.
Do I need expensive tools to start woodworking?
No. Many beginner projects can be made with a tape measure, saw, drill, sandpaper, glue, clamps, and goggles. The better first purchase is usually the tool that matches the project you want to build, not the priciest kit on the shelf. Pre-cut lumber also reduces tool needs.
How long do simple woodworking projects usually take?
Time varies by tool setup and how much sanding or fitting a project needs. Plan on about 1 to 2 hours for coasters or a picture frame, 2 to 4 hours for a box, birdhouse, tray, or cutting board, and 4 to 6 hours for a stool or larger crate. The more square the layout must be, the longer the project usually takes.
What are the best first woodworking projects for kids or adults?
For kids, a birdhouse or coaster set is a sensible start because the shapes are simple and the parts are small. For adults, a simple box or tray gives a better path into measuring, cutting, sanding, and assembly. Choose the project that matches the tools already on hand, not just the look.
Which beginner projects work well with scrap wood or pine?
Scrap wood and pine work well for coasters, small boxes, trays, and birdhouses. Those projects do not need perfect grain match or expensive stock, and they tolerate minor size variation. Pine is especially useful when you want practice cuts without paying for hardwood.
What finish is safest for a beginner cutting board?
Use a finish that is specifically labeled for food-contact use and intended for cutting boards. Keep the surface smooth, let the board fully dry or cure as directed by the product, and avoid coatings that are not made for food prep surfaces. The FDA’s food contact substances guidance is a good place to verify the safety category of a finish or coating.
How do I choose a birdhouse entrance hole size?
Match the opening to the species you want to attract instead of guessing. Different birds need different entrance diameters, and the wrong size can invite unwanted species or predators. Use a species chart from a reputable birdhouse guide such as NestWatch’s birdhouse guide before you cut the hole.
Do birdhouses need drainage and ventilation?
Yes. A birdhouse should have a way for water to escape and air to move so the interior does not overheat or stay damp. Add drainage holes in the floor and ventilation near the top sides, and keep the roof sloped. A dry, ventilated box is safer and healthier than a sealed one, even if the sealed version looks cleaner.
Sponsored / affiliate links. As an Amazon Associate I earn from qualifying purchases. I may earn additional commission from eligible campaigns.