Simple butt joint vs pocket hole guide for beginners
For beginners, use a simple butt joint for light, hidden, low-cost projects. Use pocket holes when you want faster assembly on face frames, cabinets, or other parts that carry more load. Pick the wrong joint and you can get weak connections, visible fasteners, extra sanding, and hardware costs that do little for strength. This guide compares speed, strength, visibility, tool cost, and the best first-project use case for each.
Simple butt joint vs pocket hole for beginners: which is easier for your first build?


The main trade-off is clear. A butt joint wins on tool cost and plain setup, while pocket holes win on speed and repeatable assembly. If you are building a light box or frame, the simplest joint may be enough. If you want a cleaner screw-driven assembly with less clamping fuss, pocket holes are often the smoother start.
| Decision factor | Simple butt joint | pocket hole for beginners | Winner |
|---|---|---|---|
| Load handling | Best for light duty unless reinforced with glue, screws, nails, or blocks | Better for beginner furniture, face frames, and projects that need more holding power | pocket hole for beginners |
| Tool cost | Lowest entry cost; you may already own what you need | Entry tools can start around $40 and rise to $400 for common jig setups | Simple butt joint |
| Setup time | Fast to cut, but slower if you must clamp, predrill, and reinforce | Usually faster to assemble once the jig is set | pocket hole for beginners |
| Visibility | Can be nearly invisible if glued well and fasteners are hidden or filled | Screw heads are hidden in pockets, but the holes themselves must be placed carefully | Tie |
| Beginner error risk | Higher risk of split-out, racking, and weak end-grain glue lines | Higher risk of wrong depth, wrong screw placement, or overdriving screws | Tie |
Load handling and likely failure points
A butt joint is the simplest woodworking joint, but it gives you very little surface area and no mechanical lock. That makes it weak when the joint carries weight or sees repeated use, especially if you rely on end grain and glue alone. Pocket holes spread screw load better than a plain butt joint, but they still need careful placement and stock thick enough for the screw.
Tool cost and setup time
Simple butt joints usually cost the least to start. Pocket-hole setups add a jig, a stepped drill bit, a depth collar setup, a clamp, and a square drive bit, and that extra kit is why they cost more up front. In return, pocket holes are often faster to assemble than many glued joints once the setup is dialed in.
Visibility, clamping, and cleanup
Butt joints can disappear into a frame or box if you plan the fasteners and finish well. Pocket holes hide the screw heads inside the drilled pockets, which helps on the finished face, but they can leave visible holes on the inside or underside. That makes them a good fit where the hidden side will stay hidden.
📊 Pocket holes are pre-drilled holes made at an angle, typically 15 degrees. Source: How To Use A Kreg Pocket Hole Jig.
What is a butt joint?
A butt joint is made when the end of one board meets another board. It is the simplest connection in woodworking and shows up as end-to-edge, end-to-face, or end-to-end joining. That simplicity is why beginners reach for it first, especially on boxes, frames, and face frames.
Where butt joints show up: boxes, frames, and face frames
Butt joints are common in carcass-style boxes, simple shop jigs, and frame assemblies where another part or fastener will carry the load. They are not a good answer for a joint that must resist twisting by itself. In thin stock or visible furniture parts, reinforcement matters more than the joint name.
Why end grain changes the glue story
Wood glue works best on long grain. End grain absorbs glue like straws, so a glue-only butt joint on end grain is usually weak. That is why a plain glued butt joint is often not enough for weight-bearing parts or anything that gets regular use.
How to reinforce a butt joint with screws, nails, or blocks
Beginners can make a butt joint more reliable by adding screws, nails, or corner blocks. A pilot hole is recommended before driving wood screws because it lowers splitting risk, especially near the ends of boards. Glue can still help on long grain contact, but the reinforcement is what gives the joint practical staying power. (en.wikipedia.org)
What is a pocket hole joint?
A pocket hole joint is angled screw joinery made with a jig, usually drilled at about 15 degrees. The screw is driven through the pocket into the mating board, which pulls the pieces together and creates clamping pressure. That is why many beginners find it easier to assemble than a glue-and-clamp routine.
How angled screws work at about 15 degrees
The pocket hole angle is set so the screw enters the workpiece from the pocket and bites into the adjoining board at an angle. This lets the screw pull the joint tight as it is driven. The result is a fast, beginner-friendly assembly method for light-assembly-with-screws projects.
What the pocket hole jig, stepped drill bit, and square drive screw do
The pocket hole jig guides the drill to the correct angle. The stepped drill bit forms the pocket and pilot path, and the depth collar helps control how deep the bit cuts. Pocket hole screws often use a square drive bit and are designed for this setup so the screw can clamp the joint while helping reduce the chance of splitting compared with a typical screw.
Why pocket holes feel easier on first assembly
Beginners often like pocket holes because the parts can be clamped and fixed together in a straight sequence. There is less waiting for glue to grab and less need to juggle multiple clamps across a wide assembly. For many first projects, that means less frustration and a cleaner path from dry fit to finished frame.
Which joint is stronger for beginner projects?
For most beginner builds, the pocket hole joint is stronger in practical use when the project needs quick screw-based clamping and some resistance to pulling apart. A reinforced butt joint can be enough for light boxes and simple frames, but a glue-only butt joint is weak on end grain and should not be treated as a default for load-bearing work.
When a pocket hole joint is the better pick
Choose pocket holes when the joint must go together quickly, stay aligned, and carry moderate load in a face frame, cabinet carcass, or hidden support. They are also a good fit when you want to avoid waiting around for glue to set before moving to the next step. The screw creates the clamp force as it goes in.
When a reinforced butt joint is enough
A reinforced butt joint is enough for a light box, a shop fixture, or a frame that is not carrying much weight. If the finished side will be painted, hidden, or filled, the simple joint can be a smart first-project choice. It is less suitable where twisting force or repeated use will stress the joint.
Why racking and screw placement matter
Racking is the side-to-side squaring force that can pull a frame out of shape. Pocket holes help resist that better than a bare butt joint, but only if the screws land where the wood still has enough thickness. Poor screw placement can split the edge or miss the holding zone, which turns a simple fix into a weak one.
Butt joint vs pocket hole decision table
Use this table as a quick filter. If your project is light and hidden, the simpler joint often wins. If the project needs quicker assembly, stronger pull-up, or a cleaner workflow for a beginner, pocket holes usually make more sense.
| Project question | Simple butt joint | pocket hole for beginners | Winner |
|---|---|---|---|
| Will the joint carry weight or get regular use? | Only if reinforced with screws, nails, or blocks | Better starting point for moderate load | pocket hole for beginners |
| Do you want the lowest tool budget? | Yes; you may only need saw, clamp, glue, and screws | No; a jig and dedicated bit add cost | Simple butt joint |
| Do you want the fastest first assembly? | Not usually, because clamping and reinforcement take time | Yes, because the screw pulls the joint together quickly | pocket hole for beginners |
| Will the joint stay visible? | Can be hidden with layout, plugs, or fill | Best when pocket holes land on the hidden side | Tie |
| Is the project likely to rack or twist? | More vulnerable unless braced | Better, though not a substitute for proper bracing | pocket hole for beginners |
- Choose a simple butt joint if the project is light, hidden, and low cost.
- Choose pocket holes if you want faster assembly and can buy the jig and matching bit.
- Choose a reinforced butt joint if the design already includes blocks, cleats, or another brace.
- Choose pocket holes if you are building a face frame, cabinet part, or beginner furniture piece with hidden fasteners.
What tools do I need for pocket holes as a beginner?
At minimum, you need a pocket hole jig, a stepped drill bit, a depth collar setup, a clamp, and a square drive bit. Pocket holes can be made with a power drill and a jig, and many first-time buyers start with a common entry tool like a Kreg Jig. Models vary, with examples described from $40 to $400, including the Kreg 320, Kreg 520, Kreg 720, and Kreg Foreman.
Minimum pocket-hole setup
The jig guides the angle, the special bit drills the pocket, and the depth stop keeps the hole and screw path consistent. Without the jig, you lose the repeatability that makes pocket holes friendly for beginners. That is why the jig is not optional if you want a proper pocket hole.
Cost tiers beginners should expect
Reported pocket-hole model tiers start at $40 and go up to $400. The Kreg 320 is described as the $40 version, the Kreg 520 as the $100 version, the Kreg 720 as the $130 version, and the Kreg Foreman as the $400 version. The right choice depends on how often you expect to drill pockets and how much setup speed matters to you.
When should you use glue, screws, or both?
Use glue where long grain meets long grain, use screws where you need mechanical holding, and use both when the joint benefits from immediate clamping plus bond strength. Avoid relying on glue alone on end grain. In a butt joint, screws with a pilot hole are often the practical beginner fix; in pocket holes, pocket hole screws plus glue can make the joint better than either one alone.
Long grain glue joints versus end grain glue joints
Long grain gives glue more bonding area and a stronger hold. End grain absorbs glue and leaves less effective bond, which is why glue-only butt joints are not a good answer for load or regular use. If the joint is end grain to end grain or end grain to face, plan on reinforcement.
Why pilot holes matter in butt-joint screw work
A pilot hole helps the screw cut cleanly and lowers the chance of splitting the board. That matters most near the end of a board or in narrow stock. For a beginner, pilot holes make butt-joint screw work more forgiving and reduce the chance of cracking a face frame or box side.
When pocket hole screws plus glue make sense
Pocket hole screws already provide clamping pressure, but glue can still help when the joint is long grain to long grain or when the design allows a little open time for positioning. Do not expect glue to rescue a bad fit or poor screw placement. The better result comes from sound layout, correct depth, and the right screw length.
Choose a simple butt joint if… / choose pocket holes if…
Choose a simple butt joint if the project is light, the joint will be hidden or painted, and you want the cheapest path to a working build. Choose pocket holes if you want faster assembly, better screw-driven clamping, and a beginner-friendly method for face frames, cabinet parts, and similar light-to-moderate projects. Neither method is magic, but each has a clear job.
Choose a simple butt joint if…
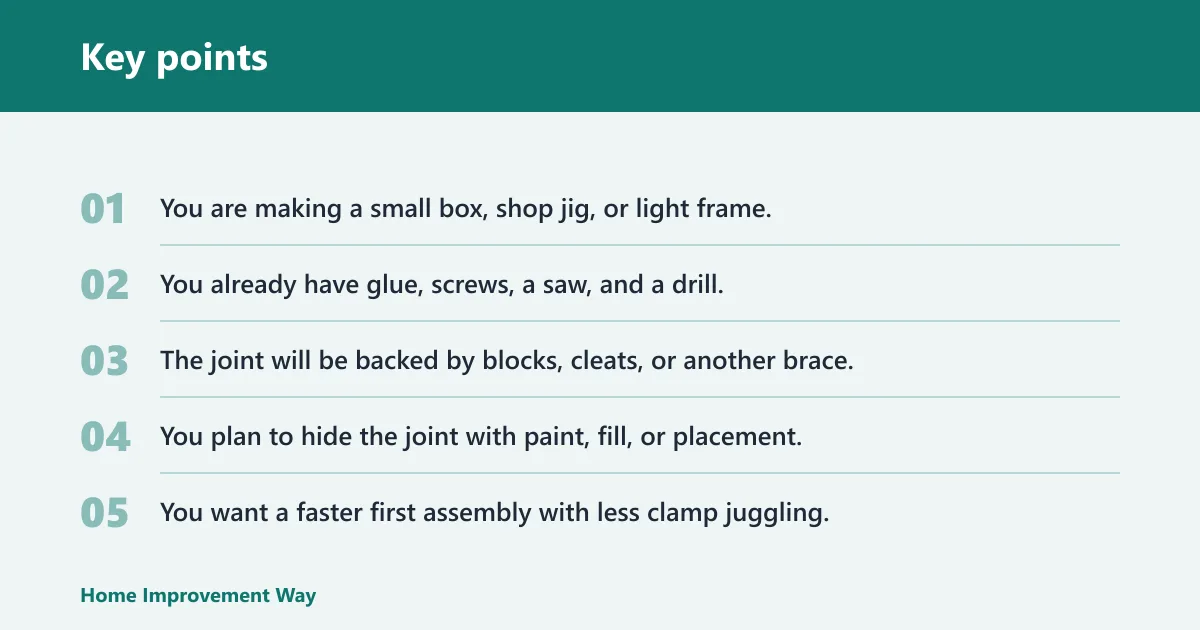
- You are making a small box, shop jig, or light frame.
- You already have glue, screws, a saw, and a drill.
- The joint will be backed by blocks, cleats, or another brace.
- You plan to hide the joint with paint, fill, or placement.
Choose pocket holes if…
- You want a faster first assembly with less clamp juggling.
- The project is a face frame, cabinet part, or similar beginner build.
- You can buy the jig and matching bit without pushing your budget too far.
- You want a screw-driven joint that helps pull the parts tight as you build.
Common mistakes to avoid with each joint
A common first-timer mistake is treating glue as enough on end grain. Another is placing pocket screws where the board is too thin, which can cause split-out or a broken edge. With butt joints, watch for racking, because a square-looking dry fit can move out of square once weight or screws are added.
Suppose you are building a shelf box from pine with a painted finish. A plain butt joint may be fine if you add screws, pilot holes, and inside corner blocks. If the same box must go together quickly and stay square during assembly, pocket holes will usually be the easier route.
Frequently asked questions
What is the difference between a butt joint and a pocket hole joint?
A butt joint puts the end of one board directly against the face or edge of another board. A pocket hole joint uses an angled screw, usually drilled at about 15 degrees, to pull two boards together. The butt joint is simpler; the pocket hole is usually faster to assemble and more forgiving for beginners.
Which is stronger, a simple butt joint or a pocket hole for beginners?
For beginner projects, a pocket hole joint is usually stronger in practical use because the screw creates clamping pressure and better holds the joint together. A simple butt joint can be strong enough when reinforced, but it is weak without help, especially on end grain or in parts that carry load.
Do I need a pocket hole jig to make pocket holes?
Yes. A pocket hole jig is the drill guide that holds the bit at the correct angle and position, and the setup is what makes pocket holes repeatable. Pocket holes can be made with a power drill and a jig, but without the jig you do not get the proper angled hole.
Can I use a butt joint with just glue?
Only for very light-duty work, and mostly where the glue is bonding long grain. Glue alone is weak on end grain, so a glue-only butt joint is not a good choice for weight-bearing parts or projects that will get regular use. Add screws, nails, or blocks when the joint matters.
When should a beginner use screws, glue, or both?
Use glue for long grain-to-long grain contact, screws when you need mechanical holding, and both when the design benefits from clamp force plus bond strength. For butt joints, predrill with a pilot hole before driving screws. For pocket holes, pocket hole screws and glue can work well together when the joint is well fit.
Is a butt joint good enough for boxes and frames?
Yes, for many light boxes and simple frames, a butt joint is good enough if you reinforce it. It is a common choice for face frames and basic carcasses. If the box will carry weight, get handled often, or must stay square under stress, pocket holes or added blocking are the safer beginner choice.
What are the common mistakes when using pocket holes?
The usual mistakes are drilling at the wrong depth, using the wrong screw length, placing holes too close to an edge, and forgetting that the joint still needs good clamping and fit. Beginners also sometimes treat pocket holes like a fix for poor layout. They are a joinery method, not a cure for bad measurements.
How do I choose the easiest joint for my first project?
Start with the project’s load, visibility, and tool budget. If the build is light and hidden, a reinforced butt joint is the cheapest and simplest route. If you want quicker assembly and can buy the jig, pocket holes usually feel easier on the first try, especially for face frames and cabinet parts.
Sponsored / affiliate links. As an Amazon Associate I earn from qualifying purchases. I may earn additional commission from eligible campaigns.