Beginner Woodworking Projects
The best beginner woodworking projects are builds with six or fewer parts, forgiving joinery, and one hard layout step: a shop stool, wall shelf, planter box, or small side table. I have seen plenty of first projects go sideways for the same reason: the build asks more of the tools and space than the beginner can give. Pick a project beyond your tools or space, and you waste money on lumber, fight bad cuts, and end up quitting after a half-built box. This guide matches first projects to your tool kit, work area, and error tolerance, with difficulty, common failure points, and hand-tool-only or no-table-saw options.
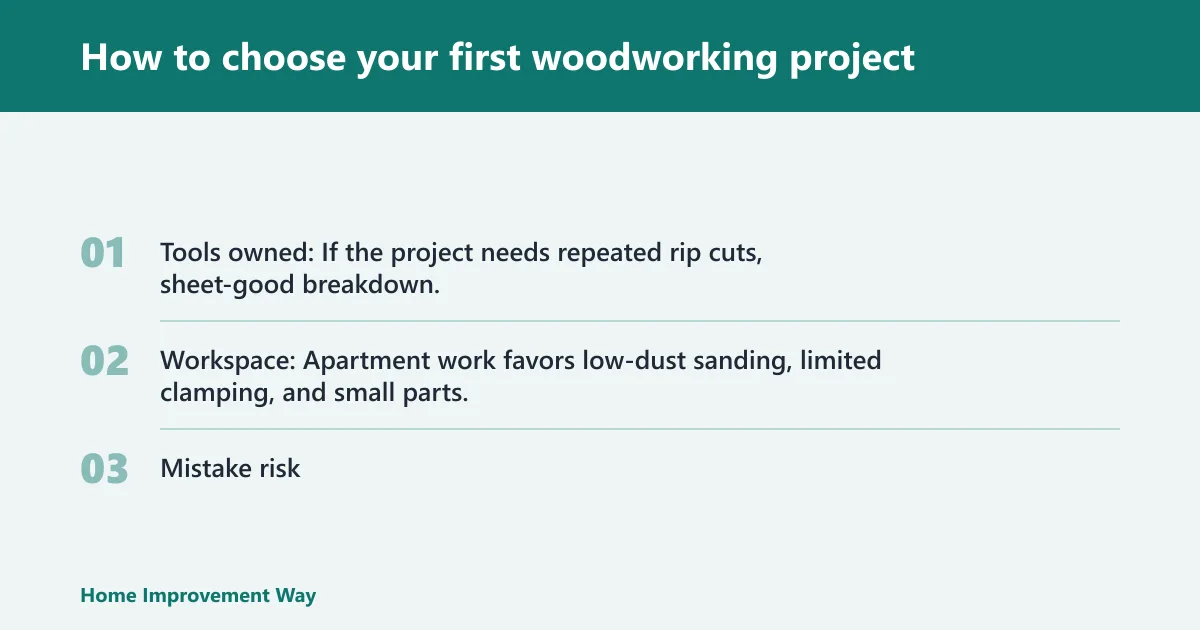
How to choose your first woodworking project

Use three filters: tools, workspace, and mistake risk
A good first project is not the one with the nicest photo. It is the one your current tools can cut accurately, your workspace can support safely, and your patience can survive.
Start with three filters.
- Tools owned: If the project needs repeated rip cuts, sheet-good breakdown, or clean miters, make sure the tool list matches what is on hand. A drill and sander point toward assembly-heavy builds. A jigsaw or circular saw opens up shelves, racks, and boxes.
- Workspace: Apartment work favors low-dust sanding, limited clamping, and small parts. A driveway or garage can handle longer boards, louder tools, and painted finishes.
- Mistake risk: Projects fail in predictable ways. Frames go out of square. Shelves rack. Cutting boards get weak glue lines. Birdhouses split near fasteners if pilot holes are skipped.
What makes a project beginner-safe
Beginner-safe projects usually tend to have fewer cuts, wider tolerance, and joinery that can often be corrected during dry-fit. Straight cuts are easier to recover from than miters. Butt joints and screw joinery are easier to align than small floating parts or drawer slides.
Easy clamping matters too. Flat glue-ups and box shapes let a new builder spot errors early. Narrow trim assemblies and compound angles do not.
When to start with solid wood, plywood, or a pre-cut board
Solid wood is the better first choice for cutting boards, simple stools, and painted utility projects because small dimension changes are easy to manage. Plywood is often the better choice for shoe racks, shelves, and storage because it stays flatter across wide spans.
Pre-cut boards are the lowest-risk path when space is tight. That is especially true for apartment builds and first gift projects, where cutting fewer pieces often matters more than saving material.
In my own builds, pre-cut stock has been the easiest way to keep project one enjoyable. It removes the longest cuts, reduces setup time, and lets a beginner spend energy on fit, glue, and finish instead of wrestling a full sheet on a shaky bench.
📊 Anika’s site includes a beginner woodworking 101 topic on using a speed square. Source: Beginner Woodworking And DIY Projects And Turorials- Anika’s….
What are the easiest woodworking projects for beginners?
The easiest woodworking projects for beginners are small builds with straight crosscuts, one joinery method, and only a few places where parts must line up: cutting boards, simple wall shelves, birdhouses, and open shoe racks. On jobs like these, I can teach measuring, squaring, drilling, sanding, and finishing without pushing a beginner into drawers, tight miters, or long panel glue-ups.
Projects with the fewest layout steps and straightest cuts
Three projects stand out.
- Cutting board: one glue-up, edge rounding, sanding, and food-safe finish.
- Open wall shelf: a few square cuts, basic fastening, and easy use indoors.
- Birdhouse: small parts, basic box-building, and simple drill work.
Those builds work because they can often be sized around a pine board from the home center, offcuts from another project, or pre-cut stock. That keeps the first project focused on process instead of forcing a beginner to buy a full sheet of plywood or a long hardwood board just to get started.
Projects that teach one skill at a time
A first build should teach one main lesson.
- Cutting boards teach glue-up pressure and sanding discipline.
- Picture frames teach length matching and corner assembly.
- Birdhouses teach small box assembly and pilot holes.
- Shelves teach square assembly and fastening layout.
- Shoe racks teach repeat cuts and spacing.
Projects to avoid first
Skip anything with lots of miters, moving parts, drawers, or thin strips. Drawer boxes and slides punish tiny errors, so they are better left for project two or three even if the cut list looks simple.
Also skip large tabletops and deep cabinets. They add clamping problems, material handling problems, and finish problems all at once.
What tools do I need for beginner woodworking projects?
The minimum useful tool kit for beginner woodworking projects is a tape measure, speed square, drill, jigsaw or circular saw, two 12-inch clamps or a pair of 24-inch clamps, and a random-orbit sander. That kit covers layout, straight cuts, pilot holes, fastening, and surface prep for most first builds without forcing a beginner into shop-only machines or fussy setup.
The short starter kit
The practical beginner tool list looks like this:
- Tape measure: for part sizing, marking, and checking diagonals.
- Speed square: for square cut lines and quick layout. Anika’s site includes a beginner woodworking 101 topic on using a speed square.
- Drill: for pilot holes, screws, and light countersinking.
- Jigsaw or circular saw: for breaking down boards and making straight or shaped cuts.
- Clamps: for glue-up, holding work, and pulling joints into line.
- Sander: for flattening glue squeeze-out and finish prep.
A small starter kit matters because it keeps the first buying list aligned with a first project instead of turning the hobby into a shopping exercise. In my experience, beginners make faster progress when every tool in the room gets used on the same day.
What each tool helps you do on a first build
A speed square fixes a lot of beginner measuring errors before they happen. A drill prevents splitting when pilot holes are used. A sander hides saw marks, but it also creates new problems if edges are over-rounded or corners are softened where parts need to meet flush.
For no-table-saw work, a circular saw with a guide is usually the better match for straight shelf parts. A jigsaw is better for curved cutting boards or simple decorative shapes, but it leaves rougher edges that need more sanding.
Which tools can wait until project two or three
A pocket-hole jig can wait unless the first project is a shelf or stool that benefits from hidden screw joinery. A miter saw can wait if straight square cuts are being made with a circular saw and guide. A table saw can definitely wait.
A beginner also does not need a table saw to make a first cutting board if the board is glued from pre-cut strips or cut from a pre-sized blank. That is one reason cutting boards stay near the top of most realistic first-project lists.
The beginner-project scorecard

How the scoring works
The table ranks projects by the things beginners actually trip over: tool count, cut count, joinery type, build time, and mistake risk. Lower tool count and lower cut count usually mean fewer chances to ruin stock. Simpler joinery means easier dry-fit, easier clamping, and easier recovery after a bad measurement.
Scorecard table: 10 beginner woodworking projects
| Rank | Project | Best setup | Tool count | Approx. cut count | Joinery type | Estimated build time | Common mistake risk | Why it fits |
|---|---|---|---|---|---|---|---|---|
| 1 | Cutting board from pre-cut stock | Apartment, hand-tools-light, small bench | 4 | 0-4 | Glue-up | Short build, longer finish cure | Low | Few parts, one flat assembly, easy sanding practice |
| 2 | Simple wall shelf | Apartment, small shop | 5 | 4-6 | Butt joints and screws | Half day | Low to medium | Teaches square assembly and fastening layout |
| 3 | Birdhouse | Small bench, driveway | 5 | 6-10 | Glue and nail or screws | Half day | Medium | Good box-building practice with outdoor use |
| 4 | Open shoe rack | Small shop, entryway build | 5 | 8-10 | Butt joints and screws | Half day to full day | Medium | Repeat cuts, useful storage, forgiving design |
| 5 | Picture frame with square corners | Apartment, gift build | 4 | 4 | Glue and nails | Short | Medium | Low material use, custom sizes such as 8×10 |
| 6 | Picture frame with miters | Bench or garage | 5 | 4 | Mitered glue joints | Short | Medium to high | Looks polished, but poor miters show fast |
| 7 | Freestanding shelf unit | Garage, small shop | 6 | 10-14 | Screws or pocket-hole joinery | Full day | Medium to high | Useful home storage, more chances to rack out of square |
| 8 | Planter box | Driveway, patio | 5 | 10-12 | Screws and exterior glue | Full day | Medium to high | Forgiving appearance, but outdoor finish matters |
| 9 | Shop stool | Garage, small shop | 6 | 10-16 | Screws or pocket-hole joinery | Full day | High | Good skill-builder, but seat wobble exposes errors |
| 10 | Simple bench or side table | Garage | 6 | 12-18 | Pocket holes or screws | Full day | High | More parts, longer stock, harder to keep square |
Recommendation path for hand-tools-only, small-shop, and apartment setups
Hand-tools-only: choose a cutting board from pre-cut stock, a square-corner picture frame, or a very small wall shelf assembled with pre-cut parts.
Small-shop: choose an open shoe rack, birdhouse, or wall shelf. These fit on a short bench and do not require handling full sheets.
Apartment: choose projects with low noise, low dust, and limited glue spread: cutting boards, frames, and short shelves. Avoid long rip cuts and spray finishes.
How to use the table to choose first and second projects
For the first project, stay in ranks 1 through 4. For the second, move to a project that adds only one new variable, such as miter cuts or pocket holes.
That progression matters more than chasing style. A badly chosen first build teaches workarounds. A well-chosen one teaches control.
What beginner woodworking project should I build first?
The best first beginner woodworking project depends on what is already in the tool box and where the build will happen. With only a drill and sander, start with a pre-cut cutting board or shelf kit. With a circular saw or jigsaw, move to a wall shelf or shoe rack. For gifts, choose frames or boards.
If you only own a drill and a sander
Start with a cutting board from pre-sized strips or a pre-cut board blank. It teaches glue-up, sanding, edge easing, and finishing without requiring long accurate saw cuts.
Use food grade mineral oil on cutting boards. That recommendation lines up with common guidance from food-contact finishing references and with how I finish boards in my own shop: oil, wipe off the excess, let it soak, then repeat until the surface stops drinking it quickly.
If you have a circular saw or jigsaw and a small bench
Build a wall shelf or open shoe rack. Both projects need square cuts more than fancy cuts. In my shop, a speed square and straightedge guide do more for clean shelf parts than an extra machine sitting in the corner.
A shoe organizer works especially well for entryway use because the dimensions are usually forgiving, and plywood or board construction allows simple assembly with screws.
If you want the fastest win versus the best skill-builder
The fastest win is the cutting board. The best skill-builder is the wall shelf. The board has lower assembly stress. The shelf forces layout, drilling, clamping, and checking for square.
Picture frames sit between those two. They are a solid first gift build if the corners stay simple and the stock is kept straight, narrow, and easy to clamp.
If your goal is a gift, home storage, or a project to sell
For gifts, pick a cutting board or picture frame. For home use, pick a shelf or shoe rack. For simple sales, pick only projects you can repeat with identical parts and consistent finish.
That is where many beginners get tripped up. A project that is fun once can be miserable on piece five if repeat cuts wander or finish prep is sloppy.
Best beginner woodworking projects by setup and goal
What are beginner woodworking projects with hand tools only?
Hand-tool-only beginner woodworking projects work best when lumber is already cut to size or needs only short crosscuts. Good options include a small cutting board, a square-corner picture frame, a wooden doormat, and a narrow wall shelf assembled from pre-cut boards with glue, nails, or screws.
A wooden doormat is exactly the kind of low-machine project that fits a hand-tool-only start. It can be built with a miter box, hammer, nails, glue, and patience, which is about as realistic as beginner woodworking gets.
What beginner woodworking projects can I make without a table saw?
Most solid beginner woodworking projects do not need a table saw at all. A circular saw, jigsaw, drill, clamps, and sander are enough for cutting boards, shelves, birdhouses, picture frames, shoe racks, planter boxes, and simple stools if the cuts are planned around guides and manageable board widths.
That matters for readers working on a balcony, in a hallway, or on a folding bench. In those setups, cut planning and workholding matter more than owning one more machine.
What are good beginner woodworking projects for the home?
The best beginner woodworking projects for the home solve a real storage or display problem while keeping cut count and joinery manageable. Strong first choices are wall-mounted shelves, freestanding shelves, shoe racks, small stools, and entryway organizers because they use basic fastening, square parts, and easy-to-check alignment.
Wall-mounted shelves are the top home-use pick because mistakes show early. If the shelf box is out of square, the diagonals will tell the story before finish goes on. Layout for wall fastening matters too. Mark stud or anchor positions before final assembly if possible.
What are the best beginner woodworking projects for gifts?
The best beginner woodworking projects for gifts are cutting boards, picture frames, and small decorative shelves because they use less material, fit on a small bench, and reward careful sanding. They also pack and store easily, which matters when a project is being built in an apartment or shared room.
Picture frames are especially flexible because they can be built in custom sizes such as 8×10. Straight-cut frames are safer than mitered ones for project one. If the goal is a gift that looks cleaner than its construction skill level, a frame with square corners and a painted finish hides more than a hardwood miter frame does.
What easy woodworking projects sell?
Easy woodworking projects that sell are the ones a beginner can repeat accurately with consistent prep and finish: cutting boards, simple picture frames, wall shelves, and shoe racks. Buyers notice uneven sanding, streaky finish, and crooked corners faster than they notice wood species, so repeatability matters more than trying a harder design.
Small wall shelves and cutting boards are the strongest first sale candidates because material waste is low and storage between builds is easy. Birdhouses can sell too, but outdoor use raises finish and drainage questions. Avoid benches and stools until joinery and squareness are reliable.
10 beginner woodworking projects ranked from safest to more demanding
1 to 3: cutting boards, small shelves, and birdhouses
Cutting boards: Best first build if the stock is already dimensioned. Key tasks are glue-up, scraping or sanding squeeze-out, edge rounding, and finish. Failure points are glue-starved joints, uneven clamping, and over-sanding one area into a dip.
Small shelves: Best first build for home use. Basic fastening, storage use, and square assembly all show up here. Failure points are crooked screw placement, out-of-square corners, and wall layout done after the unit is built.
Birdhouses: Best for practicing simple box-building. A beginner does not need a fancy design or mixed materials to learn the lesson. The useful part is the project type itself: mostly butt joints, small parts, and simple drilling.
4 to 6: shoe racks and picture frames
Shoe organizers and shoe racks: Strong small-shop projects because parts are repetitive and short. They work well in plywood or solid boards. Failure points are bad spacing, unsupported long spans, and racks assembled without checking square after each shelf goes in.
Picture frames: Straight-cut frames are moderate difficulty. Mitered frames are a step up because tiny errors multiply into visible gaps. For display use, straight corners can look clean if the finish is tidy and the glass or backer fits properly.
7 to 10: freestanding shelves, benches, planter boxes, and stools
These projects are still reasonable for beginners, but not as project one. Freestanding shelves must resist racking. Benches and stools punish tiny errors with wobble. Planter boxes are forgiving in appearance, but outdoor finishes, drainage, and end-grain exposure raise the build stakes.
For small-shop readers, a stool can be worth doing second or third because it teaches accurate leg layout and load-bearing joinery. For apartment readers, it is usually too much noise, dust, and clamping for project one.
How do the core skills change from project to project?
The main skills change in a clear order: first come square cuts and simple glue-ups, then basic screw joinery, then pocket holes and miter fitting, and after that larger assemblies that must stay square while being clamped. Beginners make faster progress when each project adds one new skill instead of three.
Basic joinery: butt joints, screws, pocket holes, glue and nails
Butt joints are the best first joinery because the parts are easy to mark and clamp. Screw joinery adds holding power and quick assembly, but pilot holes matter or the wood can split.
Pocket-hole joinery is useful for stools, shelves, and benches, but it introduces jig setup and screw-length choices. Glue and nail assembly works well on small frames and birdhouses, where nails hold position while glue cures.
Keeping cuts square, parts matched, and assemblies from racking
Square matters more than smooth on project one. Check every cut with a speed square. Match paired parts before assembly. On box builds, compare diagonals before driving final screws. If one diagonal is longer, shift the assembly until both match.
Racking is the sneaky failure. Shelves and racks can look fine flat on the bench and twist the moment they stand up.
Avoiding common failures
Tear-out: support the exit side of the cut and use sharp blades. Splitting: drill pilot holes, especially near board ends. Weak glue-up: spread glue fully, clamp enough to close the joint, and avoid starving it by over-tightening.
Bad measurements: mark from one reference edge whenever possible. Poor miters: leave them for project two or three. Out-of-square assembly: dry-fit before glue, then check diagonals while clamps are still loose enough to adjust.
Finishing basics beginners need before project one
Surface prep and sanding
Sand flat areas evenly and resist the urge to linger on edges. That habit rounds parts that should stay crisp, especially on shelves and frames. Remove pencil marks before finish, not after the first coat.
On plywood, go gently near the face veneer. On cutting boards, sand enough to remove glue and machining marks before oil touches the surface.
Protective finishes by project type
Cutting boards need a food-safe finish. Food grade mineral oil is the standard beginner-safe choice for a simple board because it is easy to apply, easy to renew, and does not ask a first-time builder to learn a more complex finishing schedule.
Shelves, shoe racks, and stools can take paint, wipe-on clear coat, or oil depending on wood choice and use. Outdoor projects need exterior-rated protection, but keep the first outdoor build simple. A small birdhouse or feeder is a better early outdoor test than a large bench or planter with many joints.
How to avoid blotching, lap marks, and streaks
Blotching shows up when stain hits unevenly sanded softwood. Lap marks show up when finish is applied unevenly and partially dries before the next pass. Streaks come from brushing too dry or going back into tacky finish.
For a first project, wipe-on finishes are usually safer than thick brushed coats. Paint also hides more small flaws than stain does, especially on shelves and shoe racks.
Frequently asked questions
What are the easiest woodworking projects for beginners?
The easiest beginner woodworking projects are cutting boards, simple shelves, birdhouses, and open shoe racks because they use straight cuts, basic joinery, and parts that can be checked for square without special jigs. They also expose common mistakes early, before a full day of work is wasted.
What beginner woodworking project should I build first?
The safest first project is a cutting board from pre-cut stock if the tool kit is limited, or a small wall shelf if a circular saw or jigsaw is available. Choose the board for the fastest win and the shelf for the best overall practice with measuring, drilling, and assembly.
What tools do I need for beginner woodworking projects?
A strong starter kit includes a tape measure, speed square, drill, jigsaw or circular saw, clamps, and sander. That covers layout, cutting, pilot holes, fastening, and finish prep for most first builds. More specialized tools, including a table saw, can wait until later projects demand them.
What are beginner woodworking projects with hand tools only?
The best hand-tool-only beginner projects are a cutting board from pre-cut stock, a square-corner picture frame, a wooden doormat, and a very small shelf assembled from pre-cut boards. These builds keep noise low, reduce dust, and avoid long rip cuts that are awkward without machines.
What easy woodworking projects sell?
Cutting boards, simple picture frames, and compact wall shelves are the easiest woodworking projects to sell because they store easily, repeat well, and do not require large work areas. A beginner should choose sale projects only when cut accuracy, sanding consistency, and finish quality are repeatable from one unit to the next.
What are good beginner woodworking projects for the home?
Good home-use beginner projects include wall-mounted shelves, freestanding shelves, shoe racks, and small stools because they solve storage or seating needs while teaching square assembly and basic fastening. Among those, the wall shelf is usually the smartest first choice because the parts are few and the layout is easy to verify.
Can I start woodworking without a garage or dedicated shop?
Yes. Many good first projects fit on a folding table, a pair of sawhorses, or a small bench, especially if the parts are pre-cut or kept short. I have had the smoothest beginner sessions in small spaces when the project stayed under shelf size, the clamp count stayed low, and the finish could be wiped on instead of sprayed.
What wood is best for a first project?
Pine, poplar, and plywood are usually the easiest first materials because they are easy to find, affordable, and forgiving enough for shelves, racks, and painted projects. For cutting boards, use a suitable closed-grain hardwood and keep the shape simple so the beginner can focus on glue-up and sanding instead of complicated milling.
How long should a beginner project take?
A realistic first build usually takes a few hours of active work plus drying or cure time for glue and finish. If a project looks like it can be finished in a single evening but actually depends on perfect miters, lots of sanding, or multiple finish coats, it is not really a beginner-time project.
What is the most common reason first projects fail?
The most common failure is not one bad cut. It is choosing a build that asks for too many accurate cuts, too much stock handling, or too many new skills at once. In practice, beginners recover better from a crooked hole than from a project plan that never matched their tools or workspace.
Should I stain or paint my first woodworking project?
Paint is usually easier for project one because it hides mixed grain, small filler repairs, and minor sanding flaws. If you want a clear or natural look, use a simple wipe-on finish and spend extra time on surface prep, because beginner mistakes show up most clearly under transparent finishes.
For most readers, the best path is simple: start with the smallest project that teaches one useful skill, finish it completely, and let the second build add just one more challenge. That approach has been more reliable in my experience than chasing a “dream project” too early, and it usually leads to cleaner work, less wasted lumber, and more confidence at the bench.
Sponsored / affiliate links. As an Amazon Associate I earn from qualifying purchases. I may earn additional commission from eligible campaigns.