How to Make Your First Clean Cut in Wood
Clamp the board, mark one cut line, support both sides, and start with a sharp or fine-tooth blade so the first cut stays controlled and clean. A rushed first cut can splinter the edge, drift off line, and leave you with a board that needs extra trimming or replacing. This guide covers the setup, safety checks, and cutting steps that help you make a clean first cut on the first try.
What makes a first cut clean?


A clean first cut follows the line, leaves little tear-out, avoids burn marks, and keeps the offcut from breaking away early. Those four results depend on setup as much as the saw itself: stable support, the right blade, a clear mark, and a cutting path that matches the grain and stock type.
Square line and fit
A cut looks clean when the end is square to the face and matches the mark you made. Use a tape measure for length, then a speed square to carry the mark around the board if you need a true crosscut. For precise layout, a marking knife leaves a finer line than a pencil, but a pencil is easier for most beginners.
Tear-out, splintering, and burning
Tear-out usually shows up on the exit side of the cut, especially on plywood and other sheet goods. Splintering is more common with coarse blades, dull blades, and cuts against the grain. Burning is usually a sign of too much friction, which often means a dull blade, a blade that is not suited to the wood, or a feed rate that is too slow. Tool makers and woodworking references consistently point to sharpness, correct tooth geometry, and steady feed as the main controls for burn reduction and cleaner edges (Wood Magazine, DEWALT blade guide).
Offcut support and breakage
The offcut needs support until the cut is complete. If it drops early, it can snap fibers at the last moment and leave a ragged edge. Keep the work on sawhorses or a bench, and add a sacrificial backing board when you are cutting a thin piece or a sheet edge that tends to splinter.
Choose the right wood and stock
Wood species and stock type affect how easy the first cut feels. Softwood is generally easier to start with than hardwood, and pine is often a beginner-friendly option because it usually cuts with less force than denser woods. Board thickness and grain direction also matter because they change how much resistance and tear-out you should expect.
Softwood vs hardwood
Softwoods such as pine, fir, and spruce often cut faster and with less effort. Hardwoods such as oak or maple are denser, so they can slow the saw and may make wandering more likely if the setup is loose. For a first cut, softwood gives you more feedback and less chance of forcing the tool.
Why pine is easier for a first cut
Pine is often easier because it is soft enough for hand tools to track well and for power saws to move through without much resistance. It still splinters if the blade is dull or the board is not supported, so “easy” does not mean “careless.” It means the wood is more forgiving when your setup is simple.
Board thickness and grain direction
Thin stock flexes more, which can pinch a blade or let the line move if the board is not fully supported. Thick stock needs a steadier feed and more control. Grain direction matters too: cutting with the grain usually reduces tear-out, while crosscutting through grain often needs a finer blade and more support at the exit side.
Which saw should you start with?
The best first saw depends on the cut, not only the wood. A handsaw is best for small beginner cuts with low setup. A circular saw is best for straight cuts in boards or sheet goods. A miter saw is often best for repeatable square crosscuts when you need the same length more than once.
Handsaw for small, low-setup cuts
A handsaw gives the most control with the least setup, which makes it a strong choice for a small board, a trim cut, or a cut where power tools would feel oversized. Look for tooth count per inch that suits the job: more teeth per inch usually mean a smoother cut, while coarser teeth remove material faster. Crosscut teeth are shaped for cutting across grain; rip teeth are shaped for cutting along grain.
For the first cut with a handsaw, use this sequence: 1) set the board flat and clamp it close to the line, 2) choose a finer crosscut saw for across-grain work or a rip saw for along-grain work, 3) start with short, light strokes to establish the kerf, 4) keep the saw angled gently so the teeth do the cutting instead of your arm forcing the line, and 5) hold the offcut until the blade clears so the end does not snap. That slower start is exactly what makes small cuts cleaner and more accurate.
Circular saw for boards and sheet goods
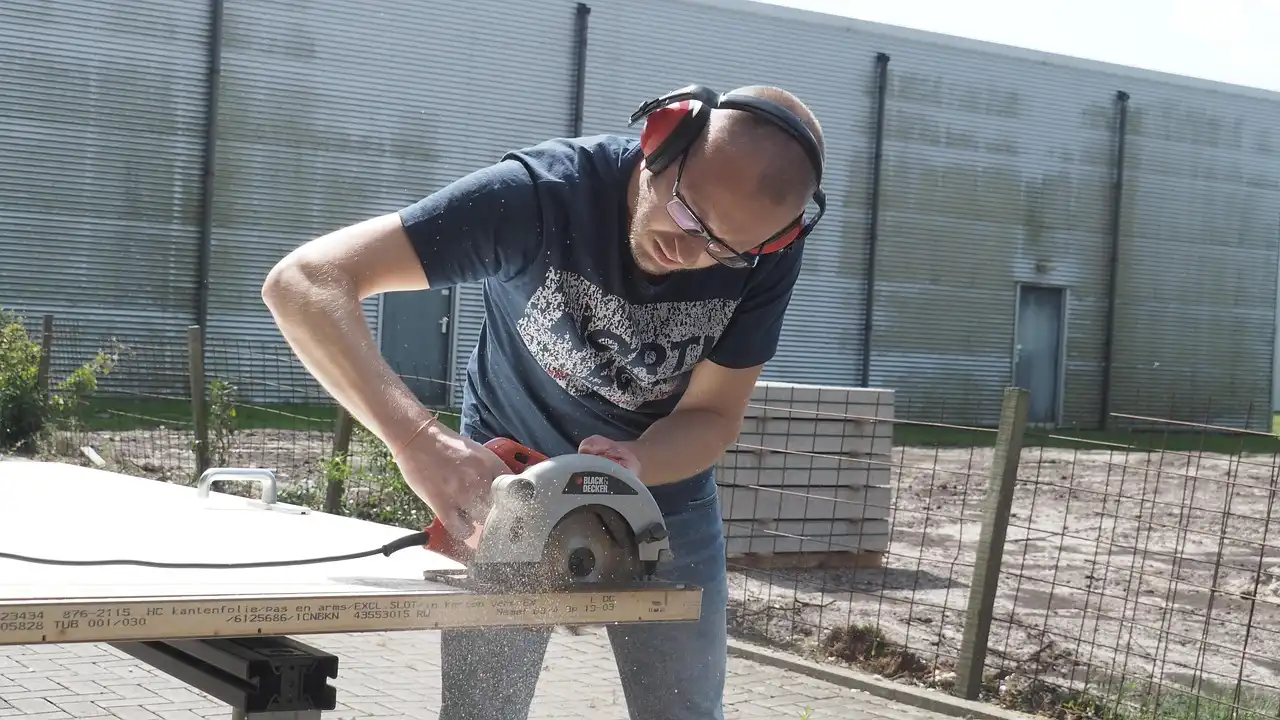
A circular saw is the better choice when you need a long straight cut in a board or a sheet edge. Blade diameter and kerf width matter because they affect depth and material loss. Most beginners do better with a saw guide or straightedge, since freehand cuts are more likely to wander, especially on long cuts. For safe operation, OSHA recommends appropriate eye, hearing, and foot protection when exposure calls for it, and a blade setup that matches the task (OSHA personal protective equipment).
A blade depth set just below the material is the common best practice because it reduces exposed blade, limits tear-out, and helps the cut track better (DEWALT blade guide).
Miter saw for repeatable square crosscuts
A miter saw is the cleanest choice for repeatable square crosscuts when the board fits the tool. Set the fence square and the miter angle at zero for a straight cut, then clamp the stock if the saw and material setup allow it. The cut-off piece should be supported so it does not fall and chip the edge.
For the first cut with a miter saw, use this sequence: 1) place the board firmly against the fence with the cut mark aligned, 2) confirm the blade is sharp and appropriate for crosscutting, 3) start the saw at full speed before lowering into the wood, 4) lower with a controlled, even motion rather than forcing the head down, and 5) let the blade finish the cut before raising the head so the offcut stays supported. Keeping the fence square and the feed steady is what gives the cleanest repeatable result.
Set up your line, support, and clamp
A good setup often matters more than the last inch of the cut. Measure twice, cut once is still solid advice, but beginners also need a clear line, a stable work height, and a way to stop the board from moving. That is what keeps the saw from drifting and the offcut from breaking free.
Measuring and marking tools
Use a tape measure for length, then mark with a pencil or marking knife. A speed square helps transfer a square line across the face and edge. If the cut must be exact, mark from the same reference edge each time so you do not measure from the wrong side of the board.
Sawhorses, bench height, and clamps
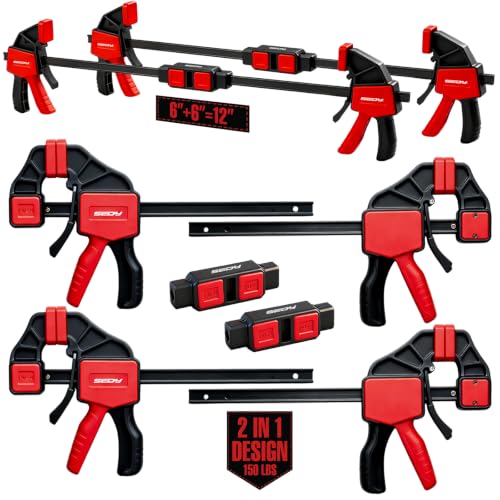
Support the work on sawhorses or a workbench so the cut line is visible and the board is not hanging in the air. Clamp the stock when possible, especially for a circular saw or a handsaw on a small piece. The goal is simple: the board should stay still while the tool moves.
Sacrificial backing board and offcut support
A sacrificial backing board under the cut line helps protect the bottom face from splintering. It is especially useful on plywood, thin boards, and trim cuts. Support the offcut too, because the last bit of the cut is where a clean edge often gets damaged.
- Mark the cut from a single reference edge.
- Place the board on sawhorses or a bench.
- Clamp the stock if it can move.
- Add backing support if the exit side is fragile.
- Check that the offcut has a place to rest.
Wood cut decision table
This table gives a simple first-cut path for common beginner jobs. It is built around control first, not speed first.
| Scenario | Best tool | Setup | One key risk | Cleanest first-cut tip |
|---|---|---|---|---|
| Small board | Handsaw | Clamp the board on a bench with the line overhanging slightly | Wandering from an overlong stroke | Use short starter strokes to seat the saw in the kerf |
| Long board | Circular saw | Support the board on sawhorses and guide the saw with a straightedge | Blade drift over a long distance | Set the blade just deeper than the material and keep the base flat |
| Sheet edge | Circular saw | Clamp a straightedge and place backing support under the cut line | Bottom-face splintering | Cut with the good face down when the blade exits from the top side |
| Repeat cut | Miter saw | Set the fence square, lock the stop if used, and clamp the stock | Inconsistent length from a shifting board | Keep every piece registered against the fence before lowering the blade |
| Trim cut | Handsaw | Mark the line clearly and support both sides of the piece | Breaking a small offcut at the end | Finish the cut slowly and hold the offcut until the blade clears |
Stronger decision guidance for the same jobs
For the cleanest first cut, match the blade and the support to the stock: use a higher-tooth-count handsaw for small trim work, a fine-tooth circular saw blade for plywood or other sheet goods, and a crosscut blade for square repeat cuts. Thin or fragile stock should be backed up from underneath, while longer boards need support at both ends and near the cut line. For sheet goods, the cleaner face is usually the one that should be placed down when using a standard circular saw because the blade exits the top side of the board and can bruise that face; on a miter saw, support both the fence side and the cut-off side so the work stays seated. For plywood and other veneered sheet goods, backing support and a finer-tooth blade are the simplest ways to reduce tear-out (Rockler on cutting plywood, BOSCH circular saw blade guide).
How do you make the cut without wander?
Keep the saw under control by matching the tool to the cut and by guiding the blade with the work, not your arms alone. A clean first cut comes from a steady start, a shallow or scored beginning when needed, and a finish that stays slow enough to protect the exit edge.
Handsaw stroke control and tooth choice
With a handsaw, start with light strokes so the teeth follow the mark instead of skipping across the surface. Crosscut teeth are better when you are cutting across grain, and a finer tooth count per inch usually leaves a smoother edge on beginner-sized cuts. Let the saw do the work instead of pressing hard.
Circular saw guide use and blade depth
Set the blade depth so it clears the wood by about a small amount, just enough for the cut to pass through the material. That reduces kickback risk and keeps the cut cleaner. Use a straightedge or saw guide for the first cut path, and keep the base plate fully in contact with the board. If the saw is fighting the cut or leaving burn marks, stop and check the blade.
Miter saw fence settings and steady feed
For a miter saw, confirm that the fence is square for a 90-degree crosscut and that the miter setting has not moved. Hold the stock firmly against the fence, then lower the blade in a steady motion. Do not force the cut; a smooth feed usually leaves a cleaner edge than a fast drop or a pause mid-cut.
Say your first project is a 1-by-4 pine board for a shelf brace. A handsaw can work well if you only need one short cut, but the board should be clamped flat and the offcut held until the blade clears. That keeps the end from breaking and leaves a cleaner edge than a loose cut would.
Suppose you need to trim a plywood sheet edge for a cabinet side. A circular saw with a straightedge is the better choice, and the sheet should be supported on both sides of the cut line. If the blade is dull or the guide slips, the cut can burn or splinter near the exit side.
Safety and cut-quality checklist
Wear safety glasses, closed-toe shoes, and hearing protection when using power saws. Add a dust mask or respirator when the wood dust calls for it, especially during long cuts or when the material throws fine dust. Keep hands away from the blade path, and stop if the stock starts moving. General PPE guidance from OSHA also emphasizes matching protection to the hazard rather than treating every tool the same (OSHA personal protective equipment).
- Check that the blade is sharp and suited to the material.
- Match tooth count and blade type to the cut.
- Clamp or steady the board before starting.
- Support the offcut and the far end of the stock.
- Use a guide for long straight cuts.
- Finish the cut slowly and keep pressure even.
- Watch for burning, binding, or splintering and stop if they start.
Frequently asked questions
How to cut wood easily
The easiest way is to use a tool that suits the stock and cut type. For a small piece, a handsaw gives control with little setup. For a long straight cut, use a circular saw with a guide. For repeated square cuts, a miter saw is simpler and more consistent.
How to cut wood at home
At home, set up on sawhorses or a sturdy bench with enough room for both sides of the cut. Keep the board stable, mark from one reference edge, and use a blade that suits the wood. Pine and scrap pieces are good practice material before you move to a final board.
How to cut long simple wood
For a long straight board, a circular saw with a straightedge is usually the most practical choice. Support the board so it does not sag, because sagging can pinch the blade or pull the cut off line. Set the blade depth just deeper than the material and move steadily.
How to cut large pieces of wood
Large pieces need more support than most beginners expect. Place the work on sawhorses or a bench so both sides of the cut are supported, then add a backing board if the material is prone to splintering. A circular saw is often the best fit for large sheet goods.
How to cut wood cutouts
For cutouts, drill a starter hole where needed, then use the tool that fits the shape and stock thickness. A jigsaw is usually the easiest choice for interior curves or openings, while a circular saw is better for straight openings that start at an edge. Support the work so the cutout section does not tear free and splinter the surrounding face.
How to clean up a rough cut edge after sawing
Start with light sanding or a fine file to remove small splinters and tool marks. If the edge is badly rough, plane or trim it back to the line before sanding. Work from coarse to fine just enough to smooth the edge without rounding it over more than needed.
What does a clean cut mean versus clean wood?
A clean cut means the sawn edge is smooth, square, and free of major tear-out, burn marks, or ragged fibers. “Clean wood” usually means the board itself is not dirty, oily, or damaged. The terms are different: a board can be clean wood and still have a rough cut edge, or be dusty wood and still have a very clean cut.
Sponsored / affiliate links. As an Amazon Associate I earn from qualifying purchases. I may earn additional commission from eligible campaigns.