
How to Repair Small Chips in Wood Trim
Repair a small chip in wood trim by matching the trim material first, then fill shallow damage with paintable wood filler or caulk; use a wood patch only if the missing area is deeper than about 1/8 inch. Skip that check, and the repair can show through paint, crack, or leave a dark halo around the patch. This guide shows how to identify MDF, pine, or hardwood trim and choose the lightest fix that will disappear after paint.
What you need


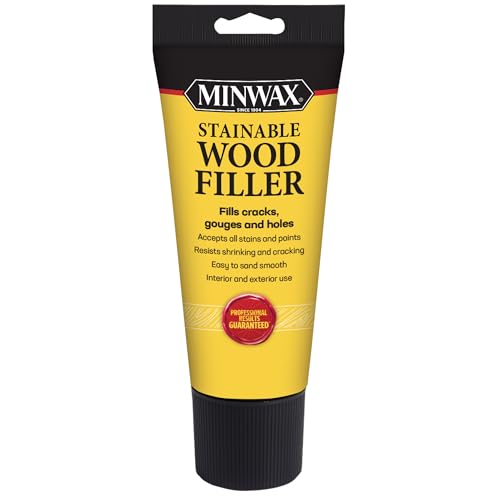

- Paintable wood filler for shallow chips and divots
- Stainable filler if the trim will stay stained, not painted
- High-quality paintable caulk for hairline edge chips at seams
- Two-part filler for deeper chips, corner breaks, or fast patching
- Putty knife or flexible spreader
- 220-grit sandpaper
- Clean cloths or tack cloth
- Primer that matches the trim system
- Touch-up paint matched to the existing sheen and color
- Nitrile gloves
- Dust mask or vacuum for cleanup
Optional items for painted trim
- Small angled brush for touch-up paint
- Fine blending pad or soft cloth
- Wood patch or veneer repair material for deeper missing sections
Prep supplies for a clean work area
- Vacuum with brush attachment
- Drop cloth or paper to catch sanding dust
- Painter’s tape if nearby walls or flooring need protection
Is the chip just cosmetic?
If the trim is hard, dry, and the chip is shallow, repair it in place with filler or caulk. If the wood is soft, swollen, lifting, or breaking along the profile, the problem is bigger than a paint touch-up and may need replacement or moisture repair first.
Check depth and edge stability
Press gently around the chip. Solid trim should feel firm, with the break limited to the finish layer or a shallow dent in the wood. A missing edge at a corner, a gouge deeper than 1/8 inch, or layered paint buildup that is peeling back usually needs a stronger repair method.
Look for loose paint, soft wood, or moisture damage
Wood trim with softness, dark staining, swollen fibers, or recurring cracking may be taking on moisture. Do not fill over that and hope paint hides it. Stop the moisture first, or the repair will fail again.
Decide whether repair or replacement makes sense
Use filler for small chips, minor edge breaks, and cosmetic dings. Replace the section if the damage runs through a corner, distorts the profile, or leaves too little sound wood for a patch to hold. Say your baseboard has a 3/16-inch chip on a flat face: filler and paint are usually enough. Suppose the same chip sits on a mitered outside corner with swelling underneath: replacement is the safer call.
Wood trim repair decision table
| Damage depth | Best filler or repair method | Sanding needed and repaint timing | Common failure mode |
|---|---|---|---|
| Hairline chip in painted trim | Paintable caulk | Light smoothing only; paint after skinning | Caulk shrinks if packed too deep |
| Shallow chip under about 1/8 inch | Paintable wood filler | Yes, sand with 220 grit after curing; prime, then paint | Poor adhesion if dust stays in the chip |
| Deeper gouge or broken profile edge | Two-part filler | Shape before full cure; sand, prime, then paint | Overmixing a large batch before it can be used |
| Loose veneer edge | Stabilize first, then fill | Sand only after the veneer is secure; paint after priming | Filler fails because the veneer keeps lifting |
| Soft, swollen, or rotten wood | Replace the damaged section | Do not sand or fill as the main fix | Hidden decay spreads under paint |
How do you repair the chip?
Clean the chip, secure any loose fibers, and choose the least aggressive filler that can still hold shape after paint. Then overfill slightly, let it cure fully, sand it flush with 220-grit paper, prime, and touch up with matching paint in the same sheen.
- Clean and dry the area. Remove dust, wax, and loose paint, then let the trim dry fully in a dry, warm, dust-free, well-ventilated space.
- Stabilize loose fibers or veneer. Trim only loose bits that lift cleanly, and press loose veneer back into place before filling.
- Press filler into the chip with a putty knife. Keep the repair localized and leave the filler slightly proud of the surface so it can be sanded flush later.
- For deeper chips, use two-part filler in a very small batch. A golf ball size of base mixed with about an inch-long amount of hardener is enough for many minor repairs, and the mix becomes too hard to work with about 5 minutes after mixing.
- Let it cure, then sand with 220 grit. Sand only after the filler hardens, and feather the edges so the patch blends into the surrounding profile.
- Prime and touch up paint. Match the existing color and sheen, then apply paint after sanding so the repair does not flash differently under light.
If that didn’t work, try this next
- If filler pulls away, clean the chip again and let the wood dry longer before refilling.
- If the repair sinks, add another thin pass of filler rather than one thick load, then re-sand after curing.
- If the patch still shows, prime the repair and repaint a wider section of the trim so the sheen transition is less obvious.
When should you stop and replace the trim?
Stop filling when the trim is soft, swollen, cracked through a corner, or missing too much profile to rebuild cleanly. Replace the section if the damaged area keeps opening after repair or if moisture has already broken down the wood fibers.
Rotten or swollen wood
Rotten trim will not hold a cosmetic patch for long. If a screwdriver or fingernail sinks into the wood, or if the trim feels spongy after paint is removed, the moisture source needs attention before any cosmetic repair.
Cracked corners and broken profiles
Corners and shaped trim profiles fail differently from flat faces. A corner chip often exposes several surfaces at once, and filler can shrink away from the edges. If the profile is broken across a visible curve or bead, a replacement section usually looks better and lasts longer.
Repeated chip-outs after filling
If a repair chips again at the same spot, the surface may be too brittle, too dirty, or still moving. A recurring failure near a door stop, baseboard corner, or exterior edge usually means the trim needs a stronger repair or replacement.
Common mistakes
Using the wrong product is the fastest way to make the repair stand out. Painted trim usually wants paintable filler or caulk; stained trim needs stainable filler; veneer needs stabilization before filling; and two-part filler belongs on deeper damage, not hairline chips.
- Skipping sanding or priming: filler can telegraph through paint unless it is leveled and sealed first.
- Overfilling a corner: thick buildup on a profile edge leaves a visible lump after paint.
- Painting too soon: uncured filler can shrink under the finish.
- Ignoring sheen: satin, semi-gloss, and gloss reflect light differently, so the touch-up must match the existing trim.
- Trying to fill rotten wood: soft trim needs moisture repair or replacement, not a cosmetic cover-up.
Quick notes for different trim types
Solid wood trim usually chips as a clean break or dent, so filler can bond well if the wood is sound. Veneer trim is different: the face layer can lift before it breaks away, and that lifted edge needs to be secured before any filler goes in. MDF trim often chips at corners and profile cuts, where a two-part filler can help rebuild the shape.
For painted trim, the final step is always color and sheen matching. Touch-up paint should blend with the existing finish, and a small repair may still need a wider feathered repaint to disappear under natural light.
Frequently asked questions
How to fix chipped wood furniture
Furniture repairs often use veneer terms and methods because many pieces have thin face layers over a core. Secure any lifting edge first, then fill only after the surface is stable. For painted furniture, prime the repair before touch-up paint so the patch does not flash through the topcoat.
How to fix chipped paint on trim
If the wood beneath is sound, scrape loose paint, feather the edges, and refill only if the chip exposed wood or created a divot. Sand smooth with 220 grit, then prime before touch-up paint. Match the sheen as well as the color, because gloss differences can make the repair obvious.
Sponsored / affiliate links. As an Amazon Associate I earn from qualifying purchases. I may earn additional commission from eligible campaigns.