5 Best Glues for Wood Joints: Based on Specs and Reviews
For wood-joint gaps under about 1/32 inch, use PVA or a sawdust-and-glue blend; for gaps from about 1/32 to 1/8 inch, use epoxy; for moving or slightly larger gaps, use polyurethane; use CA only for hairline gaps and quick tack, not structural filling. Bad filler choice can leave weak joints, visible seams, squeeze-out, or repairs that fail under clamp pressure. This guide gives a gap-size-and-load decision system for PVA, epoxy, polyurethane, CA, and sawdust blends.
Quick comparison
| Product | Badge | Best for | Price | ||
|---|---|---|---|---|---|
 |
Titebond II Premium Wood Glue 8 Oz. – Honey Cream, 5003 |Titebond | Our pick | 8 oz · ANSI Type II · Honey Cream | $5.44
Price as of 24 Oct 2026
|
View |
 |
Gorilla Original Glue, Expands Into Materials, Brown, 18 ozGORILLA | Best for gaps | 18 oz · Expanding polyurethane · Brown | $23.99
Price as of 24 Oct 2026
|
View |
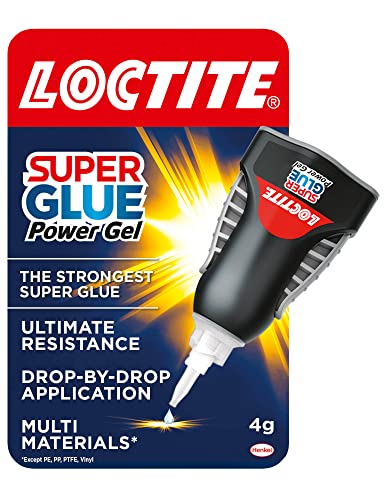 |
Loctite Super Glue Power Flex Control, Flexible Super GlueLoctite | Also great | 3 g · Gel · Non-drip nozzle | $11.99
Price as of 24 Oct 2026
|
View |
 |
J-B Weld Original Steel Reinforced Epoxy Syringe, HighJ-B Weld | Budget pick | 2-pack syringe · 6220 PSI tensile | $11.18
Price as of 24 Oct 2026
|
View |
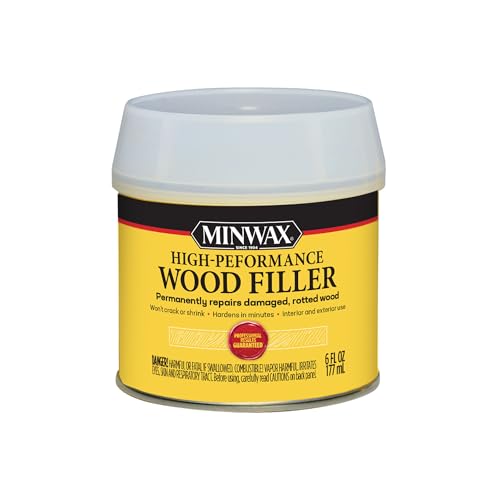 |
Minwax 41600000 High-Performance Wood Filler, 6-OunceMINWAX COMPANY, THE | Pair with it | 6 oz · Interior/exterior · Sands in 30 min | $17.99
Price as of 24 Oct 2026
|
View |
Use the table below to match the gap size to the job, not the adhesive label. A chair rung that flexes needs a different answer from a cabinet seam that only needs to disappear under finish.
Say your picture frame has a hairline seam at one corner. PVA may close it if the joint still pulls tight under clamp pressure. If the same seam opens to a visible void, switch to epoxy instead of piling on more wood glue.
How we chose
The decision rules here follow four factors: gap size, whether the joint carries load, cleanup demands, and finish impact. That order matters in trim, cabinets, chair joints, and small frame repairs.
We also split cosmetic filling from structural repair. That matters because a filler that sands well may still fail in a joint that flexes or gets clamped hard.
| Gap type | Best adhesive | Why it works | Risk | Clamp requirement | Finish impact | Do not use |
|---|---|---|---|---|---|---|
| Hairline | PVA or thick CA | Thin glue line and tight closure are still possible; thick CA can bridge tiny spaces quickly. | PVA can shrink in a thick line; CA can fail if the joint flexes. | Firm but controlled | Usually low if wiped clean; CA may leave shiny spots | Epoxy unless the joint is actually open; polyurethane for a neat seam |
| Small visible | Epoxy | Two-part resin and hardener can bridge uneven surfaces and remain strong across small voids. | Longer cure and more cleanup if overfilled | Controlled; enough to hold alignment | Can telegraph if poorly tooled, but sands well after cure | Plain PVA as the only filler; thin CA; sawdust blend for a structural seam |
| Shallow cosmetic | Sawdust and glue blend | Best for narrow cosmetic seams, nail holes, and shallow surface gaps that will be sanded flush. | Poor color match; can look patchy under stain | Light, if the joint still closes | Usually sandable, but stain match is uncertain | Chipped-out or missing wood; load-bearing joints |
| Load-bearing gap | Epoxy | Fills voids structurally and tolerates imperfect wood-to-wood or wood-to-metal fits better than standard wood glue. | Can be overused where a real fit correction is still needed | Moderate, to keep parts aligned | May need shaping before finish | PVA, sawdust blend, or CA as the primary repair |
| Missing wood | Epoxy with repair shaping | Builds missing edges or damaged corners where there is no intact face to glue back together. | More work, longer cure, and more sanding | Often fixture-based, not just clamp-based | Can be made flush, then primed or finished | PVA, polyurethane, CA, or sawdust blend alone |
Can wood glue fill small gaps?
PVA wood glue can fill only minor imperfections, and it works best when the joint still closes under clamping pressure. That makes it the right call for tight-fitting trim, cabinet faces, picture frames, and other joints where the seam is small and the wood still meets cleanly.
Where PVA works best
Wood glue reaches peak strength in a thin glue line. If the parts fit well and the gap is minor, PVA is usually the cleanest option because it wipes with water and sands easily after cure. It is the best fit for tight joints that need only a slight correction.
That includes many interior repairs: a cabinet stile with a faint seam, a miter on a frame, or trim that has shifted a little but still pulls closed. In those cases, the adhesive is bonding wood to wood rather than trying to act like a filler.
Where PVA starts to fail
PVA starts to fail when the glue line gets thick. A thick line can shrink, weaken, and leave a visible ridge after sanding. If the joint will not close with controlled clamping, the repair is no longer a PVA job.
A common first-timer mistake is forcing PVA into a gap that keeps springing back open. The result is a starved bond at the edges and a weak line in the middle. For those gaps, step up to epoxy or correct the fit first.
Why thick glue lines are weaker
The strength problem is simple: wood glue is strongest when the joint is tight. Once the glue itself becomes the bridge instead of the wood surfaces, the repair depends more on the adhesive body than on the wood fibers it can bond to. That is why thick glue lines are weaker than thin ones for many wood glues.
For a chair joint or table rail, that difference matters. If the joint carries load or flexes, a thick PVA line is a gamble, even if it looks filled on day one.
Epoxy: best for larger voids
Epoxy is the safest option for larger voids and load-bearing repairs. It is a two-part resin and hardener that can bridge uneven surfaces and remain strong across small voids, which is why it beats wood glue once the gap stops closing like a normal joint.
When epoxy beats wood glue
Choose epoxy when the gap is visible, the surface is damaged, or the repair includes wood-to-metal or broken wood edges. It fills voids structurally, so it is the better choice when the missing material is part of the strength, not just the appearance.
That makes it useful on damaged cabinet corners, loose chair parts with worn shoulders, and mixed-material fixes where PVA cannot bond the other surface well. It also handles repairs where a small void remains after fit correction.
Cure times and handling
Epoxy cure time varies by product, and full cure can range from 24 to 72 hours. Some formulas reach usable strength sooner, but manufacturer directions should control when you remove clamps or put the joint under load.
Do not rush sanding or finishing just because the surface feels hard. A surface skin can fool you while the center is still curing. For a repair that will be stressed, wait for the full cure window on the label.
Use on damaged wood and mixed-material repairs
Epoxy is the right choice when wood has missing fibers, crushed edges, or a corner that no longer meets cleanly. It can also be used on wood-to-metal joints where a standard wood glue has no meaningful gap-filling path.
Picture a cabinet leg with a missing corner near the floor. PVA cannot rebuild that shape. Epoxy can fill, bond, and then be sanded or shaped back to the line of the part.
Will polyurethane glue fill gaps?
Polyurethane glue can fill some gaps, but it is not the same as a true gap-filling adhesive. It expands as it cures, and that expansion can help it reach irregular spaces. It can also create messy foam, and the foam is not the same as solid adhesive.
How expansion helps and hurts
Expansion helps when the joint is slightly uneven or when two porous surfaces do not meet perfectly. It hurts when the gap is wide, because the foamed residue can become weak and crumbly instead of forming a dense, reliable bond.
Hods reports polyurethane glue can expand 3 to 4 times its volume during cure. That movement is useful in some repairs, but it also means the glue can squeeze out and foam where you did not want it. Cleanup is harder than with PVA.
Clamping control matters
Polyurethane needs good clamping control. Too much pressure can force adhesive out of the joint, while too little pressure lets the parts shift as the glue expands. The goal is firm but controlled clamping that keeps the parts aligned without starving the bond.
Some formulas call for 1 to 2 hours of clamp time, but usable strength still depends on the product and the job. If the label asks for a longer wait, follow it. The clamp is not the finish line.
Why foamed residue is a problem in wide gaps
Foamed residue is a problem because it is not solid adhesive. In a wide gap, the cured foam can look like a filled repair while lacking the solid body needed for a stressed joint. That is why polyurethane is not the first choice for larger voids or flexing chair parts.
Use it only when the joint is a good candidate for controlled expansion and the cleanup burden is acceptable. If you need a neat, sandable fill in a visible seam, epoxy usually gives a better result.
Thick CA glue: best for tiny fixes
Thick or gel CA glue is good for tiny gaps and chips. It sets fast, stays in place better than thin CA, and is useful for small non-structural repairs where you need quick tack rather than a full joint rebuild.
Best uses for chips and pinholes
Thick CA works well on pinholes, tiny edge chips, and very small gaps that only need a quick fill before sanding. The gel form is easier to place on vertical spots and small defects than thin glue that runs away from the repair.
Loctite’s gel format is a good example of this use case: a non-drip nozzle and flexible gel body help on small vertical fixes. That still does not make it a load-bearing filler.
Why it is not for structural joints
CA glue is not a great choice for joints that flex or carry load. It can bridge a tiny space, but it is brittle compared with the needs of a moving chair joint or a long cabinet rail. Once the wood moves, the glue line can crack.
Use it for small, non-structural repairs only. If the parts need clamping to stay aligned over time, epoxy or a properly fitted wood glue joint is the safer route.
Fast set and brittle failure modes
The speed is the appeal and the trap. Fast set helps when you need a quick tack, but it also leaves less working time to align a joint. If you force the repair, the final line can be brittle and hard to correct after it kicks.
That is why CA is a niche tool here, not a general answer to wood-joint gaps. It is best thought of as a spot repair adhesive, not a gap bridge for stressed furniture.
Should you use sawdust and glue?
Sawdust and glue is best for cosmetic filling, not for rebuilding a joint. Woodgears recommends rubbing glue off with sawdust to fill a joint gap, and says the method works for gaps and nail holes. It can be a good match for hairline to small shallow gaps that will be sanded flush.
Best cosmetic uses
Use the mix on shallow seam lines, tiny nail holes, and narrow cosmetic gaps where the surface will be sanded and finished afterward. Wide and shallow gaps can also take a glue-and-sawdust paste if the goal is appearance, not structure.
This method fits trim touch-ups and cabinet face repairs where the gap is small and the wood color is close enough to blend after sanding. It is quick, cheap, and easy to shape once cured.
Where the mix breaks down
Do not use sawdust and glue for chipped-out or missing wood. It has no real structure for rebuilding a corner, and it does not replace a missing edge in a chair leg or frame. It is a surface filler, not a structural patch.
It also breaks down when the gap is deep enough that the paste shrinks, cracks, or stands proud after sanding. If the void is part of the joint’s strength, epoxy is the safer choice.
Sanding and stain matching
Sawdust paste sands well after cure, but stain matching is the weak point. The dust color may differ from the board, and glue can change how stain takes on the repair line. Test the finish on scrap if the repair will stay visible.
For a stained cabinet face, a cosmetic filler that looks fine raw can still flash under finish. That is why this mix is best reserved for minor surface work where the color hit will be small.
Which one should you buy?
Choose by gap size first, then by load. If the joint is tight and only needs minor cleanup, PVA is the budget-friendly choice. If the gap is visible or the repair carries load, epoxy is the safer buy. If you only need a cosmetic patch, sawdust and glue may be enough.
Budget pick for tight joints
For tight-fitting wood joints, Titebond II Premium Wood Glue is the straightforward pick. It is a PVA glue with easy cleanup, smooth sanding, and exterior versatility. The drawback is the same as every PVA here: it still wants a joint that closes, not a wide void.
For indoor trim, cabinet face frames, and picture frames with minor imperfections, that is often the most sensible choice. If the gap is minor and the joint pulls together cleanly, PVA keeps the repair simple.
J-B Weld Original Steel Reinforced Epoxy: best for load-bearing gaps
This epoxy suits larger voids, damaged wood, and mixed-material repairs where strength matters more than easy cleanup. Based on the product details and buyer feedback, the appeal is structural fill rather than a neat cosmetic seam.
The drawback is working time and finish prep. It takes more care to shape, and you must respect the full cure window before loading the joint or sanding it flat.
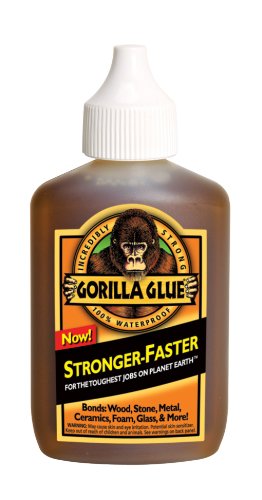
Gorilla Original Glue: best for expanding fills
This polyurethane glue fits repairs where the parts are slightly irregular and you can control clamping well. Its expansion can help it reach uneven surfaces, and it bonds wood plus some dissimilar materials.
The drawback is the foam. In wider gaps, that foamed residue can be weak and crumbly, so it is not the cleanest choice for visible seams or load-bearing voids.
Loctite Super Glue Power Flex Control: best for tiny chips
This gel CA glue is suited to tiny, non-structural gaps, edge chips, and fast tack on small vertical spots. The non-drip format helps it stay where you put it, which matters for pinholes and minor seam touch-ups.
The drawback is brittleness. It is not a good choice for flexing joints or any repair that must carry meaningful load over time.
Minwax High-Performance Wood Filler: best for cosmetic shaping
This filler is useful when the repair is cosmetic and you need to sand, carve, plane, or drill the patched area after cure. It fits missing-surface touch-ups better than a glue-only approach.
The drawback is that it is a filler, not a wood joint adhesive. Use it for patching and shaping, not for bonding a stressed joint back together.
How do you fix a wood joint that won’t close completely?
Start with fit correction, then choose the filler, then finish. If the joint will not close, do not jump straight to glue. Remove old adhesive, check for swollen wood, and test the dry fit again before deciding whether PVA, epoxy, polyurethane, CA, or a sawdust blend is the right answer.
- Dry-fit the joint and mark the point of interference.
- Trim, scrape, or sand the high spot until the parts close more fully.
- Choose the adhesive by gap size and load, not by convenience.
- Apply firm but controlled clamping pressure so the parts align without squeezing out too much adhesive.
- Let the product cure for the time listed by the manufacturer before sanding or loading the joint.
- Sand, then finish only after the repair is fully stable.
Suppose a cabinet rail leaves a 1/16-inch gap after a loose tenon is reset. That is no longer a PVA-only fix. Correct the fit first, then epoxy the void so the repair can hold without a brittle line or a foamy edge.
Another common case is a trim miter with a hairline seam that only shows under bright light. There, a tight PVA joint or a small sawdust blend may be enough, as long as the seam closes before the glue starts to skin over.
Frequently asked questions
What is the best glue for filling small gaps in wood joints?
For truly small gaps, epoxy is the safest all-purpose choice because it bridges voids structurally. For hairline gaps that still close under clamp pressure, PVA is better and cleaner. For tiny chips or quick tack, thick CA can work, but only on non-structural spots.
Can wood glue fill small gaps in a joint?
Yes, but only minor ones. PVA wood glue works best when the joint still closes with clamping pressure and the gap is small. It is not the right answer for a visible void, a flexing chair joint, or any repair where the glue itself would become the bridge.
Is epoxy better than wood glue for gap filling?
Yes, once the gap is more than minor or the joint carries load. Epoxy is a true gap-filling adhesive that can bridge uneven surfaces and cure into a structural repair. Wood glue is still better for tight, well-fitting joints with only slight imperfections.
Will polyurethane glue fill gaps in wood joints?
It can fill some gaps, but not all in the same way. Polyurethane expands as it cures, which helps in uneven fits, but the expanded foam is not the same as solid adhesive. In wider gaps, that foam can be weak and crumbly, so it is a poor structural fix.
Can I use thick CA glue for small gaps in wood?
Yes, for tiny, non-structural gaps and chips. Thick or gel CA bridges small spaces better than thin CA and sets quickly. It is not a good choice for flexing joints or any repair that needs lasting load-bearing strength, so keep it to quick cosmetic fixes.
How big of a gap can wood glue fill safely?
Only a minor one. If the joint closes under clamping pressure and the glue line stays thin, PVA can work well. Once the gap becomes visible enough that the glue must act like a spacer, shift to epoxy or correct the fit first. Thick PVA lines are weaker than thin ones.
Sponsored / affiliate links. As an Amazon Associate I earn from qualifying purchases. I may earn additional commission from eligible campaigns.