How to Fix Nail Pops in Drywall Before Repainting
If a nail pop is shallow and the framing is sound, set or remove the fastener, add drywall screws 1 to 2 inches away, tape if the paper is torn, fill, sand, and prime before repainting; if several pops line up or recur, inspect for framing movement first. Skipping that check can leave ridges, flashing, or fresh bumps under new paint. This guide shows how to tell cosmetic pops from movement-related ones and the exact repair sequence for walls and ceilings.
What you need first


- Drywall knife in 6-inch and 10-inch sizes
- Joint compound or setting-type compound for deeper repairs
- Drywall screws
- Drill or driver with a drywall bit
- 120-grit and 220-grit sandpaper
- Primer for spot-priming the repair
- Putty knife, dust brush, and vacuum
- Utility knife for loose paper or torn edges
- Raking light or a portable lamp
- Paint and matching rollers or brushes
How to tell a simple pop from a bigger problem
Look at the shape, location, and pattern before you touch the repair. A single raised bump with a visible fastener is often a local fastening issue. Multiple pops in a line, ceiling-line pops, rust, or nearby cracking point to panel movement, a weak fastening pattern, or a framing problem that needs a closer look.
Use raking light to find the high spot
Hold a light low across the wall or ceiling so the beam skims the surface. The high spot will cast a small shadow and often reveals a cracked ring of compound or a nail head sitting proud. That view helps you decide whether the fastener needs resetting or whether the panel itself has shifted.
Check for rust, cracking, and repeated pops
Rust around a pop means the exposed metal can add cosmetic damage. Cracks that run away from the fastener, or another pop in the same place after a previous repair, are stronger warning signs. Repeated failures usually mean the board is still moving or the original fastening pattern was weak.
Decide whether the fastener, panel, or framing moved
One pop in the middle of a wall is often an isolated fastener issue. Pops along a ceiling joint, near a corner, or in a cluster are more likely tied to joist movement or panel looseness. If the area flexes when pressed, stop and inspect before you patch over it.
| Pop type | Likely cause | Repair action | Stop/inspect triggers |
|---|---|---|---|
| Isolated wall pop | Loose fastener or small board shift | Set or remove the nail, add a drywall screw into the same stud near the pop, then fill and prime | Stop if the pop returns after repair or if the drywall feels loose |
| Ceiling-line pop | Joist movement, gravity load, or weak fastening | Re-secure into the joist with a screw placed near the pop, then patch in thin coats | Inspect if there are multiple ceiling pops or textured cracking |
| Repeated pops | Ongoing movement or poor fastening pattern | Stop after one repeat and inspect the framing and nearby fasteners | Do not repaint until the cause is found |
| Pops with rust or nearby cracking | Exposed metal, moisture, or broader movement | Inspect for staining, soft drywall, and adjacent cracks before repair | Stop if the paper is soft, stained, or blistered |
How to fix a nail pop before repainting
For a normal, isolated pop, secure the board to the same stud or joist, fill the damaged spot in thin coats, sand it flat, and spot-prime before paint. Do not just tap the nail back in place. A popped nail should not be hammered back in because it can re-pop and telegraph through fresh paint.
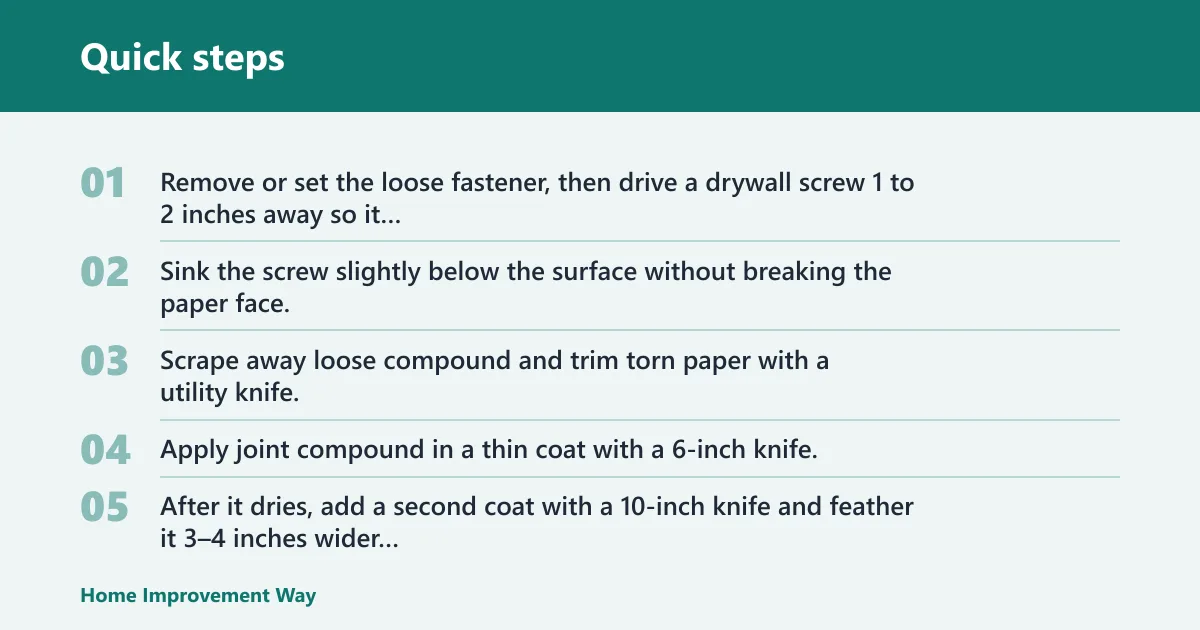
- Remove or set the loose fastener, then drive a drywall screw 1 to 2 inches away so it bites the same stud or joist.
- Sink the screw slightly below the surface without breaking the paper face.
- Scrape away loose compound and trim torn paper with a utility knife.
- Apply joint compound in a thin coat with a 6-inch knife.
- After it dries, add a second coat with a 10-inch knife and feather it 3–4 inches wider than the first coat.
- Sand with 120-grit, then finish with 220-grit.
- Prime the patch, let it dry, and repaint the area.
Use the right compound depth
Joint compound shrinks as it dries, so a single heavy pass often leaves a dip. For a deeper repair, use setting-type compound where the opening is larger or the area needs faster hardening. It can accept a second coat in 90 minutes, which helps when you need to build the surface in stages.
Keep the patch wider than the bump
Feathering matters more than piling on material. The first coat should cover the defect, and the second coat should extend 3–4 inches wider so the edge disappears into the surrounding wall or ceiling. That wider blend is what keeps the repair from flashing after paint.
Why do nail pops keep coming back?
Recurring pops usually mean the fix addressed the surface, not the cause. The drywall may be loose around the fastener, the framing member may still be moving, or the original fastening pattern may have been weak. Moisture and ceiling texture can also make a repaired spot more likely to show again.
Loose drywall around the fastener
If the old nail hole is wallowed out, the board no longer grips the fastener well. In that case, a nearby screw is the lasting anchor, not the old nail. Place the screw into the same stud or joist, but not directly over the pop, so the panel is held tight without creating another weak point.
Movement at the framing member
Wood framing can shift with seasonal changes, and new construction can show pops during the first year. If several fasteners in one area move, the board may be reacting to joist or stud movement rather than a single loose nail. That is the point where more inspection beats another cosmetic patch.
Moisture, texture, or weak fastening pattern
Indoor humidity should stay in the 30%–60% range. Bathroom vent fans should run during and after showering to limit moisture buildup. If the area is textured, matching the ceiling texture matters too, because the repair can still read through even after sanding and paint.
If that didn’t work, try this next
Suppose a ceiling pop reappears two weeks after repainting. A second screw 1 to 2 inches away from the first repair can help only if the joist bite is solid. If the bump returns again, stop patching and inspect the span above the ceiling before adding more compound.
Common mistakes to avoid
Most bad repairs fail because the sequence is rushed. Fix the fastening problem first, then the surface. Skip one of those steps and the patch may look fine under normal light but show a ridge, a shadow, or a fresh bump once the room is painted.
- Hammering the nail back in and stopping there: this often lets the same fastener move again.
- Using too much compound in one coat: heavy coats shrink more and are harder to sand flat.
- Skipping primer: unprimed patches can absorb paint differently and flash through the finish.
- Ignoring ceiling pops or nearby cracks: those signs can point to movement, not a simple cosmetic defect.
- Setting the screw directly over the pop: it is less reliable than biting the same stud or joist nearby.
Say your wall has a single pop near eye level and no crack around it. That is usually a fastener repair: add a screw nearby, patch, sand, and prime. If the same repair appears again after paint, with a second bump about 8 inches away, that pattern may need inspection before more compound is added. That pattern needs inspection before you add more compound.
When should you stop and inspect further?
Stop patching if the area shows repeated pops, rust staining, soft drywall, or a crack that runs away from the fastener. Those signs can mean the panel is moving, moisture is involved, or more than one fastener has failed. Painting over that problem usually means the defect will come back through the finish.
Multiple pops in one area
Two or more pops close together can mean the panel is no longer tied firmly to the framing. Check nearby fasteners and look for movement at the stud or joist line. If several fasteners have failed, repair the underlying attachment before you paint.
Rust staining or soft drywall
Visible metal around a pop can rust and create added cosmetic problems. If the drywall face feels soft, swollen, or crumbly, treat that as a separate repair condition rather than a simple nail pop. Moisture staining should be traced before repainting.
Cracks that run from the pop
A crack that extends from the fastener is a stronger sign of movement than a lone raised dot. If the crack follows a seam, corner, or ceiling line, inspect the nearby framing and tape condition. A surface patch alone rarely holds that kind of problem.
Prevention
Before repainting, keep indoor humidity in the 30%–60% range and run bathroom vent fans during and after showering. Those steps reduce moisture stress that can make a repaired pop show again.
Frequently asked questions
Should I hammer a popped nail back in or replace it with a screw?
Replace the fastening with a screw near the pop. Hammering the nail back in can let it re-pop, especially if the board is loose or the framing is moving. The screw should bite the same stud or joist and hold the panel tight.
Do nail pops on ceilings need a different repair than wall nail pops?
Yes. Ceiling pops are more likely to involve joists, gravity, and texture matching, so inspect them more carefully before patching. The repair steps are similar, but the screw placement and finish quality matter more because ceiling flaws show faster under light.
Do I need to prime patched nail pops before repainting?
Yes. Prime the repaired area before painting to prevent flashing and uneven absorption. If you skip primer, the patch can show as a dull or shiny spot even after the topcoat dries. Spot-priming is the safer choice for small repairs.
When should I worry that nail pops mean a bigger problem?
Worry when pops repeat in the same area, show rust, line up along a seam, or come with nearby cracking or soft drywall. Those signs point to movement or moisture, not just a loose fastener. Stop repainting and inspect before continuing.
Sponsored / affiliate links. As an Amazon Associate I earn from qualifying purchases. I may earn additional commission from eligible campaigns.