How to Fix a Ceiling Fan Pull Chain Switch
A ceiling fan pull chain almost always breaks at the internal switch, not the beaded chain itself — the small plastic-and-brass Zing Ear switch wears out after years of tugging. Left alone, a stuck switch can arc internally or lose speed settings entirely, so it’s worth fixing within a week or two of first noticing trouble. This guide covers diagnosing whether the chain or the switch failed, replacing a $5-$10 universal switch, and re-threading a new pull chain safely with the power off.
Quick Answer
Cut power at the breaker, remove the fan’s canopy or housing screws, and check the small switch the chain is attached to — most “broken chain” complaints are actually a worn 3-speed pull-chain switch (Zing Ear ZE-208 or ZE-268 fit most Hunter, Hampton Bay, and Harbor Breeze fans, $5-$10). If the switch clicks through its settings fine but the chain itself is snapped or missing, just re-thread a new brass chain through the same hole instead.
This repair applies to nearly every residential ceiling fan, including the kind covered in our broader ceiling fan and lighting guides — if you’re fixing a chain on a fan you’re also installing a new ceiling fan with a light kit, this same switch mechanism applies. If your fan uses a string-style pull cord instead of a beaded chain, the reconnection point is slightly different. See our guide on how to fix a ceiling fan pull cord for that specific mechanism.
Why Pull Chains Break and Why It Matters
Pull chains are simple but essential — they control the fan’s speed, its light, or both. Chains and switches fail for a few predictable reasons. The chain itself wears out from repeated tugging and can fray or snap at the connector. More often, the failure is inside the switch: the small rotating contact assembly the chain is attached to wears down after thousands of pulls, or dust and grime work their way in and make it sticky or unresponsive.
Fixing it is worth doing quickly — not just for comfort, but because a jammed or arcing switch is a legitimate (if minor) electrical fault, and replacing a $5-$10 part is far cheaper than replacing the whole fan.
How the Pull Chain Switch Works
A pull-chain switch is a small mechanical rotary switch mounted inside the fan’s motor housing that cycles through the fan’s speeds (and then back to off) each time the chain is pulled. Most fans use a separate, simpler on/off chain for the light kit. The switch itself is a compact plastic or metal cartridge with spring contacts inside — pulling the chain rotates an internal cam that changes which contacts touch.
If the chain breaks or the switch jams, the fan won’t respond to pulls at all, or it may get stuck on one speed. A wobbling fan can also make the problem worse over time: as the chain swings back and forth at certain RPMs, it stresses the flexible point where it attaches to the switch, which can eventually snap the chain off inside the housing.
Safety First: Preparing for the Repair
Turn off the electricity to the fan at the breaker box before touching anything — don’t rely on the wall switch alone. Flip the breaker, then tug the chain to confirm the fan doesn’t respond. A non-contact voltage tester is worth the $10-15 to confirm the circuit is actually dead before you open the housing.
You’ll also need a sturdy stepladder with a wide base to reach the fan safely, and it’s worth wearing light gloves to protect your hands from the sharp sheet-metal edges inside most fan housings. Done with the power off and the right precautions, this repair is routine — ceiling fans themselves aren’t inherently dangerous when wired and maintained correctly.
📊 Electrical work carries real risk when shortcuts are taken: the Electrical Safety Foundation International reports more than 20,000 workplace electrical injuries over the last decade — the same reason professional electricians never trust a wall switch alone and always verify a circuit is dead with a tester before opening a fixture. Source: Electrical Safety Foundation International (ESFI)
Gathering Tools and Materials
You don’t need a large toolkit for this repair. Gather a Phillips screwdriver, a pair of needle-nose pliers, a flashlight, a non-contact voltage tester, and a small container to hold screws so they don’t roll away. If the switch is stuck rather than broken, a can of electrical contact cleaner can often free it up before you spend money on a replacement part.
For the replacement parts themselves, a universal pull-chain switch kit (which usually includes a matching brass chain) covers most residential ceiling fans and costs well under $10.
Best Pull Chain Switch Pick
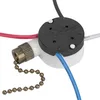
Zing Ear ZE-208 3-Speed Pull Chain Switch – $6.99
This is the same 3-speed, 4-wire switch type this guide’s “Fixing or Replacing the Pull Chain Switch” section walks you through installing — it comes with the wires pre-attached, matching the wire-labeling step above.
- Best for: 3-speed fans (high/medium/low) with 4 wires at the switch
- Why we picked it: Matches the Zing Ear ZE-208 spec most Hunter and Hampton Bay fans use, and comes with wires pre-installed so you don’t have to strip or crimp anything
- Main drawback: 4-wire units only — won’t fit a fan that uses a simpler 2-wire on/off light chain
Compare more pull chain switch options
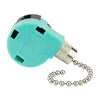 Option 1 Zing Ear ZE-268S6 3-Speed Switch – $6.99
|
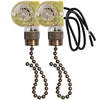 Option 2 Zing Ear ZE-109 2-Wire Light Switch (2-Pack) – $6.99
|
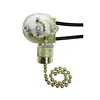 Option 3 HUAXRUI Brass Pull Chain Light Switch – $5.00
|
As an Amazon Associate we earn from qualifying purchases.
Diagnosing the Pull Chain Problem
Before taking anything apart, narrow down what’s actually wrong. Tug the chain gently: if it pulls freely but the fan doesn’t respond, the chain is likely disconnected inside the switch. If it’s stuck or won’t pull at all, the switch mechanism itself is probably jammed. If the chain is visibly broken or missing its end, that’s the simplest fix — you just need a replacement chain.
One useful test: with the power back on briefly, check whether the light (if the fan has one) still works on its own pull chain while the fan speed chain doesn’t respond. If the light works but the fan doesn’t, that isolates the problem to the fan-speed switch specifically, not the fan’s wiring or power supply.
Removing the Fan’s Housing to Access the Switch
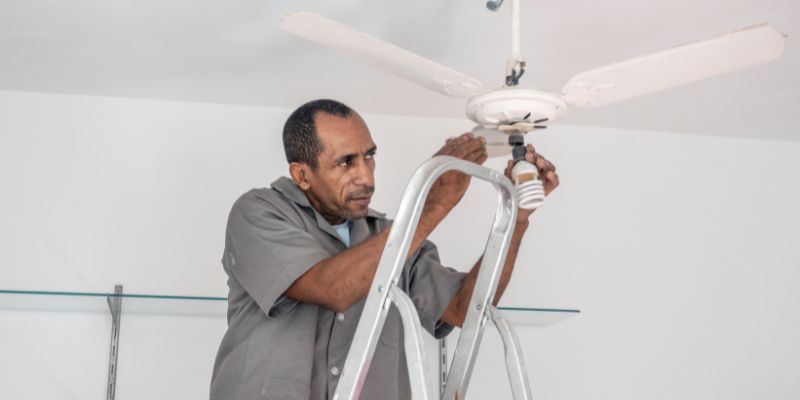
With the power confirmed off, climb your ladder and locate the fan’s housing or canopy — usually a metal or plastic cover near the base where the chain exits. Most fans have two or three screws holding this cover in place.
Remove the screws with a Phillips screwdriver, holding the cover with one hand so it doesn’t drop. Set it aside on a towel to avoid scratches. Inside, you’ll find the pull-chain switch — a small boxy component with the chain attached to one end and two to four wires connected to the other.
Replacing a Broken Pull Chain
If the chain itself broke, replacing it is the simpler of the two fixes. First check how much chain is left inside the switch — sometimes you can pull the stub out with needle-nose pliers and reattach the decorative pull end to it. If the remaining chain is too short or damaged, buy a replacement chain that matches your switch’s connector; most hardware stores and Amazon sell universal versions.
To install it, undo whatever clip or knot secures the old chain inside the switch, thread the new chain through the same hole, and secure it the same way (a small knot at the end works if there’s no clip). Pull the chain a few times to test the switch action before closing the housing back up.
Fixing or Replacing the Pull Chain Switch
If the chain is intact but the fan still doesn’t respond, the switch itself has likely failed. Start by spraying electrical contact cleaner into the switch body and working the chain gently a few times — this alone fixes a surprising number of sticky, dust-jammed switches without any parts needed.
If cleaning doesn’t help, replace the switch. Before disconnecting anything, take a photo of how the wires are connected so you can match them later. Disconnect the wires by unscrewing the wire nuts or pulling the spade connectors off the terminals — most residential switches have two to four wires. If more than one wire looks alike, label each with a small piece of tape.
Connect the new switch’s wires the same way the old one was wired, twist the wire nuts on snugly (or reconnect the spade terminals), and tuck the switch back into the housing. Pull the new chain a few times before closing everything up to confirm it clicks cleanly through each speed.
Reassembling the Fan
Once the chain or switch is fixed, put the housing cover back in place and reinstall the screws you removed earlier. Snug them down but don’t overtighten — plastic covers crack easily. If you removed the light bulb to get better access, reinstall it now.
Give the chain a final visual check to confirm it hangs freely and isn’t caught on any wiring or the housing edge before you restore power.
Testing the Fan After Repair
Restore power at the breaker and pull the chain to cycle through each fan speed and the light, if equipped. Each pull should produce a distinct click as the switch changes position.
If the fan still doesn’t work, recheck the wire connections first — a loose wire nut is a common cause of a fan that flickers or won’t start. If the chain feels loose or doesn’t click through positions cleanly, the new switch may not be fully seated; open the housing and reseat it.
Troubleshooting Common Issues
If the chain pulls normally but nothing happens, suspect the switch or a loose wire connection first. If the chain feels physically stuck, more contact cleaner and a gentle wiggle usually frees it — stubborn switches sometimes need two applications.
If the fan hums but the blades don’t turn, the problem is likely the motor or a seized bearing, not the pull chain — that’s a repair (or replacement) job, not a switch swap. If the light works but the fan itself doesn’t respond to its chain, that isolates the fault to the fan-speed switch specifically. Always confirm the power is off before touching any wiring.
Maintaining Your Ceiling Fan’s Pull Chain
Regular light maintenance prevents most pull-chain failures before they start. Wipe the blades and housing with a damp cloth every few months to keep dust out of the switch mechanism, and give the switch a light spray of contact cleaner about once a year.
Check the chain periodically for fraying and replace it before it snaps rather than after. It’s also worth tightening any loose housing screws you notice — a wobbly cover puts extra stress on the chain and switch over time.
Upgrading Your Fan for Better Performance
While you have the housing open, it’s a good time to consider a couple of upgrades. Some homeowners replace the pull-chain switch with a remote-control receiver kit instead, which removes the need for a working chain altogether — handy if the switch has failed more than once. You can also swap the fan’s bulb for an LED at the same time to cut lighting energy use.
If the fan itself is old and underpowered, this is also a natural point to consider a full replacement with a stronger motor or quieter operation — just confirm a new fan fits your existing electrical box and mounting bracket before buying one.
Common Mistakes to Avoid
A few mistakes account for most failed or repeated pull-chain repairs. Skipping the breaker shutoff is the biggest one — always kill power at the panel, not just the wall switch. Forcing a stuck chain instead of using contact cleaner is the second most common, and it usually snaps the chain rather than fixing it.
Losing track of small screws and mixing up wire connections during reassembly round out the list. Keep a small container for hardware and label wires with tape before disconnecting anything.
| Mistake | Why It’s a Problem | How to Avoid It |
|---|---|---|
| Skipping the breaker shutoff | Risk of shock or injury | Shut off the breaker and confirm with a voltage tester |
| Forcing a stuck chain | Snaps the chain instead of fixing it | Use contact cleaner and wiggle gently |
| Losing screws or small parts | Makes reassembly harder | Use a small container for hardware |
| Mixing up wire connections | Fan won’t work, or works incorrectly | Photograph wiring before disconnecting |
Cost and Budget Considerations
This is one of the cheapest electrical repairs a homeowner can make. A replacement pull chain runs $2-$5, and a universal switch kit is typically $5-$10. Doing it yourself takes well under an hour once the housing is open.
Hiring a professional electrician for the same repair typically runs $50-$150 depending on your area and the fan’s mounting height. If you’re not comfortable working near live wiring or the fan is on a very high or vaulted ceiling, it’s worth checking whether you actually need an electrician for fan-related work like this before deciding to DIY it.
Frequently Asked Questions
Why does my ceiling fan’s pull chain get stuck?
A stuck pull chain is usually caused by a jammed switch, dust buildup inside the switch housing, or a chain that has snapped off partway and is caught on something. Spraying electrical contact cleaner into the switch and gently working the chain resolves most sticking issues without a full switch replacement.
Can I fix a pull chain without replacing the whole fan?
Yes. Almost every pull-chain complaint is fixed by replacing just the chain ($2-$5) or the internal switch ($5-$10) — both are inexpensive, widely available parts, and a full fan replacement is rarely necessary just because the chain stopped working.
What tools do I need to fix a pull chain?
A Phillips screwdriver, needle-nose pliers, a non-contact voltage tester, and a sturdy stepladder cover most repairs. If you’re replacing the switch, add a replacement pull-chain switch kit and a small piece of tape for labeling wires.
How do I know if the switch or the chain is the problem?
If the chain pulls freely but the fan doesn’t respond, suspect the switch. If the chain is visibly broken, missing its end, or won’t pull at all, start with the chain itself — it’s the cheaper and simpler fix to rule out first.
Is it safe to fix a ceiling fan pull chain myself?
Yes, as long as you switch off the power at the breaker (not just the wall switch) and confirm it’s off with a voltage tester before opening the housing. Use a sturdy ladder and avoid working on the fan alone if it’s mounted on a high or vaulted ceiling.
How long does it take to fix a ceiling fan pull chain?
Most pull-chain or switch replacements take 20-30 minutes once the power is confirmed off, including removing the housing, swapping the part, and testing the fan through each speed.
Conclusion
Fixing a ceiling fan pull chain is one of the most approachable electrical repairs in the house — nine times out of ten it’s a $5-$10 switch, not the fan itself, and the whole job takes well under an hour with the power safely off. Diagnose whether the chain or the switch failed, replace the right part, and test it through every speed before you close the housing back up.
Sponsored / affiliate links. As an Amazon Associate I earn from qualifying purchases. I may earn additional commission from eligible campaigns.