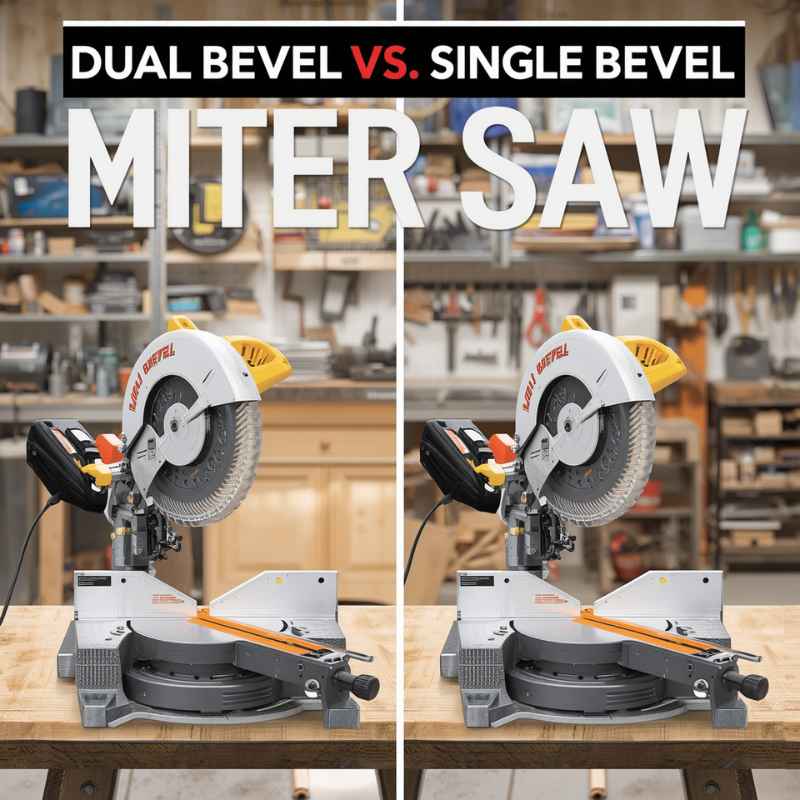
Dual Bevel vs Single Bevel Miter Saw Guide
Choosing the right miter saw can feel a little confusing for new DIYers. You might wonder about the difference between a dual bevel and a single bevel saw, and which one is best for you. Don’t worry, picking the right tool doesn’t have to be tricky.
We’re here to make it simple. This guide will help you understand the Dual Bevel vs Single Bevel: Best Miter Saw Guide Near You clearly. Let’s break it down step by step.
Understanding Miter Saw Bevel Types
Miter saws are amazing tools for cutting wood at specific angles. The bevel type is a key feature that affects how many cuts you can make and how easy they are. A miter saw’s bevel refers to the angle at which the blade can tilt to the side.
This tilt is essential for making compound cuts, which are cuts that involve both a miter angle (side-to-side) and a bevel angle (up-and-down tilt). Understanding this difference is the first step in choosing the best saw for your projects.
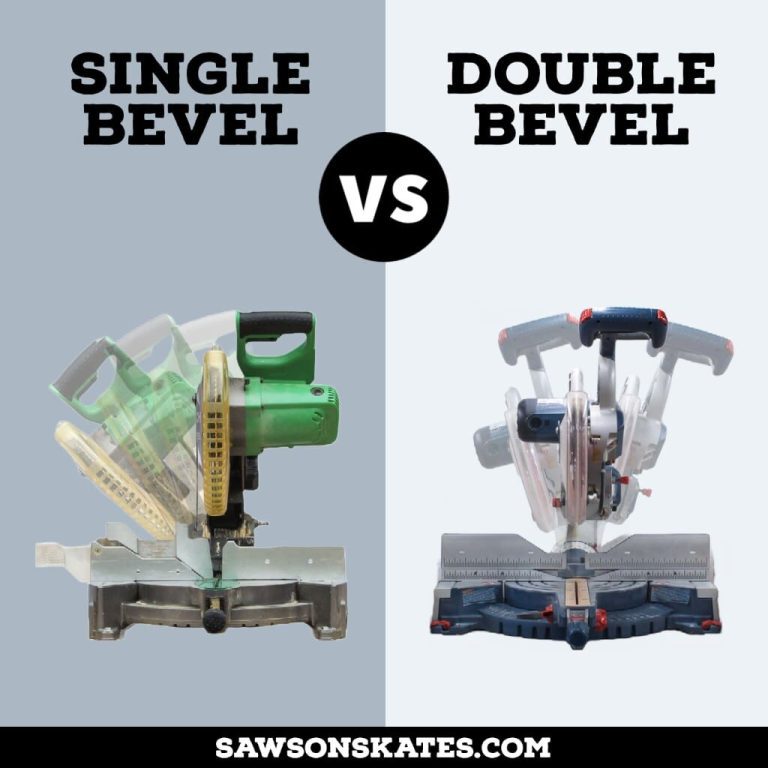
Single Bevel Miter Saws
A single bevel miter saw can tilt its blade in only one direction, usually to the left. This means you can make angled cuts on one side of your workpiece. For many basic projects, like cutting trim or simple frames, a single bevel saw is perfectly adequate.
It’s a good choice if you don’t plan on doing complex angled cuts frequently.
These saws are often simpler and more affordable than their dual bevel counterparts. This makes them an attractive option for beginners or those on a tighter budget. You can still achieve a wide range of cuts, but for compound cuts that require tilting the blade to the right, you’ll have to flip the workpiece.
This can sometimes be a bit more time-consuming and might lead to slight inaccuracies if not done carefully.
How Single Bevel Saws Work
The cutting head of a single bevel saw pivots on a single axis. When you set your desired miter angle, you can then tilt the blade up to its maximum bevel capacity, typically around 45 degrees, to one side. Once you’ve made your cut, if you need the same angle on the opposite side, you would reposition the material.
This is the main limitation compared to dual bevel models.
Advantages of Single Bevel Saws
Cost-Effective Option: Single bevel saws are generally less expensive. This makes them a great starting point for woodworking enthusiasts or those who are new to using miter saws. You get essential functionality without a high price tag, allowing you to invest in other tools or materials for your projects. Many hobbyists find these saws provide all the capability they need for common tasks.
Simpler Operation: With fewer moving parts and a straightforward adjustment mechanism, single bevel saws are often easier for beginners to learn and operate. The focus is on mastering miter angles and basic bevel cuts, reducing the learning curve. This simplicity can boost confidence and allow you to get projects done faster without wrestling with complex controls.
Lighter Weight: Many single bevel models are designed to be lighter and more portable. This is a significant advantage if you need to move your saw around your workshop, take it to job sites, or store it away when not in use. A lighter saw makes setup and breakdown much less of a chore, freeing up your time and energy for the actual cutting.
Limitations of Single Bevel Saws
Limited Compound Cut Capability: The biggest drawback is the inability to make bevel cuts to the right without repositioning the material. This adds extra steps and can introduce errors when you need identical angled cuts on opposite sides of a joint. For intricate trim work or complex framing, this limitation becomes very apparent.
Material Repositioning Required: To achieve symmetrical angled cuts, you’ll need to flip your workpiece or adjust your approach. This can be cumbersome, especially with large or heavy materials. It also increases the chance of slight variations between cuts, impacting the overall finish of your project.
Dual Bevel Miter Saws
A dual bevel miter saw offers much greater versatility. Its cutting head can tilt to bevel angles on both the left and the right side, typically up to 45 degrees in each direction. This ability to bevel in both directions is a huge advantage for making compound cuts quickly and efficiently without having to flip your material.
If you plan on doing a lot of intricate woodworking, crown molding installation, or other projects that require repeated angled cuts on opposite sides, a dual bevel saw will save you significant time and effort. While they are usually more expensive and can be heavier, the increased functionality often justifies the cost for serious DIYers and professionals.
How Dual Bevel Saws Work
Dual bevel saws feature a more complex pivot system for the blade assembly. This allows the saw to be tilted from the center detent position to the left bevel stop and to the right bevel stop. This bidirectional tilting mechanism means you can achieve complex angles with just one setup of your workpiece.
For example, when cutting crown molding, you can make inside and outside corner cuts without rotating the molding itself.
Advantages of Dual Bevel Saws
Enhanced Compound Cutting: The primary benefit is the ease of making compound cuts. You can bevel the blade left or right to match the required angle for complex joints. This is invaluable for tasks like installing intricate trim, cabinetry, or any project needing precise angled joinery on opposite sides.
Increased Efficiency and Speed: By eliminating the need to flip or reposition material for opposite bevel cuts, dual bevel saws significantly speed up your workflow. This is especially noticeable when working on repetitive tasks or large projects. You can complete cuts more quickly and maintain a faster pace throughout your work.
Improved Accuracy for Complex Cuts: The ability to make bevel cuts in both directions with the material in a consistent position helps maintain accuracy. Flipping material can sometimes lead to slight shifts or misalignments. With a dual bevel saw, you reduce these variables, leading to cleaner, more precise joints.
Versatility for Advanced Projects: For crown molding, intricate picture frames, custom furniture, and other detailed woodworking, the dual bevel capability is nearly essential. It opens up a wider range of project possibilities and allows for more professional-level results.
Limitations of Dual Bevel Saws
Higher Cost: Dual bevel miter saws are typically more expensive than single bevel models. This is due to their more complex engineering and additional mechanical features. The increased price might be a barrier for hobbyists with limited budgets or those who only need a saw for occasional, basic cuts.
Larger Size and Weight: To accommodate the dual bevel mechanism, these saws are often larger and heavier. This can make them less portable and require more dedicated space in a workshop. Moving and setting up a heavier saw can be more challenging, especially for individuals working alone.
Potentially More Complex Adjustments: While not always the case, some dual bevel saws might have slightly more involved adjustment mechanisms for the bevel angle. This could present a minor learning curve for some users, though most modern saws are designed for user-friendliness.

Key Features to Consider
Beyond the bevel type, several other features can greatly impact your miter saw experience. These include the saw’s power, blade diameter, cutting capacity, and dust collection system. Thinking about these elements will help you find a saw that fits your specific needs and project requirements, ensuring you get the most value and performance from your purchase.
Power and Motor Strength
The motor’s power, measured in amperes (Amps), determines how easily the saw can cut through different types of wood, especially dense hardwoods. A more powerful motor means less bogging down, smoother cuts, and a longer tool life. For tougher jobs, a higher Amp rating is essential.
Amp Rating: This indicates the motor’s power. For light-duty tasks, 10-13 Amps might suffice. For heavy-duty woodworking, 15 Amps or more is recommended to handle dense materials and continuous use without straining the motor. A higher Amp saw will perform better when pushing through thick lumber.
Motor Type: Most miter saws use universal motors. Brushless motors are becoming more common in higher-end models, offering increased efficiency, longer life, and quieter operation. However, they also come with a higher price tag.
RPM (Revolutions Per Minute): This specifies how fast the blade spins. A higher RPM generally leads to cleaner cuts, but it’s the torque, influenced by the Amp rating, that truly dictates cutting power through resistance.
Blade Diameter and Cutting Capacity
The blade diameter dictates the maximum width and depth of the material you can cut in a single pass. Common sizes are 7-1/4 inch, 10 inch, and 12 inch. A larger blade allows for wider crosscuts and deeper cuts.
Crosscut Capacity: This is the maximum width of material the saw can cut at a 90-degree angle. A 10-inch saw might offer around 5-6 inches, while a 12-inch saw can typically handle 7-8 inches or more. Always check the manufacturer’s specifications for precise measurements.
Miter and Bevel Capacity: This refers to the maximum angles at which the saw can cut. Most saws offer up to 45-degree miter cuts and 45-degree bevel cuts. Some high-end models provide extended miter and bevel ranges for specialized applications.
Depth of Cut: This is the maximum thickness of material the saw can cut. It’s important to match this to the typical thickness of lumber you plan to work with. For cutting thicker beams or multiple boards at once, a deeper cut capacity is needed.
Miter Saw Features Compared
| Feature | Single Bevel Miter Saw | Dual Bevel Miter Saw |
|---|---|---|
| Bevel Tilt | One direction (usually left) | Both left and right |
| Compound Cuts | Requires flipping material | Easier, no material flipping needed |
| Cost | Generally lower | Generally higher |
| Complexity | Simpler | More complex |
| Portability | Often lighter | Often heavier |
| Ideal Use | Basic cuts, trim, frames | Crown molding, complex joinery, advanced projects |
Dust Collection
Working with wood creates a lot of dust, which can be harmful to your health and make your workspace messy. A good dust collection system, either a built-in port or a bag, helps manage this. Connecting the saw to a shop vacuum is often the most effective way to control dust.
Dust Port Size: The diameter of the dust port determines how effectively it can capture sawdust. Larger ports, often 1-7/8 or 2-1/2 inches, work best when connected to a powerful shop vacuum or dust collector. Always check compatibility.
Dust Bag Efficiency: Some saws come with a dust bag that collects a portion of the sawdust. While better than nothing, these bags are generally less effective than a direct connection to a vacuum. They require frequent emptying.
Effectiveness with Shop Vacs: For optimal dust management, connect your miter saw directly to a shop vacuum. This is especially important for prolonged cutting sessions or when working indoors. Many DIYers find this essential for maintaining a clean work environment.
Blade Quality and Accessories
The blade that comes with a miter saw is often a general-purpose blade. For cleaner cuts and better performance, you might want to invest in specialized blades for different types of wood or tasks. Accessories like laser guides, LED lights, and extension wings can also improve your cutting experience.
Blade Tooth Count: Blades with more teeth (e.g., 60-80 teeth) provide smoother cuts, ideal for fine woodworking and trim. Blades with fewer teeth (e.g., 24-40 teeth) are better for rougher cuts and faster material removal in construction.
Laser Guide Systems: Many saws include a laser that projects a line onto the material, showing you exactly where the blade will cut. This greatly enhances precision, especially for beginners.
LED Work Lights: Integrated LED lights illuminate the cutting area, improving visibility and accuracy, particularly in dimly lit workshops.
Who Needs Which Type of Saw
Deciding between a single bevel and a dual bevel miter saw largely depends on your typical projects and how often you plan to use the saw. Consider your current skill level and your future woodworking aspirations.
Beginner Woodworkers
For those just starting out, a single bevel miter saw is often the perfect choice. It allows you to learn the basics of miter and bevel cuts without the added complexity and cost of a dual bevel model. You can still accomplish a wide variety of tasks, from cutting simple frames to installing basic trim.
As your skills grow and your project demands increase, you can always upgrade later.
Scenario: Building a Simple Picture Frame
Imagine you want to build a basic picture frame for a family photo. You’ll need to cut four pieces of wood at 45-degree angles. With a single bevel saw, you can set your miter angle to 45 degrees and cut one side of each piece.
Then, you’ll likely need to flip the wood to cut the other 45-degree angle for a perfect corner, or adjust your miter angle to the opposite 45 degrees. It’s straightforward and works well for this type of project.
Intermediate and Advanced DIYers
If you find yourself taking on more detailed projects like crown molding installation, custom cabinetry, or intricate furniture making, a dual bevel miter saw will be a significant asset. The ability to make compound cuts easily and efficiently will save you time and improve the quality of your work. It’s an investment that pays off in versatility and precision.
Scenario: Installing Crown Molding
When installing crown molding, you often need to cut both inside and outside corners. Each corner requires a specific miter and bevel angle. With a dual bevel saw, you can set the correct angles and make the cut without repositioning the molding.
This is crucial for achieving tight, seamless joints. If you had a single bevel saw, you would have to flip the molding for opposite corners, which is time-consuming and prone to errors.
Professional Use
For professionals, the choice is almost always a dual bevel miter saw, often a larger 10-inch or 12-inch model. Time is money in the professional world, and the efficiency gains from a dual bevel saw are substantial. The precision and versatility are essential for meeting client expectations and completing jobs quickly and accurately.
Choosing the Best Miter Saw for Your Needs
The Dual Bevel vs Single Bevel: Best Miter Saw Guide Near You shows that the right saw depends on your specific situation. Think about the types of projects you do most often, your budget, and the space you have available. Taking the time to consider these factors will lead you to a saw that truly serves your needs.
Budget Considerations
Your budget is a major factor. Single bevel saws are more budget-friendly, making them accessible for beginners. Dual bevel saws come at a higher price point due to their advanced features.
Determine how much you’re willing to spend and whether the added functionality of a dual bevel saw is worth the investment for your planned projects. Sometimes, starting with a good quality single bevel is the smarter financial choice.
Project Demands
Consider the complexity of your projects. For basic cuts like framing lumber or simple shelves, a single bevel saw is sufficient. If you plan to tackle crown molding, intricate trim work, or complex joinery, a dual bevel saw offers superior capability.
Your projects should drive your tool selection.
Workshop Space and Portability
Think about where you’ll be using the saw. If you have limited space or need to transport the saw frequently, a lighter, more compact single bevel model might be better. Larger dual bevel saws can be quite heavy and require a dedicated spot in your workshop.
Ensure the saw you choose fits your available space and workflow.
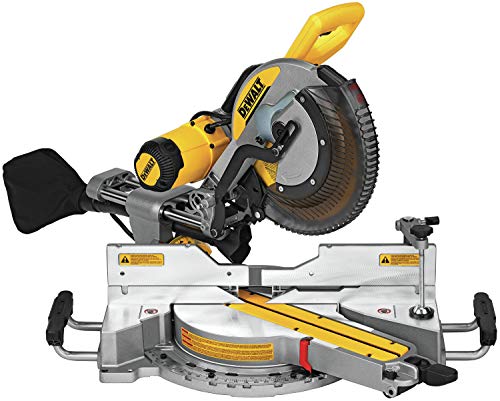
Popular Brands and Models
Many reputable brands offer excellent miter saws. Some popular choices include DeWalt, Makita, Bosch, and Ryobi. When comparing models, look at user reviews and specifications to find a saw that balances features, performance, and price.
Researching specific models within your budget and desired bevel type is key to making a good decision.
Frequently Asked Questions
Question: What is the main difference between a single bevel and a dual bevel miter saw
Answer: A single bevel miter saw can tilt its blade to make angled cuts in only one direction, usually to the left. A dual bevel miter saw can tilt its blade to make angled cuts in both directions, left and right. This makes dual bevel saws more versatile for complex compound cuts.
Question: Is a dual bevel miter saw always better than a single bevel saw
Answer: Not necessarily. A dual bevel saw is better if you frequently need to make compound cuts on both sides of your material, like for crown molding. For basic cuts or simpler projects, a single bevel saw is often more than enough and is usually more affordable and lighter.
Question: Which type of miter saw is best for a beginner
Answer: For most beginners, a single bevel miter saw is a great starting point. It’s generally less expensive, simpler to operate, and teaches fundamental cutting techniques. You can still achieve many projects with a single bevel saw.
Question: Can I do crown molding with a single bevel miter saw
Answer: Yes, you can do crown molding with a single bevel miter saw, but it’s more challenging. You’ll need to flip the molding or adjust your setup to make cuts for inside and outside corners. A dual bevel saw makes this process much easier and more accurate.
Question: Are dual bevel miter saws more expensive
Answer: Yes, dual bevel miter saws are typically more expensive than single bevel models. This is because they have a more complex tilting mechanism, which adds to the manufacturing cost. The increased price reflects the added versatility and convenience.
Summary
Deciding between a dual bevel and a single bevel miter saw comes down to your projects and budget. A single bevel saw is affordable and great for basic cuts, while a dual bevel saw offers superior flexibility for complex tasks. Consider your needs carefully to pick the best tool for your workshop.