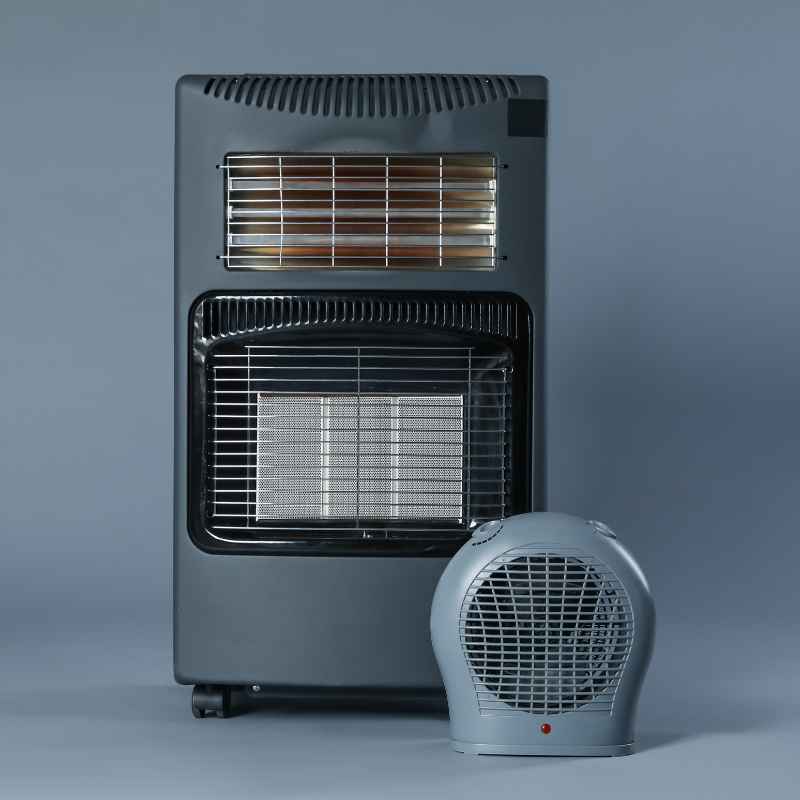
How Do You Find An Electrical Fault In Carbon Heaters?
Understanding how to locate an electrical fault in carbon heaters involves recognizing common failure points, employing basic diagnostic steps, and prioritizing safety. This guide breaks down potential issues, from broken elements to wiring problems, and explains how to approach them with care and common tools.
What Causes Electrical Faults in Carbon Heaters?
Carbon heaters are quite simple. But like anything with electricity and heat, things can break. A main issue is the heating element itself.
This is the part that gets hot. It’s usually a carbon fiber rod or film. Over time, this element can develop tiny cracks.
Or it might simply wear out from constant heating and cooling. This breaks the path for electricity to flow.
Another common problem is wiring. The wires connect the heating element to the power source. These wires can get loose.
They can also get damaged. Maybe a wire got pinched during setup. Or maybe the connection just became corroded.
Bad connections mean electricity can’t reach the element properly. This stops the heater from working.
The thermostat is also a frequent culprit. This part controls the temperature. If it fails, it might not send power to the heating element.
It could be stuck in the “off” position. Sometimes, a fuse or circuit breaker protects the heater. If these blow or trip, it’s a sign of a bigger problem.
But a blown fuse can also just be a fuse. It means something caused too much power to flow.
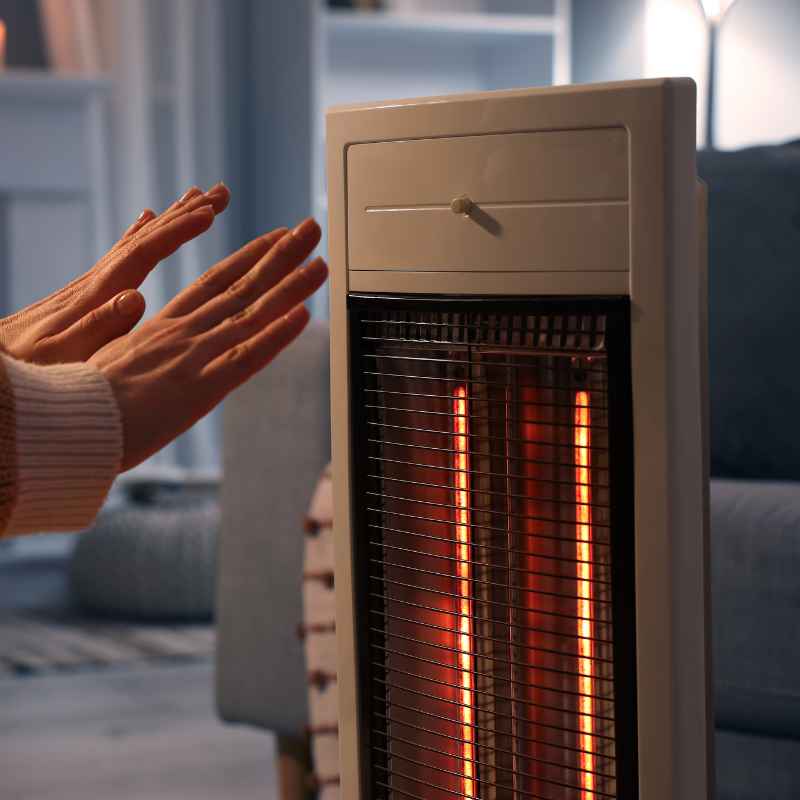
My Carbon Heater Story: The Silent Night
I remember one particularly cold evening last winter. It was late, maybe 10 PM. My living room felt like a freezer.
I always turn on my trusted carbon heater when the chill really bites. I flipped the switch, expecting that familiar, gentle warmth to start. But… nothing.
Not a sound. Not a flicker of light. Just silence.
My heart sank a little. I’d used it just the night before. It was working perfectly then.
A wave of annoyance washed over me, quickly followed by a touch of panic. Winter was here, and my main heat source was dead. I pictured myself shivering through the night.
I’m not an electrician, but I consider myself pretty handy around the house. I looked at the heater, a sleek, modern unit I’d bought a couple of years ago. It had a nice stand and a remote control.
It seemed so reliable. Now, it was just a cold, dark piece of plastic and metal. I felt a bit helpless, staring at this inanimate object that had suddenly decided to quit on me.
Common Carbon Heater Parts & Their Roles
Heating Element: The core component that glows red hot to produce heat. Made of carbon fiber or similar material.
Thermostat: A control that senses room temperature and turns the heater on or off to maintain a set heat level.
Wiring & Connectors: The pathways that carry electricity from the wall plug to all internal components.
Safety Features: Like tip-over switches or overheat protection that cut power in unsafe situations.
Control Panel/Remote: The interface you use to turn it on, adjust settings, or set timers.
I started thinking about what could have gone wrong. Was it the power cord? Did something happen to the inside?
I knew electrical things could be dangerous. So, I decided to do some research first. I didn’t want to just start poking around blindly.
The idea of electrocution was a real worry. I needed a plan. I wanted to understand the basics before even thinking about touching it.
Testing for Electrical Faults: A Step-by-Step Approach
Before you start testing, remember safety first. Always unplug the heater. Never test while it’s plugged in.
You might need a multimeter. This is a tool that measures voltage, current, and resistance. If you don’t have one, you can get a basic one fairly cheap.
It’s a good tool for many home repairs.
First, check the obvious things. Is the heater plugged into a working outlet? Try plugging something else into that outlet.
Does it work? If not, the problem is with your outlet or house wiring. Check your home’s circuit breaker box.
See if the breaker for that room has tripped. If it has, try resetting it. If it trips again right away, there’s a serious issue.
Call an electrician.
Next, examine the power cord. Look for any cuts, nicks, or fraying. If the cord looks damaged, it’s a hazard.
The heater should not be used. You might need to
Quick Heater Safety Checks
1. Unplug First: Always disconnect power before inspecting or testing.
2. Visual Inspection: Look for damage to the cord, plug, or heater casing.
3. Outlet Test: Ensure the power outlet is functioning correctly with another device.
4. Breaker Box: Check if a circuit breaker has tripped for the outlet.
5. Tip-Over Switch: If your heater has one, ensure it’s not stuck in the tripped position.
If you have continuity, the cord is likely fine. Now, let’s think about the heating element. This is where things can get a bit tricky.
You’ll need to access the inside of the heater. This usually means unscrewing the casing. Look for screws on the back or sides.
Once you have the casing off, locate the heating element. It will have wires connected to it.
With the heater still unplugged, use your multimeter. Set it to check resistance. Touch the probes to the two terminals where the wires connect to the heating element.
A good heating element will show some resistance. It won’t be zero, but it shouldn’t be infinite (meaning an open circuit). If your multimeter shows “OL” (overload) or a very high number, the element is likely broken.
It needs to be replaced.
If the element seems okay, check the wires connecting to it. Make sure they are secure. Wiggle them gently.
Sometimes, a loose connection is all it is. If you see any signs of burning or corrosion on the wires or terminals, that’s a problem. You might need to clean them or re-crimp them.
If the heating element itself and the wires connecting to it seem fine, the issue might be with the thermostat or internal controls.
Understanding the Heating Element’s Lifespan
Carbon heating elements are designed to last. But they aren’t immortal. Think of them like the filament in an old light bulb.
Over time, the intense heat causes stress. Tiny fractures can form within the carbon material. These fractures disrupt the flow of electricity.
It’s like a tiny road blockage.
When you turn the heater on, electricity tries to pass through the element. If there’s a break, the electricity can’t complete its journey. This stops the element from heating up.
Sometimes, a crack is visible. Other times, it’s microscopic. You won’t see it with your eyes.
That’s when a multimeter’s resistance test is crucial. A high or infinite resistance means the path is broken.
The number of times an element is heated and cooled also plays a role. Each cycle puts a little stress on the material. So, a heater that’s used very frequently might fail sooner.
Heaters with multiple elements are sometimes designed so one can fail, and the others keep working. But single-element heaters will stop producing heat altogether if the element breaks.
Heating Element Failure Signs
No Heat: The most obvious sign. The unit powers on, but no warmth is produced.
Intermittent Heat: It works for a while, then stops, or only heats sporadically.
Strange Smells: Sometimes, a failing element can produce unusual odors (though this is less common).
Visible Damage: Cracks or scorching on the element itself (if visible).
Multimeter Reading: High or infinite resistance (OL) when testing for continuity/resistance.
Replacing a heating element can be possible. But it depends on the heater’s design. Some are built for easy replacement.
Others are sealed units. If you can’t find a replacement part, or if the heater is old and cheap, it might be more cost-effective to buy a new one. Safety is always the priority.
If you’re unsure about replacing parts, it’s best to seek professional help or get a new unit.
Dealing with Wiring and Connection Issues
Loose or damaged wires are another common reason for electrical faults. These can happen for a few reasons. During manufacturing, a wire might not have been crimped tightly enough.
Or over time, vibrations from the fan or the heating cycle can cause connections to loosen. Kids or pets might accidentally pull on the cord, stressing the internal connections.
When you open up the heater, look closely at all the wires. Trace them from the power cord to the thermostat and then to the heating element. Are they all securely attached?
Are there any signs of overheating or melting at the connection points? This often looks like black, charred plastic around a wire terminal.
If a wire is loose, you might be able to simply push it back onto its terminal. Some terminals have screw-on connections. Others are push-fit.
If a wire has come completely off, and the terminal is still intact, you might be able to reattach it. If the terminal itself is damaged or corroded, you might need to replace that part. This can be more complex.
Wire Check Guide
Visual Check: Look for loose wires, fraying, or signs of melting/burning.
Gentle Tug: Lightly tug on wires to ensure they are securely connected.
Terminal Inspection: Check for corrosion, damage, or bent pins on connectors.
Wire Path: Follow wires from plug to element for any pinching or damage.
Continuity Test: Use a multimeter to check if electricity flows freely through each wire section.
Sometimes, a wire might be damaged internally. You can’t see the damage, but it still breaks the electrical path. In this case, the wire would need to be
When inspecting connections, also check the power cord where it enters the heater. This is a common stress point. Make sure the strain relief is intact.
This is usually a plastic clip that prevents the cord from being pulled directly on the internal wires. If this is broken, the cord can easily get damaged inside.
The Role of the Thermostat and Safety Switches
The thermostat is your heater’s brain. It tells the heating element when to turn on and off. If the thermostat fails, it might think the room is already warm enough.
Or it might fail to send the signal to heat. This means no heat, even if the power is reaching the unit.
Testing a thermostat can be tricky. Many modern thermostats are electronic. They aren’t simple mechanical switches.
You can often test their function by checking for continuity at different temperature settings. If you turn the dial to the highest setting and hear a click, that’s a good sign the thermostat is trying to engage. If there’s no click, it might be broken.
Your heater likely has safety switches. The most common is a tip-over switch. If the heater is accidentally knocked over, this switch automatically cuts off power.
This prevents fires. Sometimes, these switches can get stuck. If your heater won’t turn on, try gently rocking it or tapping the base.
See if that dislodges the switch. You can also test this switch for continuity.
Safety Switch Deep Dive
Tip-Over Switch: Located at the base. Activates when the heater is not upright, cutting power.
Overheat Protection: A sensor that shuts off the heater if internal temperatures get too high. Often a resettable fuse or thermal cutoff.
Fuse: Some heaters have an inline fuse for extra protection against power surges.
How to Test (Tip-Over): Ensure the heater is upright. Test for continuity across the switch terminals. If it reads open, the switch is likely faulty or stuck.
How to Test (Overheat): This often requires the heater to cool down completely. Some are manually resettable (a small button). If it trips repeatedly, there’s an underlying issue causing overheating.
Another safety feature is overheat protection. This is usually a small thermal fuse or a resettable switch. It monitors the heater’s internal temperature.
If it gets too hot, it shuts off power. This is a crucial safety device. If your heater has an overheat switch that has tripped, it’s important to figure out why it overheated.
Was it dust buildup blocking airflow? Was something placed too close to the heater?
If the safety switches seem okay, and the wiring to them is good, the problem might be with the main control board or the thermostat itself. Like the heating element, these parts might need replacement. This is where it starts getting more complicated for a DIYer.
Real-World Scenarios: Where Faults Happen
Carbon heaters are often used in living rooms, bedrooms, or garages. These are places where you want quick warmth. The design of most carbon heaters is pretty open.
This allows for good heat distribution. However, this open design can also invite dust and pet hair. Over time, this debris can build up inside the heater.
When the heater turns on, this dust gets heated. It can cause a burning smell. More importantly, it can insulate components.
This can lead to overheating. If the airflow is blocked, the safety mechanisms might kick in. Or worse, it could damage the heating element or other parts.
User habits play a big role too. People sometimes place things too close to the heater. Curtains, blankets, or furniture can be fire hazards.
They also block airflow. This makes the heater work harder and can cause it to overheat. Another common habit is leaving the heater on when not in the room.
While many have safety features, it’s always best practice to turn them off.
Common Fault Scenarios
Dust Buildup: Accumulation of dust on the heating element or inside the casing causes overheating and can block airflow.
Proximity Hazards: Placing flammable materials too close to the heater, blocking vents.
Cord Strain: Repeated pulling or kinking of the power cord at the point where it enters the unit.
Mechanical Shock: Dropping the heater or a strong impact can dislodge internal components or break the element.
Moisture Exposure: Using in very damp environments can lead to corrosion of electrical contacts over time.
Consider the environment. If you live in a very humid area, corrosion can be an issue. Even though they are for heating, electrical components can be sensitive to moisture.
If the heater is old, materials can become brittle. Plastic casings can crack. Wires can degrade.
Age is a factor in the reliability of any appliance.
What this means is that routine maintenance is key. Dusting the outside is easy. But occasionally, you might need to open it up (after unplugging!) and carefully vacuum out any dust bunnies.
This simple act can prevent many electrical faults from occurring in the first place.
When It’s Normal and When to Worry
It’s normal for a carbon heater to make some subtle sounds. You might hear a gentle hum when it’s running. Or a soft click when the thermostat engages or disengages.
If you turn it on and it starts warming up within a minute or two, that’s usually normal operation. A slight smell of dust when you first turn it on after a long break is also common.
You should worry if you notice any of the following:
Sparks: Any visible sparks are a major red flag. Unplug immediately. Burning Smell: A strong, acrid burning smell means something is overheating.
No Power At All: If nothing happens when you plug it in and turn it on, and the outlet is confirmed working, it’s likely an internal electrical issue. Intermittent Power: If the heater turns on and off by itself randomly, or if the lights flicker, it suggests a loose connection or a failing component. Melted Plastic: Signs of melting plastic around the cord, plug, or casing indicate severe overheating.
Loud Noises: Grinding, buzzing, or popping sounds that aren’t the normal thermostat click.
Troubleshooting Checklist
1. Check Power Source: Outlet works? Breaker reset?
2. Inspect Power Cord: No visible damage?
3. Listen for Clicks: Does thermostat seem to engage?
4. Visual Check Inside (Unplugged!): Loose wires? Burn marks?
5. Multimeter Tests: Cord continuity? Element resistance?
6. Safety Switches: Tip-over switch function?
If you’re unsure about any part of the testing process, or if you suspect a serious electrical fault, it’s always best to stop. Don’t risk your safety or damage the appliance further. For many carbon heaters, especially less expensive models, the cost of professional repair might outweigh the cost of a new unit.
This is a tough decision, but safety must come first.
Quick Fixes and Preventative Tips
Many electrical faults in carbon heaters stem from simple neglect or minor issues. Here are some tips to keep yours running smoothly and safely:
Regular Cleaning: Gently vacuum the exterior and any accessible internal parts (when unplugged!) every few months. Proper Storage: If you store the heater for the summer, ensure it’s clean and in a dry place.
Coil the cord loosely. Avoid Overloading: Don’t plug the heater into an extension cord if you can avoid it. Use a direct wall outlet.
Observe Placement Rules: Always keep heaters at least three feet away from curtains, furniture, and bedding. * Mind the Cord: Don’t run the cord under rugs or carpets, where it can be a tripping hazard or get damaged.
Preventative Maintenance Routine
Monthly: Wipe down the exterior casing and check the power cord for any visible damage.
Quarterly: Unplug the heater. Carefully vacuum any dust from the grilles and accessible internal areas.
Annually: (Optional, if comfortable) Open the casing (unplugged!) to check for loose connections or excessive dust buildup. Ensure all screws are tight.
Seasonal: Before first use after storage, inspect thoroughly. Test the power outlet with another device.
If your heater has a resettable overheat switch, make sure you understand why it tripped before resetting it. Usually, it means the heater was blocked or there was a buildup of dust. Addressing the root cause is vital.
Simply resetting it without fixing the problem could lead to a repeat incident and potential danger.
For issues like a broken heating element or a faulty thermostat, replacement is usually the only option. You’ll need to identify the exact model number of your heater. Then, search for replacement parts from the manufacturer or third-party suppliers.
Carefully follow any assembly instructions. If these parts are hard to find or expensive, consider if buying a new heater is a better choice.
Frequently Asked Questions About Carbon Heater Faults
My carbon heater won’t turn on at all. What could be wrong?
This often points to a power supply issue. First, check if the outlet is working by plugging in another device. Then, check your home’s circuit breaker box to see if the breaker has tripped.
If the outlet and breaker are fine, the problem might be with the heater’s power cord, internal wiring, or a safety switch like the tip-over switch not being properly engaged. Ensure the heater is on a flat, stable surface if it has a tip-over switch.
Why does my carbon heater smell like burning plastic when I turn it on?
A burning smell usually indicates overheating. This can be caused by dust and debris buildup inside the heater, especially on the heating element. It can also happen if something is placed too close to the heater, blocking airflow.
If the smell is strong or accompanied by smoke, unplug the heater immediately and do not use it until it’s inspected and cleaned by a professional or replaced.
My carbon heater is making a strange buzzing or humming noise. Is this normal?
A gentle hum from the fan motor (if it has one) is normal. However, a loud or unusual buzzing, grinding, or popping sound is not. This could indicate a problem with the motor, a loose internal component, or an issue with the heating element itself.
It’s best to stop using the heater and have it checked by a qualified technician.
How can I test the heating element of my carbon heater?
You will need a multimeter. First, unplug the heater. You will likely need to remove the outer casing to access the heating element.
Locate where the wires connect to the element. Set your multimeter to measure resistance (ohms). Touch the probes to the two connection points of the heating element.
A working element will show some resistance. If you get an “OL” (overload) or a very high reading, the element is broken and needs replacement.
Is it safe to try and repair a carbon heater myself?
For very simple issues like cleaning dust or ensuring a visible wire is reconnected securely (and you are comfortable doing so), it can be safe. However, any work involving testing electrical components with a multimeter, or attempting to
My carbon heater turns on for a few minutes and then shuts off. What’s the cause?
This is often a sign of the heater’s built-in overheat protection kicking in. The heater might be getting too hot because of dust buildup, blocked vents, or being too close to objects. Or, there could be a fault with the thermostat that isn’t regulating the temperature correctly.
Ensure the heater is clean, has good airflow, and is placed appropriately. If it continues to shut off, it may require professional inspection or replacement.
Conclusion: Keeping Your Carbon Heater Cozy
Finding an electrical fault in your carbon heater involves careful observation and some basic testing. By understanding common issues like heating element failure, wiring problems, and thermostat malfunctions, you can approach the situation with more confidence. Remember, safety is paramount.
Always unplug the heater before inspecting or testing. If you encounter anything that makes you uneasy, it’s best to call a professional or consider replacing the unit.
Regular cleaning and proper placement are your best defenses against future problems. A well-maintained heater can provide reliable warmth for years. Keep these steps in mind, and you’ll be better equipped to handle any hiccups that come your way.
Enjoy your comfortable home!
Sponsored / affiliate links. As an Amazon Associate I earn from qualifying purchases. I may earn additional commission from eligible campaigns.