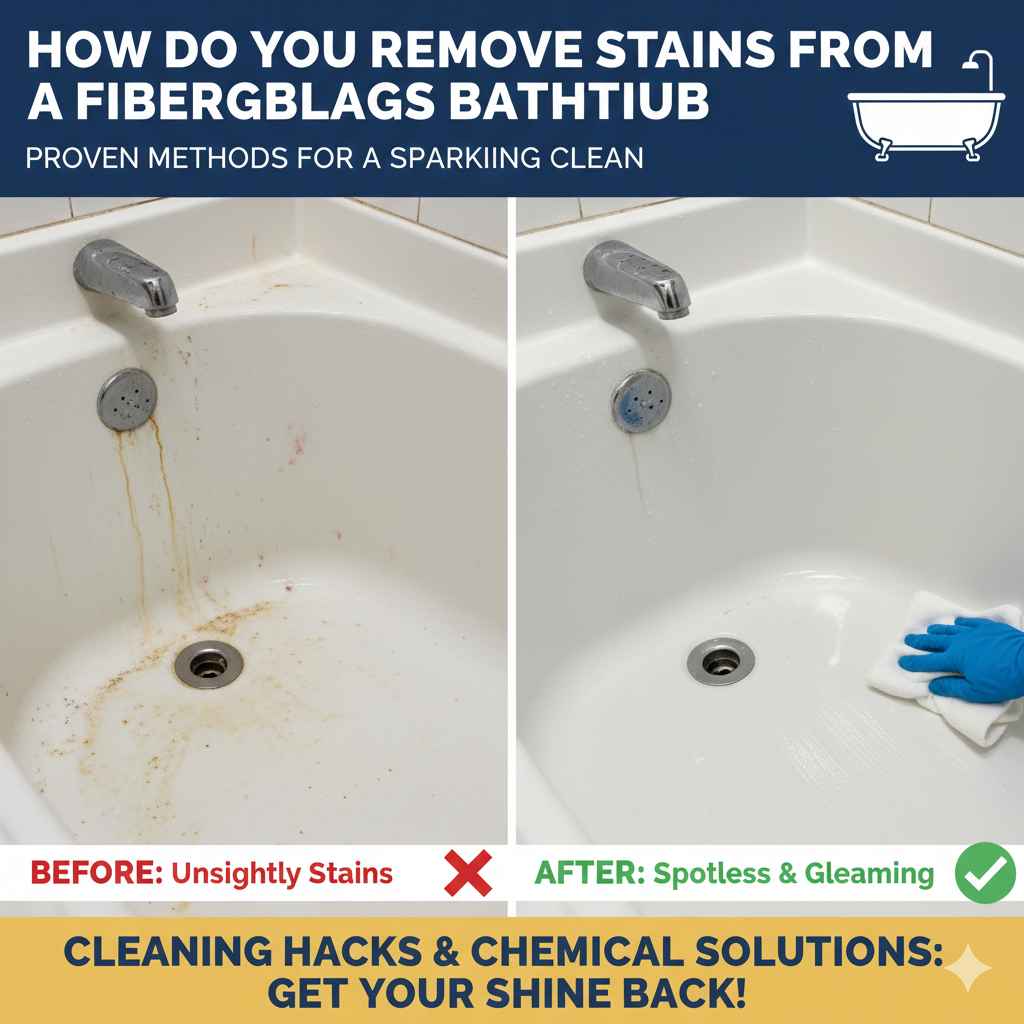
How Do You Remove Stains From a Fiberglass Bathtub: Proven
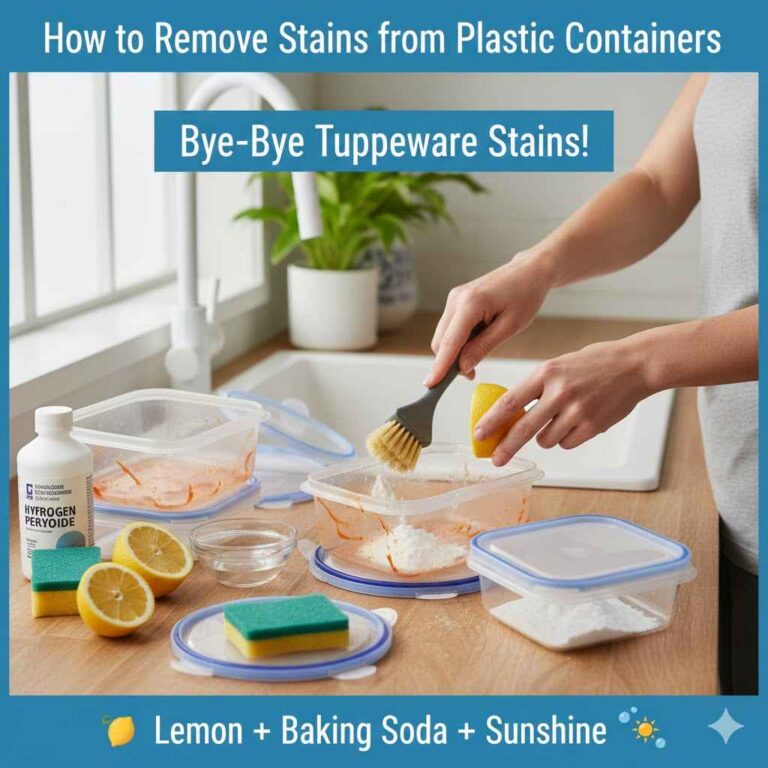
To remove stains from a fiberglass bathtub, start with a non-abrasive paste of baking soda and water. Apply it to the stain, let it sit for 30 minutes, then gently scrub with a soft sponge or cloth and rinse thoroughly. For tougher stains like rust or hard water, a paste of vinegar and baking soda often works wonders.
Hello there! It’s Md Meraj, your friendly guide for all things home improvement. Is a stubborn stain in your fiberglass bathtub driving you crazy? You’re not alone. Fiberglass is a wonderful material—lightweight and affordable—but it can be a bit sensitive. The wrong cleaner can leave scratches or dull its shine, turning a simple cleaning job into a frustrating headache. It’s easy to feel stuck, worried you might make things worse.
But don’t worry, I’m here to help. I’ve seen my fair share of bathtub stains, and I’ve learned the safest, most effective ways to get them out without damaging the surface. In this guide, I’ll walk you through simple, proven steps to make your fiberglass tub look sparkling new again. We’ll use gentle, everyday ingredients and a little bit of know-how. Let’s get that tub shining!
First Things First: Understanding Your Fiberglass Bathtub
Before we jump into cleaning, let’s quickly talk about what makes a fiberglass tub special. Knowing your material is the first step to cleaning it right. A fiberglass tub is made from layers of reinforced plastic molded into shape. The part you see and touch is a smooth, protective top layer called a gelcoat.
This gelcoat is what gives the tub its shine and color, but it’s also relatively soft compared to porcelain or cast iron. This is why harsh, gritty cleaners are a big no-no. They can easily scratch the gelcoat, creating tiny grooves where dirt and grime can get trapped. Over time, these scratches make the tub look dull and even harder to clean. Our goal is to lift the stain without harming this delicate finish.

Safety Always Comes First
Even when using simple household cleaners, it’s smart to protect yourself. These quick safety steps will ensure your cleaning project is worry-free. I never start a project without them, and neither should you.
- Good Ventilation: Open a window or turn on the bathroom fan. Even gentle cleaners like vinegar can create fumes in a small, enclosed space.
- Protect Your Hands: Wear a pair of waterproof rubber gloves. This keeps your skin from getting dry or irritated by cleaning solutions.
- Eye Protection: It’s a good habit to wear safety glasses. You never know when a splash might happen, and it’s always better to be safe.
Gathering Your Gentle Cleaning Arsenal
The good news is you probably already have everything you need right in your pantry. We are focusing on simple, effective, and affordable solutions. Here’s a list of what to have on hand:
- Baking Soda
- White Vinegar
- Liquid Dish Soap (a mild, clear one is best)
- Hydrogen Peroxide (for tough color stains)
- Lemon Juice or Cream of Tartar (for rust)
- Soft Sponges or Microfiber Cloths (avoid green scouring pads!)
- A Spray Bottle
- A Small Bowl for mixing pastes
Step 1: Identify the Type of Stain
Different stains need different treatments. Figuring out what caused the stain is half the battle. This simple table will help you play detective and choose the right method from the start.
| Stain Type | Appearance | Common Cause | Best First Approach |
|---|---|---|---|
| Soap Scum | A cloudy, whitish, or grey film that feels chalky or waxy. | Buildup of soap, body oils, and minerals from water. | Baking Soda & Vinegar Paste |
| Hard Water Stains | Chalky white spots or a yellowish, brownish tinge. Often found around the drain and faucet. | High mineral content (calcium, magnesium) in your water. | White Vinegar Spray |
| Rust Stains | Reddish-brown or orange streaks. Often appears under a leaky faucet or from a metal can. | Iron in the water or a metal object left on the surface. | Lemon Juice & Salt Paste |
| Hair Dye / Color Stains | Bright or dark spots that match a recent hair dye or bath bomb color. | Dyes from beauty and bath products seeping into the gelcoat. | Baking Soda & Hydrogen Peroxide Paste |
| General Grime / Yellowing | A dull, yellowish, or dingy appearance over the entire surface. | Age, body oils, and a slow buildup of dirt over time. | Baking Soda & Dish Soap Scrub |
Step 2: The Gentle All-Purpose Cleaning Method
For general dirt, light soap scum, or stains you can’t quite identify, always start with the gentlest method first. This baking soda paste is my go-to for most fiberglass cleaning jobs. It cleans effectively without any risk of scratching.
The Baking Soda and Water Paste
- Rinse the Tub: Give the bathtub a quick rinse with warm water to wet the surface and wash away any loose debris.
- Make the Paste: In a small bowl, mix about half a cup of baking soda with a few tablespoons of warm water. Stir until you have a thick paste, similar in consistency to toothpaste.
- Apply the Paste: Use your gloved hands or a soft sponge to spread the paste over the stained areas. Apply a thick, even layer. Don’t be shy with it!
- Let it Sit: This is the most important part. Let the paste sit and do its work for at least 30 minutes. The baking soda will gently break down the oils and grime without any harsh scrubbing.
- Gentle Scrub: After 30 minutes, take a soft, damp sponge or microfiber cloth and scrub the area in gentle, circular motions. You should feel the stain lifting away. If the paste has dried, add a little water to your sponge.
- Rinse Thoroughly: Rinse the entire tub with warm water until all the baking soda residue is gone. Use your showerhead if possible for an easy, complete rinse.
- Dry and Inspect: Wipe the tub dry with a clean cloth and inspect your work. For many common stains, this is all it takes!
Step 3: Tackling Tougher, Specific Stains
If the gentle method didn’t quite cut it, don’t worry. It just means we need a slightly different approach based on the type of stain you identified earlier. Let’s move on to our more specialized solutions.
How to Remove Hard Water Stains and Soap Scum
Hard water and soap scum are often partners in crime. The minerals in hard water combine with soap to create a tough, filmy residue. The secret weapon here is acid, which dissolves these mineral deposits. White vinegar is perfect for the job.
- Prepare Your Vinegar Solution: Fill a spray bottle with plain white vinegar. For extra cleaning power, you can warm the vinegar in the microwave for about 30 seconds first (be careful, it will be hot).
- Spray and Soak: Spray the vinegar generously over the hard water spots and soap scum. You want the areas to be completely saturated. For stubborn buildup on flat surfaces, you can lay paper towels over the stain and then soak them with vinegar. This keeps the vinegar in place and lets it work longer.
- Let it Dissolve: Let the vinegar sit for at least 30 minutes to an hour. This gives it time to break down the minerals. You might even see some fizzing, which is a good sign!
- Add Baking Soda for a Scrub: After soaking, sprinkle a good amount of baking soda directly onto the vinegar-soaked areas. It will fizz up. This reaction helps lift the loosened grime.
- Scrub Gently: Using your soft sponge, scrub the areas in circular motions. The combined power of the vinegar and the gentle abrasion of baking soda should lift the stains.
- Rinse and Dry: Rinse the tub completely with warm water and wipe it dry with a clean towel. The shine should be back!
How to Remove Stubborn Rust Stains
Rust can look intimidating, but it’s usually just a surface stain that can be removed with a mild acid. A rusty shaving cream can left on the ledge or a drippy faucet with high iron content are the usual culprits. According to the Utah State University Extension, acidic solutions are effective for rust.
- Choose Your Cleaner: You have two great DIY options. You can either make a paste from lemon juice and salt, or a paste from cream of tartar and a few drops of water. Both are mildly acidic and work well.
- Apply the Paste: Cover the rust stain completely with your chosen paste.
- Let it Work: Let the paste sit on the stain for about an hour. Don’t let it dry out completely; you can spritz it with a little water if needed.
- Scrub and Rinse: Gently scrub the area with a soft sponge. You should see the rust lifting. Rinse the area thoroughly with clean water and dry it. Repeat if a faint stain remains.
How to Remove Hair Dye and Other Color Stains
This is where we need to be extra careful, as dyes can penetrate the gelcoat. The key is to act fast and use a mild bleaching agent like hydrogen peroxide. Always test this method on a small, hidden spot first (like behind the faucet) to ensure it doesn’t discolor your tub.
- Create a Peroxide Paste: Mix baking soda with enough hydrogen peroxide to form a thick paste.
- Apply and Wait: Apply the paste to the dye stain and let it sit for 30-60 minutes. The paste will bubble slightly.
- Check Progress: Gently wipe away a small part of the paste to see if the stain is lifting. If it is, you can proceed. If not, you can let it sit a bit longer.
- Scrub and Rinse: Gently scrub the area with a soft cloth, then rinse thoroughly with warm water. This method may require a couple of applications for very stubborn dye stains.
What About Commercial Cleaners?
Sometimes, a stain is just too stubborn for DIY methods. In that case, you can turn to a commercial cleaner, but you must choose wisely. Always look for products specifically labeled as “safe for fiberglass” or “non-abrasive.”
Many bathroom cleaners contain harsh abrasives or chemicals that can permanently damage a fiberglass finish. It’s crucial to read the label. For guidance on safer cleaning products, you can check resources like the EPA’s Safer Choice program, which certifies products that are safer for you and the environment.
| Cleaners to Use | Cleaners to AVOID |
|---|---|
| Non-abrasive liquid or gel cleaners | Abrasive powder cleansers (like Comet or Ajax) |
| Products labeled “safe for fiberglass/acrylic” | Scouring pads or steel wool |
| Mild, all-purpose bathroom sprays | Harsh solvents like acetone or paint thinner |
| Cleaners with citric acid or oxalic acid for rust | Concentrated chlorine bleach (can yellow fiberglass) |
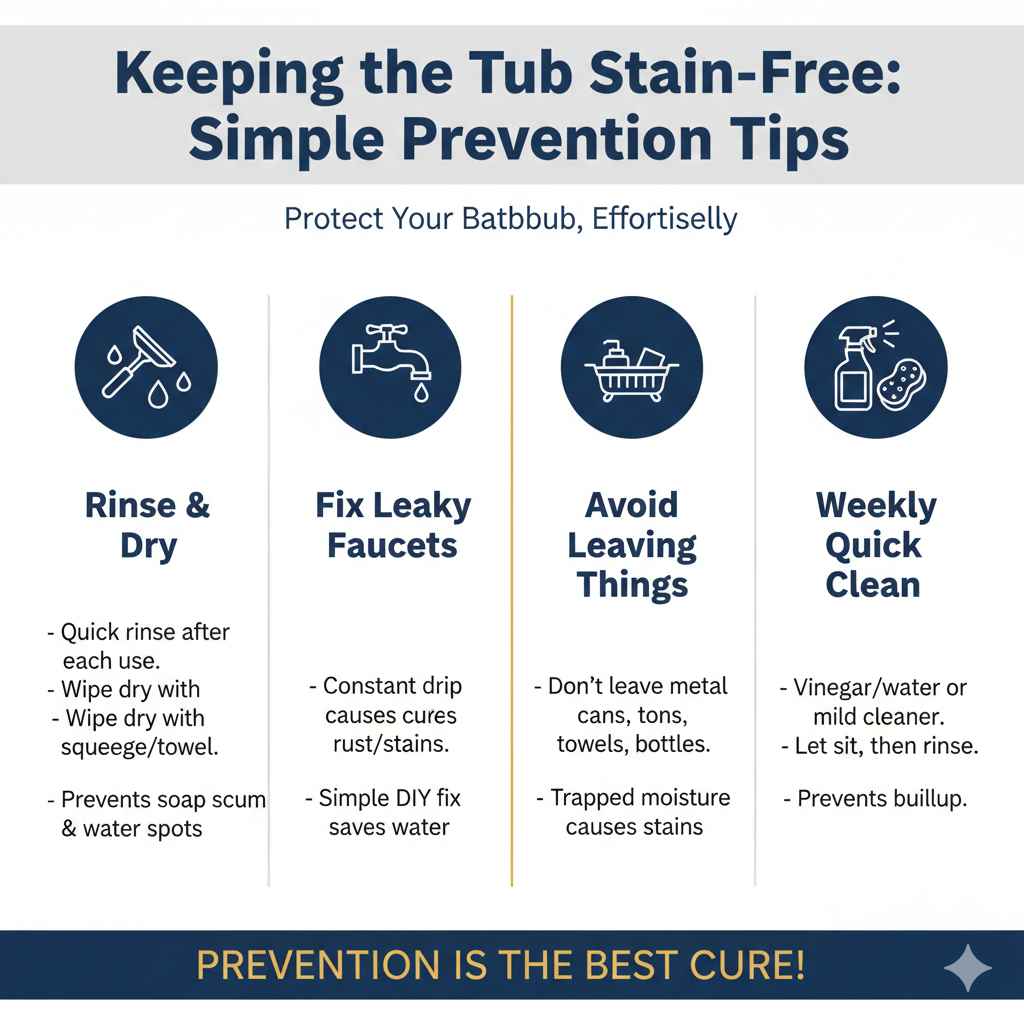
Keeping Your Tub Stain-Free: Simple Prevention Tips
An ounce of prevention is worth a pound of cure, right? Once your tub is sparkling clean, a few simple habits can keep it that way for much longer.
- Rinse and Dry After Each Use: After your shower or bath, give the tub a quick rinse to wash away soap and shampoo residue. Then, use a small squeegee or an old towel to wipe it dry. This takes 30 seconds and is the single best way to prevent soap scum and hard water spots.
- Fix Leaky Faucets: A constant drip is a sure way to get rust and hard water stains. Fixing a leak is a simple DIY project that saves water and protects your tub.
- Avoid Leaving Things in the Tub: Don’t leave metal cans, wet towels, or plastic bottles sitting on the tub ledge for long periods. They can trap moisture and cause stains.
- Perform a Weekly Quick Clean: Once a week, spray the tub with a simple solution of vinegar and water (50/50 mix) or a mild, non-abrasive bathroom cleaner. Let it sit for a few minutes and then rinse it down. This prevents buildup before it even starts.
Frequently Asked Questions (FAQ)
1. Can I use a Magic Eraser on my fiberglass bathtub?
It’s best to be very cautious. A Magic Eraser (melamine foam) is a micro-abrasive. While it can be effective on some stains, using it with too much pressure can dull the shiny gelcoat finish of your fiberglass tub. If you choose to use one, test it on an inconspicuous spot first and use very light pressure.
2. Will baking soda scratch my fiberglass tub?
No, baking soda is considered a very mild, gentle abrasive and is safe for fiberglass surfaces. It cleans by gently lifting grime without scratching the delicate gelcoat, which is why it’s a recommended cleaner for this material.
3. Can I use bleach to remove stains from fiberglass?
You should avoid using chlorine bleach directly on fiberglass. Over time, bleach can cause the fiberglass gelcoat to yellow and become brittle. For whitening, a safer alternative is to use an oxygen-based bleach product or the hydrogen peroxide and baking soda paste mentioned earlier.
4. Why has my white fiberglass tub turned yellow?
Yellowing can happen for a few reasons. It could be from age and sunlight exposure, buildup of body oils and soap scum, or the use of harsh chemical cleaners (like bleach) in the past. A thorough cleaning with a baking soda and vinegar paste can often restore much of the whiteness.
5. How often should I deep clean my fiberglass tub?
A deep clean to remove any buildup should be done every 2-4 weeks, depending on how often the tub is used. A quick rinse-and-dry after each use will make these deep cleans much faster and easier.
6. What’s the difference between a fiberglass and an acrylic tub?
They look very similar! Fiberglass tubs are made of sprayed resin layers, making them lighter and more affordable. Acrylic tubs are made from a single sheet of acrylic plastic that is heated and vacuum-formed, making them more durable and less porous, so they tend to resist staining better. The cleaning methods in this guide are safe for both surfaces.
Conclusion: Enjoy Your Sparkling Clean Tub!
There you have it! Restoring the shine to your fiberglass bathtub doesn’t require harsh chemicals or a lot of elbow grease. It’s all about using the right technique for the right stain. By starting with gentle, everyday ingredients like baking soda and vinegar, you can safely lift away most common stains and protect your tub’s finish for years to come.
Remember to be patient, let the cleaning solutions do the work for you, and always start with the mildest method first. With a little care and these proven steps, you can keep your bathtub looking bright, clean, and inviting. Now you can relax and enjoy a well-deserved soak in your beautifully clean tub. Happy cleaning!