How Long After Pressure Washing Can You Paint
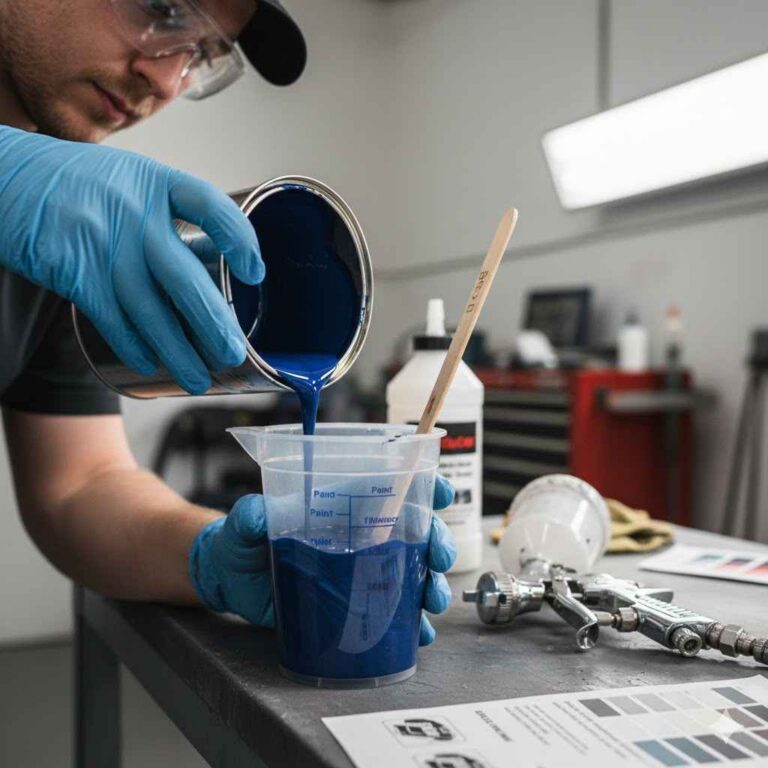
Getting your home looking great often involves a bit of elbow grease. You might be wondering about the best way to prep surfaces before you apply a fresh coat of paint. A common question, especially for folks doing DIY projects, is how long after pressure washing can you paint? It seems simple, but getting it right means your new paint job will last.
Don’t worry! We’ll walk through this step by step so you can feel confident about your next painting project. Let’s get started on making your home shine.
When Is The Surface Truly Dry
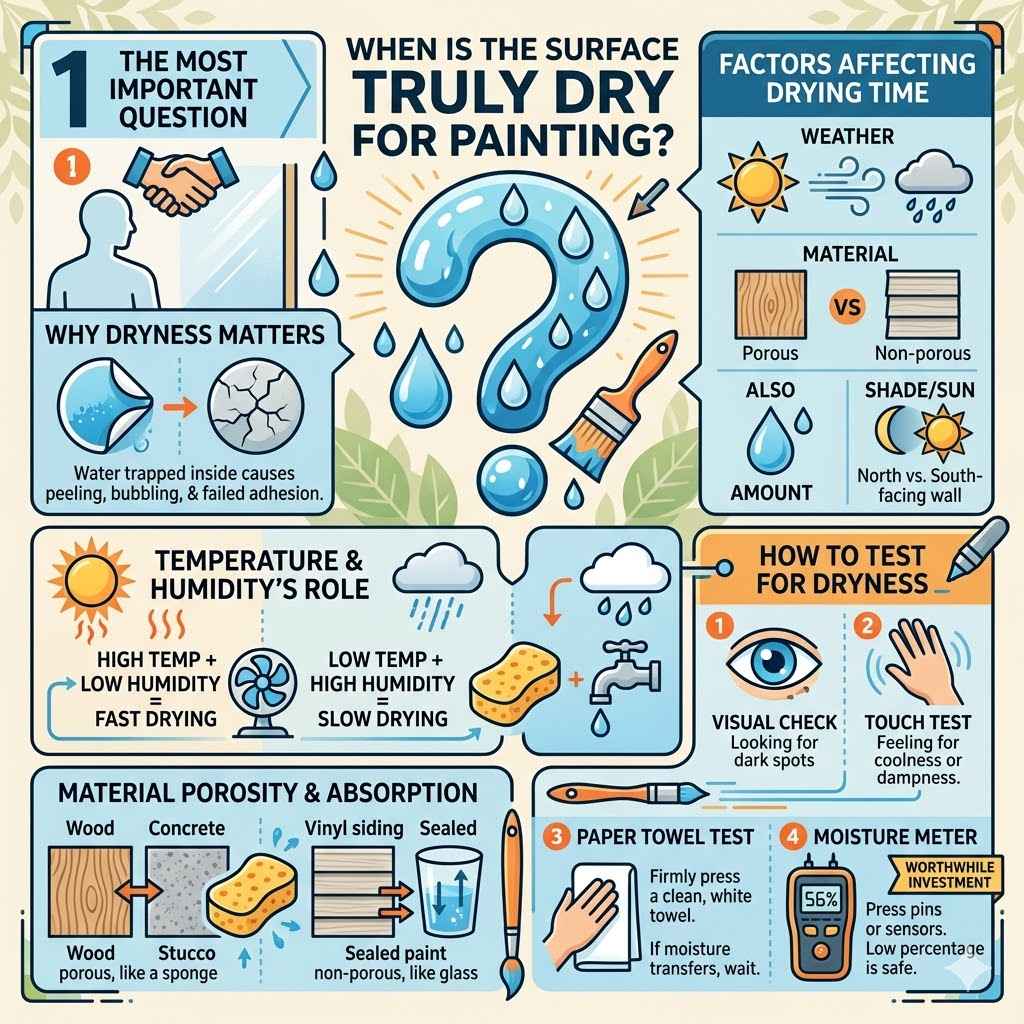
This is the absolute most important question to answer before you even think about picking up a paintbrush. Pressure washing uses a lot of water, and if that water is still trapped in or on the surface, it can cause all sorts of problems for your new paint job. Think of it like trying to stick a sticker to a wet surface; it just won’t hold well.
We need to make sure the surface is completely dry, not just to the eye but deep down, so the paint has a solid foundation to adhere to. This section will explore the factors that influence drying time and how to tell for sure if your surfaces are ready for paint.
Factors Affecting Drying Time
Several things play a big role in how long it takes for surfaces to dry after pressure washing. The weather is a huge factor. On a hot, sunny, and breezy day, things will dry much faster than on a cool, cloudy, or humid day.
Think about how long it takes for your clothes to dry on a line. The same principles apply here. The type of material you’re washing also matters.
Porous materials, like unsealed wood or concrete, will absorb more water and take longer to dry than smooth, non-porous surfaces like vinyl siding.
The amount of water used during pressure washing is another consideration. If you went heavy on the water, it’s going to take longer for it all to evaporate. Even the angle of the sun and how much shade a particular area gets can change the drying time.
A wall facing south on a sunny day will dry faster than a north-facing wall that stays in the shade for most of the day. Understanding these elements helps you make a better guess about when you can paint.
Temperature And Humidity’s Role
Temperature and humidity are like the ultimate gatekeepers of drying time. High temperatures help water evaporate faster because the water molecules have more energy. Conversely, cold temperatures slow down this process.
Imagine trying to dry a wet towel in a freezer versus a sunny room; it’s a clear difference.
Humidity is the amount of water vapor already in the air. If the air is already full of moisture (high humidity), it can’t accept much more water from your drying surfaces. This significantly prolongs drying.
Think of the air as a sponge. A dry sponge can soak up a lot of water, but a damp sponge can’t hold much more. Therefore, dry, warm, and breezy conditions are ideal for quick drying.
Material Porosity And Absorption
The materials you’re pressure washing have different abilities to soak up water. This is called porosity. Some materials are like sponges, readily absorbing water.
Others are more like a glass, with water just sitting on the surface. Unsealed wood is very porous; it’s like a natural sponge. It will drink up a lot of water and take longer to release it, making it dry slowly.
Concrete and stucco can also be quite porous, especially older or unsealed versions. They hold moisture within their tiny pores. Smooth surfaces like vinyl siding or well-sealed painted surfaces are much less porous.
Water tends to run off them more easily, and they dry much faster. Knowing the material helps you gauge how deeply the water might have penetrated.
How To Test For Dryness
You can’t just guess when a surface is dry. You need to test it. A simple visual check is just the first step.
Look for any dark spots or areas that still look wet. But sometimes, the surface can look dry on the outside while still being damp underneath. This is where a few simple tests come in handy.
They give you a more reliable answer.
One easy way is to touch the surface. Use the back of your hand, as it’s more sensitive to temperature and moisture. If it feels cool or damp at all, it’s not ready.
You can also press a dry paper towel or a piece of clean, white cloth against the surface for a minute. If any moisture transfers to the towel, you need to wait longer for it to dry completely. These tests are quick and give you peace of mind.
The Paper Towel Test Explained
This is a fantastic, low-tech way to check for hidden moisture. Grab a clean, white paper towel. Press it firmly against various spots on the surface you’ve cleaned.
Hold it there for about a minute. Then, pull the towel away and examine it closely.
If you see any dampness, discoloration, or marks on the paper towel, the surface is not dry enough. This is especially true for porous materials where water might be drawn out. Repeat this test in different areas, particularly in shaded spots or where water might have pooled.
If the paper towel stays perfectly dry, you’re likely good to go. This test is very effective for confirming dryness after pressure washing.
Moisture Meter For Professional Results
For those who want absolute certainty or are dealing with large projects or very important surfaces, a moisture meter is a worthwhile investment. These handheld devices use pins or sensors to measure the moisture content within materials. They give you a precise numerical reading, removing all guesswork.
You simply press the pins into the surface or hold the sensor against it, and the meter displays a percentage. Different materials have different ideal moisture content levels for painting, but generally, you want to see a very low percentage. Many meters come with instructions on what readings are safe for painting.
Using a moisture meter ensures you’re painting on a surface that’s truly ready.
Optimal Waiting Period After Pressure Washing
Now that we know how to check for dryness, let’s talk about the actual time you should wait. While some surfaces might feel dry quickly, giving them a bit of extra time is often the smartest move. This waiting period allows any residual moisture deep within the material to fully evaporate.
Rushing this step can lead to peeling, bubbling, or mold growth later on, undoing all your hard work.
This section will guide you through recommended waiting times for different types of surfaces. It’s not just about surface dry; it’s about the whole structure being ready to accept paint. We’ll look at common materials and give you clear timelines to follow for the best results.
General Drying Times For Common Surfaces
For many common exterior surfaces like vinyl siding, aluminum, or properly sealed wood, if the weather is good (warm, sunny, breezy), they might be ready for paint within 24 to 48 hours. This is a good general guideline. The key is that they feel and test completely dry.
However, surfaces like unsealed wood, stucco, or brick often require more time. These materials can absorb a significant amount of water. It’s not unusual for them to need 48 to 72 hours, and sometimes even longer, especially if humidity levels are high or there isn’t much direct sunlight.
Patience here is crucial for a durable finish.
Wood Surfaces
Wood is a tricky material because it’s porous and can absorb a lot of water. If you’ve pressure washed unsealed wood, you absolutely need to let it dry thoroughly. This can easily take 48 to 72 hours, and if it’s humid or not getting direct sun, it could be even longer.
Even sealed wood can hold moisture after a good washing.
The grain of the wood can hold water. If you paint too soon, that trapped moisture will try to escape, pushing the paint away. This causes peeling and blistering.
Always use your paper towel test or a moisture meter on wood to be sure. Allow for at least two full days of good drying weather, and if in doubt, wait an extra day.
Masonry Surfaces Brick Stucco And Concrete
Brick, stucco, and concrete are all porous materials that behave much like wood when it comes to drying after pressure washing. They soak up water, and it takes time for that water to evaporate from deep within the pores. For these surfaces, a minimum of 48 to 72 hours of dry weather is typically recommended.
In some cases, especially with older concrete or dense brick, it could take even longer. If the surface feels cool to the touch or if there’s any hint of dampness, wait. Painting over damp masonry can lead to efflorescence (white powdery deposits), paint delamination, and mold or mildew growth.
Always test for dryness thoroughly.
Vinyl Siding And Other Plastics
Vinyl siding, aluminum siding, and other similar plastic exterior materials generally dry much faster than wood or masonry. They are non-porous, so water sits on the surface and evaporates quickly. If the weather is warm and breezy, you might be able to paint these surfaces as soon as 24 hours after pressure washing.
However, it’s still a good idea to do a quick visual check and perhaps a touch test. Make sure there are no water streaks or lingering damp spots, especially in crevices or around seams. For these materials, the primary concern is ensuring they are clean and free of any remaining dirt or mildew that the washing might have loosened.
Once dry and clean, they are usually ready fairly quickly.
The Importance Of Weather Conditions
We’ve touched on this, but it’s worth emphasizing. The weather plays a massive role in how long your surfaces take to dry. Ideal drying conditions are warm temperatures, low humidity, and a gentle breeze.
These elements work together to pull moisture out of materials and into the air.
If you’re in a rush and the weather is cool, damp, or still, you’ll need to wait significantly longer than the general guidelines suggest. Trying to paint when conditions aren’t favorable is a recipe for paint failure. It’s better to delay your painting project for a few days to wait for better weather than to have to repaint sooner than you’d like.
Sunlight’s Role In Drying
Sunlight is a powerful drying agent. Direct sunlight heats surfaces, which in turn speeds up the evaporation of water. A wall that gets full sun all day will dry much faster than a wall that remains in the shade.
This is why north-facing walls often take longer to dry than south-facing ones.
When planning your painting, consider how much sun each area receives. If you’re pressure washing a whole house, you might find that the sunny sides are ready to paint a day before the shaded sides. You can sometimes strategically use fans to help dry shaded areas faster, but direct sunlight is the most natural and effective drying method.
Wind And Airflow For Faster Drying
Wind is just as important as sunlight for drying. A gentle breeze creates airflow across the surface, carrying away the moisture that has evaporated. Think of it like fanning yourself when you’re hot; the air movement helps you cool down by removing heat and moisture.
The same principle applies to surfaces.
Even on a warm day, if there’s no wind, drying will be slower. This is why it’s often recommended to have some airflow around your house when it’s drying. Opening windows, or if possible, using fans strategically can help.
However, be careful not to use fans that blow directly on wet paint later on, as this can cause issues with the finish. For drying after washing, airflow is your friend.
Preparing For Painting After Washing
Once you’ve confirmed that your surfaces are completely dry, the job isn’t quite finished before you can paint. There are a couple of final checks and preparations that ensure your paint adheres properly and looks its best. These steps are simple but vital for a long-lasting, beautiful finish.
Skipping them can lead to problems down the road, even if you waited the correct amount of time for drying.
This section will cover what to do right before you start painting. We’ll look at cleaning up any residue, making minor repairs, and applying a primer if needed. These small efforts will make a big difference in the quality of your final paint job.
Final Cleaning And Inspection
Even after pressure washing, there might be a fine layer of dust or loosened debris left on the surface. Before painting, give the surfaces a quick once-over. You can use a soft brush or a dry cloth to gently wipe away any loose particles.
This ensures a truly clean surface for the paint to grip.
This is also the perfect time for a final inspection. Look for any areas you might have missed during the pressure washing, or any small damages that might have appeared. Check for any mildew spots that didn’t fully come off.
Addressing these now, before painting, will prevent them from showing through your new paint job or causing issues later.
Checking For Residue
Sometimes, pressure washing can leave behind a fine film, especially if you used cleaning solutions. This film can prevent paint from adhering properly. A simple way to check is to wipe a clean, dry cloth across the surface.
If any grime or residue comes off on the cloth, you may need to do a light rinse with plain water and allow it to dry again. This is a critical step for ensuring a strong bond between the paint and the surface.
Minor Repairs And Surface Prep
While you’re doing your final inspection, look for any small cracks, holes, or damaged areas. These should be repaired before painting. Small cracks can be filled with caulk or wood filler, depending on the material.
Loose paint chips should be scraped away. If you find any stubborn mildew spots that pressure washing didn’t remove, you might need a specialized mildew cleaner.
Making these minor repairs ensures that your paint job will be smooth and even. It also protects the underlying material from further damage. Properly prepared surfaces are key to a professional-looking and durable paint finish.
Don’t skip these small but important steps.
Priming For The Best Adhesion
Primer is like a foundation for your paint. It helps the paint stick better, covers stains, and can even help create a more uniform color, especially if you’re making a big color change. While not always strictly necessary, especially if you’re painting over a similar color with a high-quality paint, priming after pressure washing can be highly beneficial.
Primer seals the surface and provides a uniform base for your topcoat. It’s particularly important for porous surfaces that have been washed, as it can help lock down any remaining dust and provide a better grip for the paint. If you have any doubts about adhesion or are painting over a dark color with a light one, using a primer is a smart choice.
When Is Primer Necessary
Primer is especially necessary when painting over raw or unpainted wood, bare metal, or surfaces with stains that might bleed through paint. It is also highly recommended when you are switching from a dark color to a much lighter color, as it can help the new lighter paint cover more effectively in fewer coats. If your pressure washing revealed any bare spots or significantly changed the texture of the surface, primer is a good idea.
Even on surfaces that appear to be in good shape, using a quality exterior primer can enhance the durability and longevity of your paint job. It creates a stable surface that the paint can adhere to, reducing the chances of peeling or chipping in the future. Always check the paint manufacturer’s recommendations; they often suggest specific primers for their products.
Types Of Exterior Primers
There are several types of exterior primers available, each suited for different situations. Latex-based primers are common for general use on most exterior surfaces like wood, stucco, and previously painted surfaces. They are water-based, easy to clean up, and dry relatively quickly.
Oil-based primers are known for their excellent adhesion and ability to block stains. They are particularly good for covering knots in wood, water stains, or chalky surfaces. However, they have a stronger odor and require mineral spirits for cleanup.
Some specialty primers are designed for specific issues, like mildew resistance or adhesion to challenging surfaces.
Painting After Pressure Washing A Summary Of Best Practices
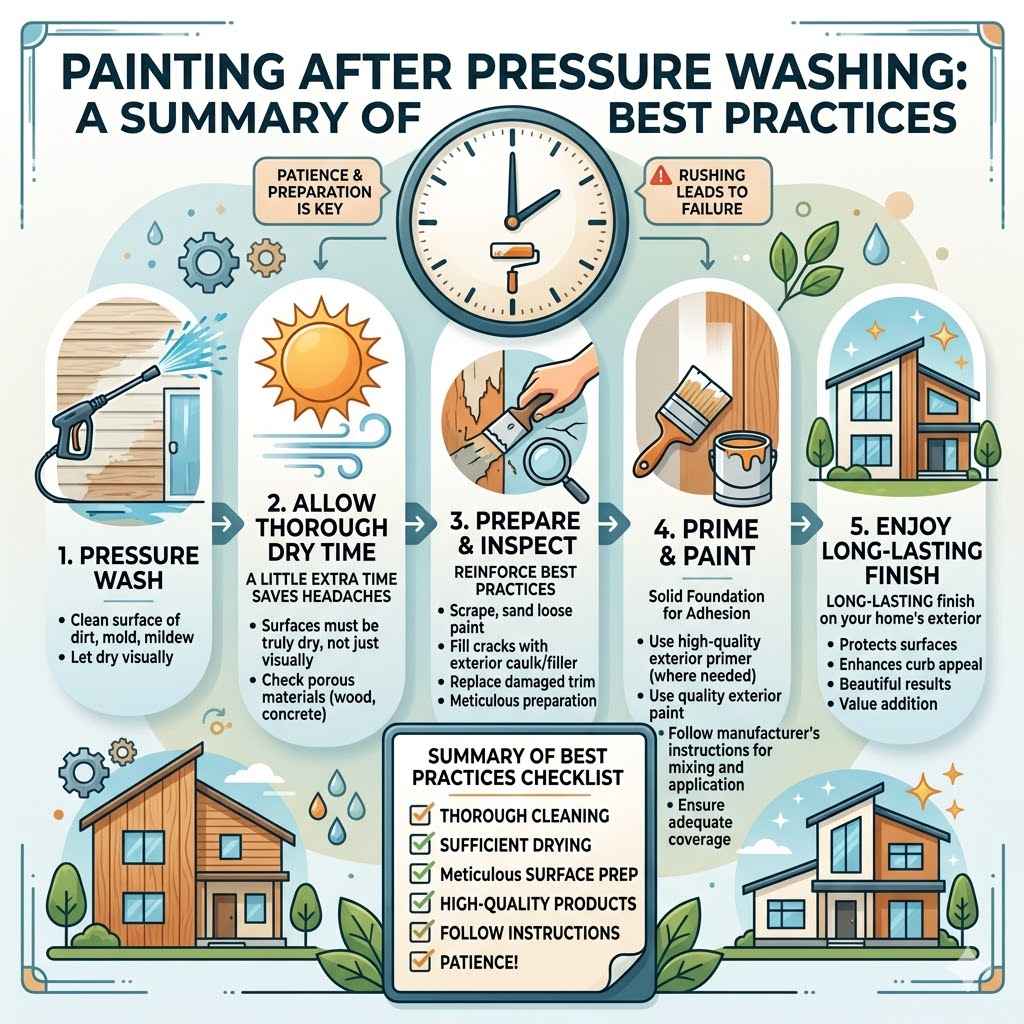
So, we’ve covered the important steps and considerations when it comes to painting after pressure washing. The key takeaway is patience and proper preparation. Rushing the process is the most common mistake homeowners make, leading to premature paint failure.
By following the guidelines we’ve discussed, you can ensure a beautiful and long-lasting paint finish on your home’s exterior.
This final section will briefly recap the most critical points. It’s about ensuring your surfaces are not just visually dry but truly ready to accept paint. We’ll reinforce the best practices so you can feel confident tackling your next project.
Remember, a little extra time spent on preparation saves you a lot of headaches and money in the long run.
Key Takeaways For A Successful Paint Job
The most crucial factor is ensuring surfaces are completely dry. This means waiting at least 24-48 hours for non-porous materials in good weather, and 48-72 hours or more for porous materials like wood, brick, or stucco, especially in less-than-ideal weather conditions. Always test for dryness using the paper towel method or a moisture meter.
Inspect the surfaces thoroughly for any remaining dirt, debris, or damage. Make necessary repairs. Consider using an exterior primer, especially for porous surfaces or when making significant color changes, to ensure the best adhesion and coverage.
Following these steps will lead to a professional-looking and durable paint job that stands the test of time.
Sample Scenario 1 A Siding Project
Imagine you’ve just pressure washed your house’s vinyl siding on a sunny Tuesday morning. The weather forecast for Wednesday and Thursday is warm and breezy. Based on our recommendations, you can likely start painting by Friday morning.
You’ll do a quick wipe-down on Thursday evening to ensure no dust has settled, and if it still looks and feels perfectly dry, you’re ready to go.
This timeline allows the siding to dry thoroughly, with the help of sunshine and breeze. You’ve avoided the temptation to paint too soon, ensuring the new paint will adhere well to the clean, dry surface. This proactive approach prevents common issues like peeling paint that can occur if painted too soon after washing.
Sample Scenario 2 A Wooden Deck Project
Now, let’s consider your wooden deck. You pressure washed it on a Saturday. The weekend forecast is overcast and humid, with a chance of light rain on Sunday.
It’s Monday, and the deck looks dry to the touch, but the humidity is still high. It might feel dry, but the wood could still hold moisture deep within its grain.
For this wooden deck, it’s best to wait until at least Wednesday or Thursday, assuming the weather improves with more sun and less humidity. Even then, perform the paper towel test in several spots. If any dampness appears, extend the drying time further.
Painting wet or damp wood will lead to premature failure of the stain or paint, requiring re-doing the work sooner.
Frequently Asked Questions
Question: How long does it take for wood to dry after pressure washing
Answer: Wood can take 48 to 72 hours or even longer to dry completely after pressure washing, especially if it is unsealed, the weather is humid, or it is not getting direct sunlight. Always test for dryness with a paper towel or moisture meter.
Question: Can I paint my house the same day I pressure wash it
Answer: Generally, no. Most exterior surfaces need at least 24 to 48 hours to dry thoroughly after pressure washing before painting. Porous materials like wood or masonry require even longer.
Painting too soon can cause paint failure.
Question: What happens if you paint over damp surfaces
Answer: Painting over damp surfaces can lead to serious problems like paint peeling, bubbling, cracking, mold growth, and mildew. Moisture trapped beneath the paint will try to escape, compromising the paint’s adhesion and integrity.
Question: Should I use a primer after pressure washing
Answer: While not always mandatory, using a primer after pressure washing is highly recommended, especially for porous surfaces, to ensure the best paint adhesion and a durable finish. It also helps with stain blocking and uniform color.
Question: How can I tell if my walls are dry enough to paint
Answer: Visually inspect for wet spots. Touch the surface with the back of your hand; it should feel dry and not cool. A paper towel pressed against the surface for a minute should remain completely dry.
For absolute certainty, use a moisture meter.
Summary
When asking how long after pressure washing can you paint, remember that thorough drying is key. Wait 24-48 hours for siding and 48-72+ hours for wood or masonry, testing dryness always. Ensure surfaces are clean and consider primer for the best results.
Patience ensures a lasting, beautiful paint job.