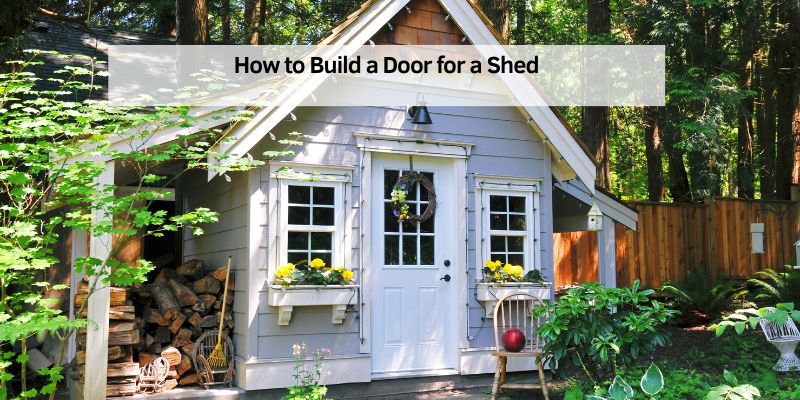
How to Build a Door for a Shed
Hey there! If you’re reading this, you’re probably looking to add a sturdy, good-looking door to your shed. I’ve been there—standing in my backyard, staring at my shed, wondering how to make it secure and functional without breaking the bank. Building a shed door is one of those projects that feels daunting at first, but trust me, it’s totally doable. Whether you’re a seasoned DIYer or just starting out with your toolbox, I’m going to walk you through every step of the process.
I’ve built a few shed doors myself, and I’ve learned what works, what doesn’t, and how to make it look great. So, grab a cup of coffee, and let’s dive into how to build a door for your shed that’s strong, practical, and maybe even a little stylish.
Why Build Your Own Shed Door?
I love the satisfaction of building something with my own hands, and a shed door is no exception. When you build your own, you get to customize it to fit your shed perfectly. Plus, it’s often cheaper than buying a pre-made door, and you can make it as simple or fancy as you want. A custom-built door also lets you match your shed’s style, whether it’s a rustic wooden shed or a sleek modern one. And let’s be honest—there’s something pretty awesome about saying, “Yeah, I built that!” when someone compliments your shed.
Another reason to build your own door is durability. Store-bought doors can sometimes be flimsy, especially for outdoor sheds exposed to rain, wind, and sun. By building your own, you control the materials and construction, ensuring it’s tough enough to last for years. I’ve also found that building my own door gives me a chance to add personal touches, like unique hardware or a custom paint color, that make my shed stand out.
Tools and Materials You’ll Need
Before we get started, let’s talk about what you’ll need. I’ve made the mistake of diving into a project without gathering everything first, and it’s a hassle to stop midway for a trip to the hardware store. Here’s a rundown of the tools and materials I use for a basic shed door. Don’t worry if you don’t have every tool—some can be rented or substituted.
| Item | Purpose |
|---|---|
| Tape Measure | To measure the door frame and materials accurately. |
| Circular Saw or Hand Saw | For cutting wood to the right size. |
| Drill and Drill Bits | For making holes for screws and hardware. |
| Screwdriver | To secure screws tightly. |
| Level | To ensure the door is plumb and even. |
| Carpenter’s Square | To check that corners are square for a proper fit. |
| Clamps | To hold wood pieces together while assembling. |
| Sandpaper or Sander | To smooth rough edges for a polished look. |
| Lumber (2x4s, Plywood) | For the door frame and surface (details below). |
| Exterior-Grade Screws | To hold everything together securely. |
| Hinges (Heavy-Duty) | To attach the door to the shed. |
| Latch or Lock | For securing the door. |
| Weatherproofing Sealant | To protect the door from moisture. |
| Paint or Stain | To finish and protect the door. |
For materials, I usually go with pressure-treated 2x4s for the frame because they resist rot and insects. For the door’s surface, exterior-grade plywood or tongue-and-groove boards work well. I’ve used both, and plywood is easier for beginners, while tongue-and-groove gives a classic look. You’ll also need heavy-duty hinges—three is ideal for a standard shed door—and a latch or lock that suits your needs. If you live in a rainy area like I do, don’t skip the weatherproofing sealant. It’s a lifesaver for keeping your door in good shape.
Measuring and Planning Your Door
The first step is measuring your shed’s door opening. I can’t stress this enough: measure twice, cut once. I learned this the hard way when I cut a piece of wood too short and had to start over. Use your tape measure to get the height and width of the door frame. Standard shed doors are about 36 inches wide and 72 inches tall, but yours might be different, especially if your shed is custom-built.
Subtract about 1/4 inch from both the width and height to allow for clearance. This gap ensures the door swings smoothly without scraping the frame. Also, check that your door opening is square using a carpenter’s square. If it’s not, you might need to adjust your measurements or shim the frame later. I like to sketch a quick plan on paper, noting the dimensions and where the hinges and latch will go. It helps me stay organized and visualize the final product.
Building the Door Frame
Now, let’s get to the fun part—building the frame. I usually start with 2x4s because they’re sturdy and easy to work with. Cut two 2x4s to the height of your door (minus that 1/4-inch clearance) for the vertical sides, or stiles. Then, cut three 2x4s for the top, bottom, and middle rails. The top and bottom rails should be the width of your door minus 1/4 inch, minus the width of the two stiles (since they’ll overlap). For a 36-inch-wide door, the rails are typically around 29 inches long, but double-check your math.
Lay the pieces out on a flat surface in a rectangle, with the middle rail positioned about halfway up for extra support. I use clamps to hold everything in place while I check that the corners are square with my carpenter’s square. Once everything looks good, I secure the frame with exterior-grade screws. I pre-drill holes to prevent the wood from splitting, especially with pressure-treated lumber. Two screws per joint usually do the trick. If you want extra strength, you can add diagonal bracing between the top and bottom rails, forming a “Z” shape. I’ve done this for larger doors, and it really helps prevent sagging.
Adding the Door Surface
With the frame done, it’s time to add the surface. I’ve used plywood for most of my shed doors because it’s affordable and easy to cut. Choose exterior-grade plywood that’s at least 1/2-inch thick for durability. Measure and cut the plywood to match the frame’s dimensions, then lay it over the frame. I like to use clamps to hold it in place while I screw it down. Use exterior-grade screws every 6-8 inches along the edges and across the middle rail for a solid connection.
If you’re going for a fancier look, tongue-and-groove boards are a great choice. I built a shed door with these once, and it gave the shed a charming, rustic vibe. Cut the boards to the height of the frame, then fit them tightly together across the frame. Secure them with screws or construction adhesive. If you choose this option, make sure the boards are straight and flush to avoid gaps. Whichever material you use, sand the surface lightly to remove rough spots. It makes painting or staining much easier later.
Installing Hinges and Hardware
Now that your door is taking shape, it’s time to add the hinges. I use three heavy-duty, exterior-grade hinges to ensure the door stays secure and swings smoothly. Place one hinge about 6 inches from the top, one 6 inches from the bottom, and one in the middle. Mark the hinge locations on the door and the shed frame, then pre-drill holes to avoid splitting the wood. I’ve found that screwing the hinges to the door first, then attaching the door to the shed, is easier than doing it the other way around.
Once the hinges are on, hang the door temporarily to test the fit. Open and close it a few times to make sure it swings freely without sticking. If it’s tight, you might need to sand or plane the edges slightly. I had to do this once when my door was rubbing against the frame, and a little sanding fixed it right up. After the hinges are set, install your latch or lock. I prefer a simple slide bolt for basic sheds, but if you’re storing valuable tools, consider a deadbolt for extra security. Follow the manufacturer’s instructions for your specific hardware, and make sure everything is aligned so the door locks smoothly.
Weatherproofing and Finishing
If you live somewhere with harsh weather like I do, weatherproofing is a must. I’ve seen untreated shed doors warp and rot within a couple of years, and it’s such a shame when that happens. Start by applying a weatherproof sealant to all surfaces, especially the edges where water can seep in. I use a brush-on sealant because it’s easy to apply and gets into all the nooks and crannies. Let it dry completely before moving on.
Next, decide how you want to finish the door. I usually paint my shed doors to match the shed itself, but staining is a great option if you want to show off the wood’s grain. For painting, use an exterior-grade paint and apply at least two coats for good coverage. I roll on the paint with a small roller for a smooth finish, then use a brush for any tight spots. If you’re staining, apply the stain with a brush or rag, following the grain, and finish with a clear exterior varnish to protect it. Let everything dry thoroughly—usually 24-48 hours—before hanging the door permanently.
Hanging the Door Permanently
Now it’s time to hang the door for good. With the hinges already attached to the door, lift it into place and align the hinges with the shed frame. I usually ask a friend to hold the door steady while I screw the hinges into the frame. Use a level to make sure the door is plumb, and shim the frame if needed to get it just right. Once the hinges are secure, test the door again to ensure it opens and closes smoothly. If it’s sticking or sagging, check the hinges for loose screws or adjust the shims.
After the door is hung, install any additional weatherstripping around the edges to keep out drafts and moisture. I’ve found that adhesive-backed foam weatherstripping is easy to apply and works well for most sheds. Just cut it to size and press it into place along the frame. This step makes a big difference in keeping your shed’s interior dry and comfortable.
Adding Personal Touches
One of my favorite parts of building a shed door is adding personal touches. You can make your door unique with decorative hardware, like wrought-iron hinges or a vintage-style latch. I once added a small window to a shed door using a piece of plexiglass—it let in light and made the shed feel less like a dark cave. If you’re handy with a router, you could carve a simple design into the plywood for a custom look. Just make sure any additions are weatherproof and won’t compromise the door’s strength.
If you’re feeling creative, paint the door a bold color or add a stencil design. I painted one of my shed doors a bright red to match my garden tools, and it’s become a fun focal point in my backyard. Whatever you choose, make sure it reflects your style and complements your shed’s overall look.
Maintaining Your Shed Door
Once your door is built and installed, a little maintenance goes a long way. I check my shed door every spring and fall to make sure it’s holding up. Look for signs of wear, like loose screws or peeling paint, and fix them right away. Reapply sealant or paint every couple of years to keep the wood protected. If you notice the door sticking or sagging, check the hinges and frame for alignment issues. A quick adjustment can prevent bigger problems down the road.
I also recommend keeping the area around the door clear of debris, like leaves or dirt, which can trap moisture and cause rot. If you live in a snowy area, shovel snow away from the door to prevent water damage. With a little care, your shed door will stay strong and functional for years.
Conclusion
Building a shed door is one of those projects that feels so rewarding when it’s done. I remember the first time I built one—I was nervous about getting the measurements right and making it sturdy, but seeing it swing open perfectly made it all worth it. By following these steps, you can create a door that’s not only functional but also adds character to your shed. From choosing the right materials to adding your personal flair, every part of this process is a chance to make something you’re proud of. So, grab your tools, take your time, and enjoy the process. Your shed deserves a door that’s as awesome as the stuff you’re storing inside!
Frequently Asked Questions
What’s the best wood for a shed door?
I like using pressure-treated 2x4s for the frame because they resist rot and bugs. For the surface, exterior-grade plywood is affordable and durable, but tongue-and-groove boards give a nicer look if you want something fancier. Just make sure whatever you choose is rated for outdoor use.
How long does it take to build a shed door?
It depends on your skill level, but for me, it takes about 4-6 hours from start to finish, including measuring, cutting, assembling, and finishing. If you’re new to DIY, give yourself a full day to take it slow and get it right.
Do I need special tools to build a shed door?
Not really! A basic set of tools like a saw, drill, screwdriver, and level will do the job. If you don’t have a circular saw, a hand saw works fine—it just takes a bit longer. Clamps and a carpenter’s square are helpful but not mandatory.
How do I make sure my shed door is secure?
Use heavy-duty hinges and a strong latch or deadbolt. I also recommend checking the door frame to make sure it’s solid. If you’re storing valuable items, consider a lock with a key for extra peace of mind.
Can I add a window to my shed door?
Yes, and it’s a great way to let in light! I’ve used plexiglass for a small window because it’s lightweight and shatter-resistant. Just cut a hole in the plywood, secure the plexiglass with screws or adhesive, and seal the edges to keep water out.