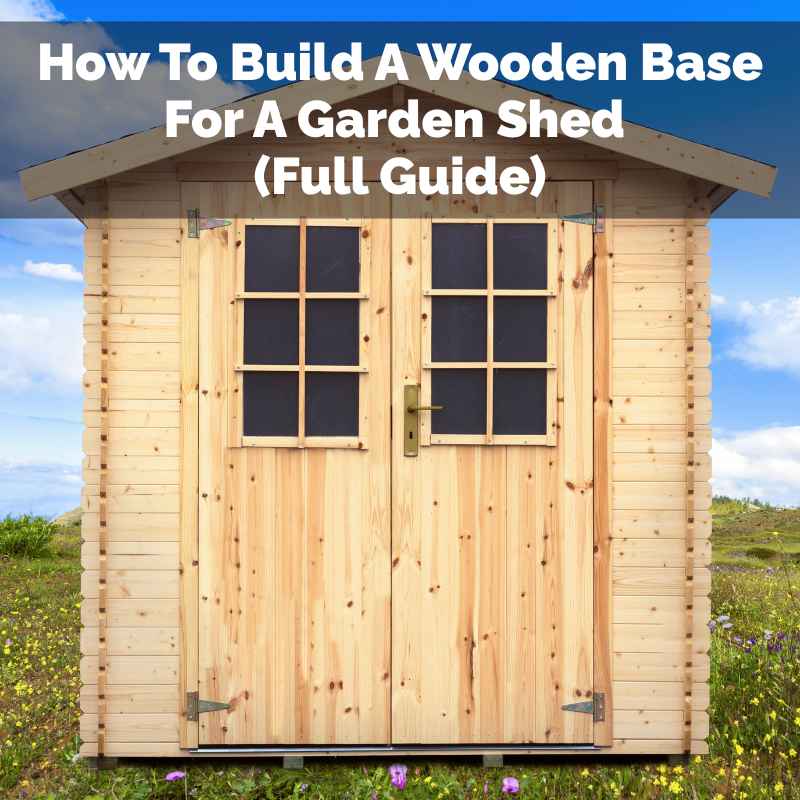
How To Build A Wooden Base For A Garden Shed (Full Guide)
Building a stable wooden base for your garden shed is key for its longevity. This guide details the process, from site preparation and material selection to step-by-step construction. Following these instructions ensures a solid foundation that protects your shed from ground moisture and shifting.
Why a Wooden Base is a Great Choice
A shed base keeps the shed off the damp ground. This is super important. Ground moisture can make wood rot.
It can also invite insects. A good base makes your shed last much longer. It also stops the shed from sinking into soft soil.
This keeps it level and looking good.
Wood is a popular material for shed bases. It’s relatively easy to work with. You can cut it and shape it with basic tools.
It’s also strong enough to hold up a shed. Plus, it can be more affordable than concrete. Many DIYers find it a good balance of cost and effort.
It provides a solid platform for your shed.
Other options exist, like concrete slabs. Concrete is very strong. But it’s also more work and cost.
You might need to hire help for that. Gravel bases are simpler but may not be as stable. For many people, a wooden base hits the sweet spot.
It offers good support without being too complicated.
Planning Your Shed Base
Before you grab your tools, you need a plan. First, decide where your shed will go. Think about sun and shade.
Also, consider drainage. You don’t want water pooling around your shed. Check local rules too.
Some areas have rules about shed placement.
Measure the shed footprint. Your base needs to be at least this big. It’s often good to make it a little bigger.
This gives you some wiggle room. It also helps protect the base from rain. Think about the shed’s weight.
A larger shed needs a stronger base.
What kind of ground do you have? Is it sandy, clay, or rocky? This affects how you prepare the site.
You want a level spot. You might need to dig down a bit. Or add some fill dirt.
Good planning saves a lot of work later.
Choosing Your Materials
The type of wood you use matters. You want wood that can stand up to the weather. Look for pressure-treated lumber.
This wood is treated to resist rot and insects. It’s a must for anything touching the ground. Common choices are pressure-treated pine or fir.
For the main frame, you’ll likely use 2×6 or 2×8 joists. Joists are the beams that form the floor structure. The size depends on the shed’s size and weight.
For a small shed, 2×6 might be fine. For a bigger one, 2×8 offers more strength.
You’ll also need fasteners. Use galvanized screws or nails. These won’t rust.
Screws hold better than nails. Deck screws are a good choice. Make sure they are long enough to go through both pieces of wood.
You might also need concrete deck blocks or piers. These lift the wood base off the ground. This adds extra protection from moisture.
Essential Tools You’ll Need
Measuring Tape: For accurate cuts and placement.
Level: Crucial for ensuring your base is perfectly flat.
Saw: A circular saw or miter saw makes cutting lumber easy.
Drill/Driver: For sinking screws quickly and securely.
Shovel and Spade: For clearing and leveling the ground.
Hammer: For any nail work, though screws are often better.
Safety Glasses: Always protect your eyes when working with tools.
Work Gloves: To protect your hands.
Site Preparation: The Foundation of Your Foundation
This step is super important. It ensures your base is stable. Start by marking out the area for your shed.
Use stakes and string. Make sure the corners are square. You can check this by measuring the diagonals.
They should be equal.
Next, clear the area. Remove any grass, weeds, or debris. You want to get down to bare soil.
Digging down a few inches is a good idea. This creates a slightly sunken area. It helps keep the base from moving.
Level the ground. Use your shovel and level. This takes time but is worth it.
A level base means a level shed. If the ground is very soft, you might need to add a layer of gravel. This improves drainage and stability.
A layer of landscape fabric underneath the gravel stops weeds.
Consider using concrete deck blocks or piers. You’ll place these at the corners and along the edges. Dig holes for them.
Make sure they are at the correct height. They should support the wooden frame. Use your level to ensure each block is perfectly level with the others.
This is the most critical part of site prep.
Building the Frame: Step-by-Step
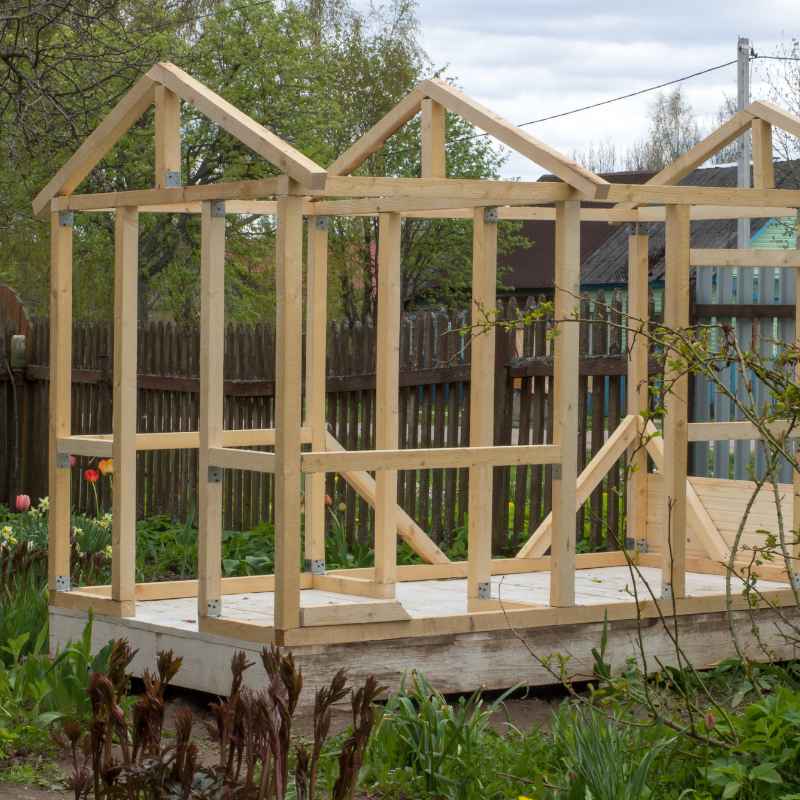
Let’s get building! You’ll start with the outer frame. Cut your pressure-treated lumber to size.
For a simple rectangular shed, you’ll have two long pieces and two shorter end pieces.
Lay these pieces on the prepared ground or on your deck blocks. If using blocks, ensure the lumber rests on them. Use your level to check that everything is flat.
Attach the corners. You can do this by screwing them together. A strong joint is vital.
Inside this outer frame, you’ll add joists. These run across the shorter dimension. They should be spaced evenly.
A common spacing is 16 inches on center. This means the center of one joist is 16 inches from the center of the next. Use joist hangers for strong connections to the outer frame.
Cut the joists to fit snugly. Screw them into place. Make sure they are flush with the top of the outer frame.
Double-check that everything is level. Measure again. You don’t want any sagging in the floor.
Contrast: Wood Base vs. Concrete Slab
Wood Base:
- Pros: Easier DIY, less expensive upfront, good for slightly uneven ground, faster to build.
- Cons: Requires pressure-treated wood, needs regular checks for rot, can be less durable over decades than concrete.
Concrete Slab:
- Pros: Very durable, strong, long-lasting, great for heavy sheds, pest resistant.
- Cons: Expensive, requires professional help or significant DIY effort, less forgiving for ground shifts.
Adding the Floorboards
Once your frame is solid, it’s time for the floor. You’ll use plywood or deck boards for this. For most sheds, 3/4-inch exterior-grade plywood is a good choice.
It’s strong and creates a smooth surface.
Cut the plywood sheets to fit. Lay them over the joists. Stagger the seams if you’re using multiple sheets.
This adds strength. Screw the plywood down securely. Use plenty of screws.
Space them about every 6 inches along the joists.
Make sure the edges of the plywood sit fully on the joists. If they hang over, they can break. This floor will be the floor of your shed.
It needs to be very sturdy. Think about how much weight it will hold. Tools, stored items, and people walking on it.
If you choose deck boards, lay them across the joists. Leave a small gap between boards. This allows for expansion and drainage.
Screw them down securely as well. Make sure the ends of the boards land on a joist. This is crucial for support.
Protecting Your Wooden Base
Even with pressure-treated wood, extra protection is smart. Your base is exposed to the elements. Rain, snow, and sun can take their toll.
Consider adding a layer of roofing felt or heavy-duty plastic sheeting. Lay this over the joists before you put down the plywood or deck boards. This acts as a moisture barrier.
It adds another layer of defense against water.
Once the shed is built, try to keep the area around the base clear. Don’t let leaves or debris pile up. This traps moisture.
Trim back bushes or plants that might touch the wood. Good airflow is your friend.
You can also apply a wood sealant or stain to the visible parts of the base. Do this after construction. This adds UV protection and water repellency.
Reapply it every few years. This simple step can significantly extend the life of your wooden base.
Observational Flow: Building the Base
Step 1: Site selection and marking.
Step 2: Clear and level the ground.
Step 3: Place support blocks (if used).
Step 4: Build the outer frame.
Step 5: Install interior joists.
Step 6: Add moisture barrier (optional but recommended).
Step 7: Attach floorboards (plywood or deck boards).
Step 8: Final checks for level and stability.
Real-World Context: Shed Base Scenarios
Think about where you live. If you get a lot of rain, drainage is key. Ensure your site slopes away from the shed.
This prevents water from collecting under the base. In areas with heavy snow, make sure the base is strong enough. It needs to support the weight of snow on the shed roof.
What are you storing in the shed? If it’s heavy items like a riding mower or lots of garden supplies, your base needs to be robust. This might mean using larger lumber, like 2x8s, and closer joist spacing.
Consider the ground type. Clay soil can expand and contract a lot. This can make a base shift.
Using deck blocks or piers helps. They allow the ground to move slightly without affecting the shed as much. Sandy soil drains well but can be less stable.
You might need to compact it well.
Sometimes, you might build a shed base on an existing patio or deck. In these cases, you might not need to do much ground prep. But you still need to ensure the patio or deck itself is level and strong enough to support the shed.
Always check for stability.
What This Means for Your Shed
A well-built wooden base means your shed will stand straight. It won’t lean or sag over time. This is important for the shed’s doors and windows.
They will open and close smoothly. A crooked shed looks bad and doesn’t function well.
Your shed will also last longer. By keeping the structure off the ground, you prevent early rot. This saves you money on repairs and replacements.
It also protects your stored items from dampness and pests.
Think of the base as the shed’s foundation. Just like a house, a strong foundation is critical. A good base gives you peace of mind.
You won’t worry about your shed collapsing or falling apart.
When to Consider a Different Base Type
While wood is great, it’s not always the best. If you plan to store extremely heavy items, like a car or large workshop machinery, a concrete slab is likely better. These loads require more structural integrity.
If your ground is very unstable or prone to extreme shifting, a concrete foundation might offer more long-term stability. This is especially true in areas with significant frost heave.
For very small garden storage boxes or simple shelters, a simpler base might suffice. A few concrete pavers or even just a level spot on gravel might work. But for a proper garden shed, a more robust wooden base is usually recommended.
Quick-Scan Table: Lumber Sizes Explained
| Lumber Size | Typical Use | Notes |
|---|---|---|
| 2×4 | Wall framing, small shed bracing | Lighter duty |
| 2×6 | Shed base joists, floor framing for small to medium sheds | Good all-around strength |
| 2×8 | Shed base joists, floor framing for larger/heavier sheds | Increased strength and support |
| 4×4 | Corner posts, main support beams | Robust structural element |
Always use pressure-treated lumber for ground contact applications.
Quick Fixes & Tips for Your Shed Base
Keep it Clear: Regularly sweep away leaves and debris from around and under the base. This prevents moisture buildup.
Check for Level: Once a year, use your level to check the shed base. If it has shifted, you might need to adjust your support blocks.
Seal Exposed Wood: If any part of the pressure-treated wood looks like it’s drying out or graying, apply a new coat of sealant or stain.
Ventilation: Ensure there’s some airflow under the shed. If plants or soil are packed too tightly against the base, trim them back.
Inspect Fasteners: Look for any screws or nails that might be loosening or rusting. Tighten or replace them as needed.
Myth vs. Reality: Shed Bases
Myth: A shed will be fine on just dirt.
Reality: Placing a shed directly on the ground leads to rot, instability, and pest problems very quickly. A base is essential.
Myth: Pressure-treated wood never rots.
Reality: While highly resistant, it can still rot if constantly submerged or if the treatment wears off. Maintenance is still needed.
Myth: Any level spot is fine for a shed base.
Reality: Drainage is critical. A level spot that collects water will cause problems, no matter how well built the base is.
Frequently Asked Questions About Wooden Shed Bases
Do I need a building permit for a shed base?
It depends on your local regulations. Many areas have rules about the size and height of accessory structures. It’s always best to check with your local building department before you start construction.
Sometimes even the base requires notification.
How much space should I leave around my shed base?
Leave at least a foot of space around the perimeter of your shed. This allows for air circulation. It also makes it easier to perform maintenance and repairs on the base and the shed itself.
More space is better for drainage.
Can I build a wooden shed base directly on concrete pavers?
Yes, you can. Pavers can provide a more stable and level surface than bare ground. Place the pavers on a bed of gravel for drainage.
Then, build your wooden frame on top of the pavers. Ensure the pavers themselves are level.
What is the best wood for a shed base?
Pressure-treated lumber is the best choice for any wood that will be close to or in contact with the ground. Look for lumber rated for ground contact. Common types include pressure-treated pine or fir.
They resist rot and insects.
How often should I check my wooden shed base?
It’s a good idea to inspect your shed base at least once a year. Pay attention after heavy rains or storms. Look for any signs of rot, insect damage, or shifting.
Early detection can prevent bigger problems.
Is a 4×4 post sufficient for corner supports?
For most standard garden sheds, 4×4 posts are sufficient if they are properly set and braced. However, for larger or heavier sheds, or in areas with very unstable soil, you might consider using larger posts like 6×6 or reinforcing the corners.
Conclusion: A Solid Future for Your Shed
Building a proper wooden base for your garden shed is a project that pays off. It ensures stability and extends the life of your shed. Take your time with planning and site preparation.
Use good quality materials. Follow these steps carefully.
You’ll end up with a sturdy platform. Your shed will stand strong for years to come. Enjoy your new, well-supported garden shed!
Sponsored / affiliate links. As an Amazon Associate I earn from qualifying purchases. I may earn additional commission from eligible campaigns.