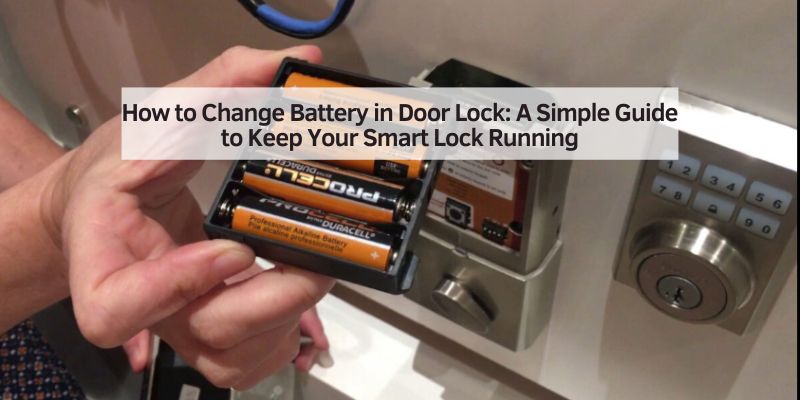
How to Change Battery in Door Lock: A Simple Guide to Keep Your Smart Lock Running
Hey there! If you’ve landed here, you’re probably wondering how to change the battery in your door lock. I totally get it—those smart locks are super convenient, but when the battery starts to fade, it can feel like a mini crisis. Don’t worry, though! I’ve been through this process myself, and I’m here to walk you through it step by step. Whether you’re a tech-savvy homeowner or someone who’s never touched a screwdriver, this guide will make replacing the battery in your keypad or smart door lock a breeze. Let’s dive into everything you need to know to keep your home secure and your lock humming along smoothly.
Smart locks have changed the game for home security. No more fumbling for keys or worrying about losing them. But, like any gadget, they need a little TLC to stay in tip-top shape. The battery is the heart of your smart lock, powering all those cool features like keyless entry, remote access, and even smartphone alerts. When it dies, you might find yourself locked out or stuck using a backup key—if your lock even has one! Knowing how to swap out that battery is a must for any homeowner. I’ve replaced batteries in my own smart locks a few times, and trust me, it’s easier than you think. In this article, I’ll share my tips, tricks, and step-by-step instructions to make the process painless, plus some advice to keep your lock running longer.
Why Changing Your Door Lock Battery Matters
Let’s start with why this is such a big deal. Your smart lock is only as good as its power source. Without a working battery, those fancy features—like unlocking your door with a code or your phone—grind to a halt. I learned this the hard way when my lock started beeping at me one morning. It was the low-battery warning, and I ignored it for a few days. Big mistake! One evening, I came home to a lock that wouldn’t budge. I had to dig out the backup key, which was buried in a drawer somewhere. It was a hassle I could’ve avoided.
A dead battery doesn’t just lock you out; it can also compromise your home’s security. If your lock stops working, you might not be able to secure your door properly. Plus, some smart locks rely on batteries to store access codes. While most modern locks keep codes in memory even when the battery dies, you don’t want to take chances. Regularly checking and replacing the battery ensures your lock stays reliable. Most smart locks use AA or AAA batteries, and they typically last 6 months to a year, depending on how often you use the lock. Heavy use, like multiple unlocks a day, drains batteries faster. My front door lock, for example, gets a lot of action with kids and guests coming and going, so I swap the batteries every 8 months or so.
Signs Your Door Lock Battery Needs Replacing
How do you know it’s time to change the battery? Your lock will usually give you a heads-up. Here are the warning signs I’ve noticed with my own locks:
- Low Battery Alerts: Most smart locks send notifications to your phone through their app. My lock, for instance, sent me a push notification when the battery hit 20%. Some locks also have a blinking LED light or a beeping sound when you enter your code.
- Slow or Unresponsive Lock: If your lock takes forever to respond to your code or app, the battery might be struggling. I noticed my lock was sluggish a few days before it gave me the low-battery warning.
- Frequent Beeping or Flashing: Some locks, like my Yale model, beep or flash a red light when the battery is low. It’s annoying but effective—it definitely got my attention!
- Complete Failure: If your lock stops working entirely, the battery is likely dead. This happened to me once, and I had to use the backup key to get inside.
Pay attention to these signs. Most locks give you weeks of warnings, so you’ve got time to act. Don’t wait until you’re locked out like I did that one time—it’s not fun scrambling for a key in the dark!
Tools You’ll Need to Change the Battery
Before you start, gather a few simple tools. I like to have everything ready so I’m not running around the house mid-process. Here’s what you’ll need:
| Tool | Purpose |
|---|---|
| Screwdriver (Phillips or Flathead) | To remove screws securing the battery cover. Check your lock’s manual for the right type. |
| Replacement Batteries | Usually 4 AA or AAA alkaline batteries, but some locks use 9V or lithium batteries. |
| Soft Cloth | To clean the battery compartment and prevent corrosion. |
| Small Brush (optional) | To clear out dust or debris from the compartment. |
I always keep a set of screwdrivers in my toolbox, and I recommend getting a multi-head screwdriver if you don’t already have one. It’s handy for different lock models. For batteries, stick to high-quality alkaline ones like Duracell or Energizer. I made the mistake of using cheap batteries once, and they only lasted a few months. Also, check your lock’s manual to confirm the battery type—some locks are picky, and using the wrong kind can cause issues.
Step-by-Step Guide to Changing the Battery
Alright, let’s get to the good stuff—how to actually change the battery. I’ve done this a bunch of times, and it’s straightforward once you know the steps. Here’s my tried-and-true process:
Step 1: Check Your Lock’s Manual
Every lock is a little different. My Schlage lock has a different setup than my friend’s August lock. Your lock’s manual will tell you where the battery compartment is and what type of batteries to use. If you’ve lost the manual, check the manufacturer’s website. Most brands like Yale, Schlage, or Kwikset have online guides or videos. I found a PDF manual for my lock in about 5 minutes on the Yale website when I misplaced mine.
Step 2: Locate the Battery Compartment
The battery compartment is usually on the interior side of the door. This makes sense for security—you don’t want someone tampering with it from outside. On my lock, it’s hidden behind a cover plate above the keypad mechanism. Some locks have a sliding cover, while others use screws. If you’re not sure, look for a small panel or a set of screws. My Kwikset lock has two tiny screws holding the cover in place.
Step 3: Remove the Battery Cover
If your lock has screws, grab your screwdriver and carefully remove them. I put the screws in a small bowl so they don’t roll away—trust me, losing those tiny screws is a pain! If it’s a snap-on cover, gently press or slide it to pop it off. Be gentle; you don’t want to crack the plastic. I made that mistake once and had to order a replacement cover online.
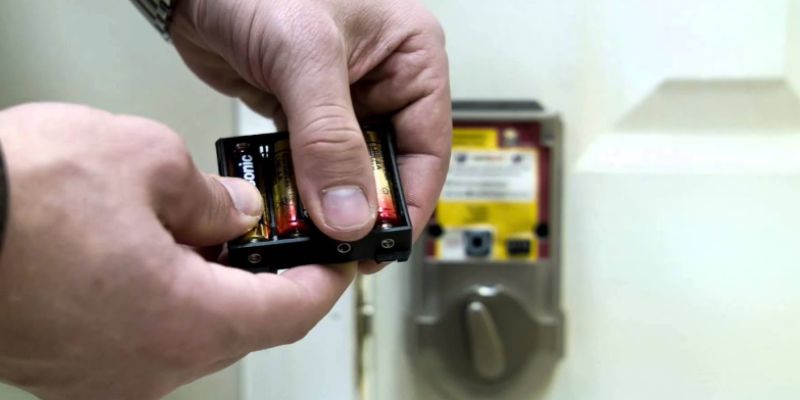
Step 4: Take Out the Old Batteries
Once the cover is off, you’ll see the batteries. Most locks use 4 AA batteries, but some, like certain hotel locks, might use 8 or even a 9V battery. Carefully remove the old batteries. I like to check for any corrosion or gunk in the compartment. If you see any, use a soft cloth or a small brush to clean it out. My lock had a bit of dust buildup once, and cleaning it made a big difference in performance.
Step 5: Insert New Batteries
Now, pop in the new batteries. Pay attention to the positive (+) and negative (-) signs in the compartment. I’ve accidentally put a battery in backward before, and the lock wouldn’t work until I fixed it. The compartment usually has markings to guide you. If your lock uses a battery pack, like some Schlage models, disconnect the old pack and connect the new one. Make sure the batteries are snug and secure.
Step 6: Replace the Cover
Put the cover back on and secure it with the screws or snap it into place. I always double-check that it’s firmly in place—you don’t want it popping off later. Tighten screws gently to avoid stripping them. I learned that lesson after overtightening and having to deal with a wobbly cover.
Step 7: Test the Lock
Here’s the moment of truth! Test your lock by entering your code or using the app. My lock gives a green flash when it’s working properly. If it doesn’t respond, double-check the battery orientation or try a fresh set of batteries. Sometimes, a lock might need a quick reset—check your manual for instructions. I had to reset my lock once after a battery change, and it took all of 2 minutes.
Common Mistakes to Avoid
I’ve made my fair share of mistakes when changing lock batteries, so let me save you some trouble. Here are some pitfalls to watch out for:
- Using the Wrong Batteries: Stick to the recommended type (usually AA or AAA alkaline). I tried using rechargeable batteries once, and my lock didn’t like them at all. It kept losing power faster than expected.
- Mixing Old and New Batteries: Always replace all batteries at once. Mixing old and new ones can cause uneven power drain and shorten battery life. I learned this after wondering why my lock died so quickly.
- Forcing the Cover Off: If the cover won’t budge, check for hidden screws or clips. I almost broke my lock’s cover by prying too hard before realizing there was a tiny screw I missed.
- Ignoring Corrosion: If you see rust or corrosion in the battery compartment, clean it gently with a cloth and a bit of rubbing alcohol. I ignored this once, and it caused connection issues.
- Not Testing the Lock: Always test the lock after replacing the batteries. I skipped this step once, assumed everything was fine, and got locked out later that day.
How to Extend Your Smart Lock’s Battery Life
Want to make those batteries last longer? I’ve picked up a few tricks over the years to stretch my lock’s battery life. Here’s what works for me:
- Use High-Quality Batteries: Cheap batteries might save you a buck, but they don’t last. I stick with trusted brands like Duracell or Energizer.
- Reduce Lock Usage: If your lock has an auto-lock feature, adjust the timing to reduce how often it activates. I set mine to lock after 30 seconds instead of 10, which saved some battery.
- Keep It Clean: Dust and moisture can mess with battery contacts. I wipe down my lock’s exterior and clean the battery compartment every few months.
- Check for Firmware Updates: Some locks, like my Yale, get firmware updates through the app that optimize battery usage. I check for updates every few months.
- Avoid Extreme Temperatures: If your lock is exposed to harsh weather, like on an exterior door, it can drain the battery faster. I added a small awning over my front door to protect the lock from direct sun and rain.
By following these tips, I’ve stretched my battery life from 6 months to almost a year. It’s all about small tweaks that add up.
What to Do If Your Lock’s Battery Dies
Sometimes, despite your best efforts, the battery dies before you can replace it. I’ve been there, and it’s not fun. Here’s what to do if you’re locked out:
- Use a Backup Key: Many smart locks, like my Schlage, come with a physical key for emergencies. Keep it in a safe but accessible spot, like your car or with a trusted neighbor.
- Try a Temporary Power Source: Some locks have a 9V battery terminal or a USB-C port for emergency power. I keep a 9V battery in my garage for this exact reason.
- Check the App: If your lock supports remote access, try unlocking it through the app. This worked for me once when I was away from home and my lock’s battery was low.
- Call a Locksmith: If all else fails, a professional locksmith can get you in without damaging the lock. I haven’t had to do this yet, but it’s good to have a local locksmith’s number saved.
To avoid this situation, set a reminder to check your lock’s battery every 6 months. I use my phone’s calendar app to nudge me when it’s time.
Maintenance Tips for Your Smart Lock
Changing the battery is just one part of keeping your smart lock in great shape. Here’s how I maintain mine to ensure it lasts for years:
- Clean the Keypad: Dirt and grime can build up on the keypad, making it less responsive. I use a soft cloth with a mild cleaner to wipe it down every couple of months.
- Lubricate the Lock: If your lock feels stiff, a little lubricant on the bolt can help. I use a graphite-based lubricant, as it’s safe for locks.
- Inspect for Wear: Check the lock for loose screws or signs of damage. I found a loose screw on my lock once, and tightening it fixed a rattling issue.
- Update the App: If your lock connects to a smartphone app, keep it updated. I’ve noticed that app updates often improve connectivity and battery efficiency.
Regular maintenance keeps your lock reliable and saves you from costly repairs. I spend about 10 minutes every few months checking mine, and it’s worth the effort.
Choosing the Right Smart Lock for Easy Battery Replacement
Not all smart locks are created equal when it comes to battery replacement. When I was shopping for my latest lock, I looked for models that made battery changes easy. Here are some things to consider:
- Accessible Battery Compartment: Look for locks with a compartment that’s easy to access without disassembling the whole lock. My Yale lock has a simple slide-off cover, which I love.
- Long Battery Life: Some locks, like the eufy FamiLock S3 Max, boast up to 6 months of battery life with a rechargeable option. I’m considering one for my back door.
- Low-Battery Alerts: Choose a lock with clear warnings, like app notifications or audible beeps. My current lock’s app alerts are a lifesaver.
- Backup Options: Locks with a physical key or emergency power port are ideal. I picked my Schlage lock because it has both.
If you’re in the market for a new smart lock, check reviews for battery life and ease of replacement. It’ll save you headaches down the road.

Conclusion
Changing the battery in your door lock might seem like a small task, but it’s a big deal for keeping your home secure and your smart lock running smoothly. I’ve been through the process enough times to know it’s not as scary as it sounds. With a few tools, a little patience, and the steps I’ve shared, you’ll have your lock powered up in no time. I love the peace of mind that comes with knowing my lock is always ready to protect my home. By staying on top of battery changes and following some simple maintenance tips, you can avoid lockouts and keep your smart lock working like a charm.
So, grab those batteries, check your lock’s manual, and give it a quick refresh. You’ll feel like a home improvement pro when you’re done! And if you run into any issues, don’t stress—just revisit this guide or reach out to your lock’s manufacturer. Here’s to keeping your home safe and your smart lock humming along!
Frequently Asked Questions
How Often Should I Change the Battery in My Smart Lock?
It depends on how much you use the lock. In my experience, most smart locks need a battery change every 6 to 12 months. If you use your lock a lot, like I do with my busy front door, aim for every 6-8 months. Check your lock’s app or manual for specific guidance.
What Type of Batteries Should I Use for My Door Lock?
Always use the batteries recommended by your lock’s manufacturer. Most locks, like mine, use 4 AA or AAA alkaline batteries. Some use 9V or lithium batteries. I stick with high-quality brands like Duracell to avoid leaks or short battery life.
Will My Lock’s Codes Reset When I Change the Battery?
No, most modern smart locks keep your codes in memory even when the battery is removed. I’ve changed my lock’s batteries several times, and the codes stayed intact. If you’re worried, check your manual or test the codes after replacing the battery.
What Should I Do If My Lock Doesn’t Work After a Battery Change?
First, double-check that the batteries are inserted correctly. I made this mistake once, and flipping them around fixed it. If that doesn’t work, try a fresh set of batteries or reset the lock according to the manual. If it’s still acting up, contact the manufacturer or a locksmith.
Can I Use Rechargeable Batteries in My Smart Lock?
Some locks work with rechargeable batteries, but others don’t. I tried them in my lock, and they didn’t last as long as alkaline ones. Check your lock’s manual to see if rechargeables are okay, and make sure they’re the right voltage.
How Can I Tell If My Smart Lock Battery Is Low?
Your lock will usually warn you with a blinking light, a beeping sound, or a notification in the app. My lock started beeping and sent me an app alert when the battery hit 20%. Keep an eye out for slow responses or delays when unlocking, too.