How to Change a Table Saw Blade Step by Step
Unplug the saw, lower the blade, remove the throat plate, loosen the arbor nut in the direction specified by the owner’s manual, swap the blade, and tighten everything before checking for wobble. A blade that is installed wrong can bind, loosen, or cut poorly. This guide covers the standard change process, thread-direction checks, stuck-hardware troubleshooting, and the final safety inspection. [Safety source: OSHA machine-guarding principles; manual-specific steps should always come from the saw’s own instructions.]
What you’ll need


- Safety glasses
- Work gloves
- A well-lit workspace
- The saw-supplied wrench, or the correct socket, Allen wrench, or adjustable wrench for your model
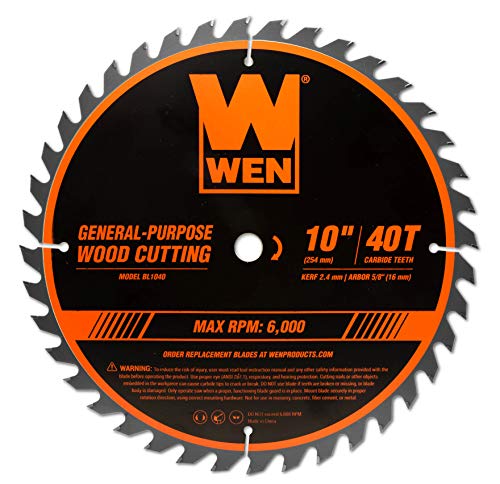
- The replacement blade
- The owner’s manual for your exact saw model
- A brush or dry cloth for clearing dust and pitch from the arbor area
Blade types to match before you buy
| Blade type | Common tooth count | What it is usually used for | Why it matters during replacement |
|---|---|---|---|
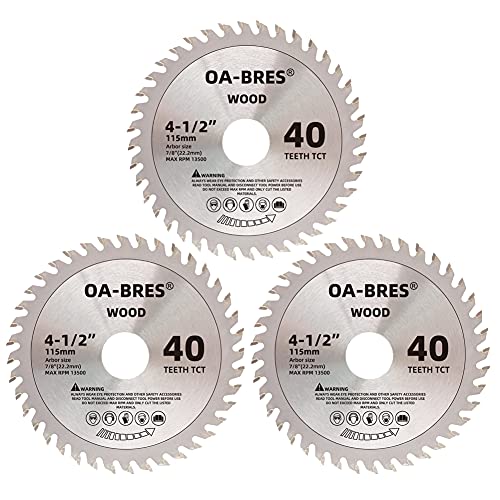
| General purpose | 40 to 50 teeth | Mixed ripping and crosscutting | A good default when the old blade was a do-everything blade |
| Rip blade | 24-30 wide teeth | Cutting with the grain | Use this when the old blade was burning or slow on long grain cuts |
| Crosscut blade | 80 to 90 teeth | Cleaner cuts across the grain | Higher tooth count can mean smoother edges but slower feed |
| Combination blade | 50 to 60 cutting teeth | Balanced general-use cutting | Often chosen when you want one blade for more than one task |
How do you prepare the saw?
Disconnect power first, then let a hot blade cool before you touch it. A saw that was just used can stay hot enough to burn bare skin, and an energized tool can start unexpectedly if the switch gets bumped while you work. [Safety source: OSHA lockout/tagout and machine-guarding guidance.]
- Unplug the saw from the outlet, or remove the battery pack on a cordless model.
- Raise the blade to a clear working position if your manual says that helps access the arbor nut.
- Remove the arbor wrench or any loose tool from the saw body before you start.
- Check that the workspace is bright enough to read the rotation arrow and nut edges.
Why the manual matters here
Portable, contractor, and hybrid saws can place the arbor, guard release, and wrench storage in different spots. Open the manual for your exact model and follow the blade-change section, because the lock button, release order, and wrench location can change from one saw to the next. Confirm the tool’s thread direction in the manual before loosening anything. [Ryobi and DeWalt manual pages may differ by model; only rely on them for the brand-specific steps they actually show.]
How do you remove the guard and throat plate?
Remove the blade guard and throat plate so you can reach the blade cavity. The order and release method vary by model, so follow your manual instead of forcing clips or pins. Set every removed part where it cannot fall into the saw cabinet. [Safety source: manufacturer guarding instructions and standard machine-guarding practice.]
- Release the blade guard or guarding system using the method listed for your saw.
- Lift out the throat plate carefully and put it aside.
- Keep fasteners, springs, and spacers in one place so they return in the same order.
Two common layout differences
Ryobi and DeWalt saws often use different guard-release hardware, and portable saws usually pack tighter around the arbor than contractor or hybrid saws. That changes how much access you have to the nut and washer stack, not the basic replacement process. Only apply a brand-specific release step if the matching manual shows it. [Ryobi and DeWalt manual pages only.]
How do you loosen the arbor nut?
Use the arbor lock if your saw has one, then loosen the arbor nut with the correct wrench or socket. Confirm thread direction in the manual before turning anything; many saws loosen one way, but not all use the same thread direction. Never force the nut if the direction feels wrong. [Safety source: manufacturer instructions and standard hand-tool practice.]
- Find the arbor lock button or pin, if your saw has one, and engage it.
- Fit the wrench, socket, or supplied tool fully on the arbor nut.
- Turn the nut in the direction shown in the manual; do not assume a universal direction.
- If the nut resists, stop and confirm whether your model uses a different thread direction or a bevel-release step.
If the nut is stuck
Stuck hardware usually comes from sawdust, pitch, corrosion, or a nut that has not moved in a long time. Do not pry against the teeth. That can damage the blade or slip the wrench off the nut. Clean the exposed threads, re-seat the wrench squarely, and confirm the lock is fully engaged before trying again.
How do you remove the old blade and inspect the arbor?
Take off the nut and outer washer, then slide the blade off the arbor without reaching over the teeth more than necessary. After that, inspect the arbor, washer faces, and surrounding pocket for pitch, sawdust, or a washer that is bent or dirty enough to keep the new blade from sitting flat. [Safety source: manufacturer service guidance and general machine-maintenance practice.]
- Remove the arbor nut and outer washer in the order shown by your manual.
- Lift the old blade off the arbor and set it aside safely.
- Brush or wipe the arbor, flange, and washer faces until they are free of debris.
- Check the carbide tips on the removed blade for chips, dull edges, or burn marks that explain the replacement.
When to replace the blade
Replace a blade when carbide tips are chipped, dull, or burned, or when cut quality drops even though the saw setup is correct. A damaged edge can leave rough cuts, heat the stock, and make the motor work harder than it should.
How do you install the new blade?
Align the new blade with the rotation arrow and the tooth orientation shown by the saw and blade markings. Do not rely on a blanket “face forward” rule. The blade has to match the saw’s direction of rotation, sit flat on the arbor, and clamp evenly before the nut is tightened. [Safety source: manufacturer blade-install instructions and standard guarding practice.]
- Place the blade on the arbor with the printed rotation arrow matched to the saw.
- Make sure the blade sits flush against the arbor flange with no debris behind it.
- Reinstall the washer and arbor nut in the correct order.
- Tighten the nut fully with the wrench or socket, using the arbor lock if the saw has one.
Post-install safety check
Before restoring power, verify that the blade is seated flat, the washer order is correct, and the arbor nut is tightened. Reinstall the throat plate so it sits flush, confirm the guard and riving knife move normally, hand-spin only if your manual allows it, and make sure no wrench remains on the saw before a brief no-load test. [Safety source: manufacturer post-service checks and general machine-guarding practice.]
Suppose the blade is a crosscut model with 80 to 90 teeth and the new cut still burns the edge. That points away from the blade type and toward seating, alignment, or a loose nut that needs another inspection before the first cut.
Table saw blade troubleshooting matrix
| Symptom | Likely cause | Fix |
|---|---|---|
| Stuck arbor nut | Wrong thread direction, seized threads, or pitch buildup | Unplug the saw, confirm thread direction in the manual, engage the arbor lock if present, clean the threads, and retry with the correct wrench |
| Blade won’t seat flat | Dust on the flange, bent washer, or debris behind the blade | Remove the blade, clean the arbor and washer faces, and reinstall with the blade fully against the flange |
| Wobble after install | Nut not fully tightened, blade mounted backward, or damaged arbor parts | Disconnect power again, remove the plate, check blade direction, retighten the nut, and inspect for bent hardware |
| Guard won’t reinstall | Guard parts are out of sequence or the blade is not seated in the right position | Check the manual for the correct reassembly order, reseat the blade, then reinstall the guard before the throat plate |
| Cut quality worsens after replacement | Wrong blade type, dull teeth, or poor alignment after install | Confirm the tooth count and blade type match the cut, then repeat the post-install wobble and clearance check |
Common mistakes
Most failed blade changes come from skipping the manual, using the wrong wrench, or assuming every saw loosens the same way. Another common miss is leaving the wrench on the saw and restoring power before the guard and throat plate are back in place.
- Do not force the arbor nut without checking thread direction.
- Do not hold the blade by hand while breaking the nut loose unless your manual explicitly allows that method.
- Do not install the blade without cleaning pitch and dust from the arbor faces.
- Do not test the saw until the guard, throat plate, and wrench are all cleared from the machine.
Prevention
Keep the blade clean after use and store the saw with the wrench returned to its holder. That makes the next change faster and reduces the chance of fighting a stuck nut or a dirty arbor.
Frequently asked questions
How do I replace a table saw blade?
Unplug the saw before starting, remove the guard and throat plate, loosen the arbor nut in the correct direction, swap the blade, and retighten the hardware before reassembly. Finish with a check for wobble, smooth rotation, and guard movement before restoring power.
How do I remove a table saw blade safely?
Start with the saw unplugged and the blade cool. Use the arbor lock if your model has one, keep the correct wrench fully seated on the nut, and follow the manual for guard removal and thread direction. That lowers the risk of slips and stripped threads.
Which way should a table saw blade face when installed?
Match the blade’s rotation arrow to the saw’s direction of rotation and follow the manual for tooth orientation. Do not use a generic face-forward rule, because different saws and blade markings can make that misleading.
What tools do I need to change a table saw blade?
Most changes need safety glasses, work gloves, and the correct wrench, socket, or saw-supplied tool for the arbor nut. Some saws use an Allen wrench or have a dedicated arbor lock button or pin, so check the model listing before you start.
How do I loosen the arbor nut on a table saw?
Engage the arbor lock if present, fit the correct tool firmly, and turn in the direction shown by the manual. Do not assume counterclockwise for every saw; thread direction can vary by model, so confirm before applying force.
When should I replace a table saw blade?
Replace it when carbide tips are chipped, dull, or burned, or when cut quality falls even though the saw is set correctly. A blade with 24-30 rip teeth, 40 to 50 general-purpose teeth, or 80 to 90 crosscut teeth can still need replacement if the cutting edges are damaged.
Sources
Manufacturer owner’s manual pages for the specific saw model used in the instructions, including blade-change, guard-removal, arbor-lock, and post-install check sections. Use the exact model manual rather than a close match.
Ryobi owner’s manual pages for any Ryobi-specific claims in this article, including any model-specific arbor-lock, guard-release, or loosen/tighten-direction notes.
DeWalt owner’s manual pages for any DeWalt-specific claims in this article, including any model-specific arbor-release, bevel-adjustment, or blade-service notes.
OSHA machine-guarding and lockout/tagout safety guidance for power-tool servicing, de-energizing equipment before maintenance, and keeping guards and tools in place before restart.
Sponsored / affiliate links. As an Amazon Associate I earn from qualifying purchases. I may earn additional commission from eligible campaigns.
 Adjustable Conveyor Roller Stand, Table Saw Outfeed Roller with Adjustable Height Retractable Feature Braked Wheels & Practical Hooks Flexible Roller Conveyorfor for Logistics Automobile Manufacturing
 Heavy Duty Roller Conveyor, Table Saw outfeed Table with Lockable Universal Casters, Adjustable Adjustable Roller Stand for Woodworking with 6 Widened Conveying Rollers