How to Change Wood Color: Dark to Light
How to change wood color from dark to light can transform a piece of furniture or flooring, breathing new life into your space. This process often involves careful stripping, sanding, and then applying a new finish to achieve the desired lighter tone. Understanding the best methods ensures you don’t damage the wood while achieving a beautiful, updated look.
Simply put, changing dark wood to a lighter shade typically requires removing the existing finish, sanding the surface smooth, and then applying a new stain or finish, often with bleaching agents if a significant lightening is desired. Patience and the right tools are key to a successful outcome.
Key Takeaways
- Changing wood color from dark to light often starts with chemical strippers to remove old finishes.
- Thorough sanding is crucial to remove residual color and prepare the wood for new treatments.
- Bleaching is a common method for significantly lightening dark wood tones.
- Applying a new stain or finish allows for control over the final light hue.
- Protecting the newly lightened wood with a sealant is essential for durability.
What is Wood Bleaching and Why Use It?
Wood bleaching is a chemical process used to lighten the natural color of wood. This is particularly useful when you have a dark-stained piece that you want to transform into a lighter, more modern aesthetic, or when trying to match existing lighter wood elements in a room. The goal is to remove or significantly reduce the natural dark pigments within the wood fibers.
Why would you choose to bleach wood instead of just sanding and restaining? Sanding alone can only remove superficial stains and finishes, but it won’t alter the inherent dark color of the wood itself. If the wood is naturally dark, like walnut or dark oak, simply reapplying a lighter stain might not be enough to overcome the underlying tone.
Bleaching actively alters the wood’s cellular structure, removing the dark chromophores that give it its color.
This process is a powerful tool for achieving dramatic transformations, opening up design possibilities for furniture, cabinetry, and flooring. It allows you to take an old, dark piece and make it fit seamlessly into a contemporary design scheme or create a rustic, whitewashed effect. However, it’s a process that requires careful application and safety precautions.
Types of Wood Bleaches
- Oxalic Acid Bleach: Excellent for removing water stains, iron stains, and general darkening. It’s a good choice for a milder lightening effect and often used in conjunction with other methods.
- Chlorine Bleach (Household Bleach): More aggressive and effective at removing tannins and dark pigments. It can lighten wood more significantly but may also raise the grain.
- Two-Part Peroxide Bleaches: These are often the most powerful and effective for drastic lightening. They typically involve a base solution and an activator, creating a chemical reaction that breaks down lignin and dark pigments.
When to Consider Bleaching
- Transforming dark furniture: If you have antique or mid-century modern dark wood furniture that feels too heavy for your current decor.
- Achieving a specific aesthetic: For styles like farmhouse, coastal, or Scandinavian, where light, airy wood tones are common.
- Evening out inconsistent color: When dealing with wood that has developed uneven dark spots or stains over time.
- Preparing for a light finish: To ensure a pale stain or whitewash appears true to color without the dark undertones showing through.
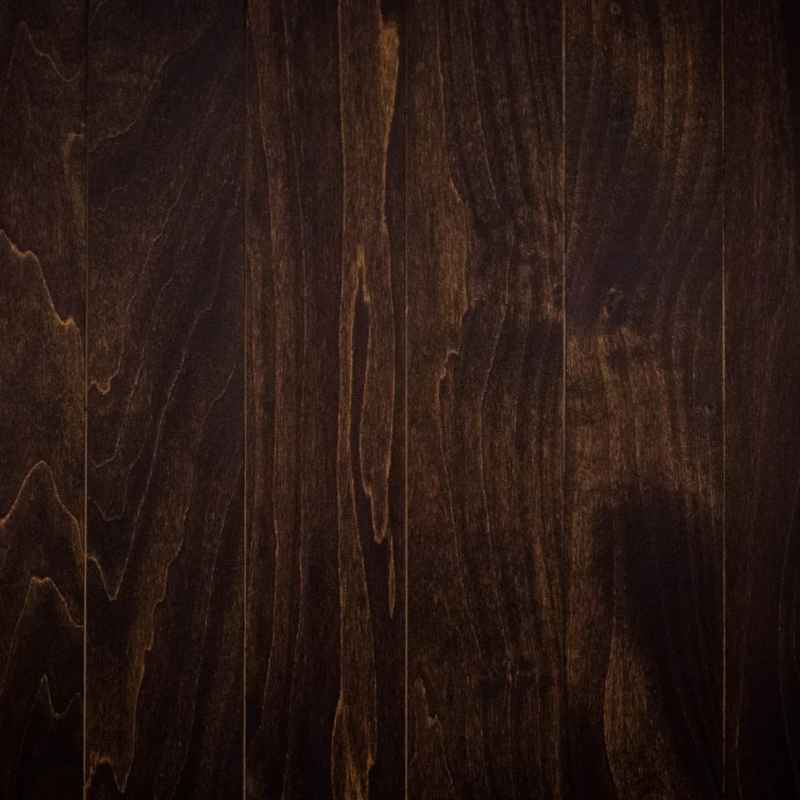
Step-by-Step Guide: Changing Dark Wood to Light
Successfully changing wood color from dark to light requires a methodical approach. It’s not a quick fix, but the results can be remarkably rewarding, giving your wood a completely new character. Each step builds upon the last, so precision is important.
Before you begin, gather all your materials. This includes chemical strippers, sandpaper (various grits), a wood bleach (choose based on desired outcome), a neutralizer for the bleach, stain or finish, applicators, and protective gear. Ensure you’re working in a well-ventilated area, especially when using strong chemicals.
The initial removal of the old finish is critical. A chemical stripper will break down varnish, lacquer, or paint, making it easier to remove with scrapers and rags. Once the bulk of the finish is gone, thorough sanding begins.
This stage refines the surface and removes any remaining finish residue. Finally, the bleaching process, followed by neutralization and application of a new finish, brings the wood to its lighter state.
1. Strip the Existing Finish
The first step is to completely remove any existing finish. This might be varnish, lacquer, paint, or an old stain. Chemical strippers are usually the most effective for this.
Apply the stripper according to the product’s instructions, typically with a brush. Allow it to work for the recommended time until the finish blisters or softens.
- Choose a stripper suitable for your wood type and finish.
- Apply in a well-ventilated area with gloves and eye protection.
- Use a plastic or metal scraper to gently lift the softened finish.
- Wipe away residue with mineral spirits or denatured alcohol.
- Repeat if necessary to ensure all old finish is gone.
Important: Never use steel wool for stripping as it can leave behind particles that will rust and stain the wood, especially after bleaching. Opt for plastic scrub pads or brass brushes.
2. Sand the Wood Smooth
Once the old finish is stripped, the wood surface will likely be uneven and may still have some embedded color. Sanding smooths out any imperfections and removes remaining finish or stain. Start with a coarser grit sandpaper (like 80 or 100) to tackle any roughness, then progressively move to finer grits (150, 220) for a silky-smooth finish.
- Begin with 80-100 grit for initial smoothing.
- Progress to 150 grit to remove deeper scratches.
- Finish with 220 grit for a furniture-smooth surface.
- Sand with the grain to avoid visible scratch marks.
- Use a sanding block or orbital sander for efficiency and evenness.
After sanding with the finest grit, clean the surface thoroughly with a tack cloth or a vacuum cleaner with a brush attachment to remove all dust. Any remaining dust can get into your new finish and create a gritty texture.
3. Apply Wood Bleach
Now comes the lightening phase. For significant color change, a two-part peroxide bleach or a strong oxalic acid solution is often necessary. Always follow the manufacturer’s instructions meticulously.
Apply the bleach evenly with a brush or applicator, working in sections if needed, and let it penetrate the wood.
- Mix bleach components according to instructions if using a two-part system.
- Apply thinly and evenly with a synthetic brush.
- Allow the bleach to sit for the recommended time (often several hours or overnight).
- Do not allow the bleach to dry completely on the surface; reapply if needed.
- For very dark woods, a second application might be required.
Warning: Wood bleach is a strong chemical. Always wear heavy-duty rubber gloves, eye protection, and a respirator to protect yourself from fumes and skin contact. Work in a very well-ventilated area.
4. Neutralize the Bleach
After the bleach has done its work and you’ve achieved the desired lightness, it’s crucial to neutralize the chemical reaction. If you don’t neutralize it, the bleach can continue to work on the wood, potentially weakening it or affecting how new finishes adhere. A common neutralizer for oxalic acid is a solution of baking soda and water, while hydrogen peroxide bleaches often recommend a vinegar and water solution or plain water rinses.
- Mix your neutralizer solution as per bleach manufacturer guidelines.
- Apply the neutralizer evenly over the bleached wood surface.
- Allow it to work for the specified duration.
- Rinse the wood thoroughly with clean water.
- Let the wood dry completely, which can take 24-48 hours.
Ensuring the wood is fully dry and neutralized is paramount. Any residual moisture can cause problems when you apply stains or finishes. You can speed up drying slightly with fans, but avoid direct heat.
5. Sand Lightly and Clean
Once the wood is completely dry after bleaching and neutralizing, you’ll likely find that the grain has been raised. The bleach itself can cause the wood fibers to swell. A very light sanding with a fine-grit sandpaper (220 or higher) will knock down this raised grain, restoring a smooth surface.
This is not about removing color, but about preparing the surface for its final treatment.
- Use 220-grit or finer sandpaper.
- Sand very lightly, just enough to flatten the raised grain.
- Always sand with the wood grain.
- Clean the surface thoroughly with a tack cloth.
- Ensure no dust remains before applying any new finish.
This light sanding ensures that your new stain or finish will apply evenly without any textural inconsistencies. It’s a delicate step, as aggressive sanding could remove some of the achieved lightness.
6. Apply New Stain or Finish
With the wood now lightened and smooth, you can apply your chosen new color. For a true light wood look, you might opt for a clear coat to showcase the natural, now lighter, grain. Alternatively, you can apply a light-colored stain – like a pale oak, maple, or even a white wash – to achieve a specific painted or toned effect.
Apply your chosen product evenly, following the manufacturer’s directions.
- Choose a clear coat for natural wood or a light stain for color.
- Test your chosen stain on a scrap piece of the same wood first.
- Apply stain or finish with a brush, rag, or sprayer, working with the grain.
- Wipe off excess stain according to product directions.
- Allow sufficient drying time between coats.
Multiple thin coats are generally better than one thick coat for both stains and clear finishes. This allows for better control over the final look and ensures a durable application.
7. Seal and Protect
The final step is to protect your newly lightened wood with a durable topcoat. This could be a polyurethane, varnish, lacquer, or a wax finish, depending on the item and the desired level of protection. A good sealant will guard against moisture, scratches, and wear, ensuring your hard work lasts.
- Select a sealant appropriate for the wood’s use (e.g., tabletop vs. wall paneling).
- Apply 2-3 thin coats of your chosen sealant.
- Allow adequate drying time between coats.
- Lightly sand with very fine grit (320+) between coats for extra smoothness.
- Clean off dust thoroughly after each sanding.
This final protective layer is essential for the longevity and beauty of your transformed wood piece. It will give it a finished look and make it easier to clean and maintain.
Achieving a Whitewashed Effect
Achieving a whitewashed look on dark wood is a popular way to create a coastal or farmhouse aesthetic. It involves applying a white stain or paint in a way that allows the wood grain to show through. The bleaching process described earlier is an excellent precursor to this effect, as it ensures the underlying wood is light enough for the white to be prominent.
After bleaching and sanding, you can apply a diluted white paint or a dedicated white wash product. The key is dilution. Mix white latex paint with water or a glazing liquid until you reach the desired transparency.
Too much paint, and you’ll have an opaque painted finish; too little, and you won’t see the effect.
Apply the diluted white mixture evenly. Immediately after application, wipe off the excess with a clean, lint-free cloth, working with the wood grain. This action removes the white pigment from the surface, leaving it in the wood grain and crevices, thereby creating the characteristic whitewashed look.
Multiple applications can build up the intensity of the white, but always allow drying time between coats.
Whitewashing Techniques
- Diluted Paint: Mix white latex paint with water (e.g., 1 part paint to 1-3 parts water). Adjust ratio for opacity.
- Glazing Liquid: Use a commercial glazing liquid mixed with white paint for a more controlled, professional finish.
- White Stain: Some companies offer white-tinted wood stains that offer a translucent effect.
- Raking Technique: Apply the white wash liberally and then “rake” it out with a stiff brush or a squeegee to create streaks.
- Distressing: After the whitewash is dry, lightly sand certain areas to create an aged, worn appearance.
Tips for a Successful Whitewash
- Start with a light, clean surface: Ensure your wood is properly bleached and sanded.
- Test your mixture: Always test your whitewash mixture on a scrap piece of wood before applying it to your project.
- Work in small sections: This is especially important if you’re wiping off excess, as you want to maintain a consistent look.
- Wipe with the grain: This ensures the effect looks natural.
- Don’t overdo it: It’s easier to add more whitewash than to remove it if you apply too much.
Common Mistakes to Avoid
When attempting to change dark wood to a lighter shade, several common pitfalls can lead to disappointing results. Understanding these errors beforehand can save you a lot of time and effort, ensuring a smoother process and a better final outcome.
One of the most frequent mistakes is insufficient stripping or sanding. If the old finish isn’t completely removed, the bleach and new stain won’t penetrate evenly, leading to blotchy results. Similarly, rushing the sanding process and not using progressively finer grits will leave visible scratches that will be amplified by the new finish.
Another critical error is skipping the neutralization step after bleaching. This can lead to a weak or unstable finish that may yellow over time. Finally, not testing your products on scrap wood is a recipe for disaster, as stains and finishes can look very different on various wood species and even different parts of the same piece.
Mistake Checklist
| Mistake | Consequence | How to Avoid |
|---|---|---|
| Incomplete Stripping | Uneven bleaching or staining; finish peeling. | Use a quality stripper and scrape thoroughly; repeat if needed. |
| Skipping Neutralization | Weakened wood, yellowing finish, poor adhesion. | Always neutralize the bleach with the recommended solution and rinse well. |
| Insufficient Sanding | Rough surface, visible scratches, poor stain absorption. | Start with coarser grits and progress to 220 grit; sand with the grain. |
| Not Testing Products | Unexpected color results, blotchiness, or finish failures. | Always test bleach, stain, and finish on an inconspicuous area or scrap wood. |
| Over-Sanding After Bleaching | Removing the desired lightness, creating an uneven appearance. | Use very fine grit sandpaper (220+) and sand lightly only to knock down raised grain. |
Avoiding these common errors will significantly increase your chances of a successful and beautiful wood color transformation.
Frequently Asked Questions
Can I change dark wood to light without bleaching?
Yes, to a degree. If the wood is only dark due to a stain or finish, sanding thoroughly can remove it, revealing the natural wood color underneath, which may be lighter. However, if the wood itself is naturally dark, sanding alone won’t change its inherent hue; bleaching is then required for a significant lightening.
How long does the wood bleaching process take?
The entire process, from stripping to sealing, can take several days. Bleaching itself might require hours to set, followed by neutralization and complete drying, which can take 24-48 hours. Applying stains and topcoats adds more time for drying and curing.
Will bleaching damage the wood?
If done correctly and according to instructions, bleaching should not significantly damage the wood. However, over-bleaching or improper neutralization can weaken wood fibers or make them brittle. Always follow product guidelines and use appropriate safety measures.
What is the best way to apply wood bleach?
Wood bleach is typically applied with a synthetic bristle brush or a clean, lint-free cloth. It’s important to work in a well-ventilated area and wear protective gear. Apply evenly and allow it to work for the recommended time before neutralizing.
Can I bleach exotic or oily woods?
Exotic and oily woods can be more challenging. Some oily woods may resist the bleach or require special preparation. It’s always best to test your chosen bleach on a small, inconspicuous area of the specific wood species first to ensure it reacts as expected and achieves the desired result.
Final Thoughts
Successfully changing wood color from dark to light is an achievable project with patience and the right approach. From stripping and sanding to careful bleaching and finishing, each step plays a crucial role in transforming your wood pieces. By understanding the process and avoiding common mistakes, you can reveal the lighter, refreshed beauty of your wood, enhancing your home’s aesthetic.
Sponsored / affiliate links. As an Amazon Associate I earn from qualifying purchases. I may earn additional commission from eligible campaigns.