How to Cut Out Door Hinges Without a Router
Hey there! If you’re like me, you love tackling DIY projects around the house, especially when it comes to fixing up doors or installing new ones. But let’s be honest—sometimes the tools we need, like a router, aren’t sitting in our toolbox. That’s where creativity comes in! I’ve been in that exact spot, staring at a door and wondering how to cut out door hinges without a router. After plenty of trial and error, I’ve learned some solid techniques that get the job done cleanly and efficiently.
In this guide, I’m going to walk you through everything I’ve discovered, step by step, so you can confidently cut hinge mortises like a pro, even without fancy equipment. Whether you’re a beginner or a seasoned DIYer, this article is packed with practical tips to make your project a success. Let’s dive in!
Why Cutting Door Hinges Matters
When I first started working on doors, I didn’t realize how important it was to get the hinge mortises just right. A hinge mortise is that shallow recess in the door and frame where the hinge sits flush. If it’s not cut properly, your door might not close smoothly, or worse, it could sag over time. I learned this the hard way when a door I hung ended up sticking because the hinges weren’t flush.
Getting those cuts precise ensures the door operates smoothly and looks professional. Without a router, it might seem tricky, but with the right tools and techniques, you can achieve a clean result. Plus, doing it yourself saves money and gives you that satisfying “I did this!” feeling.
Tools You’ll Need
Before we get started, let’s talk about the tools you’ll need. I’ve found that you don’t need a ton of fancy gear to cut hinge mortises. Here’s what I keep on hand for this job:
| Tool | Purpose |
|---|---|
| Sharp chisel | For carving out the hinge recess |
| Hammer or mallet | To drive the chisel |
| Utility knife | To score the outline for clean edges |
| Measuring tape | To measure hinge placement |
| Pencil | To mark the hinge outline |
| Combination square | To ensure straight lines and right angles |
| Screwdriver | To secure the hinge screws |
| Sandpaper (fine grit) | To smooth the mortise surface |
I also recommend having a steady work surface, like a workbench or sawhorses, to keep the door stable. Safety glasses and gloves are a must—trust me, a slip with a chisel can sting! If you’re missing any of these, most are affordable and easy to find at a hardware store.
Step-by-Step Guide to Cutting Door Hinges Without a Router
I’ve cut hinge mortises on several doors now, and this process has become my go-to. It’s straightforward, but it takes patience to get it right. Here’s how I do it:
Step 1: Measure and Mark the Hinge Placement
The first thing I do is figure out where the hinges will go. For a standard door, I place the top hinge about 7 inches from the top and the bottom hinge about 11 inches from the bottom. If there’s a third hinge, I put it roughly in the middle. I use a measuring tape and pencil to mark these spots on the door’s edge. Then, I hold the hinge in place and trace its outline with a pencil. A combination square helps me keep the lines straight and ensures the hinge will sit at a perfect right angle. I’ve learned that taking time here prevents mistakes later.
Step 2: Score the Outline
Once the hinge is marked, I grab a utility knife and carefully score along the pencil lines. This step is key because it helps prevent the wood from splintering when you start chiseling. I press firmly but not too hard, making a shallow cut about 1/16 inch deep. I go over the lines a couple of times to make sure the outline is clear. This little trick has saved me from messy edges more times than I can count.
Step 3: Set the Chisel Depth
Hinge mortises need to be just deep enough for the hinge to sit flush with the door’s surface. I check the thickness of the hinge leaf (usually about 1/16 to 1/8 inch) and use that as my guide. To keep things consistent, I sometimes mark the chisel blade with a piece of tape to show the depth. This way, I don’t accidentally dig too deep. It’s a small hack, but it’s made a big difference in my results.
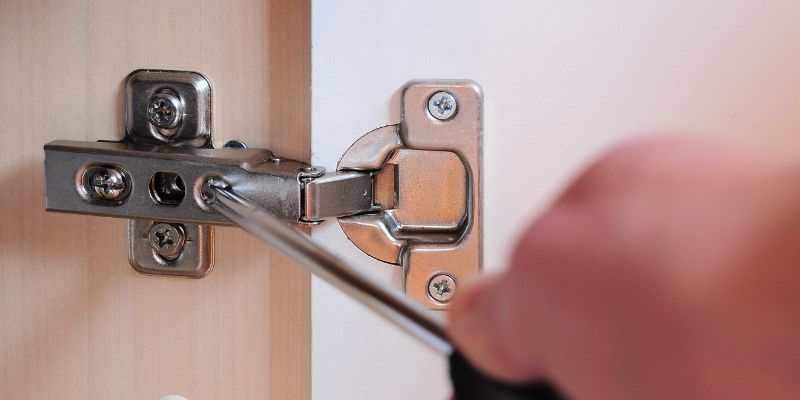
Step 4: Chisel Out the Mortise
Now comes the fun part—chiseling! I use a sharp chisel (dull ones make the job harder) and a hammer or mallet. I start by placing the chisel just inside the scored outline, with the beveled side facing down. I tap lightly to create a shallow cut, working my way around the perimeter. Then, I angle the chisel slightly and remove thin layers of wood, moving from the edges toward the center. I take my time here, removing small amounts at a time to avoid mistakes. If the wood is hard, I might make a few extra passes to keep things smooth.
Step 5: Test the Hinge Fit
After chiseling, I place the hinge in the mortise to check the fit. It should sit flush with the door’s surface, with no gaps. If it’s too tight, I chisel a bit more. If I’ve gone too deep (it happens!), I use a thin piece of cardboard or wood veneer to shim the hinge up. This step is all about patience—rushing can lead to a sloppy fit.
Step 6: Smooth and Clean
Once the hinge fits perfectly, I grab some fine-grit sandpaper and lightly sand the mortise to smooth out any rough spots. This makes the hinge sit even better and gives the door a polished look. I also wipe away any dust or debris with a clean cloth to keep things tidy before installing the hinge.
Step 7: Install the Hinge
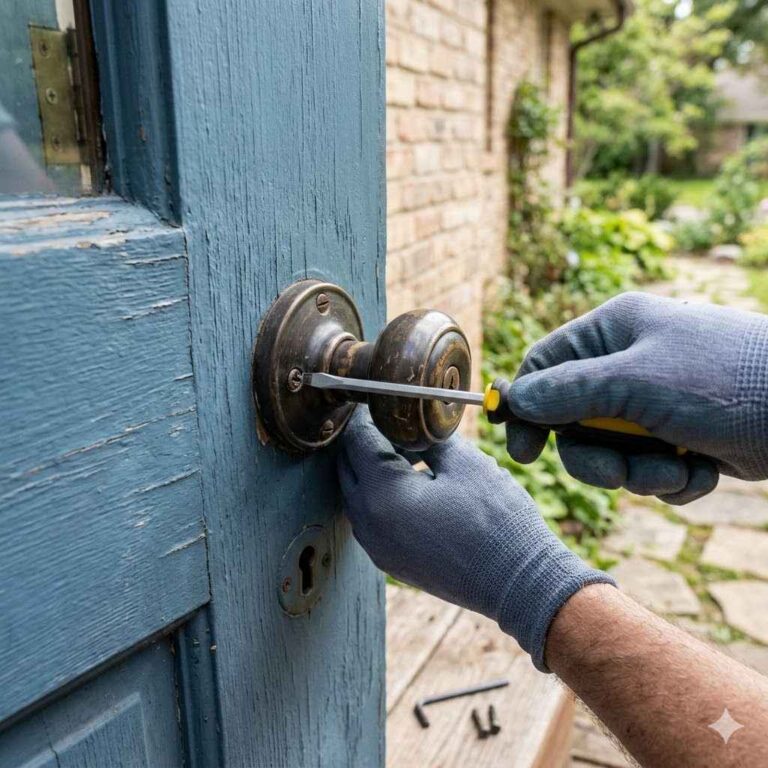
With the mortise ready, I place the hinge in the recess and mark the screw holes with a pencil. I use a drill or screwdriver to secure the hinge with the provided screws. I make sure not to overtighten, as that can strip the wood or pull the hinge out of alignment. Once the hinge is secure, I test the door’s swing to make sure everything feels smooth.
Tips for Success
Over the years, I’ve picked up a few tricks that make this process easier. First, always use a sharp chisel. A dull one will tear the wood and make you frustrated. I sharpen mine before every project. Second, work in good lighting so you can see your lines clearly. I’ve made mistakes in dim light that could’ve been avoided. Third, if you’re new to chiseling, practice on a scrap piece of wood first. It builds confidence and helps you get a feel for the tool. Finally, don’t rush. Taking your time ensures a cleaner result.
Common Mistakes to Avoid
I’ve made my share of mistakes, so let me save you some trouble. One big one is not scoring the outline deeply enough. Without a good score, the wood can splinter, leaving jagged edges. Another mistake is chiseling too deeply, too quickly. It’s tempting to dig in, but slow and steady wins here. Also, double-check your measurements before cutting. I once placed a hinge an inch off because I didn’t measure twice, and it threw off the whole door. Lastly, make sure your door is secure while you work. A wobbly door makes chiseling harder and less precise.
Alternatives to Chiseling
If chiseling feels intimidating, I’ve tried a couple of other methods that work in a pinch. One is using a Dremel tool with a small cutting bit to carefully carve out the mortise. It’s not as precise as a chisel, but it can get the job done if you’re careful. Another option is a hand plane, which can shave down the wood in thin layers. I’ve used this for shallow mortises, but it takes practice to keep it even. Both methods require patience and a steady hand, but they’re good alternatives if you don’t trust your chiseling skills yet.
Why I Love This Method
There’s something satisfying about cutting hinge mortises by hand. It feels like real craftsmanship, and I love the control it gives me. Unlike a router, which can be loud and messy, chiseling is quiet and precise. Plus, the tools are affordable and easy to store. Every time I finish a door and see it swing perfectly, I feel proud of the work I’ve done. It’s a skill that gets better with practice, and I’m confident you’ll feel the same way once you try it.
Maintaining Your Tools
After a few projects, I learned that taking care of my tools makes a big difference. I keep my chisels sharp with a honing stone and store them in a dry place to prevent rust. My utility knife gets fresh blades regularly to ensure clean cuts. I also clean my tools after each use to keep them in top shape. A little maintenance goes a long way, and it saves you from struggling with dull or dirty tools.

When to Call a Professional
I’ll be honest—sometimes this job can feel overwhelming, especially if you’re working with a heavy or expensive door. If you’re not confident in your skills or don’t have the time to get it right, a professional carpenter can handle it. I’ve called in help for tricky projects, like when I was installing a custom door with odd-sized hinges. It cost a bit, but it saved me stress and ensured a perfect fit. If you decide to go this route, ask for references and check their work to make sure they’re reliable.
Conclusion
Cutting door hinges without a router might sound daunting, but I promise it’s doable with the right approach. I’ve been there, fumbling through my first few attempts, but with practice, I’ve come to love the process. It’s rewarding to see a door hang perfectly because of the care I put into those mortises. By following the steps I’ve shared—measuring carefully, scoring the outline, chiseling with patience, and double-checking your work—you’ll get professional results without needing fancy tools.
Plus, you’ll save money and learn a skill you can use for years. So grab your chisel, take your time, and enjoy the process. You’ve got this! If you have any questions or run into challenges, the FAQs below might help. Happy DIYing!
FAQs
What if I don’t have a sharp chisel?
A dull chisel makes the job harder and can tear the wood. I recommend sharpening it with a honing stone or buying a new one. A sharp chisel cuts cleanly and saves time.
Can I use a different tool instead of a chisel?
Yes! I’ve used a Dremel tool or a hand plane for small mortises. They work, but they require more care to keep the cuts even.
How do I know if the hinge is flush?
Place the hinge in the mortise and run your finger over the edge. It should feel level with the door. If it sticks up or sinks too low, adjust the mortise.
What if I cut too deep?
It happens! I’ve fixed this by placing a thin piece of cardboard or wood veneer under the hinge to raise it. Just make sure it’s secure.
How long does this process take?
For one hinge, I usually spend about 15-20 minutes. It depends on your experience and the wood’s hardness. Take your time for the best results.
Can I do this on a metal door?
Metal doors are trickier. I’d recommend professional or specialized tools like a metal-cutting jig. Chiseling works best for wood.
Do I need to cut mortises on both the door and frame?
Yes, both need mortises for the hinges to sit flush. I follow the same process for the frame, making sure the measurements match the door.