How to Fit Door Hinges
Hello, friend! If you’ve ever hung a door or tried to fix one that’s sagging, you know how important it is to get the hinges just right. I’ve spent plenty of weekends tinkering with doors in my home, and let me tell you, learning how to fit door hinges properly has been a game-changer. It’s not just about screwing a hinge onto a door—it’s about precision, patience, and a few tricks I’ve picked up along the way. Whether you’re installing a new door, replacing old hinges, or just curious about the process, I’m excited to share everything I’ve learned. This guide is packed with practical steps and tips to help you fit door hinges like a pro, even if you’re new to DIY. So, grab a cup of coffee, and let’s get started!
Why Fitting Door Hinges Correctly Is a Big Deal
When I first started working on doors, I thought hinges were just metal flaps you screwed on. Boy, was I wrong! A poorly fitted hinge can make a door stick, sag, or even damage the frame over time. I learned this the hard way when a bedroom door I installed kept scraping the floor because the hinges weren’t aligned. Properly fitted hinges ensure the door swings smoothly, closes securely, and stays level for years. It’s not just about function, though—a clean hinge installation looks sharp and adds a professional touch to your project. Trust me, taking the time to do it right is worth it.
Tools You’ll Need
Before we dive into the process, let’s talk about the tools I use. You don’t need a workshop full of gear, but having the right tools makes the job easier. Here’s what I keep handy:
| Tool | Purpose |
|---|---|
| Sharp chisel | To carve out hinge mortises |
| Hammer or mallet | To drive the chisel |
| Utility knife | To score the hinge outline |
| Measuring tape | To measure hinge placement |
| Pencil | To mark the hinge outline |
| Combination square | To ensure straight lines and right angles |
| Screwdriver or drill | To secure hinge screws |
| Sandpaper (fine grit) | To smooth the mortise surface |
| Level | To check door alignment |
I also recommend a sturdy work surface, like sawhorses or a workbench, to hold the door steady. Safety glasses and gloves are a good idea, too—I’ve had a few close calls with chisels! Most of these tools are affordable and easy to find at your local hardware store.
Step-by-Step Guide to Fitting Door Hinges
Fitting door hinges is a process I’ve refined over time. It takes focus, but it’s totally doable. Here’s how I do it, step by step:
Step 1: Plan Your Hinge Placement
The first thing I do is decide where the hinges will go. For a standard interior door, I place the top hinge about 7 inches from the top edge and the bottom hinge about 11 inches from the bottom. If the door is heavy, like an exterior door, I add a third hinge roughly in the middle. I use a measuring tape and pencil to mark these spots on the door’s edge. Then, I double-check my measurements with a combination square to make sure everything’s straight. I’ve learned that rushing this step can throw off the whole project, so I take my time.
Step 2: Mark the Hinge Outline
Once I know where the hinges go, I hold each hinge in place and trace its outline with a pencil. I make sure the hinge is flush with the door’s edge and the knuckle (the round part) sticks out just enough to allow the door to swing. A combination square helps me keep the lines straight and ensures the hinge sits at a 90-degree angle. I also mark the hinge placement on the door frame to make sure everything lines up later. This step feels simple, but it’s critical for a clean fit.
Step 3: Score the Outline
Before I start chiseling, I grab a utility knife and score along the pencil lines. This creates a shallow cut that helps prevent the wood from splintering. I press firmly and go over the lines a couple of times, aiming for a depth of about 1/16 inch. I’ve found that scoring makes a huge difference in getting clean edges, especially on softer woods like pine. It’s a small step, but it saves a lot of cleanup later.
Step 4: Chisel Out the Mortise
Now it’s time to carve out the hinge mortise—that shallow recess where the hinge sits flush. I use a sharp chisel and a mallet. First, I check the hinge’s thickness (usually 1/16 to 1/8 inch) to know how deep to cut. I place the chisel just inside the scored outline, with the beveled side down, and tap lightly to create a perimeter cut. Then, I work my way inward, removing thin layers of wood. I go slow, chiseling small amounts at a time to keep the mortise even. This part takes patience, but it’s satisfying to see the recess take shape.
Step 5: Test the Hinge Fit
After chiseling, I place the hinge in the mortise to see how it fits. It should sit flush with the door’s surface, with no gaps or wobbling. If it’s too tight, I chisel a bit more. If I’ve cut too deep (it’s happened more than once!), I shim the hinge with a thin piece of cardboard or wood veneer. I keep testing until the fit is perfect. This step is where I remind myself not to rush—getting it right here makes the rest of the job easier.
Step 6: Smooth the Mortise
Once the hinge fits, I use fine-grit sandpaper to smooth the mortise surface. This removes any rough spots and gives the hinge a snug, professional fit. I also wipe away dust with a clean cloth to keep the area tidy. A smooth mortise not only looks better but also helps the hinge sit securely.
Step 7: Mark and Cut the Frame Mortises
With the door hinges ready, I move to the door frame. I mark the hinge locations on the frame, making sure they align perfectly with the door’s hinges. I use a level to check that the frame is plumb, then repeat the scoring and chiseling process for each hinge mortise. This part can be trickier because the frame is fixed in place, but I prop it up steady and work carefully. Alignment is key—misaligned hinges will make the door bind or swing unevenly.
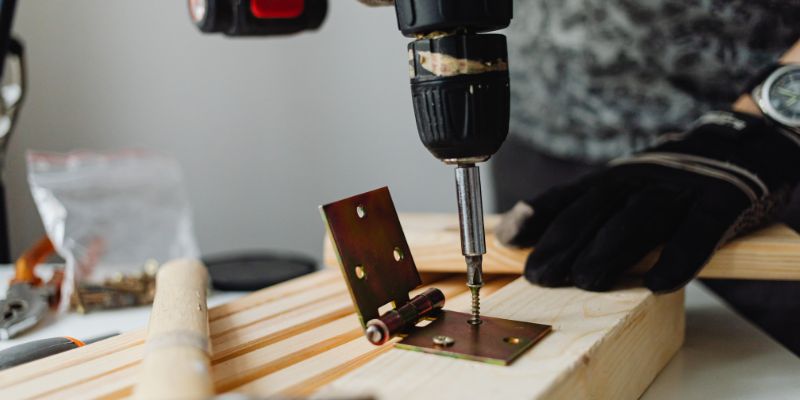
Step 8: Install the Hinges
Now it’s time to secure the hinges. I start with the door, placing each hinge in its mortise and marking the screw holes with a pencil. I use a drill or screwdriver to drive in the screws, being careful not to overtighten, which can strip the wood. Then, I attach the other half of each hinge to the frame mortises, following the same process. I check that all screws are snug and the hinges move freely.
Step 9: Hang the Door and Test
This is the moment of truth! I lift the door (sometimes with a buddy’s help) and align the hinge knuckles to slide in the pins. Once the door is hung, I test its swing. It should open and close smoothly, with no sticking or gaps. If something’s off, I check the hinge alignment and make small adjustments, like tightening screws or shimming a hinge. I also use a level to confirm the door is plumb. This step always feels rewarding when the door swings just right.

Tips for a Perfect Fit
I’ve picked up a few tricks that make fitting hinges easier. First, always use a sharp chisel—dull ones tear the wood and make the job frustrating. I sharpen mine before every project. Second, work in good light so you can see your lines clearly. I’ve messed up cuts in dim corners before. Third, if you’re new to chiseling, practice on scrap wood to get comfortable. Finally, measure twice (or three times!) before cutting. A small mistake early on can cause big problems later.
Common Mistakes and How to Avoid Them
I’ve made plenty of errors fitting hinges, so let me save you some grief. One mistake is not scoring deeply enough. Without a good score, the wood can splinter, leaving rough edges. Another is chiseling too much at once—go slow to keep the mortise even. I also learned to double-check hinge alignment between the door and frame. Once, I hung a door only to find it wouldn’t close because the hinges were slightly off. Lastly, secure your door or frame while working. A wobbly surface makes chiseling sloppy.
Choosing the Right Hinges
Not all hinges are the same, and I’ve learned to pick the right ones for the job. For interior doors, I use standard butt hinges, usually 3.5 inches long. For heavier exterior doors, I go for 4-inch hinges with ball bearings for smoother movement. I also check the finish—brushed nickel or oil-rubbed bronze looks great and resists rust. If you’re replacing hinges, match the size and screw pattern of the old ones to avoid extra work. I once bought the wrong size and had to re-cut mortises, which was a hassle.
Maintaining Your Hinges
Once your hinges are fitted, a little care keeps them working smoothly. I lubricate mine with a drop of household oil every year to prevent squeaking. I also check screws periodically to make sure they’re tight—loose screws can cause sagging. If a hinge gets rusty, I remove it, sand off the rust, and apply a rust-resistant spray paint before reinstalling. These small steps extend the life of your hinges and keep your door functioning like new.
When to Get Professional Help
I love DIY, but sometimes a professional is the way to go. If you’re dealing with a heavy solid-wood door, an oddly shaped frame, or custom hinges, a carpenter can save you time and stress. I called one for a tricky front door installation, and their expertise was worth every penny. If you decide to hire someone, ask for references and check their work to ensure they’re reliable. But for most standard doors, I’m confident you can handle this with the steps I’ve shared.
Why I Enjoy Fitting Door Hinges
There’s something deeply satisfying about fitting door hinges. It’s a mix of precision and craftsmanship that makes me feel accomplished. Unlike some DIY projects that need power tools or big budgets, this one relies on simple tools and careful work. Every time I hang a door and watch it swing perfectly, I get a little thrill. It’s a skill that’s useful for life, whether you’re fixing up your home or helping a friend. I hope you’ll find the same joy in it.
Conclusion
Fitting door hinges might seem like a small task, but it’s one that makes a huge difference in how your door looks and works. I’ve hung enough doors to know that getting those hinges right is worth the effort. From measuring carefully to chiseling precise mortises, every step builds toward a smooth, professional result. With the steps and tips I’ve shared, you’re ready to tackle this project with confidence, whether it’s your first door or your tenth.
Grab your tools, take your time, and enjoy the process—I promise you’ll love the feeling of a job well done. If you hit any snags, check out the FAQs below for quick answers. Happy hinge-fitting!
FAQs
How many hinges do I need for a door?
For most interior doors, two hinges are enough. I use three for heavy or exterior doors to add stability.
What if my chisel isn’t sharp?
A dull chisel makes messy cuts. I sharpen mine with a honing stone or replace it if it’s too worn.
Can I fit hinges without a chisel?
It’s tough, but I’ve used a Dremel tool for small mortises. It’s less precise, so chiseling is better if you can.
How do I fix a hinge that’s too loose?
If screws are loose, I fill the holes with wood toothpicks and glue, then re-screw. It tightens things up.
What if the door doesn’t close properly?
Check hinge alignment. I adjust by shimming or tightening screws. A level helps spot the issue.
Can I reuse old hinges?
Yes, if they’re in good shape. I clean them and match the size to avoid re-cutting mortises.
How long does it take to fit hinges?
For one door, I spend about 30-45 minutes per hinge, depending on the wood and my focus.