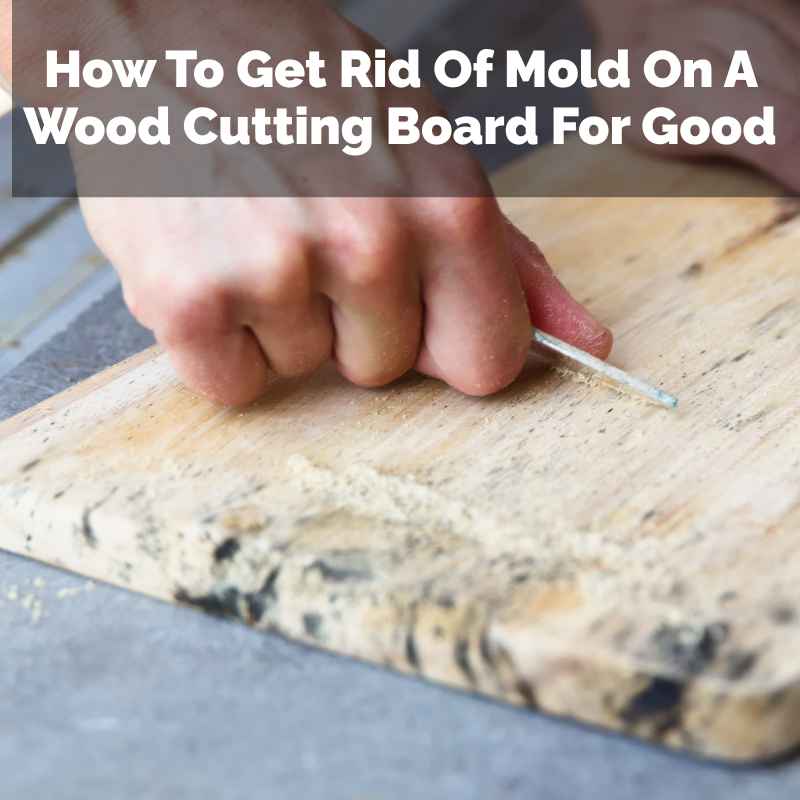
How To Get Rid Of Mold On A Wood Cutting Board For Good
It’s that dreaded sight: tiny green or black spots blooming on your favorite wooden cutting board. You grab it for prep, and there it is. Mold.
It’s frustrating, a little gross, and makes you question if it’s even safe to use anymore. You’re not alone. Many home cooks face this messy problem.
Dealing with mold on wood can feel tricky. But don’t toss that board just yet. We can sort this out together.
Getting rid of mold on a wood cutting board involves cleaning it thoroughly, disinfecting it, and then properly drying and storing it to prevent mold from returning. Regular maintenance is key to keeping your wooden boards safe and usable.
What is Mold and Why Does it Love Cutting Boards?
Mold is a type of fungus. It loves damp, dark places. Your cutting board, especially if it’s wood, can be a perfect hangout spot for mold.
Wood has tiny pores. These pores can trap food bits and moisture. That’s exactly what mold needs to grow.
Think about what happens on a cutting board. You chop raw meat, then veggies. Bits of food get left behind.
Water from washing or food itself can soak into the wood. If the board doesn’t dry out fast enough, mold can start. It’s a silent grower.
You might not see it at first. But it’s there, feasting on those food particles.
Several things help mold take hold. Leaving a wet board in a dark corner is one. Not drying it completely after washing is another.
Even just having high humidity in your kitchen can contribute. Once mold starts, it can spread quickly if not handled.
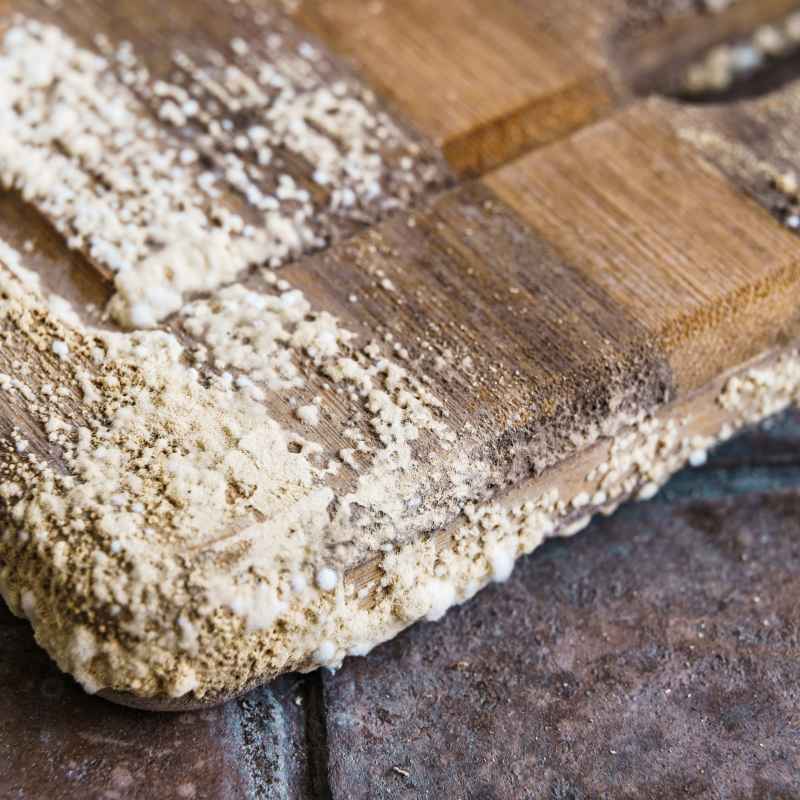
My First Encounter with Cutting Board Mold
I remember one evening vividly. I was making dinner. I reached for my trusty old maple cutting board.
I’d used it for everything that day. As I picked it up, I saw it. A fuzzy patch of what looked like green fuzz near the handle.
My stomach dropped. I’d cleaned it, or so I thought. But clearly, not well enough.
Panic set in. Was this board ruined? Was I putting my family at risk?
The thought of serving food on a moldy surface made me feel sick. I pictured tiny mold spores jumping onto my fresh salad. It was a gross mental image.
I felt a mix of annoyance at myself for not being more careful and worry about the board’s fate. I almost threw it out right then. But then I remembered some advice I’d heard.
I decided to try and save it before giving up.
Mold’s Favorite Foods on Your Board
Mold isn’t picky. It eats almost anything organic. On a cutting board, this includes:
- Meat juices
- Vegetable scraps
- Fruit sugars
- Grease
- Even the wood itself over time
Any of these left behind can be a meal for mold.
Spotting the Signs: What Mold Looks Like
Mold on a cutting board usually shows up as colored spots. These can be black, green, blue, or even white. Sometimes, it looks fuzzy.
Other times, it might appear slimy. You might also notice a musty smell. If your board smells off, that’s a big clue.
Don’t ignore these signs. Mold isn’t just unsightly. Some types of mold can produce toxins.
These can be harmful if ingested. It’s important to be able to identify mold early. This helps you deal with it before it becomes a bigger problem.
Check your boards often. Look in the grain of the wood. Look along edges and in any nicks or cuts.
These are prime spots for mold to hide. A good light source is your friend here. Shine it on the board from different angles.
The Cleaning Process: Getting Rid of the Mold
The first step is to get rid of the visible mold. You’ll need some basic supplies. A stiff brush or a scrub sponge is helpful.
You also need a cleaning agent.
For a mild case, hot soapy water can work. Use a good dish soap. Scrub the moldy spots well.
Rinse thoroughly with clean water. This step removes loose mold and food debris.
However, mold is tough. Hot soapy water might not kill it all. You need to disinfect.
This kills the mold spores. It makes the board safe again. There are a few safe and effective ways to do this.
White vinegar is a great option. It’s acidic. It kills many types of mold.
Another option is a mild bleach solution. But be careful with bleach. It can damage some woods.
And you must rinse it very, very well.
Many people prefer to use natural disinfectants. Hydrogen peroxide is another good choice. It’s effective and breaks down into water and oxygen.
Let’s break down the best methods for cleaning and disinfecting.
Method 1: The Vinegar Power Clean
Vinegar is a go-to for many household cleaning tasks. It’s safe, cheap, and effective against mold. Here’s how to use it on your cutting board.
First, wash your board with hot, soapy water. Scrub it well. Rinse it clean.
Now, get a spray bottle. Fill it with undiluted white vinegar. Spray the vinegar generously over the entire board.
Make sure to get all the moldy spots. Let it sit for at least 5 minutes. This gives the vinegar time to work.
After 5 minutes, scrub the board again. Use your stiff brush or sponge. Focus on the areas where you saw mold.
Scrub until the mold is gone. Then, rinse the board thoroughly with clean water. You want to get all the vinegar smell off.
The vinegar helps kill mold spores deep in the wood. This method is gentle on wood but tough on mold. It’s a safe way to disinfect your kitchen tools.
It won’t leave harsh chemical smells behind.
Vinegar vs. Bleach for Cutting Boards
Vinegar:
- Natural and food-safe.
- Kills many mold types.
- Less likely to damage wood finish.
- Leaves a temporary vinegary smell.
Bleach:
- Very effective killer of mold spores.
- Can be harsh on wood.
- Requires thorough rinsing to remove residue.
- Use sparingly and dilute properly.
Most experts recommend starting with vinegar.
Method 2: The Gentle Hydrogen Peroxide Approach
Hydrogen peroxide is another excellent disinfectant. It’s a bit stronger than vinegar. It also breaks down into harmless components.
Start by washing your board with hot, soapy water. Rinse it well. Get a bottle of 3% hydrogen peroxide.
You can find this at any drugstore. Pour the peroxide directly onto the moldy areas. Or, spray it on.
Let it sit for about 10 minutes. You might see it fizz a bit. This is normal.
It means it’s working.
After 10 minutes, scrub the board again. Use your brush or sponge. Make sure to get all the mold removed.
Rinse the board very well with clean water. The smell of peroxide usually goes away quickly. This method is very effective at killing mold spores.
It’s important to use the 3% solution. Higher concentrations can be too strong for wood. Always test on an inconspicuous spot if you’re unsure.
But for most wood cutting boards, 3% peroxide is safe and effective.
Method 3: The Baking Soda Scrub and Rinse
Baking soda is a mild abrasive. It’s also great at absorbing odors. It can help lift mold and grime.
After washing your board with hot, soapy water, make a paste. Mix baking soda with a little water. You want a thick paste, like toothpaste.
Apply this paste to the moldy areas. Let it sit for a few minutes. Then, use your brush to scrub the paste into the wood.
The baking soda acts like a gentle sandpaper. It helps lift away the mold and stains.
After scrubbing, rinse the board completely with water. For extra power, you can combine baking soda with vinegar. Scrub with the baking soda paste first.
Then, spray with vinegar and scrub again. This double-action approach can be very effective. Rinse well afterward.
Baking soda also helps to neutralize any lingering smells. This is a nice bonus. It’s a safe ingredient.
It won’t harm your family or your cutting board.
Quick Mold Check
After cleaning, inspect your board carefully. Hold it up to the light. Look for any remaining spots or discoloration.
If you still see mold, repeat the cleaning and disinfecting process.
The Crucial Drying Step
This is where many people make a mistake. You’ve cleaned the mold. You’ve disinfected the board.
Now, what? If you just leave it wet, mold can come back. Drying is just as important as cleaning.
The best way to dry a wooden cutting board is to let it air dry. Stand it up on its edge. This allows air to circulate around all sides.
Don’t lay it flat. This traps moisture underneath. Place it somewhere with good airflow.
Avoid putting it back in a dark cabinet immediately. Give it time to dry completely.
You can also pat it dry with a clean towel. But this won’t get all the moisture out of the wood pores. Air drying is the most thorough method.
It might take several hours. Be patient. This step prevents new mold growth.
In humid climates, drying can be harder. If your home is very damp, consider using a fan to help speed up the drying process. Make sure the board is bone dry before storing it.
Oiling Your Cutting Board: Protection and Preservation
Once your board is clean and completely dry, it’s time to oil it. Oiling is crucial for wooden cutting boards. It seals the wood.
It prevents moisture from soaking in too deeply. This makes it harder for mold to grow.
What kind of oil should you use? Food-grade mineral oil is the most common and recommended. You can find this at most pharmacies or kitchen supply stores.
Other options include beeswax blends or specialized cutting board oils.
Avoid using vegetable oils like olive oil or canola oil. These can go rancid over time. They can develop their own unpleasant smells.
They can even attract bacteria. Stick to mineral oil or a dedicated cutting board conditioner.
How often should you oil? It depends on how often you use the board. A good rule of thumb is to oil it once a month.
If the board looks dry or chalky, it’s time for an oiling. You can tell when it needs oiling by running some water over it. If the water beads up, the board is well-sealed.
If the water soaks in, it’s time to oil.
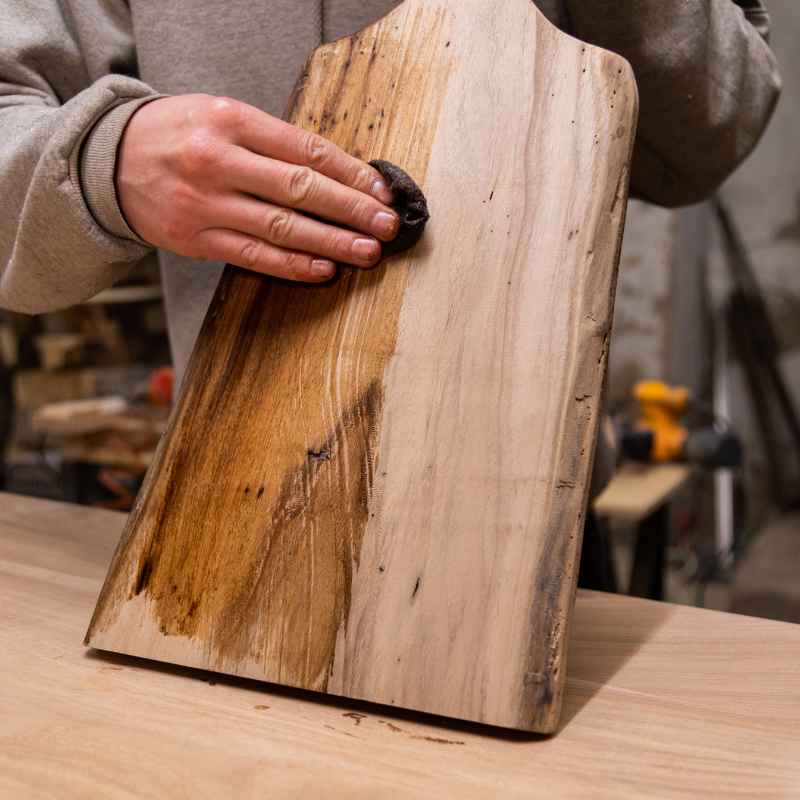
To oil, apply a generous amount of mineral oil to the board. Use a clean cloth or paper towel. Rub the oil into the wood.
Let it soak in for a few hours, or even overnight. Then, wipe off any excess oil. Your board will look renewed and feel smooth.
Oiling Best Practices
- Use food-grade mineral oil.
- Apply generously to a dry board.
- Let it soak in for several hours.
- Wipe off excess.
- Oil monthly, or when the board looks dry.
Preventing Mold Before it Starts
The best way to deal with mold is to stop it from growing in the first place. Prevention is much easier than cleaning. Here are some simple habits that will keep your cutting boards mold-free.
Rinse Immediately: After each use, rinse your cutting board. Don’t let food bits sit on it for hours. This is especially important after cutting raw meat or poultry.
Those juices are mold food.
Wash Thoroughly: Wash your board with hot, soapy water after every use. Use a good scrub brush to get into the grain. Don’t just do a quick rinse.
Dry Completely: This is the most critical step for prevention. Always dry your board fully. Stand it up to air dry.
Never put a damp wooden board away. Ensure it’s bone dry before storing it. If you live in a very humid area, this step needs extra attention.
Store Properly: Store your board in a dry, well-ventilated area. Don’t leave it in a damp sink or a dark, enclosed cabinet where air can’t circulate. Hanging it up or standing it on its edge is ideal.
Sanitize Regularly: Even with daily washing, it’s a good idea to sanitize your board once a week. Use the vinegar or hydrogen peroxide method mentioned earlier. This kills any lurking spores.
Consider Separate Boards: If you prep a lot of raw meat, consider having a separate board for it. And another for fruits and vegetables. This helps prevent cross-contamination and can simplify cleaning.
Deep Clean Periodically: Don’t wait for mold to appear. Give your boards a deep clean and oiling every month. This keeps them in top shape and protected.
Wood Type Matters
Some woods are more resistant to mold and bacteria than others. Hardwoods like maple, walnut, and cherry are good choices. They have denser grains.
This makes them less likely to absorb moisture and harbor mold. Softer woods might require even more diligent care.
When to Give Up on a Cutting Board
Sometimes, despite your best efforts, a cutting board might be beyond saving. If mold has deeply penetrated the wood, or if it keeps coming back no matter what you do, it might be time to let it go.
Look for deep, black stains that won’t come out. Smell your board after cleaning and drying it thoroughly. If the musty odor persists, it’s a sign that mold might still be embedded within the wood.
If you see mold growing in deep cracks or gouges that you can’t clean out, it’s also a sign that the board might need replacing.
Your health is more important than a cutting board. If you have any doubts about its safety, it’s better to
Real-World Scenarios and Cutting Boards
Imagine a busy family kitchen. Meals are prepped daily. Raw chicken is chopped for dinner.
Then, tomatoes for a salad are sliced on the same board. If the board isn’t rinsed and dried immediately, those chicken juices can sit. They can soak into the wood.
That’s an invitation for mold. Especially if the board is stored in a dim, humid spot under the sink.
Or think about a weekend baker. They use their wooden board for kneading dough. Flour dust can get into the wood.
If there’s any moisture left from previous use, that flour can become a mold buffet. The board might get left out overnight. The kitchen might be warm.
All these conditions help mold thrive.
The design of the board also plays a role. A board with a juice groove can be helpful. It catches liquids.
But if that groove isn’t cleaned out well, it can become a mold haven. Boards with feet allow for better air circulation. This is a plus for preventing moisture buildup.
Common Cutting Board Mistakes
Mistake: Leaving a wet board to air dry flat on the counter.
Why it’s bad: Moisture gets trapped underneath, inviting mold.
Fix: Stand the board on its edge to dry.
Mistake: Using vegetable oils for conditioning.
Why it’s bad: They can go rancid and smell bad.
Fix: Use food-grade mineral oil.
Mistake: Not rinsing the board right after use.
Why it’s bad: Food particles and juices become mold food.
Fix: Rinse immediately after each use.
What This Means For You
Seeing mold on your cutting board can be alarming. But now you know it’s not a death sentence for the board. Most of the time, you can save it.
The key is understanding why mold grows. It needs moisture, food, and time.
When is mold on a cutting board normal? It’s normal for it to happen if conditions are right. If you’ve been using your board heavily and haven’t dried it properly, mold might appear.
It’s a sign that your routine needs a small adjustment.
When should you worry? You should worry if the mold is extensive. You should worry if it returns quickly after cleaning.
If you’ve tried multiple cleaning methods and it’s still there, it’s time to be concerned. Also, if you notice a strong, persistent musty smell that won’t go away, it’s a sign of deep-rooted mold.
Simple checks are easy. After cleaning, hold the board up. Look for any remaining dark spots or fuzzy bits.
Smell it. If it smells fresh, you’re likely good. If it smells musty, clean again.
Quick Tips for a Mold-Free Board
Here are some simple things to do right away:
- Rinse and Stand: Always rinse your board immediately after use. Then, stand it on its edge to dry completely.
- Vinegar Spritz: Keep a spray bottle of white vinegar handy. Spritz your board after washing for an extra layer of protection.
- Monthly Oil Date: Set a reminder to oil your board once a month. It’s a small task that makes a big difference.
- Check Your Storage: Make sure your board isn’t stored in a damp place. Air circulation is key.
Frequent Questions About Cutting Board Mold
Can mold on a cutting board make you sick?
Yes, some types of mold can produce toxins. Ingesting them can cause illness. It’s important to thoroughly clean and disinfect any moldy cutting board.
If you are concerned, it’s always best to replace it.
Is it safe to use bleach on a wooden cutting board?
Bleach can be used, but with caution. Dilute it heavily (e.g., 1 tablespoon bleach per gallon of water). Always rinse the board extremely thoroughly afterward.
Many prefer gentler methods like vinegar or hydrogen peroxide to avoid potential damage to the wood or residue.
How do I know if the mold is gone for good?
After cleaning and disinfecting, let the board dry completely. Inspect it under good light for any signs of mold. Smell it.
If there’s no mold and no musty smell after it’s fully dry, it should be gone. Consistent prevention is key to keeping it gone.
Can I sand off mold from a cutting board?
For minor surface mold, light sanding might help remove stains. However, mold can grow deep into the wood grain. Sanding might not remove all of it.
It’s often better to use a disinfectant. If sanding is needed, use fine-grit sandpaper and then clean and oil the board.
What if my cutting board has deep cracks?
Deep cracks are hard to clean. They can trap moisture and food particles. Mold loves these spots.
If you see mold in deep cracks, it’s very difficult to remove completely. It might be time to consider replacing the board for safety reasons.
How often should I deep clean and oil my cutting board?
A good rule of thumb is to deep clean and oil your cutting board at least once a month. If you use it very frequently, or if it looks dry or feels rough, you might need to do it more often. Consistent care prevents many problems.
Conclusion: Your Board, Your Kitchen, Your Health
Dealing with mold on your cutting board is a common kitchen challenge. But with the right knowledge and habits, you can tackle it. You can also prevent it from coming back.
Focus on thorough cleaning, complete drying, and regular oiling. These steps protect your board and keep your kitchen safe. Enjoy using your clean, healthy cutting board!
Sponsored / affiliate links. As an Amazon Associate I earn from qualifying purchases. I may earn additional commission from eligible campaigns.