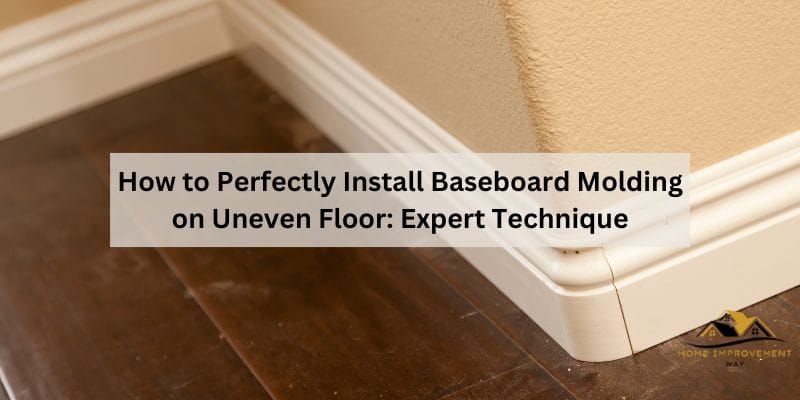
How to Perfectly Install Baseboard Molding on Uneven Floor: Expert Technique
Install baseboard molding on an uneven floor by using shims to level the molding with the floor. Installing baseboard molding on an uneven floor can be a challenging task, but with the right technique, it can be accomplished smoothly.
Uneven floors can create gaps between the baseboard and the floor, resulting in an unsightly finish. However, by following a few simple steps, you can achieve a professional-looking installation. One method involves using shims to level the baseboard molding with the uneven floor, ensuring a seamless appearance.
We will provide a step-by-step guide on how to install baseboard molding on an uneven floor using shims, allowing you to create a polished and attractive finish in any room.
Tools And Materials
Tools and Materials:
Essential Tools
Before you start installing baseboard molding on an uneven floor, make sure you have the essential tools to get the job done:
- Measuring tape
- Pencil
- Miter saw or miter box
- Nail gun or hammer
- Sandpaper
- Level
- Wood filler
- Putty knife
- Paint or stain
Baseboard Molding Materials
Choosing the right materials for your baseboard molding is crucial. Here are the basic materials you’ll need:
| Material | Description |
|---|---|
| Baseboard molding | Choose molding that suits your style and matches your existing decor. |
| Construction adhesive | This will help secure the molding in place, especially on uneven floors. |
| Nails | Opt for finishing nails that are long enough to penetrate the molding and anchor it to the wall. |
| Polyurethane caulk | Use caulk to fill any gaps between the molding and the wall or floor. |
With these essential tools and materials, you’ll be well-equipped to tackle the installation of baseboard molding on an uneven floor. Remember, measuring accurately and taking your time during the installation process will ensure a professional-looking end result.

Preparing The Uneven Floor
Before installing baseboard molding on an uneven floor, it is important to properly prepare the floor surface. This will ensure that the molding sits flush against the floor, giving your room a polished and professional look. In this section, we will walk you through the steps involved in preparing the uneven floor for the installation of baseboard molding.
Leveling The Floor
If you have an uneven floor, the first step is to level it out as much as possible. This will provide a smooth and even surface for your baseboard molding to adhere to. Here’s how you can level an uneven floor:
- Identify problem areas: Start by closely inspecting your floor to identify any high or low spots. These areas can be a result of uneven concrete, subfloor damage, or simply natural variations in the flooring materials.
- Mark the problem areas: Once you have identified the problem areas, use a pencil or masking tape to mark them. This will make it easier to address these areas during the leveling process.
- Fill the low spots: To fill low spots in the floor, you can use a floor leveling compound. Follow the manufacturer’s instructions to mix the compound and spread it evenly over the low areas. Use a trowel to smooth out the compound and create a level surface.
- Sand down high spots: If you have high spots on your floor, you will need to sand them down until they are level with the rest of the floor. Use a sanding block or an electric sander for this process. Be sure to wear protective goggles and a mask to prevent dust inhalation.
- Clean the floor: Once you have leveled the floor, thoroughly clean it to remove any debris or dust. A clean surface will ensure better adhesion of the baseboard molding.
Identifying Problem Areas
Identifying problem areas on your uneven floor is crucial for achieving a smooth and professional baseboard installation. Here are some steps you can follow to identify and address problem areas:
- Inspect your floor: Take a close look at the flooring to identify any noticeable unevenness or irregularities. This may include cracks, dips, or raised areas.
- Use a level: Utilize a long spirit level or a laser level to determine if there are any significant variations in height across the floor. This will help you pinpoint problem areas that require attention.
- Measure deviations: Use a tape measure or ruler to measure the height deviations in problem areas. This will give you a clear idea of how much leveling needs to be done.
- Take notes: As you identify problem areas and measure deviations, make sure to take notes. This will come in handy during the leveling process, as you will have a clear plan of action.
Identify and address problem areas is a critical first step to successfully install baseboard molding on an uneven floor. By following these steps for leveling the floor and identifying problem areas, you can ensure a smooth and professional-looking installation. Once your floor is properly prepared, you will be ready to move on to the next step of the installation process.
Measuring And Cutting The Baseboard Molding
Learn how to measure and cut baseboard molding for installation on an uneven floor. This step-by-step guide will help you achieve a professional finish in your home.
Measuring The Wall Length
Before you start installing baseboard molding on an uneven floor, you need to measure the wall length accurately. This step is crucial to ensure that you cut the molding with the correct dimensions. To measure the wall length, follow these simple steps:
- Using a tape measure, begin at one corner of the wall and measure the distance to the opposite corner.
- Make sure to account for any doorways or corners along the wall that may require additional molding.
- Record the measurement accurately, as this will serve as the basis for cutting the baseboard molding.
Cutting Techniques, Ensuring Each Heading Adheres To Html Syntax
Once you have measured the wall length, it’s time to cut the baseboard molding. There are several cutting techniques you can use to ensure the molding fits perfectly along the uneven floor. Here are some cutting techniques to keep in mind:
Cutting angles
When dealing with uneven floors, cutting angled edges is crucial to creating a seamless look with the baseboard molding. To cut the angles accurately, use a miter saw or coping saw. Follow these steps:
- Place the baseboard molding correctly on the miter saw or coping saw, ensuring it is secure and stable.
- Adjust the saw to the desired angle, typically 45 degrees for most corners.
- Carefully cut the molding at the selected angle.
- Repeat this process for all corners and edges, ensuring a precise fit against the uneven floor.
Using a template
If the floor has significant irregularities, creating a template can be a helpful technique. Here’s how you can use a template:
- Take a piece of cardboard or plywood and place it against the uneven floor.
- Trace the contour of the floor onto the cardboard or plywood, ensuring to capture all the bumps and dips.
- Cut along the traced line to create a template.
- Use this template to trace and cut the baseboard molding, allowing it to fit perfectly against the uneven floor.
By using these cutting techniques, you can ensure that the baseboard molding fits seamlessly against the uneven floor, creating a polished and professional finish to any room.
Installing The Baseboard Molding
Installing baseboard molding on an uneven floor requires careful precision to achieve a seamless and professional-looking finish. With the right techniques, you can ensure that your baseboard molding fits snugly against the floor, covering all gaps and imperfections. In this section, we will guide you through the process of installing baseboard molding, starting with the longest wall and using scribing and coping techniques.
Starting With The Longest Wall
To start installing your baseboard molding on an uneven floor, begin with the longest wall in the room. This will serve as your reference point for the rest of the installation process. Measure the length of the wall and cut the baseboard molding accordingly, ensuring a clean and precise cut.
Next, apply construction adhesive or use finishing nails to secure the baseboard molding to the wall, making sure it aligns with the floor. Position the molding so that it is straight and level, using a level tool to guide you. Secure it firmly in place, ensuring it is tightly attached to the wall.
Scribing And Coping Techniques
Uneven floors often require scribing and coping techniques to ensure a perfect fit for your baseboard molding. Scribing involves tracing the contour of the floor onto the back of the baseboard molding, while coping involves cutting away excess material to create a seamless joint between two pieces of molding.
When scribing, use a compass or contour gauge to transfer the irregular shape of the floor onto the back of the molding. Carefully cut along the scribed line using a coping saw or a jigsaw, taking your time to maintain the accuracy of the cut.
For coping, start by cutting a 45-degree angle on the end of the second piece of molding that will join the first piece. Next, use a coping saw to carefully remove the excess material along the profile of the first piece, creating a clean and tight fit between the two pieces of molding.
Remember to always test the fit of each piece before permanently securing them in place. Make any necessary adjustments to ensure a seamless fit, and use wood filler to cover any visible gaps or imperfections.
By following these techniques and taking your time to ensure a precise fit, you can successfully install baseboard molding on an uneven floor. Remember to measure accurately, use the right tools for scribing and coping, and check the fit of each piece before moving on to the next. With patience and attention to detail, your baseboard molding installation will result in a polished and professional look.

Finishing Touches And Tips
Learn how to install baseboard molding on an uneven floor with these helpful finishing touches and tips. Create a seamless and polished look for your home with step-by-step instructions and expert advice.
Now that you have successfully installed baseboard molding on your uneven floor, it’s time to put those finishing touches and make your project seamless. These final steps will ensure that any gaps or holes are filled, the molding is properly sealed, and the appearance of your baseboard molding is flawless.
Filling Gaps And Holes
To achieve a professional look, it’s essential to fill any gaps or holes between the baseboard molding and the floor. Begin by inspecting the entire length of your molding, identifying areas that require filling. Use a caulk gun to apply a bead of caulk along these gaps, making sure to press it firmly into place.
Next, using a putty knife, spread wood putty over any visible nail holes or imperfections in the molding. Smooth the putty with the putty knife to create a seamless finish. Allow the caulk and putty to dry completely before moving on to the next step.
Using Caulk And Putty
Caulk and putty are essential for achieving a polished and professional look for your baseboard molding. Caulk seals the gaps between the molding and the floor, preventing any dust or debris from accumulating. It also creates a seamless transition between the molding and the wall, enhancing the overall aesthetic appeal.
On the other hand, putty is ideal for filling in nail holes or small imperfections on the surface of the molding. It helps create a smooth finish, making the baseboard appear flawless and well-crafted. Ensure you choose a color of putty that matches the tone of your baseboard molding.
Painting Or Staining
Once the caulk and putty have dried, it’s time to paint or stain your baseboard molding. This step adds the final touch, bringing your baseboards to life and adding a polished look to your room.
If you prefer to paint, start by applying a coat of primer to the entire length of the molding. This will help the color adhere better and ensure a smooth finish. After the primer has dried, apply your chosen paint color using a small brush or roller. Remember to paint with even strokes, following the natural grain of the wood.
For staining, begin by sanding the surface of the molding with fine-grit sandpaper to create a smooth texture. Wipe away any dust and apply the stain using a clean cloth or brush. Allow the stain to penetrate the wood for the desired amount of time, ensuring you follow the manufacturer’s instructions. Finally, wipe away any excess stain and let it dry completely.
By following these finishing touches and tips, you can achieve a flawless and professional installation of baseboard molding on an uneven floor. Taking the time to fill gaps, use caulk and putty, and paint or stain the molding will enhance its aesthetic appeal and help create a cohesive look in your space.
Conclusion
To sum up, installing baseboard molding on an uneven floor can be a challenging task, but with the right tools and techniques, it can be accomplished successfully. By following the steps outlined in this blog post, you can ensure a professional and visually appealing result.
Remember to measure carefully, make necessary adjustments, and secure the molding properly. With these tips, you can transform your space and create a polished look that will enhance the overall aesthetic of your room.