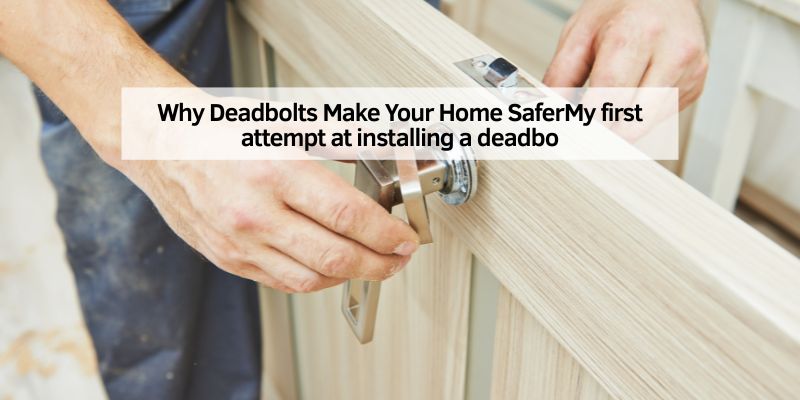
Why Deadbolts Make Your Home SaferMy first attempt at installing a deadbo
lt was a comedy of errors! I mismeasured the door, dropped screws everywhere, and nearly gave up. But once I got it right, my home felt so much safer. Learning how to install deadbolts is a simple way to boost your home’s security without breaking the bank. This guide will walk you through choosing the right deadbolt, gathering tools, and installing it step-by-step. Whether you’re a beginner or a DIY pro, you’ll find easy tips and tricks to make your door tough as nails. Let’s dive in and make your home a fortress!
What Is a Deadbolt?
A deadbolt is a strong lock that slides a metal bolt into your door frame. It’s tougher than a regular doorknob lock, making it harder for intruders to break in. Deadbolts come in two main types: single-cylinder (uses a key outside, a thumb-turn inside) and double-cylinder (uses a key on both sides). They’re a must for exterior doors, as they add an extra layer of protection. According to the Schlage, deadbolts can reduce break-in risks by up to 30%.
Why Deadbolts Matter
Deadbolts are like a superhero for your door. They resist picking, bumping, and forced entry better than standard locks. I once helped a neighbor install one after a nearby break-in, and she said it gave her peace of mind. Plus, they’re affordable and easy to install with basic tools.
Tools and Materials You’ll Need
Before you start, gather these items. Most are probably in your toolbox already!
-
Tools:
- Screwdriver (Phillips head)
- Drill with 2⅛-inch and 1-inch hole saws
- Tape measure
- Pencil for marking
- Chisel for fine-tuning
-
Materials:
- Deadbolt kit (check out Kwikset for reliable options)
- Screws (usually included in the kit)
- Optional: wood filler for mistakes
Visual Idea: A labeled diagram showing a drill, hole saws, and a deadbolt kit would help beginners visualize the tools.
Choosing the Right Deadbolt
Look for a deadbolt with an ANSI Grade 1 or 2 rating, which means it’s super strong. Grade 1 is the toughest, perfect for front doors. I once bought a cheap no-name deadbolt, and it jammed after a month—stick with trusted brands like Schlage or Kwikset. Single-cylinder deadbolts are great for most homes, but double-cylinder ones add extra security if you have glass near the door. Check out this table for a quick comparison:
| Deadbolt Type | Pros | Cons | Best For |
|---|---|---|---|
| Single-Cylinder | Easy to use, affordable | Less secure near glass | Most exterior doors |
| Double-Cylinder | Extra secure, no thumb-turn | Needs key inside, slower exit | Doors with nearby windows |
Table 1: Comparing Deadbolt Types for Home Use
How to Install Deadbolts: Step-by-Step Guide
Installing a deadbolt is easier than it sounds—no sweat! Follow these steps, and you’ll have a secure door in under an hour.
Step 1: Measure and Mark Your Door
Grab your tape measure and pencil. Most deadbolts go about 6-12 inches above the doorknob. Mark the spot for the deadbolt on the door’s edge and face. Use the template from the deadbolt kit to mark where to drill. I once skipped this step and drilled crooked—don’t be me!
Step 2: Drill the Holes
Use a 2⅛-inch hole saw for the main lock hole and a 1-inch hole saw for the bolt hole on the door’s edge. Drill slowly to avoid splintering. Wear safety glasses—wood chips fly!
Step 3: Install the Bolt and Lock
Slide the bolt into the edge hole and secure it with screws. Then, fit the lock cylinder into the main hole. Make sure the “up” arrow on the lock faces upward. This part feels like a puzzle, but it clicks together easily.
Step 4: Attach the Strike Plate
Close the door and mark where the bolt hits the frame. Use a chisel to carve a shallow slot for the strike plate, then screw it in. Test the bolt to ensure it slides smoothly.
Step 5: Test and Tweak
Lock and unlock the deadbolt with the key (and thumb-turn for single-cylinder). If it sticks, check your alignment or tighten screws. My first install wobbled until I tightened everything properly.
Visual Idea: A step-by-step diagram showing the door’s edge with the bolt hole and strike plate placement would clarify the process.
Benefits of Installing a Deadbolt
Deadbolts make your home safer and can lower your insurance costs—some companies offer discounts for added security. They’re also low-maintenance and last years. I love the confidence of knowing my front door can withstand a good kick.
Drawbacks to Consider
Deadbolts aren’t perfect. Double-cylinder models can slow you down in an emergency, like a fire, since you need a key to exit. They’re also pricier than basic locks, but the security is worth it.
| Feature | Deadbolt | Standard Lock |
|---|---|---|
| Security Level | High (resists picking) | Low (easier to bypass) |
| Cost | $20-$100 | $10-$50 |
| Installation Time | ~1 hour | ~30 minutes |
Table 2: Deadbolt vs. Standard Lock Comparison
Common Mistakes to Avoid
Here are mistakes I’ve made or seen others make:
- Skipping the template: Always use the kit’s template to avoid misaligned holes.
- Using short screws: Longer screws (at least 3 inches) make the lock stronger.
- Ignoring the frame: Reinforce the door frame with a strike plate for max security.
Visual Idea: A simple infographic highlighting these mistakes with red Xs and correct methods with green checks would be super helpful.
My Top Tips for Deadbolt Installation
After installing dozens of deadbolts, here’s what I’ve learned:
- Check your door thickness: Most deadbolts fit 1⅜ to 1¾-inch doors. Measure first!
- Lubricate the bolt: A bit of graphite spray keeps it smooth.
- Test before tightening: Loose screws let you adjust alignment easily.
For extra security, consider a door reinforcement kit, like those from Armor Concepts. They make your door frame nearly unbreakable.
| Tip | Why It Helps | Cost |
|---|---|---|
| Graphite Spray | Smooth bolt movement | $5-$10 |
| Long Screws | Stronger hold | $2-$5 |
| Door Reinforcement Kit | Tougher door frame | $50-$100 |
Table 3: Cost-Saving Tips for Deadbolt Installation
Alternative Approaches
If a deadbolt feels too tricky, try a smart lock for keyless entry—though they’re pricier. Or, use a chain lock for extra security without drilling. I tried a smart lock once, but the batteries died, so I went back to a trusty deadbolt.
Frequently Asked Questions
What Tools Do I Need to Install a Deadbolt?
You need a screwdriver, drill, 2⅛-inch and 1-inch hole saws, tape measure, pencil, and chisel. Most deadbolt kits include screws and a template to make it easy.
How Long Does It Take to Install a Deadbolt?
It takes about 45-60 minutes for beginners. With practice, you can do it in 30 minutes. Take your time to avoid mistakes!
Can I Install a Deadbolt on Any Door?
Most doors work, but check the thickness (1⅜ to 1¾ inches). Hollow doors may need extra reinforcement to hold the lock securely.
Are Double-Cylinder Deadbolts Safe?
They’re very secure but require a key to unlock from inside, which can slow you down in emergencies. Use them only near glass panels.
How Much Does a Deadbolt Cost?
Deadbolts range from $20 for basic models to $100 for high-end ones. Grade 1 or 2 models offer the best security for the price.
What If My Deadbolt Doesn’t Fit Properly?
Check your measurements and alignment. If it sticks, loosen screws and adjust. Use a chisel to deepen the strike plate slot if needed.
Do I Need a Professional to Install a Deadbolt?
No, most DIYers can handle it with basic tools. Follow the kit’s instructions, and you’ll be fine. Call a pro if your door is unusual.
Conclusion
Installing a deadbolt is a simple way to make your home safer. With a few tools and an hour, you can lock out trouble and sleep better at night. My first install was messy, but now I love the process—it’s like giving your door a superpower! Try it yourself, and don’t let a few dropped screws stop you. Share your deadbolt stories or tips in the comments—I’d love to hear how it went! For more lock advice, check out ANSI’s lock standards. Now, grab that drill and make your home a fortress!