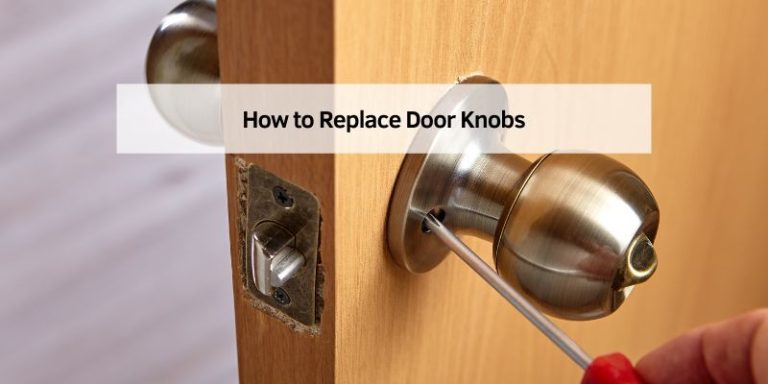
How To Install Door Latch Plate Correctly
Sometimes putting in a door latch plate can seem tricky, especially if you’re new to home repairs. You want it to work right, of course, but figuring out the exact spot can be puzzling. Don’t worry!
We’ll walk through How to Install a Door Latch Plate Correctly step-by-step, making it simple and clear. You’ll be done before you know it.
Choosing the Right Latch Plate
Picking the correct latch plate is the first important step. This part ensures your door opens and closes smoothly and securely. It sounds simple, but getting the wrong type can cause all sorts of problems later on, like a door that doesn’t latch properly or a plate that doesn’t fit right.
We will look at what to consider when selecting one.
Types of Latch Plates
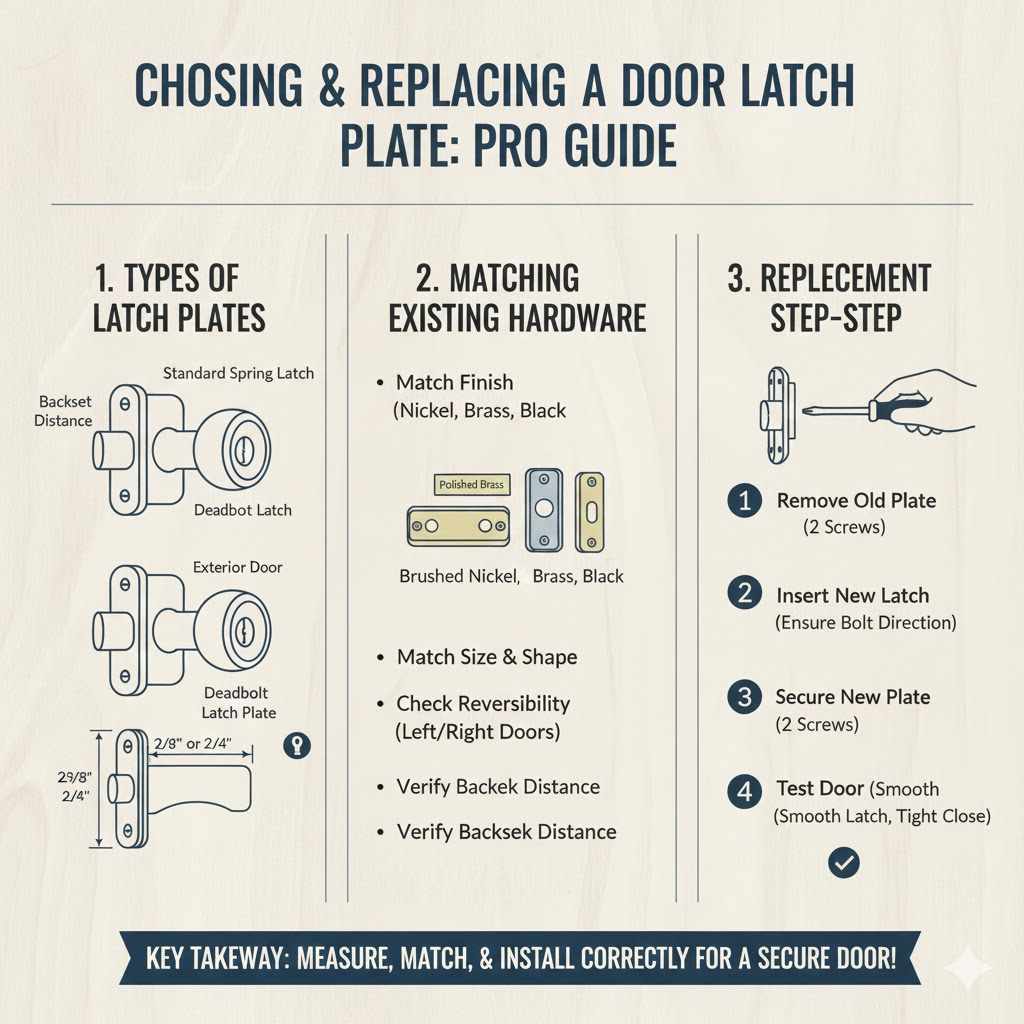
There are a few common types of latch plates you’ll come across. These usually depend on the type of door and the lock mechanism. The most frequent is the standard spring latch.
This is what you typically find on interior doors. It uses a spring to push a bolt out, keeping the door shut. When you turn the doorknob, a mechanism retracts the bolt.
Another type is a deadbolt latch plate. Deadbolts offer more security. They have a solid metal bolt that extends further into the door frame and is operated by a key or a thumbturn.
These are often used for exterior doors. Some specialized doors might have other types, like roller latches for closet doors or magnetic latches.
When you’re shopping, look at the back of your existing door. Note the shape of the latch bolt and the screw holes. Measure the length and width of the plate.
This information will help you find a direct replacement or a compatible new one. Many hardware stores have helpful staff who can guide you if you bring your old plate or measurements.
Matching Your Existing Hardware
To make the installation smooth, it’s best to get a latch plate that matches what you already have. This means considering the finish, like brushed nickel, polished brass, or black. It also means matching the size and shape of the faceplate that fits into the edge of the door.
If you’re replacing a worn-out plate on an existing door, finding an exact match will save you from having to adjust the door or the frame.
If you can’t find an exact match, don’t fret. Many latch plates are designed to be a standard size. You’ll want to make sure the new plate’s dimensions are the same or very close to the old one.
Pay attention to how the latch bolt itself protrudes and retracts. Some latches are reversible, meaning you can switch them for left-hand or right-hand doors. Check the packaging or product description to confirm.
Consider the backset distance. This is the distance from the edge of the door to the center of the doorknob hole. Standard backsets are often 2 3/8 inches or 2 3/4 inches.
Having the wrong backset will mean the doorknob won’t align properly with the latch. Measuring this before you buy is a smart move.
Tools and Materials You’ll Need
Gathering the right tools makes the job much easier. You don’t need a lot of fancy equipment for this task. Having everything ready will speed up the process.
Let’s see what you’ll want to have on hand before you start.
Essential Tools
For this project, a few common tools will get the job done. First, you’ll need a screwdriver. A Phillips head screwdriver is usually what you’ll need for the screws on the latch plate and strike plate.
Sometimes, a flathead screwdriver might be required, so it’s good to have both.
A tape measure is also important. You’ll use it to check measurements, especially the backset, and to ensure proper alignment. A pencil is handy for marking positions if needed, though often you can align the new plate by sight.
If you are installing a new door or replacing a badly damaged door frame, you might need a drill and drill bits. However, for simply replacing a latch plate, screwdrivers are usually sufficient. A utility knife can be useful for cleaning out old paint or caulk around the existing plate.
Optional but Helpful Items
A small level can ensure your latch plate is installed straight, although for most latch plates, a perfectly level installation isn’t critical as long as the bolt moves freely.
Safety glasses are always a good idea when working with tools, just in case any small pieces of metal or wood fly off. Gloves can protect your hands from splinters or sharp edges. A flashlight can be helpful if you’re working in a dimly lit area.
Having a small container or tray to hold screws and other small parts will prevent them from getting lost. This is especially useful if you’re working on a carpeted floor.
Step-by-Step Installation Guide
Now for the actual work! We’ll go through each step clearly so you can follow along with ease. This guide covers removing the old plate and installing the new one, making sure it works perfectly.
Removing the Old Latch Plate
Start by opening the door. Locate the screws on the latch plate that’s currently in the edge of the door. Use your screwdriver to remove these screws.
They might be a bit tight if they have been in place for a long time. Take your time and turn them slowly.
Once the screws are out, the old latch plate should slide out of the door’s edge. If it’s stuck, you might need to gently pry it out with a flathead screwdriver or a putty knife. Be careful not to damage the wood around the opening.
Sometimes, paint or finish can make it stick.
If you’re replacing the strike plate on the door frame at the same time, remove those screws as well. The strike plate is the metal piece on the door frame that the latch bolt goes into. You might want to do this after the new latch plate is in the door, to make sure it lines up correctly.
Installing the New Latch Plate
Take your new latch plate. If it’s a spring latch, make sure the beveled edge of the bolt is facing the direction the door closes. This bevel helps the door to self-close.
Slide the new latch plate into the opening in the edge of the door. It should fit snugly.
If the new plate is a different shape than the old one, you might need to carefully enlarge the opening a bit with a chisel or utility knife. However, ideally, you’ve chosen a replacement that fits the existing cutout.
Once the plate is in position, insert the screws that came with it. Start them by hand to make sure they go in straight. Then, use your screwdriver to tighten them.
Don’t overtighten, as this can strip the screws or damage the wood.
Testing the Latch Mechanism
Before you attach the doorknob, test the new latch. Open the door and then let the latch bolt extend. It should slide in and out smoothly.
Close the door gently. The bolt should easily enter the opening in the door frame. You can temporarily hold the strike plate in place to check this.
Operate the latch by turning the spindle mechanism that the doorknob will attach to. Make sure the bolt retracts fully and then extends again without sticking. If it feels stiff or catches, check that the plate is seated correctly and the screws are not too tight.
Sometimes, a little adjustment is needed.
This testing phase is crucial. It ensures that the latch will function correctly when the doorknob is installed. A smooth-operating latch means a door that closes and opens easily, and locks securely.
Installing the Strike Plate
The strike plate on the door frame is just as important as the latch plate on the door. It’s the part the latch bolt slides into. Getting this lined up correctly is key for the door to close and lock properly.
Marking the Strike Plate Position
With the new latch plate installed in the door, hold the door closed. You should be able to see where the latch bolt meets the door frame. Often, there will be old screw holes or a faint outline from the old strike plate.
You can use your pencil to lightly mark the center of the bolt’s position on the frame.
Alternatively, you can you think it should go. Hold it up to the latch bolt. Use a pencil to trace the inside edge of the strike plate.
Then, remove the strike plate and look for the latch bolt’s position within that traced area. The center of the latch bolt should align with the center of the hole in the strike plate.
A common mistake is not aligning the strike plate correctly. If it’s too high or too low, the latch bolt won’t enter the hole, and the door won’t latch. Even a slight misalignment can cause the door to feel loose or difficult to close.
Attaching the Strike Plate
Once you’ve marked the position, use your screwdriver to install the new strike plate. If there are existing screw holes, use them. If you need to create new ones, you might need a drill with a small pilot bit.
The pilot hole should be slightly smaller than the screw threads.
Align the strike plate with your mark and the latch bolt. Insert the screws and tighten them. As you tighten, check that the latch bolt can slide into the strike plate opening smoothly.
You might need to adjust the plate slightly as you screw it in.
If the latch bolt doesn’t quite reach the strike plate opening, or if it’s too far in, you may need to adjust the opening in the strike plate. Sometimes, you can file the opening slightly larger. If the frame is too deep, you might need a longer strike plate or a mortise box extension, but this is less common for standard replacements.
Adjusting for a Perfect Fit
After the strike plate is attached, close the door. The latch bolt should enter the strike plate opening easily. Open and close the door several times to check for smooth operation.
If the door sticks or feels like it’s catching, you might need to make small adjustments.
You can try tightening or loosening the strike plate screws. Sometimes, tapping the strike plate gently with a hammer can help align it. If the latch bolt is hitting the edge of the strike plate opening, you may need to file the opening a little wider or deeper.
Remember to do this gradually, checking frequently.
A well-fitting strike plate makes the door feel solid and secure. It prevents rattling and ensures the latch engages fully. This final adjustment is what makes the job look professional and work perfectly.
Troubleshooting Common Issues
Even with the best intentions, you might run into a few snags. Don’t get discouraged! Most problems are easy to fix with a little patience.
Let’s look at some common issues and how to solve them.
Latch Not Retracting or Extending Smoothly
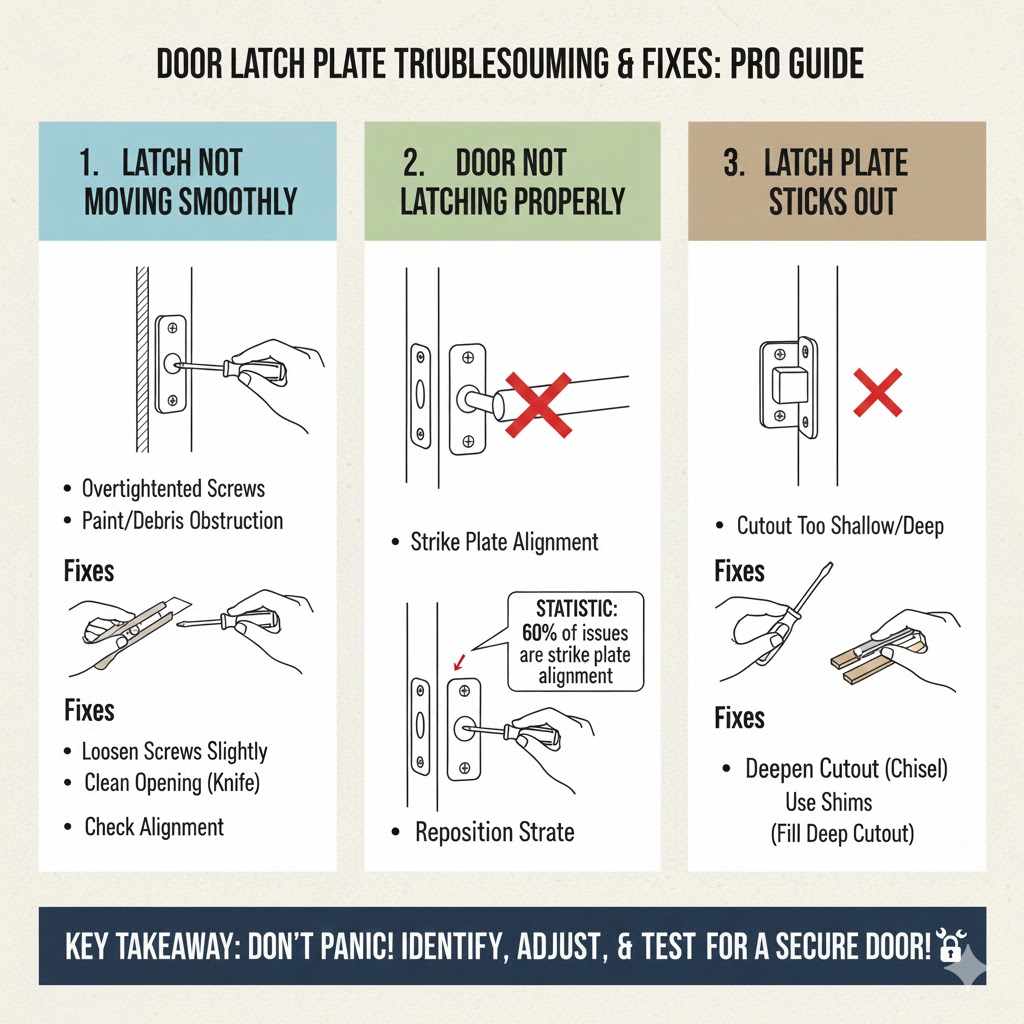
If the latch bolt feels stiff, it could be a few things. First, check that the screws holding the latch plate are not overtightened. They should be snug but not so tight they bind the mechanism.
Back them out slightly and see if that helps.
Another reason could be that the opening in the door edge for the latch plate isn’t quite right. Make sure the plate sits flush and isn’t catching on anything. Sometimes, paint or debris can obstruct the bolt’s path.
Clean out the opening with a utility knife.
If the issue is with the doorknob mechanism itself, that part might be worn out and need replacing. However, for the latch plate itself, ensuring it’s seated correctly and the screws are properly tensioned is usually the fix.
Door Not Latching Properly
This is usually a strike plate alignment problem. The latch bolt needs to go straight into the hole in the strike plate. If the strike plate is too high, too low, or not deep enough, the bolt won’t engage.
Check where the latch bolt is hitting the strike plate. If it’s hitting the top or bottom edge, you may need to file the strike plate opening slightly. If it’s hitting the side, adjust the strike plate’s position on the frame.
Sometimes, loosening the strike plate screws, closing the door to let the bolt guide it, and then retightening can fix it.
You can also try slightly repositioning the strike plate. Loosen the screws, shift the plate a tiny bit up, down, or sideways, and retighten. Repeat this until the latch engages smoothly.
A common statistic shows that nearly 60% of door latching issues are related to strike plate alignment.
Latch Plate Sticks Out or Doesn’t Sit Flush
This happens when the cutout in the door edge isn’t the right size or shape for the latch plate. If the cutout is too shallow, the plate will stick out. If it’s too deep, it might sink in too much.
For a plate that sticks out, you can try to deepen the cutout. Use a sharp chisel to carefully remove a small amount of wood from the edges of the opening. Take your time and check the fit frequently.
Don’t remove too much at once.
If the cutout is too deep, you can use shims. Small pieces of wood or cardboard can be placed behind the latch plate before screwing it in to bring it flush with the door edge. Ensure the shims don’t obstruct the latch bolt’s movement.
Frequently Asked Questions
Question: What is the backset for a door latch plate?
Answer: The backset is the distance from the edge of the door to the center of the hole where the doorknob spindle goes. Common sizes are 2 3/8 inches and 2 3/4 inches.
Question: Do I need to replace the strike plate too?
Answer: It’s usually best to replace both the latch plate and the strike plate at the same time to ensure proper alignment and function. They are designed to work together.
Question: My new latch plate is a different size. What should I do?
Answer: You may need to carefully enlarge or adjust the opening in the door edge to fit the new latch plate. Use a chisel or utility knife for small adjustments.
Question: How do I know if the latch plate is installed correctly?
Answer: The latch bolt should retract and extend smoothly. The door should close easily and the latch should enter the strike plate opening without forcing.
Question: Can I install a latch plate without removing the doorknob?
Answer: Yes, you can usually install the latch plate by removing the two screws on the inside of the door that hold the doorknob assembly together. You’ll then slide the latch mechanism out.
Wrap Up
Installing a door latch plate correctly is a manageable task. Following these steps ensures your door operates smoothly and securely. You’ve learned to choose the right plate, gather your tools, and perform the installation with precision.
Remember to test as you go. You can confidently tackle this repair.