How to Install Shelf Brackets: Easy Step-by-Step Guide
Have you ever found yourself staring at a pile of books or decorative items, wondering where to put them? Installing shelf brackets is a simple solution that can transform your space.
Whether you’re looking to add a personal touch to your home or simply create more storage, learning how to install shelf brackets is a skill worth mastering. Imagine the satisfaction of seeing your items neatly displayed, and how impressed your friends and family will be with your handiwork.
In this guide, we’ll walk you through the steps to ensure your shelf brackets are securely mounted and perfectly aligned. By the end of it, you’ll have the confidence to tackle this project yourself, saving money and gaining a valuable skill. Let’s dive in and get your shelves up!
Choosing The Right Shelf Brackets
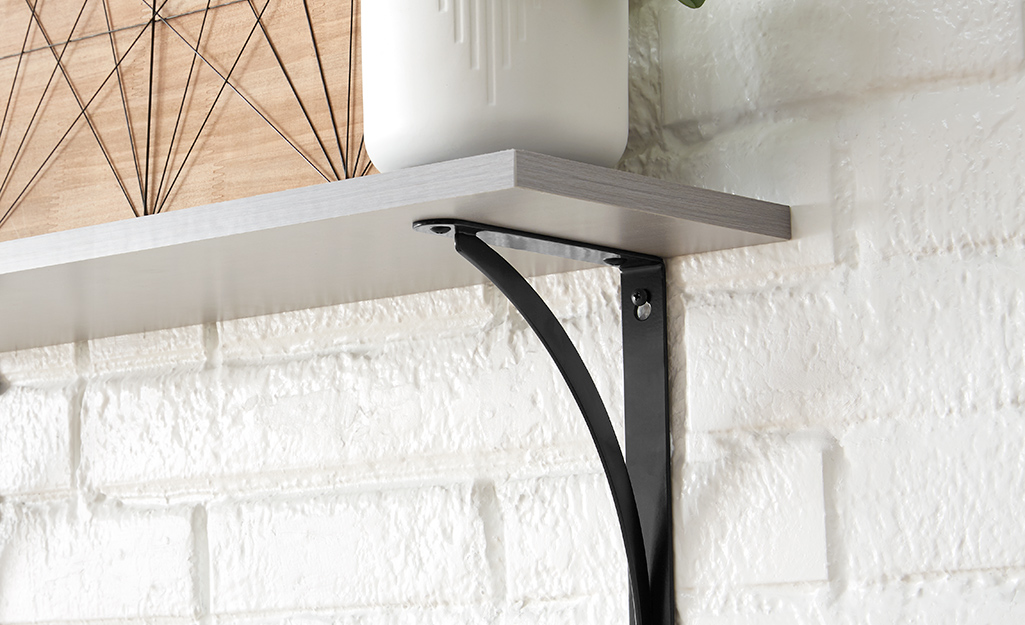
Many brackets come in different shapes and sizes. L-shaped brackets are common. They are strong and simple. Floating brackets give a clean look. You can’t see them easily. Adjustable brackets let you change the shelf’s height. This is useful for tall items.
Brackets are made from different materials. Metal brackets are very strong. They can hold heavy shelves. Wooden brackets look nice with wood shelves. They fit well in cozy rooms. Plastic brackets are light. They are good for small items.
Each bracket has a weight limit. Check the weight limit before buying. Heavy shelves need strong brackets. Light shelves need less strong brackets. Too much weight can break the bracket. Safety first!

Credit: aprettyfix.com
Gathering Necessary Tools And Materials
Drill is needed for making holes. A screwdriver helps to tighten screws. Level ensures shelves are straight. Tape measure checks correct placement. A pencil marks spots for drilling. Stud finder finds strong wall parts. Safety goggles protect eyes. Gather all tools before starting.
Shelf brackets hold shelves securely. Screws attach brackets to the wall. Wall anchors add extra strength if needed. Shelves are placed on brackets once installed. Use quality materials for a strong shelf. Check all supplies are ready.
Preparing The Wall Space
Finding wall studs is important. Use a stud finder to locate studs. Move the finder along the wall. Listen for a beep or light signal. Mark the spot with a pencil. Repeat until you find two studs. This ensures the shelf will be secure.
Measure the height for your shelf. Use a tape measure. Decide how high you want the shelf. Mark the spot with a pencil. Measure the distance between brackets. Keep it even. Mark each spot for brackets. These marks guide you when installing.
Installing The Shelf Brackets
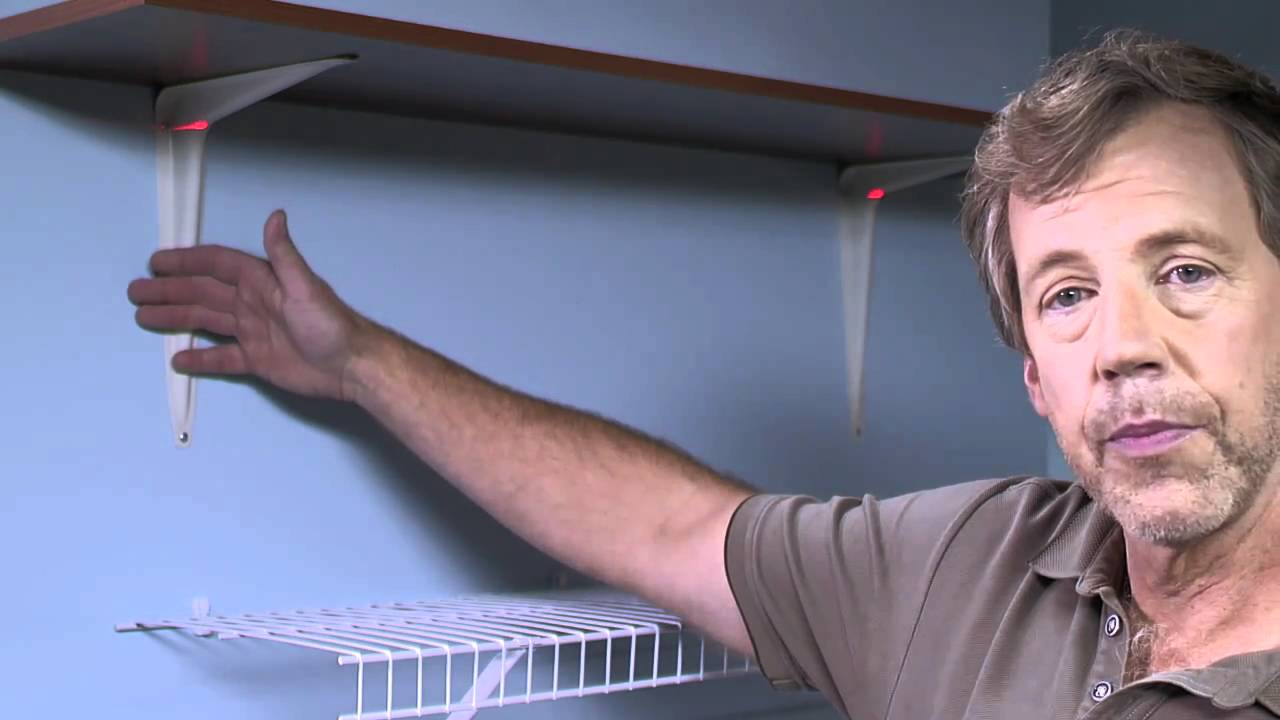
Measure the spot for the brackets on the wall. Use a pencil to mark the points. Hold the bracket in place. Check if it is level. Use a drill to make small holes at the marks. These are the pilot holes. They help the screws fit better. The holes stop the wall from cracking. This step is very important.
Line up the bracket with the pilot holes. Push a screw through each hole. Use a screwdriver to turn the screws. Make sure they are tight. The bracket should not move. Test by pulling it gently. If it feels loose, tighten more. Check each bracket the same way. Now, the brackets are ready for the shelf.
Placing And Securing The Shelf
Make sure the shelf is straight. Use a level to check. Adjust if it’s not straight. Hold the shelf in place. Mark the spots for brackets with a pencil. Double-check the marks. They must be even.
Place the shelf on the brackets. Use screws to secure the shelf. Tighten the screws with a screwdriver. Make sure the shelf is stable. Check that it does not move. Use more screws for heavier shelves. This keeps them safe and secure.
Finishing Touches
After installing the shelf brackets, ensure they are stable and secure. Gently push on the shelf to see if it wobbles. If it moves, tighten the screws with a screwdriver. Make sure every bracket is firmly attached to the wall. This will prevent accidents and keep your items safe. If you notice any loose parts, fix them immediately. A stable shelf can hold more weight and last longer.
Use a spirit level to check the shelf’s position. Place it on the shelf and see if the bubble is in the center. If not, adjust the brackets by loosening the screws a little. Move the shelf until it is perfectly level. Then, tighten the screws again. A level shelf looks nice and works better. Make sure to double-check everything before using your new shelf.
Troubleshooting Common Issues
Installing shelf brackets often involves tackling common issues like uneven walls and finding the right tools. Simple steps can prevent mistakes during installation, ensuring a sturdy setup. Always ensure screws fit snugly for secure brackets.
Uneven Shelves
Shelves might not sit level. First, check if the wall is flat. Walls can be bumpy. Use a level tool. This tool helps find bumps. Adjust the bracket to fit the wall. Sometimes, the shelf is not cut right. Measure the shelf again. Make sure both sides are equal. If not, trim the shelf. This helps it sit flat.
Loose Brackets
Brackets might feel wobbly. This happens if screws are loose. Tighten all screws with a screwdriver. Make sure they fit snugly. If the wall is soft, use anchors. Anchors hold screws tight. Choose the right size anchor for your screws. If brackets still move, check the bracket size. Some need special screws. Make sure you have the right ones. Always ensure everything is tight before placing items on the shelf.
Credit: www.homedepot.com
Frequently Asked Questions
How Should Shelf Brackets Be Installed?
To install shelf brackets, first locate wall studs using a stud finder. Mark drilling points, ensuring level alignment. Drill pilot holes, then attach brackets securely with screws. Finally, place the shelf on brackets, confirming stability.
Should I Attach Brackets To Shelf Or Wall First?
Attach brackets to the wall first for stability and accurate alignment. Secure them firmly to ensure the shelf’s proper support and weight distribution. This method helps prevent potential errors in positioning and ensures a secure installation.
What Is The Rule Of Thumb For Shelf Brackets?
Install shelf brackets 24 to 30 inches apart for optimal support. Choose brackets matching shelf material and weight. Ensure brackets are securely fixed into wall studs for stability. Use appropriate tools and follow manufacturer guidelines for best results. Maintain equal spacing for balanced and safe shelving.
Do Shelf Brackets Need To Be In Studs?
Shelf brackets should be secured to studs for maximum strength. This ensures the shelf can hold heavier items. Without studs, use wall anchors suitable for your wall type. Proper installation prevents shelves from sagging or collapsing. Always check weight limits for both brackets and wall anchors.
Conclusion
Installing shelf brackets is straightforward with the right steps. Measure carefully. Use a level to ensure straight lines. Choose strong brackets for safety. Secure them tightly to the wall. Double-check your work. A well-installed shelf adds both function and style.
Enjoy your new storage space. It’s a practical addition to any room. Feel proud of your DIY achievement. Share your experience with friends. Inspire them to try it too. Happy organizing!