How to Make Door Hinge Cutouts: A Step-by-Step Guide for Beginners and Pros
Hey there! If you’re reading this, you’re probably looking to tackle the task of making door hinge cutouts. I remember the first time I tried this—it felt intimidating, but once I got the hang of it, it was like unlocking a new skill in woodworking. Whether you’re a beginner or a seasoned woodworker, cutting precise hinge mortises is a game-changer for installing doors that look clean and function smoothly. In this guide, I’ll walk you through everything I’ve learned from years of trial and error, sharing tips and tricks to make your door hinge cutouts professional-grade. Let’s dive in and make this process as straightforward as possible!
Why Door Hinge Cutouts Matter
When I first started woodworking, I didn’t realize how important hinge cutouts (or mortises) were. A hinge cutout is a recessed area on the door or frame where the hinge sits flush. Without it, your door won’t close properly, and the hinges will stick out awkwardly. A well-done cutout ensures the door swings smoothly and looks polished. It’s one of those small details that make a big difference. Over the years, I’ve seen sloppy hinge installations ruin an otherwise beautiful door, so let’s get this right from the start.
The goal is to create a shallow pocket that matches the hinge’s shape and thickness. This allows the hinge to sit flush with the wood surface, giving your door a seamless look. It’s not just about aesthetics—proper cutouts also prevent gaps, reduce wear on the hinges, and make the door sturdier. Whether you’re installing a new door or replacing old hinges, mastering this skill is essential.
Tools You’ll Need for Perfect Hinge Cutouts
Before we start, let’s talk about tools. I’ve tried cutting hinge mortises with everything from a basic chisel to fancy routers, and here’s what I recommend for a solid setup. You don’t need to break the bank, but having the right tools makes the job easier and the results cleaner.
Here’s a quick rundown of what you’ll need:
| Tool | Purpose |
|---|---|
| Sharp chisel (1/4” to 1”) | For carving out the wood and cleaning up edges |
| Mallet | To tap the chisel without damaging it |
| Router with hinge template | For precise, repeatable cuts (optional but highly recommended) |
| Marking gauge or pencil | To outline the hinge’s position accurately |
| Utility knife | For scoring the wood to prevent splintering |
| Measuring tape | To measure hinge placement on the door and frame |
| Screwdriver | For securing the hinge after cutting |
| Combination square | To ensure straight lines and right angles |
| Sandpaper (120-grit) | For smoothing the cutout surface |
I’ve found that a sharp chisel is your best friend for this job. If your chisel is dull, you’ll struggle to get clean edges, so sharpen it before you start. A router with a hinge template is a luxury, but it saves time on bigger projects. If you’re just doing one door, a chisel and some patience will do the trick.
Preparing Your Door and Frame
Preparation is everything. I learned this the hard way when I rushed into cutting a mortise and ended up with a crooked hinge. Take your time to set up properly, and the rest will be much easier.
First, decide where your hinges will go. Most doors have two or three hinges, depending on the size and weight. For a standard interior door, place the top hinge 7 inches from the top of the door and the bottom hinge 11 inches from the bottom. If you’re using three hinges, the third one goes roughly in the middle. I always measure twice to avoid mistakes.
Next, mark the hinge locations on both the door and the frame. Hold the hinge in place and trace its outline with a pencil or marking gauge. I like to use a utility knife to lightly score the outline—it helps prevent the wood from splintering when you start cutting. Make sure your lines are straight and match the hinge’s exact dimensions. A combination square is great for checking that everything is aligned.
If you’re working on a pre-hung door, the frame might already have cutouts, so you’ll only need to focus on the door itself. For new installations, you’ll need to cut mortises on both the door and the frame to ensure they align perfectly.
Choosing the Right Hinge for Your Project
Not all hinges are created equal, and picking the right one can affect how you make your cutouts. I’ve worked with everything from standard butt hinges to concealed hinges, and each has its quirks.
Standard butt hinges are the most common for interior and exterior doors. They’re rectangular and usually 3 to 4 inches long. The thickness of the hinge leaf determines how deep your cutout needs to be—typically about 1/8 inch for most residential hinges. Measure the hinge thickness with a caliper or ruler to be sure.
For cabinet doors or lighter applications, you might use smaller hinges, which require shallower cutouts. Heavy exterior doors might need larger, thicker hinges, so your mortise will be deeper. If you’re using specialty hinges like concealed or European hinges, you’ll need a different approach, often involving a drill and a Forstner bit. For this guide, I’ll focus on standard butt hinges since they’re the most common.
Step-by-Step Guide to Cutting Hinge Mortises by Hand
Now, let’s get to the fun part—actually cutting the mortise! I’ll walk you through the chisel method first since it’s accessible to everyone and gives you great control. Here’s how I do it:
- Score the Outline: Place the hinge on the door or frame where you marked it. Use a utility knife to score along the pencil lines. Go over the lines a couple of times to create a shallow groove. This helps guide your chisel and prevents the wood from splitting.
- Mark the Depth: Check the thickness of the hinge leaf (the flat part that sits in the mortise). Most hinges are about 1/8 inch thick. Mark this depth on the edge of the door or frame with a marking gauge or pencil. This ensures you don’t cut too deep.
- Start Chiseling: Hold your chisel vertically with the beveled side facing the inside of the mortise. Tap it gently with a mallet to cut along the scored outline. Work slowly and stay within the lines. I usually start at the corners and work my way around to define the perimeter.
- Remove the Waste: Once the outline is cut, angle the chisel slightly and start removing thin layers of wood from the center of the mortise. Take small, controlled cuts to avoid digging too deep. Keep checking the depth against the hinge to make sure you’re not going too far.
- Clean Up the Edges: After removing most of the waste, go back and clean up the edges with the chisel held vertically. Make sure the corners are square and the bottom of the mortise is flat. A combination square can help you check for flatness.
- Test the Fit: Place the hinge in the mortise to see how it fits. It should sit flush with the surface of the wood. If it’s too tight, shave off a little more wood. If it’s too loose, you might need to start over or use shims to fill the gap.
- Smooth the Surface: Once the hinge fits perfectly, lightly sand the mortise with 120-grit sandpaper to remove any roughness. This ensures a snug fit and a professional look.
I’ve found that patience is key here. Rushing leads to uneven cuts, and that’s a headache to fix. If you’re new to chiseling, practice on a scrap piece of wood first to get a feel for it.
Using a Router for Faster, Precise Cutouts
If you have a router and a hinge template, you can speed things up and get super consistent results. I started using a router after years of chiseling by hand, and it was a game-changer for larger projects.
A hinge template is a jig that guides the router to cut the exact shape and depth of the mortise. You can buy one or make your own from plywood or MDF. Here’s how I use a router for hinge cutouts:
- Set Up the Template: Secure the hinge template to the door or frame with clamps. Make sure it’s aligned with your marked hinge location. Double-check that the template matches the hinge size.
- Adjust the Router: Use a straight bit (usually 1/2 inch) and set the router depth to match the hinge thickness. I always do a test cut on scrap wood to confirm the depth is correct.
- Cut the Mortise: Run the router along the template, keeping it steady and moving smoothly. The template will guide the router to create a perfect rectangle. Work in shallow passes if the hinge is thick to avoid burning the wood.
- Clean Up the Corners: Routers with straight bits leave slightly rounded corners, so use a chisel to square them up. This only takes a minute if your router cut is precise.
- Test and Sand: Just like with the chisel method, test the hinge fit and sand the mortise lightly to smooth it out.
The router method is faster, especially if you’re doing multiple doors, but it requires some setup and practice. If you’re only doing one or two hinges, the chisel method might be simpler.
Common Mistakes to Avoid
I’ve made plenty of mistakes over the years, and I want to save you the trouble. Here are some pitfalls to watch out for:
- Cutting Too Deep: If your mortise is too deep, the hinge won’t sit flush, and the door might not close properly. Always check the depth as you go.
- Crooked Lines: Misaligned cuts can make the hinge sit unevenly. Use a combination square to keep everything straight.
- Splintering Wood: Scoring the outline with a utility knife prevents this. Don’t skip that step!
- Wrong Hinge Placement: Double-check your measurements before cutting. A hinge that’s off by even 1/8 inch can throw off the entire door.
- Dull Tools: A dull chisel or router bit makes the job harder and the results messier. Sharpen your tools before starting.
If you do mess up, don’t panic. Small mistakes can often be fixed with wood filler or shims, but it’s better to take your time and get it right the first time.
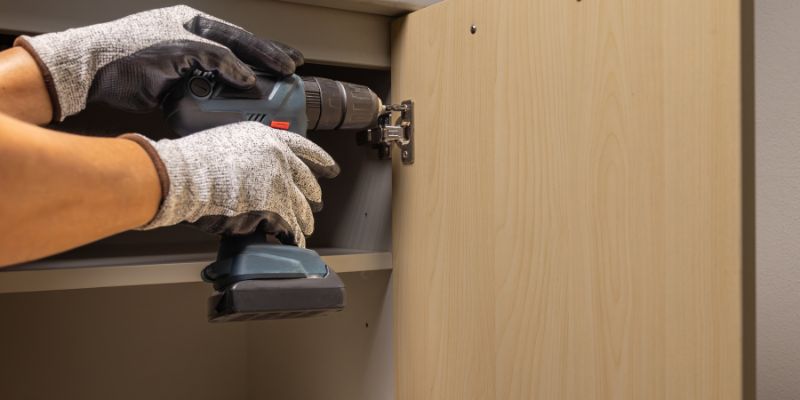
Installing the Hinges
Once your cutouts are done, it’s time to install the hinges. This part is straightforward but still requires care. Place the hinge in the mortise and check that it sits flush. If it does, mark the screw holes with a pencil or awl. I like to pre-drill the holes with a small bit (1/16 inch or so) to prevent the wood from splitting. Then, screw the hinge into place using the screws that came with it.
Repeat the process for the frame side, making sure the hinges align perfectly. I usually hang the door temporarily to test the fit before tightening everything down. If the door swings smoothly and closes without gaps, you’re golden!
Finishing Touches for a Professional Look
After the hinges are installed, take a moment to make everything look perfect. Sand any rough edges around the mortise, and if you’re staining or painting the door, do that now. I’ve found that applying a finish before installing the hinges can make the cutouts look cleaner, but it’s not mandatory.
If you’re working with a painted door, touch up any scuffs or marks around the hinge area. For stained doors, make sure the wood inside the mortise matches the rest of the door for a seamless look.

Conclusion
Making door hinge cutouts might seem daunting at first, but with the right tools and a bit of patience, it’s a skill anyone can master. I’ve been there, fumbling through my first attempts, but each project taught me something new. Whether you’re chiseling by hand or using a router, the key is to take your time, measure carefully, and test your work as you go. The satisfaction of seeing a door swing perfectly on hinges you installed yourself is worth every minute of effort.
This guide is based on years of hands-on experience, and I hope it helps you avoid the mistakes I made along the way. Grab your tools, start small, and soon you’ll be cutting hinge mortises like a pro. If you have any questions or run into trouble, check out the FAQs below or drop a comment on my blog—I’d love to help you out!
FAQs
What’s the easiest way to make door hinge cutouts for a beginner?
The easiest way for a beginner is to use a sharp chisel and mallet. Score the hinge outline with a utility knife, then carefully chisel out the wood in small layers. It’s slower than using a router, but it’s affordable and gives you full control. Practice on scrap wood first to build confidence.
Can I make hinge cutouts without a router?
Absolutely! I’ve done plenty of hinge cutouts with just a chisel and mallet. It takes more time and patience, but the results can be just as good. Follow the hand-chiseling steps I outlined, and you’ll get there.
How deep should a hinge cutout be?
The cutout should match the thickness of the hinge leaf, usually about 1/8 inch for standard butt hinges. Measure your hinge with a ruler or caliper to be sure, and check the depth as you cut to avoid going too far.
What do I do if I cut the mortise too deep?
If the mortise is too deep, you can fix it by adding a thin shim (like a piece of cardboard or veneer) to the bottom of the cutout. Glue it in place, let it dry, and test the hinge fit again. It’s not ideal, but it works in a pinch.
How do I know if my hinge cutouts are aligned properly?
Test the door by temporarily hanging it after installing the hinges. If it swings smoothly and closes without gaps, your cutouts are aligned. If not, check for uneven hinges or misaligned cutouts and adjust as needed.
Do I need a hinge template for a router?
A hinge template isn’t mandatory, but it makes router cuts much faster and more precise. If you’re doing multiple doors, it’s worth investing in one. For a single door, you can freehand with a router or stick to chiseling.